How to make a saber out of paper? Many parents of boys have thought about this question. You can use it to decorate the belt of a carnival costume of a pirate or hussar, or let your child play “robbers” with other children. This is safer and more reliable, since the child will not injure anyone in the heat of the game. A saber differs from a sword and a dagger by the presence of a handle that protects the warrior’s fingers from an enemy’s blow. The blade of such a weapon can be straight or slightly curved.
In this article we will look at how to make a saber out of paper in different ways. For decorative purposes, the blade can be rolled from several layers of thin A4 paper using the origami technique. A saber cut from corrugated packaging cardboard will be more durable. The surface of the blade is additionally decorated with silver colored paper or covered with foil to imitate metal. The handle can be made brighter, choose a color that harmoniously matches with the carnival costume. For active games, you can leave the craft without decoration, since for the next attack mom will have to make a new blade.
Cardboard version
Let's look at how to make a saber out of paper with your own hands in a curved shape. In every home you will definitely find a flat piece of corrugated cardboard from old packaging on which you can draw a drawing of a saber. The curved shape of the pirate weapon is drawn by hand. You can use the sample presented in the article below.
The handle has a curly shape with thin places to hold the handle. The remaining elements of the paper saber are made from strips 6 cm wide. A short piece is placed at the beginning of the handle into a hole made in the center. The pen is made by bending the paper in an arc. If desired, you can cover the craft with colored paper using PVA glue or wrap it with colored tape.
Electrometallurgy and pyrometallurgy
Electrometallurgy technology is the recovery of metal using the method of electrolysis of a melt or solution from these compounds. In a similar way, metals are obtained from ores of alkali, alkaline earth metals or aluminum. Electrolysis is used for melts of metal oxides, chlorides, and hydroxides. Pyrometallurgy is a technology for the reduction of ore at high temperatures, as well as with reducing agents such as magnesium, aluminum, carbon dioxide, hydrogen or carbon. Tin is obtained from cassiterite, and copper from cuprite by calcination with coke, that is, carbon.
Craft from a cardboard sleeve
If you have a cardboard sleeve left around the house after using kitchen napkins, foil or baking parchment, you can use it to make an excellent DIY paper saber. Additionally, you will need a small strip of corrugated cardboard to make the handle. Having outlined the diameter of the circumference of the end part of the sleeve on cardboard, we obtain the contours of the necessary hole for putting the handle on the saber.
Then cut out the excess with scissors and attach it to the base with PVA glue. The handle is put on tightly so that it does not slip off. Additionally, it will be held in one place by foil wrapped around the “blade”. The pointed edge of the saber is made by pressing cardboard on both sides. You can secure the end with a stapler to a paper clip. To prevent the child from scratching anyone, wrap it with additional tape.
“Chasing” on any surface
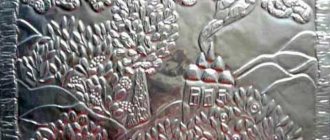
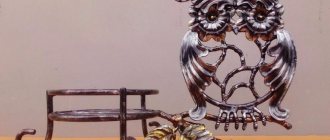
The most popular techniques for creating “metallic” objects boil down to painting them and giving them relief. To make the effect believable, craftsmen use several shades of paint, making the recesses darker and the protrusions lighter. In this way, you can achieve a texture that imitates metal with a touch of patina.
Box decorated with metal look with patina
Important! With the help of such processing, you can simultaneously hide all surface defects or update old products.
To create embossing you will need any product, for example, a wooden board, as well as consumables and other accessories:
- dark putty (black, brown);
- paints – dark brown, black, dark green or turquoise;
- metallic paints (copper, brass, gold, etc.) in two tones – dark and light;
- mold for a three-dimensional pattern;
- water-based acrylic varnish;
- self-hardening mass or polymer clay;
- tassels;
- small spatula;
- knife;
- disposable plates;
- wet wipes.
Set of acrylic paints
It is best to take acrylic paints for work. Gouache or standard construction tinted compounds are less suitable because they change color after drying. Acrylic retains the shade and creates a durable film that does not dissolve from the varnish.
On a note! For varnishing, you should not buy yacht varnish - many of them give unnecessary yellowness.
Progress
First, take a dark putty and spread a thin layer of it on the item being processed. The surface is not smoothed too smoothly - the embossing cannot look perfectly smooth.
Applying putty
To make a relief pattern, use a mold. The self-hardening mass is placed in a mold, pressed well until the smallest details are imprinted, and then the excess is cut off with a knife.
The resulting workpiece is taken out of the mold and immediately, before it hardens, pressed into the putty. Leave the product to dry for 12 hours.
After drying, the surface covered with putty begins to be painted. First of all, apply a layer of dark brown paint and let it dry. If the paint is a little cracked, it’s not a big deal - the defects will still be filled with a second layer of paintwork.
Painting the surface being processed to imitate embossing
Next comes acrylic varnish - it will fix the paint and prevent it from mixing with other shades. As the varnish dries, do this:
- Cover the board with a thin layer of turquoise or green paint so that it penetrates into the smallest cracks and holes (the paint is diluted a little with water in advance for ease of smearing).
- Take wet wipes or a regular wet cloth and carefully wipe off the paint in an arbitrary manner (don’t leave too much green, as it should imitate patina).
- Re-coat the product with varnish.
- Dilute black paint with a drop of water and apply it to the entire surface of the board, after which part of the paintwork is wiped off again with napkins (the blackness should remain in some of the slits to give the workpiece shading).
- After the paint has dried, a layer of acrylic varnish is applied.
- Take a little paint with a dark metallic shade onto a dry, hard brush, place it almost horizontally and apply the product with light movements only to the raised areas.
- Using paint with a light metallic tint, paint the most elevated areas with superficial strokes.
The finished board looks amazing and strongly resembles a metal surface with a patina. This product will be a wonderful gift and interior decoration.
Weapons made from newspaper tubes
How to make an original saber out of paper? Use old newspaper and nice, thick, ridged paper for the pen. For density, you can roll up the craft not from one newspaper, but from several. The printed page is laid out at an angle facing you on the table surface and twisted tightly using a wooden skewer or knitting needle. The edge of the newspaper is glued to the last turn with PVA glue.
The end of the saber where the handle will be placed is additionally reinforced with tape or covered with self-adhesive tape. The handle can be made oval, as in the photo in the article, or as a strip, reinforced on both sides, as on the standard version of the weapon. You can tie a satin ribbon to the handle of the saber and hang it on your shoulder or belt.
Important points
The length of the blade and handle are important, but not the only parameters. Before you start making a sword, you need to find out what the following parameters will be for the future weapon:
- Blade section shape. There are a huge number of options, but for a wooden sword the most suitable are a rectangle with pointed or rounded edges or a diamond.
- Handle shape. The best option is an oval handle, since in this case the weapon will be comfortable to hold in your hand. A round shape is not acceptable (the sword will rotate). You should also pay attention: the handle is usually made thinner than the blade.
- Point shape. It is arbitrary, but if you are making a sword for a child, then it is better to make its end rounded. For an adult, you can make a point, the two sides of which form an angle of 45 degrees.
- Garda. The widest part of the sword. Its width should be enough to protect the hand, and the sword should be comfortable to hold.
Silver Blade
The next version of the saber looks quite impressive thanks to its shiny coating. The paper should be thick. The ideal material for the manufacture of such weapons would be corrugated packaging cardboard, also folded in two layers. The edge of the saber blade is rounded with scissors, and both halves of the cardboard are coated with PVA glue on the inside. For better gluing of strips, place the workpiece under a press.
For the handle, you need to draw a template with edges of different thicknesses. Attach the larger side from the blade side. The entire surface must be carefully covered with silver colored paper; self-adhesive can be used. The handle is isolated separately, tied several times with black tape or tape.
Japanese katana
If you have already made a paper knife, we suggest adding a sword to this weapon. Now we will look at how a toy katana is made from paper. The katana is the main weapon of the samurai. With her help they fight the villains.
For production you will need:
- three white bases and two orange;
- tape and hot glue;
- ten popsicle sticks;
- ruler and simple pencil;
- scissors and a stationery knife.
If everything is prepared, let's start manufacturing:
- Place one of the white materials on the work surface in a vertical position. Using a ruler, measure two centimeters from below and draw a line along this mark. Exactly along this line we bend the lower part of the material. We continue bending until the very end.
- Cut out a strip of orange about five millimeters wide. Starting from the edge of the previous workpiece, we wind this strip first in one direction. Cover it with tape on top. We cut off another such strip and, starting from the bottom, twist it onto the handle. Cover everything with tape.
- Solid orange material, folded in half. Then we turn it over and lengthwise, then bend it in half again. We bend everything several more times and fix the edges with tape. Having fixed the product, using a ruler and pencil we draw lines from corners to corners. It turns out to be a cross, focusing on its middle, draw a rectangle with a length of two centimeters and a width of five millimeters.
- Cut out the shape with a stationery knife. We insert the manufactured handle into this hole and fix it with hot glue. We combine two white sheets into one long one, and glue the joints with tape. Along the longest lower part we put the same mark of two centimeters, and twist the part with such stripes.
- We glue the edge with tape. Cut off the end from one side at an angle. We glue the sticks together and get five wide blanks. We fix the resulting elements by length. We insert them into the middle of the katana blade made of paper material. We insert the first part of the craft into the one we just made and fill the joint with hot glue.
The katana is ready. Now your child can become a real samurai. And if you also make shuriken, then any friend who comes to play with your child will envy such a gift.
Paper origami
How to make a saber from A4 sheets by folding using the origami technique will be described in detail below in the article:
- Fold one A4 sheet in half horizontally. Then place this blank on top of a flat sheet and roll it all together into a tight tube. Attach the edge to the last turn with a glue stick.
- Take the next A4 sheet and fold it in half horizontally. Then bend the corners inward until they join the center line.
- A similar action is performed with those corners that appeared after the previous folding.
- On both sides of the workpiece you will see short, even sections remaining on the sides of the sheet. They also need to be turned to the middle.
- Fold the resulting part in half, smoothing all the fold lines with your fingers.
- Open the workpiece again and shape the blade with a thinner edge. To do this, fold the last folds another 1 cm inward and fold the paper in half again. In front of you will be the shape of a saber blade.
Glowing Sword
Namely, Frodo's sword from the Lord of the Rings trilogy.
A fun and simple project using thin clear plastic, foam board and phosphorescent paint or glow sticks filled with it, which can be purchased at many toy stores.
According to the author of the Lord of the Rings trilogy, the first owner of this sword, forged by skilled craftsmen of antiquity, was Bilbo Baggins, and then it went to his nephew Frodo. Its peculiarity is that the blade begins to glow if goblins appear nearby. Such a souvenir will undoubtedly delight any fan of fantasy, but it can also just be a good addition to a carnival costume of a warrior or pirate.
How to connect parts
All that remains is to attach all the parts together. To do this, insert the first twisted tube into the inner fold of the blade and secure the connection with glue. All that remains is to make the handle. To do this, sheet A4 is folded in half horizontally, and then each half is brought to the center line by bending equal strips. The result is a thin flat strip with an opposing fold in the middle.
Cut a length of 4 cm along the fold with scissors and insert a blade with a tube into the cut. Attach the connection with glue. All that remains is to bend the paper handle and secure it to the other end of the tube with glue.
To do everything correctly, we suggest you watch the video instructions.
Now you know how to make a saber out of paper in different ways. Try making your favorite version yourself at home. Good luck!
What methods of obtaining metal exist?
Ore, which contains various metal compounds, varies. The specific composition affects the technology for obtaining the material:
- Reduction from oxides involving carbon. Refers to the main method of obtaining many metals. Tin is smelted from tin stone, cast iron is obtained from iron ore. Other metals are smelted from oxides.
- Firing in a special industrial furnace. This technology is applied to sulfur ore. This method assumes that as a result of firing in a special furnace, a sulfur compound is obtained.
The composition of the ore directly affects the specific ore processing technology.