Plexiglas (PMMA) is one of the most common polymers on the market today, first patented in the 1930s. Initially, the material was used as glazing for military aircraft, and is now used for ordinary, everyday purposes - in the production of furniture, interior items, advertising, as well as construction, architecture and even medicine.
Processing of plexiglass is a good help for the widespread use of plexiglass. It includes:
- cutting,
- milling,
- grinding,
- gluing,
- welding,
- drilling
There are times when it is necessary to process a workpiece yourself and as quickly as possible, without contacting various specialized organizations. When working with this material at home, it is important to take into account some features so that the final result does not disappoint, and the service life of the material is not reduced to a minimum due to errors.
In this material, the online store Zuker.by will tell you how to process PMMA with your own hands.
How to cut plexiglass?
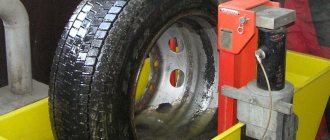
Due to its unique characteristics (in particular, thermoplasticity), PMMA will not be difficult to cut at home. You just need to acquire or take out the simplest tools from your “arsenal”. Most often, a hand saw for metal or a circular saw, a cutter, or a milling machine are used for this task. Thin sheets of acrylic (less than 2 mm) can be cut even with a regular stationery knife.
First of all, it should be noted that the surface of plexiglass heats up instantly when cutting, so the surface temperature must be constantly monitored.
Cutter (up to 2-3 mm)
The simplest and most common way is to use a cutter. The material must be placed on a flat surface, a steel ruler should be applied to the cut site and the cutter must be passed along the groove several times.
You need to cut the sheet to half the thickness of the material, and then simply break off the unnecessary piece. In this way, you can cut PMMA up to 2-3 mm thick, and for larger-scale work serious tools will come in handy.
Hacksaw for metal
You can also cut material in a straight line using a regular hacksaw for metal work.
However, it is worth considering that plexiglass is equivalent in hardness to beech, so sawing the material will take quite a long time and painstakingly. Acrylic tends to heat up when cutting, so you will have to work slowly and constantly ensure that the polymer does not heat up.
The blade may get stuck during operation. Simply cool the cut line with water.
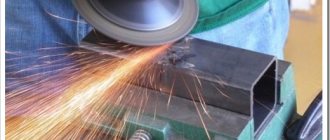
Three-tooth disc for grinder
A three-tooth wood saw blade does an excellent job of cutting plexiglass. In this case, the material does not heat up and does not stick to the tool. This option is suitable for straight cuts of sheets with a thickness of 5-10 mm.
Be sure to use a protective mask that will help protect your face from splinters
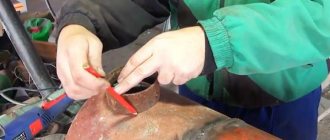
Nichrome spiral
If you need to cut PMMA in a curved shape, then use this option. Plexiglas begins to melt already at 160°C, when the nichrome spiral can heat up to 1000°C and higher. That is why it is necessary to have a rheostat nearby in order to fully control the process.
Since acrylic can burn, when working with a spiral, allow an allowance of up to 0.5 mm, and then process the material using sandpaper.
Transparent plexiglass 1.0 mm, 1250x2050 mm
we will order for you
Price on request
More details
Laser cutting
The best option, of course, is to purchase a laser cutter, which will provide a perfectly straight line, minimal waste and almost perfect ends that require little effort to process. Laser cutting has several disadvantages: the high cost of purchasing equipment (however, you can always use the services of professionals) and the appearance of slight internal stress.
The online store Zuker.by provides laser cutting services performed by highly qualified specialists. You can read more in the article “Laser cutting and engraving”.
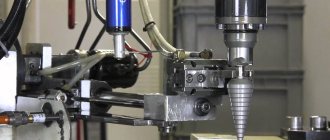
Milling cutting
A milling machine also allows you to carry out high-quality work on cutting acrylic, but purchasing equipment is not affordable for everyone. The solution is to turn to professionals.
Zuker.by offers a cutting service on a VOLTER milling and engraving machine, which will perform the work efficiently, quickly and with high accuracy. The maximum thickness of the processed PMMA workpiece is 24 mm. Details can be found in the material “Milling and Engraving”.
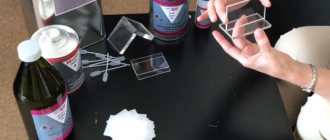
Alternative methods for gluing plexiglass using vinegar and acid
You can use acetic acid as an alternative to store-bought adhesives. At the same time, vinegar essence 70% can cope with this task; it creates a seam that is durable. But before you glue the plexiglass together with a bite, you need to understand that the acid can create serious internal stress on the bends, and as a result the glass can crack. Professionals recommend using vinegar for gluing small parts.
Vinegar essence 70% can cope with this task; it creates a seam that is durable.
The article described how you can seal plexiglass; there are many products suitable for this purpose on the market. You can also prepare the compositions yourself, but it is important to follow safety precautions.
How to bend plexiglass?
First of all, you need to understand that plexiglass is an organic material that can melt and even catch fire. Experts advise heating the material at a temperature of 150°C and melting at 170°C.
There are several basic ways to bend PMMA:
- Using a hair dryer;
- Bending with hot water;
- Using nichrome wire;
- Using a metal pipe.
We propose to consider several of the most common methods that can be easily applied at home.
Construction hair dryer
An ideal way to bend an extended or fairly large element. The product must be clamped in a vice or clamps, and then the fold line must be heated as thoroughly as possible.
The bending of the material should occur in the opposite direction from the heating. If the thickness of the material is more than 5 mm, then first you need to heat the inner corner, then the outer corner.
As a guide, multiply the thickness of the plexiglass by three times - you will get the required width of the heated strip. For example, the thickness is 3 mm. This means that the strip should have a width of 9 mm.
The main thing is to act carefully, at the same time quite quickly. If you wait a little, the material will cease to be plastic, and microcracks will form at the bend.
The PMMA then cools naturally over several hours. Do not use any forced cooling measures as this may cause damage.
Bending by boiling method
Experts consider this method to be the simplest and least expensive. First you need to prepare the container so that you can freely work with the product. The water in the container must be heated to the boiling stage and the workpiece must be kept for 5-7 minutes. After this, the workpiece can be removed and freely given the desired shape using a template.
Observe basic safety measures - ensure that you work using thermally insulating gloves.
Using a tin can
To bend a small piece of PMMA in a straight line, you can place a container (such as a tin can) on a burner with a low heat, bottom up, and place two pieces of drywall on top of it. It is necessary to place the workpiece over the resulting gap at the bend. The part can be bent after 1-3 minutes, depending on the thickness of the material.
Fasteners close
For this fastening option, the wall surface must be leveled, since as a result of fastening closely, stresses and deformations may occur in the material, which will lead to bending or damage over time. Fastening holes are drilled in the corners of the panel to be attached (a fastening option without drilling is possible, with fastening at the edge of the panel). The panel is attached to the wall either with construction hardware, in the case of a plasterboard wall, or with the help of drive-in anchors, if the wall is made of brick or concrete. The fastener can be covered with a decorative cover.
Distance holders. Another fastening option is to fix the panel at a certain distance, which will avoid the influence of the curvature of the wall (if it is not possible to eliminate it). Metal spacer holders are ideal for this. Manufacturers offer a wide range of holders:
- with various coatings;
- made of stainless steel;
- with the possibility of LED backlighting;
- various shapes and designs.
Fastening is carried out similarly to the close method. The design of the remote holder allows you to adjust the distance between the wall and the panel being fixed.
Cable fastening systems. Guide fastening cables are fixed along the wall: vertically or horizontally. Then, using special fastenings and clamps, the panels are fixed to the cable vertically or horizontally, with or without drilling additional holes.
Source
How to polish plexiglass
Unfortunately, over time, plexiglass products can become scratched, causing the appearance of the product to change for the worse. You can restore the original gloss and beauty of a part even at home.
You can polish acrylic with your own hands at home without any special skills or abilities - you just need a little time and perseverance.
How to sand plexiglass? First you need to clean the material from dirt with a simple rag, without using any abrasives.
Next is sanding with sandpaper (with the addition of a small amount of water!). First, with 800 grit - it will remove noticeable imperfections and give the surface a matte color. Fine 2000 grit sandpaper will remove and sand out any remaining deep damage.
Next, the product needs to be cleaned and wiped dry. Polishing paste evenly rubbed into the PMMA surface using a soft cloth will help restore the original transparency and shine.
Installing a glass mount on the wall
Mirrors, glass shelves, panels, stained glass windows in one form or another are always present in the house.
All these attributes of the home interior are united by one feature - the fastening of these fragile planes to the walls. Fastening glass to the wall is an important structural unit that ensures safe hanging of glass products. There are many ways to fix transparent and mirror planes on vertical fences of rooms. What is the best and secure way to fix glass to the wall surface? This article will answer this question.
If edge processing and chamfering is required
...Then it’s better to contact the online store Zuker.by. Thanks to this service, you can create a smooth and even edge, which will help not only create an even more attractive look for the product, but also avoid various cuts and damage.
For processing edges, a modular edge router Festool MFK 700 EQ-Plus is used, which allows you to cut materials with an accuracy of 0.1 mm.
Edge rounding radii can be as follows:
- R2 (radius 2 mm);
- R4 (radius 4 mm);
- 45⁰ (45 degrees).
More details about the service can be found in the material “Edging Processing of Polymer Materials”.
Types of glass products on the walls
Glass products in the form of vertical planes on the walls of premises come in several varieties:
Mirrors
Our daily life and everyday life is unthinkable without mirrors. These reflective planes accompany us everywhere, including in the interiors of both homes and public institutions. Morning greets us with our own reflection in the bathroom mirror. The mirror in the hallway sees us off to work.
Mirrors have considerable weight, so you need to choose strong and reliable dowels
A mirror is glass coated on the back with a reflective film. Let's look at several ways to attach mirrors to walls using dowels.
Dowels for supporting a mirror sheet come in a variety of shapes and designs, but they are united by one principle - reliable fixation of the glass plane on the wall.
The mirror is secured with clamps located around the perimeter of the glass. Here are some examples of mounting mirrors:
Fixation through holes in glass
We carry out fastening in several stages:
- Stepping back from the corners of the glass diagonally by 5-7 cm, drill holes with a special drill for glass. If the drill is installed in a drill chuck, you need to drill at lower speeds. Otherwise, the surface may overheat and the glass will simply burst.
- Then the mirror is applied to the wall and the places of fixation are marked with a marker or pencil through the holes. During this operation, the vertical and horizontal of the canvas are checked with a level. The mirror is set aside.
- If the wall is concrete or brick, the holes are made with a hammer drill. For a wooden wall, it is enough to use an ordinary drill with a drill bit.
- Plastic dowels are driven into the holes.
- Carefully supporting the glass, insert self-tapping screws into the holes and screw them in with a screwdriver or screwdriver. Soft plastic washers are placed under the screw heads.
- The heads of the screws are covered with decorative “hats”.
When screwing screws, you need to remember the fragility of the glass material. Over-tightening the fastening may cause the mirror to simply burst.
External supports
Glass supports consist of several parts - a dowel, a self-tapping screw, a wall washer, a support roller, a face washer and a decorative overlay.
The set of parts may differ in composition, but the property remains the same - reliable fastening. Fix the glass on the wall in stages:
- The fastenings are marked in such a way that the holes for the dowels are located along the perimeter of the glass at a distance of 50 - 70 mm from the corners of the glass vertically and horizontally.
- At the designated points, drill holes with a depth equal to the length of the dowels.
- Plastic dowels are inserted into the finished holes.
- A wall washer, a roller and a face washer are put on the self-tapping screw.
- Screw in self-tapping screws at the top, bottom and one screw on the side.
- The mirror is turned to the side until it stops.
- Install the remaining fourth side fastener.
- The screw heads are covered with plastic covers.
Fastening mirrors with liquid nails
It is convenient to glue small mirrors to the wall with liquid nails. Glue is applied to the back of the glass so that when installing the plane, the glue does not squeeze out beyond the edges of the glass. The glue is used according to the instructions on the packaging of the product.
Usually they work like this:
- glue is applied to the back of the mirror at a distance of 50 mm from the edges;
- the glass is pressed to the surface of the fence and removed;
- wait 10 minutes and press the mirror again to the same place.
Panel
Mirror panels are installed in living rooms, bedrooms, kitchens and even bathrooms. What is so attractive about large mirrored wall areas? First of all, the panel carries a significant aesthetic load in the overall harmony of the room’s interior.
In addition, installed mirror panels on the entire wall or on part of the fence visually increase the space of the room almost twice. In a small kitchen you will feel like you are in a large spacious dining room.
Most often, panels are “assembled” from several mirrors of the same size. Creating such a panel is quite accessible to anyone who owns construction tools.
Technology for installing panels on point supports
Let's say you decide to install mirrors in your small kitchen with an area of 9-10 m2. We will tell you what needs to be done for this, describing the work step by step:
- We choose the location of the panel in the kitchen. It is best to install mirrors above a seating area along a long wall.
- In a furniture store you can buy mirror sheets 400x1500 mm. 5 – 6 canvases will fit on a 2.5 m long wall.
- Fastening of stacked mirrors can consist of single clamps with a wide support shelf.
- Future holes for dowels are marked on the wall. The attachment points at the top should be in the middle of the width of each blade. The lower markings are made at the junction of adjacent mirrors.
- Using a hammer drill, holes are drilled in the marks and dowels are installed.
- The top and side fasteners have a moving part with a spring lock.
- Each canvas is supported on lower supports. By moving the upper clamp upward, the mirror is pressed against the wall. The spring clip is then released.
- The first and last panels are secured with side spring latches.
An alternative cutting method is with a hot spiral
This method is much more functional and can be considered more advanced. After work, no debris remains in the form of chips, but the method is only suitable for thin material.
Advantages of cutting using a hot spiral:
- absence of chips and chip dust;
- there is no risk of cracks or scratches as with other cutting methods;
- the process is completely under your control, and you can cut out absolutely any shapes and forms;
- if the cutting is done correctly, then the material needs corrective processing, but if some edges still turn out to be melted, they can be easily cut off with a sharp cutter or carefully processed with a needle file;
- the method is suitable not only for cutting plexiglass, but also for almost any plastic;
- physical activity is kept to a minimum: you can cut without getting up from your chair.
This method is ideal for manual processing in small production environments and various workshops.
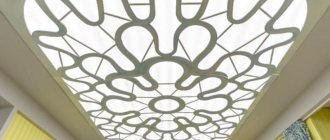
Suspended ceiling and its installation
To equip the ceiling, you need to build a frame from metal profiles.
Suspended ceiling systems come in two types:
- T-24
- T-15
T-24 is a classic system (for example, Armstrong). It can be found in the construction of suspended ceilings in shops, offices, and public buildings. The T-24 and T-15 systems differ in the width of the shelf on which the ceiling panels rest. The size of the visible part of the T-15 system is 15 mm.
The hanging system can be presented in the following color options:
- White
- Silver metallic
- Chrome plated
- Golden.