Synthetic materials have positive aspects:
- high level of sound insulation and thermal insulation,
- light in weight,
- affordable and easy to install.
Penoplex is produced by extrusion from polystyrene foam. Although it arose recently, it has become a popular insulation material. Most often, polystyrene foam is replaced with penoplex.
Tiles glued to insulation
How to insulate a wooden floor
You can lay a layer of penoplex directly on top of the plank base if it is in good condition.
Sequence of actions for insulating floorboards:
- We remove the baseboards and finishing coating. Subsequent insulation should be carried out only after checking the quality of the lag. To do this, you need to remove a couple of boards and assess their condition. Any damaged areas with mold, black spots, or eaten away by insects must be replaced. If the logs are well preserved, you can nail the boards into place, and then check the horizontal position.
- The wooden base is leveled with a grinding wheel, and cracks and recesses are filled with wood putty.
- Next, the boards are treated with antiseptic primer and allowed to dry thoroughly. Very porous wood is covered with 2 or 3 layers of primer.
- Penoplex can be laid on a dry base. The laying method is similar to the previous one - the slabs are placed on glue, placing them apart. If gaps have formed between the plates, they should be foamed. The foam should not contain toluene, which destroys penoplex.
- A vapor barrier is laid over the insulation. The canvases are overlapped by 10 cm, and the edges should overlap the walls slightly. Subsequently, all excess will be removed.
- Next, lay a layer of plywood or particle board, spacing them halfway across the width of the canvas so that the seams do not converge in one place. During the installation process, it is necessary to control the level relative to the horizon. The laid surface should be absolutely flat.
- At the final stage, the final coating can be laid.
That is, insulating the floor with penoplex over joists is simply not advisable. Therefore, we recommend using cheaper materials for such a base, for example, mineral wool or polystyrene foam.
Source: pol-v-dome.ru
Advantages and disadvantages of floor insulation with penoplex
The insulation has no competitors among sheet materials used for thermal insulation of floors, as it has the following advantages:
The degree of liquid absorption is close to zero, which allows it to be used for its intended purpose in damp rooms. After a long stay in water, the insulator absorbs only 0.5% of its weight in moisture.
Floor insulation with penoplex can be done at the stage of building a house and during its operation. The material consists of chemically inert components that resist rotting well. Thanks to these properties, its service life exceeds 50 years. The insulation cells are very small (0.05-0.12 mm) and provide greater mechanical strength to the product. Despite their high density, the slabs are easy to process. Extruded polystyrene foam can be laid on any base, even on the ground. The sheets are of a convenient shape, the dimensions are maintained with great accuracy, which facilitates installation work. This is an environmentally friendly material that does not have a negative impact on humans.
The negative properties include the following:
- The product is afraid of sunlight, so it is stored in a dark place.
It is expensive compared to other insulators. The material does not burn, but actively melts, so it is not recommended to use it in fire hazardous areas.
Main technical characteristics of penoplex
The optimal technology in modern construction is the insulation of surfaces using penoplex. This synthetic insulation has a number of advantages compared to similar materials:
- Withstands intense loads well.
- It is heat and moisture resistant.
- Environmentally friendly material, since no formaldehyde is used in its production.
- High degree of sound insulation.
- Laying with penoplex is one of the most economical options, since no additional costs are required.
The material is made in the form of plates. Its structure consists of air cells, thanks to which the slab is light, but at the same time it does not lose its rigidity. Penoplex is most often used on the following surfaces:
Penoplex thickness
Before starting work, it is often asked about density parameters and thickness indicators. It depends on the heat loss that passes through the surface. For a floor on the ground and a concrete slab in a multi-story building, the indicators will be different, even if both objects are located in the same region.
The thickness of the slab will depend on where they plan to make the screed and for what purpose it will be used. If we are talking about laying penoplex under a water-heated floor, the thickness should be maximum. This way it will be possible to reduce heat loss and heating costs will be lower.
Recommended insulation thickness values for screed:
- For a concrete floor in a heated room - from 20 to 40 mm. If the goal is to simultaneously achieve sound insulation, it is better to choose slabs with a thickness of 50 mm.
- Slabs of 100 mm or more are laid on a concrete base on the ground in an unheated room from below.
Price and best manufacturers
Each type of glue has a different price category and it depends on several factors:
- individual costs .
- Currency fluctuations.
- Product release form (volume, packaging).
- Brand. Depending on the manufacturer’s brand, price differences can be significant.
- The quantity of material purchased - the more, the better (wholesale).
Preliminary cost:
- ATLAS mixture 1 bag 25 kg – 300-320 rubles.
- TITAN – 1 bottle 750 ml – 400 rubles.
- CERESIT CT83 – 1 bag 25 kg – 380 rubles.
- PENOSIL cylinder 750 ml – 350 rubles.
- ABIZOL - 5 liters for 700-750 rubles.
Best manufacturers:
INSTA STIK
TEKAPUR GUN
ALL FIX
Insulation of residential buildings
It is necessary to insulate any residential premises, from dachas and cottages to apartment buildings and private houses. After all, insulating the floor in a private house with penoplex will not only reduce costs, but also preserve the health of your loved ones, as well as the structure of the whole house. And you won't have to wear wool socks 6 months a year, and the kids will be able to play right on the floor without getting sick. And if the house has a basement, insulating the basement floor with penoplex is also an integral part of heat preservation.
Before you do such an important job as insulating the floor in an apartment with penoplex, you need to calculate how much material you have to purchase. And since the slabs come in standard sizes, this is easy to do. But it’s better to take it with a reserve. In general, the best option is to use 40 mm penoplex insulation for the floor.
Recommendations
- It is advisable to purchase adhesives from well-known manufacturers with an excellent reputation.
- All work must be carried out at positive air temperatures.
- If a tile is attached to penoplex , it must not only be attached with glue, but also with plastic dowels, so that peeling does not occur.
- Materials must not contain harmful emissions.
- It is necessary to pay attention to the recommendations indicated on the manufacturer’s packaging regarding parameters and rules of use.
- Do not use fastening mixtures containing elements or impurities of gasoline, kerosene, or formaldehyde.
- It is advisable to carry out all work in a special protective suit in order to prevent dust and fumes from entering the respiratory tract.
When choosing penoplex as insulation, the main thing is to pay attention to the fixation process using suitable adhesive substances. The strength and durability of the created heat-insulating ball, which the living space so needs, depends on this. Compliance with all rules and recommendations guarantees the quality of the work performed.
Laying heated floors on Penoplex
There are differences, but they only concern the laying of pipes or heating cables/mats. Preparation of the base, the first layers, including the waterproofing layer on Penoplex, were described above. A steel mesh is laid on the waterproofing film. It is needed to fix the cable or pipes in a given position. When using heating mats, they can be placed in a layer of tile adhesive - this is simpler and more effective, so this type of heating elements for the floor is rarely used at this stage (although no one prohibits it).
Which mesh should I use? Depends on the step at which you need to lay the pipe or cable. Can be laid 50*50 mm, 100*100 mm or 150*150 mm
It is important that the chosen scheme can be implemented. What is the thickness of the wire in the mesh? Not less than 3 mm
In the case of a cable, perhaps 2 mm is possible. And before pouring the screed, the pipes will be filled with coolant and need to be held in place, so a mesh made of 3-4 mm wire is needed.
You can use Penoplex under a warm water floor without any problems
To prevent the mesh with coolant from moving when filled, it must be attached to the Penoplex. There are several options:
- Plastic clips that are driven into the insulation. But the thickness of the mesh rods is at least 4 mm.
- The metal tie is aimed at the insulation on both sides of the mesh cell.
- Special harpoon clamps.
- Special tires, but they are expensive.
- A mat with bosses is laid on top of the Penoplex. Then the grid is not needed. But these mats are also expensive.
After the mesh is secured, we attach the pipes or cable. The easiest way is with plastic ties, or knitting wire. But the wire can theoretically fray a pipe or cable as it increases or decreases in size (from heating and cooling) during operation. Therefore, if knitted with wire, it is in a plastic sheath. Manufacturers of pipes for heated floors have it.
Actually, that's all. Then they pour the screed, level it, and wait until the concrete gains strength.
Answers from experts
Andrey ▒▒▒▒▒▒▒:
You can put it on the walls, but it will crack on the floor. GVL, plywood or screed with mesh should be placed on top of the penoplex. And so that the joints do not match.
Vladimir Ivanov:
Your tiles will then dance.
Vladimir Vladimirovich:
You can put it in if you don’t mind
Bella Vesna ✿:
It is forbidden. Penoplex cannot withstand this and the tiles will crack.
Count de Wall:
Will crack immediately. The base is shaky and weak.
NOT OLD YET:
Sergey recommends almost correctly. Waterproofing is always carried out from the wet side - from the floor, in order to protect against capillary penetration of moisture into the screed and interfloor ceiling. Waterproofing - dry mixtures - is applied to the wet screed - wet on wet - with a spatula, then dried, the tiles are primed and glued. If you waterproof the floor and then tie it, then there will always be moisture in the screed - the smell of dampness and, over time, the destruction of the body of the screed. Well, if necessary, you can heat and soundproof a bathroom by laying foam plastic on the ceiling up to the screed.
Michael:
For what? of course it is possible
Sasha Novikov:
you can, treat it, but not necessarily, the screed is at least 3 centimeters. better than 5, be sure to put a net
Sergey Koltsov:
It all depends on the situation. Waterproofing, screed with mesh primer and tiles. Believe me, I have 8 years of experience in this work.
Rost:
This is what it is designed for, unlike polystyrene foam! There is no need to treat it with anything, you lay it on the floor, and then you can pour a screed directly on top of it; if the screed is thin, then it is better to reinforce the metal. mesh, and then make any floor! As for waterproofing, it depends on the room! If there is a bathtub, then waterproofing is needed, along the slab, i.e., under the penoplex, and then under the tile, i.e., along the screed. Or just on the screed. If it’s a kitchen, then see for yourself, in principle, it’s not necessary to do waterproofing.
Let's reveal the secret of which side to attach Penoplex?
Expanded polystyrene slabs have been purchased, they are packed together in packs of thick film and are waiting for work to begin. Even examining the sheets in detail, one cannot find an answer as to which side to lay extruded polystyrene foam and whether Penoplex has a front side.
Here are the answers to frequently asked questions about which side to attach Penoplex.
Which side should I glue Penoplex on?
The structure of polystyrene foam boards is the same on both sides, therefore there is no strictly defined side for laying. The sequence itself
Where is the front or back side of polystyrene foam?
This question never confuses professionals, since Penoplex has no front or back side. Therefore, when working with extrusion, no unnecessary questions arise in this regard. It is much more important to ensure that the L-edges match and the seams overlap in the case of a two-layer insulation system.
On what surfaces can Penoplex be placed? Expanded polystyrene thermal insulation is universal and is perfect for most structures. The slabs are widely used for insulating brick buildings, walls made of foam and gas blocks, reinforced concrete foundations and slabs. In this case, there is absolutely no difference which side to place Penoplex 50 mm on the floor, to the wall or attach to the ceiling. It is convenient to sheathe vertical and horizontal bases with insulation. Sheets can hide small protrusions on the base and height differences.
Insulation with Penoplex slabs is carried out on the outside and inside of walls and surfaces in the building. Let's figure out what are the nuances of installing external and internal thermal insulation.
Interior finishing with Penoplex: installation nuances
If you live in a house that is a historical monument, insulating the walls from the outside will not be possible. How to insulate an apartment or balcony from the inside correctly? The technology looks like this:
- For fixation, special PENOPLEX® FASTFIX® adhesive and 4 dowels are used for each sheet.
- The plates are attached to the wall in a checkerboard pattern. At the same time, it makes no difference which side to install the penoplex.
- The surface of the walls is thoroughly cleaned of old decor and leveled;
- The thermal insulation layer is covered with a vapor barrier made of foil-coated polyethylene.
- The joints are carefully taped with foil tape.
- Next, a frame made of wooden beams is installed and the finishing is attached.
We answer user questions
- Is it possible to stick Penoplex on tiles? When finishing loggias and balconies with tiled cladding, you can treat the walls with an adhesive composition similar to concrete contact and only then glue the extrusion. Thermal insulation boards can be fastened with dowel nails with a thermal head within 24 hours.
- Is it possible to glue wallpaper directly onto Penoplex? When decorating with wallpaper, a frame is first installed, a base of plasterboard sheets is arranged, and only then the wallpaper is glued, decorative stone or any other finishing to your taste is laid. In this design, the insulation system will be as effective as possible, and the decorative layer will last for many years.
Styrofoam
Usually this word refers to foamed polystyrene and extruded polystyrene (penoplex). In terms of chemical composition and thermal insulation properties, these materials are practically the same, however, penoplex has much greater bending strength and resistance to crumbling than traditional polystyrene foam. For this reason, recently most consumers are abandoning foamed polystyrene (foam) in favor of extruded polystyrene (penoplex).
Styrofoam
The advantage of this type of thermal insulation is its low price, ease of installation and moisture resistance. The disadvantages include the flammability of this material, and when polystyrene burns, a large amount of toxic substances is released.
Polystyrene slabs are produced in thicknesses from 5 mm to 50 mm; a special chamfer is made on the edges of the slabs so that during installation, gaps and, consequently, “cold paths” do not appear at the joints.
Expanded polystyrene
If a layer thickness of more than 50 mm is required, then two or even three layers of polystyrene are laid, with each new layer being laid offset relative to the previous one so that the joints of the slabs of the upper row fall on the centers of the slabs of the lower one.
Screed diagram with foam plastic
When insulating a floor located directly above the ground, the foam layer must be at least 300 mm for a house with a wooden floor, and 200 mm for a house with self-leveling concrete floors. You should lay at least 4 layers of the thickest foam panels, offset from each other.
If there is a cold basement under the floor, then the foam layer can be reduced by 50mm.
To insulate floors between floors of a private house, 150 mm of foam is sufficient for wooden floors and 100 mm for concrete floors.
If you are insulating floors in an apartment building, then for all floors except the first it is enough to lay one layer of foam plastic 50 mm thick. On the ground floor the thickness can be increased to 80-100 mm.
| Index | Polyspen | Polyspen Standard | Polyspen 45 | Control method |
| Density, kg/m3 | 30-38 | 30-38 | 38,1-45 | 5.6 each |
| Bending strength, MPa, not less | 0,4 | 0,4 | 0,4 | 5.8 each |
| Water absorption in 24 hours, % by volume, no more | 0,4 | 0,4 | 0,4 | 5.9 each |
| Thermal conductivity at 25+-5 degrees Celsius, W/m * °C, no more | 0,028 | 0,028 | 0,030 | at 5.10 |
| Toxicity, Hcl 50, g/m3 | T2 moderately hazardous | T2 moderately hazardous | T2 moderately hazardous | at 5.11 |
| Flammability group | G-3 normal-flammable | G-4 highly flammable | G-4 highly flammable | at 5.12 |
| Flammability group | B-2 moderately flammable | B-3 flammable | B-3 flammable | at 5.13 |
| Smoke coefficient | High smoke generating ability | High smoke generating ability | High smoke generating ability | at 5.14 |
| Compressive strength at 10% linear deformation, MPa, not less | 0,2 | 0,2 | 0,3 | 5.7 each |
Calculated thicknesses of Penoplex thermal insulation
What is it needed for?
Mats are able to retain heat without causing increased humidity and subsequent mold. The material is lightweight, so even with a poured screed it does not have a significant impact on the entire structure. This point is especially important in apartment buildings.
It has been proven that the use of penoplex, especially in private homes, reduces heat loss several times. Therefore, it is logical to invest once in a good floor repair in order to subsequently save money on electricity and heating.
Most often, mats of this type are placed on reinforced concrete floors or primed foundations. Concrete floors are the easiest to process, especially at the stage of leveling and subsequent pouring of the screed.
Instructions for insulating the floor on the balcony
Insulation of balcony floors using thermal insulation material
Insulating the balcony floor with your own hands using insulation can be done as follows:
- Thoroughly clean the floor surface from old finishes (if any) and debris using a regular broom or vacuum cleaner.
- Next, waterproof the floor. laying a special film, but better penofol, which also serves as the first layer of insulation. It is laid over the entire surface, if necessary, cutting the material with a knife to give the desired shape. When laying, it is better to use whole pieces of penofol to avoid a large number of joints.
- Having finished laying the penofol, the balcony is treated with polyurethane foam along the perimeter of the floor. blowing out the joints and seams of the material.
If you want to visualize how to properly insulate the floor on a balcony, you should find a thematic one on the Internet.
Thermal insulation of the floor on the balcony
- Next, wooden beams with a cross section of 50*50 mm are laid and secured on top of the foam foam layer. The beams are laid transversely in increments of approximately 50 cm. The outer beams are mounted with an indentation of 5-10 cm relative to the walls. Before insulating the floor on the balcony, the beams are fastened using several self-tapping screws (at least 4).
- Then the openings between the beams are filled with 50 mm thick foam boards. When laying, the slabs must be flush with the upper surface of the beams. The insulation is inserted as tightly as possible into the openings between the beams, thereby reducing the number and size of cracks. If you cannot avoid gaps, you should fill the voids with polyurethane foam.
- Next, a tongue-and-groove board or chipboard and waterproofing are laid on the floor. if you plan to lay ceramic tiles.
Insulation of a balcony floor using a heated floor system
Now let’s look step by step at how to insulate a balcony floor with a heated floor system:
- Styrodur insulating boards 20-40 mm thick are attached to the concrete base of the balcony using special glue.
- A thin layer of the same glue is applied on top of the insulation and a special welded metal mesh is placed on it.
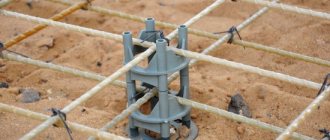
- Laying of underfloor heating cables is carried out using a metal mounting tape, ensuring that a constant cable pitch is maintained. The step should be 10 cm.
- The tape is laid out on top of the mesh and attached to the base with self-tapping screws. The distance between the two tapes should be at least half a meter.
Insulation of the floor on the balcony must be carried out in strict accordance with the instructions supplied by one or another manufacturer of cable heating structures.
Diagram of an electric heated floor on a balcony
- A temperature sensor enclosed in a corrugation is placed in the gap between the cable branches. The ends of the cable are connected to the thermostat, and the temperature sensor is also connected there.
- A screed 4-5 cm thick is poured over the cable system.
Operation of the cable can only begin after the screed has completely hardened. If the screed solution was made from a dry mixture, the hardening time should probably be indicated on its packaging.
In addition, when choosing a facing material for a balcony floor, it is recommended to give preference to materials (including tile adhesive) suitable for installation on a heated floor system according to the instructions for them.
A good solution for insulating the floor on a balcony can also be to use the so-called thin heated floor. It is very simple to lay such a warm floor under the tiles on the balcony: the thin mats of this system have a self-adhesive base, which greatly facilitates installation.
Also, a thin heated floor does not require a screed and can be installed, for example, in a layer of tile adhesive.
As you can see, insulating the floor on a balcony is not as difficult as it might seem at first glance. You just need to be diligent about the task at hand and strictly follow the instructions.
More information on the topic: https://obalkonah.ru
Technologies of facade materials: “plaster” facade with clinker tiles
Step-by-step installation instructions
Plaster facades are a widespread phenomenon in our country. They will not surprise anyone, and there is hardly a foreman or builder who has never encountered this type of home finishing. insulating systems have become a unique novelty on the market of construction technologies , allowing one to simultaneously insulate the facade and finish it with decorative facing tiles imitating brickwork . The technology for its production is similar to a plaster facade, although it is two steps longer - instead of applying the finishing layer of decorative plaster, the master glues the facade tiles and grouts the joints. The widespread introduction of clinker facing tiles on the Russian market has encouraged manufacturers to do everything according to the letter of the law and expand the boundaries of its application.
Pedantic Germans immediately
developed an optimal facade material -
an insulation system with Lobatherm clinker tiles and carried out its certification, thereby giving the green light to the mass use of wet-type facades with decorative tile cladding on buildings of any height.
The popularity of such facade cladding is understandable: clinker tiles have the same wide range of colors as conventional plaster, however, they have tangible advantages in the durability of the finish, and in addition, they reduce to zero the costs of painting and further renovation, painting, repairing cracks, etc. . The replaceability of elements helped the system conquer the multi-story construction segment. The fact is that in such a system two types of insulation can be used: mineral wool and polystyrene foam. This makes it possible to perform fire cuttings, which are mandatory in high-rise construction. However, of course, there are limitations. Thus, it is allowed to glue SPBS-25 foamed polystyrene foam on facades. Other types, including extruded insulation, cannot be used, as they do not meet fire safety requirements. Mineral wool must also be of high quality: with a density of at least 140 kg/cm 3 .
The facade insulation system with clinker tiles is attached to the prepared base (cleaned, leveled, dry).
Bonding insulation
After preparing the base, the starting profile is attached to the wall using dowels. The first row of insulation will be laid on it in the future.
The German system involves the use of universal adhesive in such wet-type facades with clinker tiles. For example, RKS from the German concern Quick-mix is suitable for both gluing insulation and gluing tiles. The total consumption is about 8 kg/m2 (4 kg for installation of insulation, 4 kg for tiles). Thermal insulation boards are glued using the usual application method: along the perimeter of the treated surface of the insulating board and in the center with several cakes. If the base is perfectly flat, the slabs are glued over the entire surface.
Reinforcing layer: glue, dowels and mesh
After gluing the insulation board, the installer must make a reinforcing layer. The peculiarity of this type of plaster facade is that the insulation is attached to the wall through a mesh. Of course, for reasons of economy in low-rise construction up to 8 meters, manufacturers of dry building mixtures allow the possibility of doing without a mesh, however, given that decorative tiles are a fairly heavy material, when working with such cladding it is more reliable to fasten them through a mesh. So, after gluing the insulation, the first reinforcing layer 4 mm thick is applied. The Lobatherm system involves the use of dry RAS mixture. A fiberglass mesh is “embedded” into the still wet solution with a slight overlap. The requirement for fiberglass mesh is at least 180 grams/m2.
Then, through the mesh, the insulating boards are attached to the wall with disc-shaped dowels. 1 m2 of insulation is attached with at least 10-12 dowels. Dowels are selected depending on the base of the load-bearing wall: for porous materials, for solid materials, etc. You can also find universal dowels on the market (universal dowels from Yota, suitable for all types of base, are certified for use in the system). Depending on the base of the wall, the dowel must be deepened by 55 mm or 35 mm.
To reinforce the corners of a building, as well as the corners of window and door openings, a reinforcing mesh with a metal perforated corner is used. To fasten sections of mesh with a metal corner installed in the vertical or horizontal planes of the opening, a section of reinforcing mesh is used, overlapped - a kind of “screed”.
After the dowels are secured, a final reinforcing layer 4 mm thick is applied. The second layer does not “smear” into the mesh! At this stage, the builder will see the result of installing a traditional plaster facade.
Now the facade should dry for 7-10 days. This somewhat extends the installation period of the facade, but serves as a NECESSARY guarantee of strength. There is no need to stop construction during this period. As a rule, installation teams first install insulation on one facade, then this area is protected from precipitation, and the team performs the same work on the other wall. By the time the reinforcing layer has been applied to all the walls of the house, it will be possible to begin installing the tiles in the first section.
Is it possible to glue tiles to polystyrene foam or polystyrene foam?
When installing insulation boards with glue, make sure that they are glued without gaps. You can glue the insulation yourself, without the help of specialists. Apply slab adhesive first around the perimeter, then in the center. Apply tile adhesive to the slab, then place the material against the surface and press for a few minutes until it adheres to the wall.
Polystyrene foam can be a good insulation material and a base for ceramics on walls. But the material does not tolerate temperature changes and the influence of water, which freezes on the tiles and in the seams.
Polystyrene foam has the following properties:
- slight linear expansion;
- heat-resistant material;
- Due to its elasticity, the insulation compensates for deformations.
Since every insulation material has its drawbacks, polystyrene foam for walls is no exception. Vulnerable to sunlight and rodents. If exposed to UV radiation for a long time, it becomes brittle. The surface changes color to yellow, which subsequently leads to erosion.
Defenseless foam plastic is a temptation for mice - during the cold season they make holes in it. To prevent this from happening, experienced builders protect the insulation with ceramic tiles.
What factors influence the choice of glue
It is best to insulate walls using penoplex . It is not advisable to use it for internal insulation of a home. The outer wall should be heated by internal heat. Otherwise, the moisture inside the wall will freeze, heat exchange will be disrupted, and the walls will begin to collapse. Therefore, it is imperative to follow the installation technology and use special glue.
The glue used for finishing indoors will be unsuitable for outdoor work. Not only temperature changes and aggressive external environment will influence, but also high humidity during the rainy season, as well as ultraviolet radiation in the summer. Not the least role is assigned to the surface that will be insulated with panels. Most often this is concrete.
Features of floor insulation work with penoplex
Penoplex is a unique building material with the properties of foam and plastic. It is a product with a closed cellular structure that retains heat well.
The product differs from other floor insulators in its high density and rigidity. It is convenient to lay it to create a frameless floor covering. Often used in the following cases:
For laying on the ground if there is no basement underneath;
In high-rise buildings on interfloor ceilings or above basements on concrete; When creating self-leveling and heated floors of small thickness (film or in the form of mats); On balconies and loggias; For forming a floor on the ground during the construction of a bathhouse.
It is not necessary to place penoplex on the joists, because in this case its advantages in the form of density and moisture resistance do not play a role, and it is better to use cheaper products for thermal insulation.
The insulator goes on sale in the form of slabs 0.6x1.2 m. The thickness of penoplex for insulating the floor in a house is 3-10 cm, depending on the climatic zones. If thermal insulation is carried out at the stage of building a house, the thickness of the samples is 3-5 cm, if not - 5-10 cm. The product goes on sale packaged in film, 10 pieces each. included.
For floor insulation it is recommended to use the following types of material:
- Penoplex "Foundation" (or penoplex 35)
. It is not impregnated with pyrine, so it should be used in cases where fire protection is not needed. The slabs are quite rigid, but are not designed for heavy loads.
Penoplex "Comfort" (or penoplex 31C)
. The insulation is considered universal and is intended for any type of room. It resists mechanical stress well.
Penoplex 45
. The blocks made from it are very strong and can withstand significant weight.
The technology for laying panels depends on the type of base and the operating characteristics of the floor coverings. The design of the floor and the need for waterproofing is determined for each case separately.
Insulation on top of the ground
To carry out the work we will need:
- gravel or small crushed stone;
- sand and cement;
- building level and rule;
- tamping device;
- reinforcing mesh;
- metallized tape;
- moisture-proofing material;
- metal beacons;
- alabaster;
- penoplex.
The work is performed in the following sequence:
If you plan to insulate the floor in a garage or other similar room that experiences heavy loads on the floor, a moisture-repellent material, a mesh of reinforcement is laid on the sand cushion and a concrete screed is made. In this case, the thickness of the screed will be greater and is usually 5-10 cm. Then the penoplex is laid, but only after the concrete base has completely dried. Consequently, a penoplex screed, the construction technology of which is similar to that for residential premises, will differ only in the thickness of the layer.
Application of penoplex
To keep the house warm without extra costs, consumers are interested in whether it is possible to glue tiles in the house to polystyrene foam? The question is not easy even for specialists, so opinions differ. In any case, it is forbidden to finish directly on top of the insulation. If you are gluing porcelain stoneware or clinker tiles to the facade, then you need to cover the penoplex with plaster with a reinforcing mesh. The foam board holds the 30 × 30 cm tile.
If it is necessary to stick the material indoors on polystyrene foam, additional surface coating will not be required. But if you plan to insulate the floor, then put a layer of cement screed on the insulation, then lay the tiles.
To choose an adhesive that is suitable for penoplex, consider the following points:
- base composition;
- environment: moisture and temperature;
- how quickly the mixture dries.
Currently, penoplex for floor insulation, including floor insulation on a balcony without a screed with penoplex, is one of the most popular thermal insulation materials. After all, it’s no secret that heat loss through the foundation accounts for 10 to 15% of the total volume. That is why thermal insulation of floors, insulation of building envelopes and external walls are among the most important measures for thermal insulation of an entire building.
Where is thermal insulation needed?
Refrigerated warehouses (in particular deep-freezing chambers) also require additional thermal insulation of the floor. In this case, it is possible to insulate a concrete floor with penoplex, because the material retains its thermal insulation properties even at constant low temperatures and high loads. With a distributed load exceeding 10 tons per square meter. meter, the deformation of the slabs is less than 2% of the total thickness.
When using penoplex slabs, the floor insulation technology involves laying them in a checkerboard pattern so that the underlying layer overlaps the upper one. This will result in continuous thermal insulation without heat-conducting bridges. It is also necessary to take into account that the vapor barrier layer must be located under the thermal insulation layer, while performing the function of a waterproofing layer.
Penoplex screed: technology
Let's consider the simplest case - Penoplex for a floor under a screed on a concrete base. This can be concrete preparation in a floor structure on the ground, or a concrete floor in a high-rise building or private house. The procedure is as follows:
- Local irregularities larger than 5 mm are leveled. The manufacturer does not specify the alignment principle. That is, it can be a leveling screed (if there are too many irregularities) or local filling of potholes and cracks with a solution. In the second option, it is necessary to trim/cut/knock down the strongly protruding fragments. Sometimes they even level it with sand. This method is also not excluded.
- Seal all cracks and crevices. Along the perimeter of the premises, around pipes and risers, communication inputs.
- Roll out the edge or damper tape.
- Lay Penoplex in one or two layers. Tape the joints with tape.
- Spread the film (another waterproofing material) with an overlap of 15-20 cm, the joints taped. We place the edges on the walls and secure them with strips higher than the planned thickness of the screed.
- The beacons are set, the screed is poured and leveled.
You can level the base with sand, but do you have a lot of unevenness?
Actually, all the technology. All clear. Only questions may arise regarding the minimum thickness of the Penoplex screed. The manufacturer recommends at least 40 mm. When laying floors in wet rooms, it is advisable to cover the slab with waterproofing. Choose the type of waterproofing material yourself. The rest of the technology is the same.
Best answers
Novosibirsk:
The tiles must be laid on a RIGID base, which is a screed. Moisture-resistant plasterboard, even 12.5 mm thick, is a wall material. If you don’t want to bother with wet work, do a dry screed using the Knauf system. But a rigid base under the tiles is a prerequisite.
Alexander:
))))))))) no, of course, it’s soft, all the seams will crack immediately
Nikolay Sorokin:
Screed is required! It is a load redistributing element and a base leveling element at the same time.
Michael:
if the drywall doesn’t play or jump, then it’s possible, but it’s better in two layers and twisted or glued together, apart, or even better, gypsum fiber
Installation of a “warm floor” system as an option for floor insulation under tiles
- Let's prepare the base. We remove the old covering and clean the space between the joists.
- If necessary, we smooth out defects using cement-sand mortar.
- We install waterproofing.
- We install insulation. The best option is polystyrene foam, penofol, polyurethane foam boards 3-5 cm thick. Special insulation for the “warm floor” system is also sold; it has recesses for pipes, which greatly facilitates the work.
- To avoid deformation of the insulation during heating of the pipes, it is recommended to leave a gap of at least 0.5 cm between the foam plastic and the wall. The gaps between the sheets can be sealed using polyurethane foam.
- We lay pipes. The best option is to use metal-plastic or polypropylene, as they are durable, strong and have good flexibility. They can be installed in one of the following ways:
- spiral;
The distance between the pipes should be 30-40 cm. - snake;
- a spiral with an offset center;
- double snake.
No matter how the pipes are laid, the distance between them should be 30-40 cm. We bring the supply and return ends to the manifold cabinet. You can attach the pipes to the insulation in the following ways:
- laying between the “bobs”;
- using U-shaped spring clips;
- aluminum mounting plates;
- installation on a special metal mesh with plastic clips for fastening pipes.
We connect the system to the water supply, set the necessary adjustments in the manifold cabinet, fill the pipes with coolant, and turn on the system.
Materials for floor insulation: what to choose
For thermal insulation to be successful, you need to choose the right insulation. The material must meet certain criteria.
Today the following thermal insulation building materials are used:
- Basalt wool in the form of tile material. The raw material for basalt is molten minerals. Fibers are created from them. They are superior in elasticity and strength to glass fibers. Thanks to special processing, basalt material has hydrophobic properties. Acrylic, which has the lowest toxicity compared to phenol and formaldehyde, is used as an interfiber substance. Eco-friendly brands of stone wool are “Eco” and “Eurostandard”. Materials are more expensive. The insulation is suitable for various home insulation technologies. Low and medium density slabs are laid on joists. The high-density material can be used for installation on soil or concrete.
- Glass wool. This material is made from quartz sand, granulated glass, borax, soda, and limestone in powder form. The ingredients are melted and the finest threads are drawn from the melt. They are connected with glue. This type of insulation has high thermal insulation qualities. The material is sold in the form of rolls or slabs and has a yellow tint. For thermal insulation of horizontal and vertical surfaces, both ordinary types of glass wool and foil are suitable. Foil makes installation easier.
- Foam boards made from foamed and pressed polystyrene granules. Due to the large number of air bubbles, the foam is practically weightless, which affects the comfort of installation. Foam boards are simply cut into pieces of the required size. The insulation does not deteriorate under the influence of mold. In cottages, the material is often used as a thermal insulation layer. But experts do not recommend using this insulation, as it is highly flammable. On the other hand, without exposure to flame, foam boards are completely inert and not dangerous to humans.
- Penoplex. This is extruded polystyrene foam, created from the same raw materials as foam material. But this insulation has improved characteristics. When the material is extruded, it is heat treated, foamed and extruded into special shapes. The resulting heat-insulating material is porous and has increased insulating and insulating properties. Insulation with penoplex material is beneficial. Penoplex has reduced thermal conductivity, is moisture resistant, and durable (provided it is protected from the sun). Thermal insulation does not allow liquid vapor to pass through, this is especially true when installing polystyrene foam on the ground floor of a private house. Then there is no need to lay a vapor barrier layer. Penoplex is suitable for insulation on soil or concrete.
Penoplex screed technology
Let’s analyze the installation of a floor with penoplex from the very beginning, because preparing the base is also an important stage. If it turns out to be uneven, then neither the screed on the penoplex slabs nor any other will differ in quality. If the floors are installed on the ground, the base under the foam screed must have a sand cushion. It must be properly compacted and leveled to avoid large differences in height. If this is an ordinary floor, then a rough screed will also not be superfluous.
The required thickness of extruded polystyrene foam and its density are determined based on the loads that are planned in the room. For regular insulation in an apartment, it is enough to lay foam boards with a thickness of 20-30 mm and a density of 31-35 kg/m3 in the screed. If this is the floor of the first floor, it is better to increase the thickness to 40 mm. When installing floors on the ground, a heat insulator with a thickness of 50-100 mm is used. If this is a garage, then it makes sense to use 45-density material, but in a house its use will most likely be economically unjustified.
The foam slabs are laid end-to-end in the screed. It is advisable to seal the seams with a special foil tape; you can also use regular tape. This is necessary to ensure that liquid from the cement screed, which will be placed over the penoplex, does not get between the slabs. Often the insulation is additionally protected with waterproofing - this can be roofing material, glassine or even simple polyethylene.
https://youtube.com/watch?v=d_ExSQvc_00
Before pouring the screed onto the foam boards, be sure to leave a temperature gap around the edges. It compensates for possible expansion. To do this, a deformation tape is attached to the wall around the perimeter, for example, foamed polyethylene foam 1 cm thick.
How floors are insulated with infrared heating
This method is the most modern. It consists of installing infrared mats, which act as heating elements. Despite the fact that this option is much more expensive than the previous ones, such insulation is installed much faster. Its installation does not require a screed device or dismantling of the old coating.
Infrared mats require a flat surface. Therefore, the appropriate work will need to be done. Floors are insulated using these elements directly under the tiles. The mats are attached to the base using glue. A minimum of “wet” processes and ease of installation make this method of home improvement the most preferable.
How to properly glue insulation boards?
A properly selected adhesive composition will not save you if you use it ineptly. Dry mixtures must be prepared and diluted with water strictly in the proportions specified by the manufacturer.
Before starting any work, both external and internal, the surface must be properly prepared.
- Noticeable irregularities and bumps need to be smoothed out.
- Clean from dust, visible dirt and old finishing materials.
- Allow the insulated surface to dry.
Installation on walls begins from the bottom up; on horizontal surfaces you need to glue from the edge. Expanded polystyrene boards should be tried to fit together as tightly as possible
It is important that the glue does not come to the surface at the joints
Any, even minimal, gaps between sheets of material are cold bridges through which unheated air will rush into the house. Subsequently, the joints are filled using sealant or polyurethane foam.
The applied layer of glue may vary in thickness. Even if the penoplex is covered with panels, drywall, or tiles are laid on it, the evenness of the fit should be checked with a level.
There are several ways to apply glue to the surface of extruded polystyrene:
- Stripes with a small interval from each other. At the same time, the glue line should not be interrupted at the corners. Be sure to apply adhesive in the center. The strips located around the perimeter should not reach the edge of the slab by 1-2 cm.
- You can use a continuous method of applying the composition. The beginning and end of each strip deviate from the edge of the penoplex by 1 or 2 cm.
- The beacon method involves applying glue pointwise with an even distribution over the entire surface of the slab. The interval between points should be 30 cm.
It is not even forbidden to combine methods of applying glue. Many craftsmen advise spreading the compound around the perimeter and applying glue in a spot in the center of the slab.
Using the chosen method, the mixture is applied to the first slab, it is pressed against the surface and held in place for some time. If the penoplex does not fall when your hands are removed from it, then you can begin installing the next element.
Answers from experts
Stas Shabanov:
Once, one client had to insulate the entrance from the entrance. And just glue 3cm extruded polystyrene foam. for glue and dowels. Next is the special grid. plaster and tiles on top. You will have to sacrifice distance and buy a smaller bathtub.
Evgeniy Sidorov:
Glue the bestyashka cloth and foam rubber on the other side, with glitter inside the bathtub, and then put moisture-resistant drywall on the dowels and then stick the tiles, this is the most optimal option, in which the bathtub will shrink a little, but nothing else
Vadim Sadovnichy:
Representative ( s otvet.mail /profile/id208881240/answers/all/) of the Astartek company, all reviews and links to the website avanta161 - southern administrative district They wrote a lie about Akterm liquid thermal insulation (supposedly worse adhesion) - an unconfirmed fact
AKTERM has never had bad adhesion! Adhesion is at a high level, to concrete 0.37
Aleksandr Kuznetsov:
There are more than enough fungi
Andrey Sidorenko:
If you are going to glue something very heavy onto polystyrene foam, then it is better to glue it! and if not, then mushrooms will suffice!
Andrey Volkov:
Be sure to glue it and nail it with “fungi” And instead of penoplex, it’s better to take facade foam - the mesh and putty will stick to it better. Penoplex doesn’t go under putty - it’s very smooth
Kim:
There should be no space between the insulated surface and the insulation that communicates with the outside air. Or this space should be isolated from outside air.
Vladimir Petrov:
There are exactly 5 mushrooms per sheet along the edges and in the center. And if there are any cracks, foam them. And for plaster, attach a mesh; the plaster adheres well
Stas Shabanov:
I would glue it and plant it on the “fungi”. And if the penoplex has no grooves, then the foam went through the seams.
Sergey:
For fungi and foam. You mainly have to glue to pick out the unevenness of the wall - creating “tablets” of glue in the corners.
Joseph Schweik:
It is necessary to glue and glue it with high quality. And fungi are just insurance against x... in the work done and, in principle, you can do without them. I insulated the base made of rubble stone with smooth penoplex (I simply glued it with the “Master” compound without any fungi). Penoplex was treated on both sides with coarse sandpaper to give it roughness. On top I applied a reinforcing layer from the same “Master” over a mesh and glued porcelain tiles. After 3 winters everything remains dead and not a single tile has fallen off...