Modern computer technologies, if not completely eliminated the need to use manual labor, have definitely reduced it to a minimum. The use of laser machines is also gaining more and more fans every year.
CNC laser machines refer to a whole range of devices designed for processing various surfaces. Management is carried out using computer programs.
Dear machine tool builders, we have selected a large number of models for you in dxf format, you can download them for free HERE.
What materials can be processed?
The device is used for processing and creating patterns on many types of surfaces:
- Mirror.
- Glass.
- Stone.
- Acrylic.
- Leather.
- Paper.
- Cardboard.
- Tree.
- Veneer.
- Plywood.
And this is not a complete list of possibilities for using CNC cutting. The use of non-contact technologies will make it possible to process even materials of small thickness. Recently, automation of such work was considered impossible in principle. As well as simple creation of drawings for a CNC laser.
Methods for obtaining patterns for plasma cutting
On the Internet you can find almost any drawings for making objects using the method of interest to us. There are entire sites on the Internet that provide access to such images - ready-made graphic files in CAD format for laser, plasma and waterjet cutting are posted here. Most often, they can be used without additional processing, since all contours are closed and consist of arcs and segments.
For 2D cutting, DXF files are typically used as this is what most CNC sheet metal cutting machines work with. The resulting blanks can be used in the process of creating gratings, gates, fences, stairs or interior items, decor for landscape design.
A well-prepared drawing for plasma cutting, depicting the silhouette of an animal, bird or plant in dxf or dwg formats, will become an attractive accent in the interior of a bedroom, living room or other room. It can also take on the role of a design element for the facade of a house or site.
Please note that some sites provide paid access to drawings. There are also many offers on the Internet for converting graphic files in bmp, jpeg, gif formats into dxf, which is required for working with plasma equipment.
Operating principle of the device
Currently, any laser equipment has an acceptable price level. That’s why it is gaining popularity and is used not only in large but also in small businesses. The drawings with templates presented in this section will also be indispensable assistants. At the same time, high-quality work and high productivity are characteristic of even the most budget models.
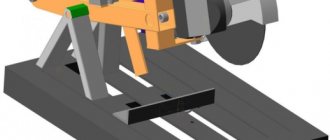
To correctly use drawings using cutting, you need to understand what the machine consists of:
- One-piece frame.
- A table located in a horizontal plane.
- Mobile portal. It is equipped with a special head that emits a laser beam.
A stepper motor allows you to set the equipment in motion. A numerical program circuit organizes the adjustment of all parameters. A Numerical Control device installs the laser at certain positions along with other devices that perform work operations.
The assembly optics unit also has several components.
- Laser tubes.
- Emitter in the form of a head.
- Reflective devices with the shape of mirrors.
- Focusing mechanism.
- Focus lens.
Types of metal carvings. Examples and programs for calculations
Welcome to my blog! Let's look at the types of metal carvings. In this post I want to consider in detail what threads are, types, purpose and use of threads of various designs and on different surfaces. I think it will be interesting for both seasoned engineers and students of universities and colleges.
Thread. The history of its appearance
Carving - what it is and where it came from. The use of the first threaded parts became known in the 4th-5th centuries BC. There is talk about the presence of screw screws during the construction of Solomon's Temple 950-586 BC. e. There, screws could be used to secure wooden structures.
It is worth noting the low quality of such products. The screw was made by winding an oiled thread around it, and the bushing nut had several (two) keys. In short, the design is questionable. Types of metal carving in those distant times were limited to several types.
Time passed and at the beginning of the 15th century, extensive production of the first 3 and 4 taps for thread cutting began. By the way, you can read about them in my article Tap, what is it. design types and how to use it. There I looked at the basic designs of the tap and its main types.
In the 18th century, they learned how to make external threads well, since they invented the lathe, but more on that in the next posts, but now let’s get to the point.
Types of metal carvings. Purpose and application
In this section we will look at the main types of metal carving. I will try to convey this information to you as detailed and accessible as possible. Stay with me it will be interesting.
Equipment with capabilities
This equipment has a laser base as its main working tool. It is distinguished by a high power rating. This makes it possible to process materials with different types of parameters. Thanks to such technologies, it is possible to obtain parts with different characteristics and dimensions.
The capabilities of laser installations are worth considering in more detail in order to correctly use patterns with templates.
- Cutting.
This is an affordable technology option, although not the most effective. A laser cutter uses less energy than a plasma cutter to do the same job. Even when using heat treatment. The advantage of this type of cutting is the accuracy of the edges and the ability to preserve optical properties.
General information
Below is information on the theoretical foundations, technological processes and equipment for laser cutting of materials, which of all laser processing technologies has received the widest industrial application. Physical phenomena in the cutting cavity and models for calculating the main technological parameters of the process are considered. Recommendations are given for the selection of cutting modes for various metals and non-metallic materials using continuous and pulse-periodic radiation from industrial lasers. The last sections describe the design diagrams of machines, automated systems and robots for cutting flat and spatial workpieces, and also provide typical examples of industrial applications of laser cutting technology.
In what areas is the equipment used?
This is an important point for those who are just about to purchase machines.
- Creation of souvenir products.
In the production of souvenirs, laser machines have shown high efficiency. It has already been said that non-contact processing makes it possible to create patterns on parts with any parameters. Which makes the entire work process easier. Even pens and USB keys are processed using this technology.
- Information, award products.
Laser machines are convenient to use for making signs with any information. Diplomas made of two-layer plastic, award certificates - and in this area laser machines have practically no equal. The main thing is to choose the right drawings.
- Promotional Products.
The equipment is especially relevant when creating interior and exterior elements. After using the machines, surfaces made of acrylic and plexiglass look good - they have a glossy end, and there are no radii left from the cutter. The smaller the element, the easier it will be to cut it when plasma cutters are used.
- Cutting plywood and veneer.
Laser cutting technology has become widely used in interior design. We are talking about the manufacture of overhead elements, decorating furniture, creating radiator and ventilation grilles. Usually we are talking about elements with a small thickness, fragile.
It is almost impossible to produce such parts using milling machines, because it is difficult to avoid the appearance of chips and cracks and other similar defects. Children's toys, construction sets and individual interior elements can also be made using this cutting technology.
This area is also characterized by the active use of laser cutting of veneer. Especially when it comes to the production of marquetry and inlay. In the Hermitage, many objects were created using this technology.
- Packaging work, changing the structure of foam rubber and plastic products.
Few people will be surprised by packaging made using laser machines. The equipment is convenient because it can be easily and quickly programmed at any time. There is no need to be tied to a specific circulation or set up complex lines for supplying materials. The surface is free of creases during non-contact processing. The surface of the pattern looks beautiful.
Where is artistic metal cutting with plasma used?
Now it has become fashionable to decorate rooms, facades and adjacent areas in country houses with artistic metal products made by plasma cutting. Most often decorated:
- balconies;
- fences;
- railings;
- doors.
Garden sculpture made of metal and various decorative little things that decorate the house, facade and site are very popular. Metal products made by a good craftsman have a number of advantages over other decorative elements:
- it is original, elegant and beautiful;
- they are strong, durable, wear-resistant;
- compatible with most other materials.
These products are versatile and unique. If you decorate the balcony of a country house with metal elements, this will undoubtedly decorate the facade. And if the grille, designed to prevent unauthorized intrusion, is made using artistic cutting, then, in addition to its main function, it will serve as a magnificent decoration.
A door is a kind of business card of a home, and decorating it with metal elements will give it a certain charm and style. The decoration of the canopies on the facades looks very impressive, gives the facade a feeling of some magical antiquity and looks simply magnificent. You can cut anything:
- Mailbox;
- vane;
- gates, gazebo, tables and benches.
Interesting: Table for plasma cutting of metal: design and choice
Special mention should be made about garden sculptures. With their help, you can create a real fairy tale in your local area. The effect will be stronger if a multi-colored anti-corrosion coating is applied to them.
Today, a wide variety of elements of the interior of a house can be made of metal. This will add additional harmony, coziness and comfort to your home. The situation changes dramatically if you install metal decorative products in the house - the usual interior details will look completely different.
But radical decisions should be avoided, as they can visually narrow the room and make it cold. Even if the interior is interesting, it is unlikely to satisfy you. There should be moderation in everything.
Additional work tips
The following factors must be taken into account during operation.
- Laser engraving can be used without creating printing forms, cliches and matrices. Accordingly, there is no need to purchase additional equipment or involve more people in processing.
Most operations can be easily performed at home. Just like the preparation of the drawings itself. Cutting them won't be difficult.
This saves time spent on pre-press processing. The production process is accelerated, the productivity of any installation becomes better.
- Laser technologies are known for not requiring the use of large quantities of materials.
Without the laser itself, engraving cannot be performed. The installation is powered by regular electricity. One laser should be enough for approximately 20 thousand hours of continuous operation. Intensive use of one device can last up to 7 years. Even if cutting is carried out constantly.
- One operator is quite capable of servicing the installation. The main requirement is the ability to work with graphics programs.
- Products can be manufactured in both small and single batches. For the design of drawings and their direct production, working files are created in a special program.
- The result of any work is obtaining durable images that are resistant to any external factors. The drawing can be saved for future use.
How to make a drawing for laser cutting correctly
Programs for processing sheet material using laser cutting methods work with vector graphic files in dwg, dxf formats. They store drawings for laser cutting. However, if your designer is working with a different vector graphics package, that's okay. Just before downloading the drawing should be recoded from the existing format to the desired one.
Today, a great variety of programs have been created that carry out such conversion. You will definitely find the utility you need. It is worth considering that when converting a drawing, some distortions or accidentally added construction elements may sometimes occur. Keep an eye on this so that you can correct them in a timely manner.
So, in order for your drawings to be laser cut or engraved, it is enough that the drawings themselves are supported by the formats of the AutoCAD or CorelDraw software packages.
The basic requirements for AutoCAD drawing files are as follows:
- Version – not lower than AutoCAD 2000.
- The scale of the finished document is 1:1, the type of coordinate system is World, flat 2D representation.
- Composite elements must have closed lines (not splines). Line types: Arc or Line.
The basic requirements for CorelDraw drawings and documents (files) are as follows:
- Text inserts and individual characters must be converted to Curves.
- In all drawings, the width of curves must be fixed by the Hairline constant.
- Scale – 1:1.
- All contours, including holes, must be created using one closed fragment.
- The versions of CorelDraw used are from 6 to 14.
For laser cutting, it is permissible to use a schematic drawing of the part in computer form. The following formats are applicable for this: CDR (working document of CorelDraw 14 or later versions), DXF or DWG files (store the results of AutoCAD versions 2007 or older). The part sketch must be a schematic object with a closed outer contour. It may have holes and slots (open cut).
Laser engraving: more about the technology
When using this technology, it is assumed that the material is removed from the surface of the workpieces by sublimation. The result is achieved by exposing the surface of the material to a focused laser beam. Maximum power is maintained when cutting. The main thing is to correctly manage the installation parameters to achieve the desired result. Laser engraving works on many of the same principles as a printer. The equipment is as convenient as possible due to the fact that almost no step is carried out manually. This is only required when preparing drawings. And in its finished form, the image will last as long as possible, without any damage.
About special programs and working with drawings
Thanks to modern laser machines, as well as programs for CNC plasma and drawing creation, you can easily process workpieces from any materials, ensuring high intensity of the process along with quality. But modern technologies have by no means contributed to the fact that humans are completely excluded from the technological chain.
Operators are only freed from participation in the workpiece manufacturing process itself.
In order to obtain the required result for CNC, it is necessary to comply with the main conditions, which include the proper level of production preparation and the development of machine control programs.
The essence of any software used in control is the creation of a set of codes that undergo transformation inside the CNC microcontroller, and then become pulses when they enter the execution mechanisms. The function of the latter is transferred to stepper motors or servomotors. But the latter option is used only for some machine models. It is important to choose the right program for creating a drawing.
Electric motors are used during the transformation of impulses, after which the latter become mechanical movements for the instrumental part. The supporting spindle and cutter are involved in the same process. A unique route is laid inside the program, which is subsequently implemented by the machine. How the cutter moves relative to the future workpiece depends on this.
Thanks to modern technologies, it becomes easy to provide the required speed and cutting force. Flame processing also makes the process easier.
A separate file is created inside the control program, which must be processed further. What does the choice of modern software imply? But you need to create a preliminary sketch of the future product, because the route cannot appear out of nowhere.
Cutting models
Thermal models
Taking into account the determining nature of thermal phenomena, thermal models created on the basis of the theory of thermal conductivity are used for evaluation calculations of cutting modes. In this case, the influence of gas-hydrodynamic phenomena in the cutting cavity is not taken into account. The simplest is a one-dimensional cutting model with sequential hole formation and overlap coefficient. For estimated calculations of cutting conditions, a model of a linear heat source in the plate is also used. In parametric form, its basic equation has the form:
6.3/P = In (4.5/Y), (28.1)
Where
Р = q/δaγ (сТn + m); Y = Vpb/a (28.2)
— parameters of power and speed, respectively; q is the effective thermal power of the beam, W; δ—metal thickness, m; a—thermal diffusivity coefficient, m2/s; γ—density, kg/m3; c—specific heat capacity, J/(kg*K); Tp is the melting point. TO; m—latent heat of fusion, J/kg; Vp—cutting speed, m/s; b—cut width, m.
At P≥10 and Y≥5, expression (28.1) is transformed into the equation Y=0.48 P for a powerful fast-moving linear heat source in the plate; at P≤4 and Y≤1 it describes the limiting state of the thermal field for a linear moving heat source. Using (28.1), you can calculate the cutting speed for a given radiation power or the required radiation power for a given metal thickness and cutting speed. As an example, let's calculate the minimum value of q required for cutting various metals with a thickness of 10-3 m at a minimum cutting speed of 1.67 * 10-3 m/s and b = 2 * 10-4 m. Below are data on the cutability of different metals:
The calculated minimum values of q characterize the cutability of metals in the melting and evaporation mode. When calculating q when cutting in evaporation mode, according to (28.2),
Р = q/δaγ (сТk + r), (28.3)
where Tk is the boiling point of the metal; r is the latent heat of evaporation, J/kg. The values of q are calculated from the condition that the thermophysical properties of metals do not depend on temperature and state of aggregation. To determine the required laser power, it is necessary to take into account the absorption capacity of the metal.
Thermohydrodynamic models
The combined model describes the non-stationary periodic nature of the destruction of the upper edge of the metal at low cutting speeds using the hole formation mechanism and the stationary destruction of the metal throughout its thickness at high cutting speeds. Using this model, it is possible to explain the presence of zones with different roughness on the cutting surface, and to perform quantitative estimates of cutting speed and edge surface roughness. But the model does not take into account the change in radiation power density over the thickness of the metal and the gas-dynamic effect of the auxiliary gas jet on the metal.
High quality DIY CO2 laser CNC machine! With touch control! + Drawings!
At this point I will talk about the design of this machine. There are no files to download in this step. I will add these files in the steps where I talk about assembling or installing individual parts of the laser cutter. For this step, I'll just explain how and why I came up with this design. I was inspired by the design look of the hobby series laser cutter from Full Spectrum Laser.
Before sketching out what I wanted the car to look like, I made a list of things to consider when designing it.
The first and most important thing is safety! When creating this machine, remember that safety is a priority.
Since this laser cutter uses a 40W CO2 laser, it is obvious that the laser beam and even its reflections. Must remain inside the machine. So I used a dark acrylic plate for the car cover. The plate is transparent enough that you can see what's going on inside. I used high pressure laminate for the side panels because it looks good and is laser resistant.
The second factor I had in mind was the size of the work area and the cutter itself. I wanted it to have a large cutting area of 600 by 1000 millimeters. Why build a small car when you can build a big one? Since this is still a DIY machine, I wanted it to be easy to replace or add parts if needed. Therefore, the margins of all individual “rooms” in the car are chosen a little wider.
Keeping in mind the ease of assembly and possible modification of this laser cutter, I decided to build a frame from 30x30 aluminum T-frames.
Now I will explain the basic design of this project. In the images of this step I have included several drafts that show you different angles of the wireframe. The design consists of five separate places. The largest space is the working area of the laser cutter. The space immediately behind the work area is a ventilation room; all vapors will be sucked from the work area into this place and discharged outside through the ventilation hose. Behind the ventilation room there are two spaces one above the other. The top space is the space where the laser will go. I wanted the laser not to be in the work area because it would be bad if it was in all those pairs. The bottom space is the space where the water tank and water pump will be located, they are necessary for cooling the laser. The last room is the space to the right of the machine where all the electronics, drivers, supplies, and touch screen will be. Separate zones of space will be separated by 3 mm thick acrylic.
The process of making a simple laser cutter
The main working element of a homemade cutter of the proposed design is the laser element of a computer disk drive. You should choose a writing drive model because the laser in such devices has a higher power, which allows you to burn tracks on the surface of the disk installed in them. The design of the read-type disk drive also contains a laser emitter, but its power, used only to illuminate the disk, is low.
Removing the laser module from the drive will require care
The laser emitter, which is equipped with a recordable disk drive, is placed on a special carriage that can move in two directions. To remove the emitter from the carriage, it is necessary to free it from a large number of fasteners and detachable devices. They should be removed very carefully so as not to damage the laser element. In addition to the usual tools, to remove the red laser diode (and this is what you need to equip a homemade laser cutter), you will need a soldering iron to carefully release the diode from the existing solder joints. When removing the emitter from its seat, you should be careful and careful not to expose it to strong mechanical stress, which could cause its failure.
The cutter requires a red LED
The emitter, removed from the writing computer drive, must be installed instead of the LED that was originally equipped with the laser pointer. To perform this procedure, the laser pointer must be disassembled, dividing its body into two parts. In the top of them there is an LED, which should be removed and replaced with a laser emitter from a computer disk drive. When fixing such an emitter in the body of the pointer, you can use glue (it is only important to ensure that the eye of the emitter is located strictly in the center of the hole intended for the beam to exit).
To control power you need to assemble a simple electrical circuit, otherwise the LED may fail
The voltage generated by the power supplies in a laser pointer is not enough to ensure the efficiency of using a laser cutter, so it is not advisable to use them to equip such a device. For the simplest laser cutter, rechargeable batteries used in a regular electric flashlight are suitable. Thus, by combining the lower part of the flashlight, which houses its batteries, with the upper part of the laser pointer, where the emitter from the writing computer drive is already located, you can get a fully functional laser cutter. When performing such a combination, it is very important to maintain the polarity of the batteries that will power the emitter.
Scheme of a cutter based on a laser pointer
Before assembling a homemade hand-held laser cutter of the proposed design, it is necessary to remove the glass installed in it from the tip of the pointer, which will impede the passage of the laser beam. In addition, you need to once again check the correct connection of the emitter with the batteries, as well as how accurately its eye is located in relation to the output hole of the pointer tip. Once all the structural elements are securely connected to each other, you can start using the cutter.
In principle, any suitable housing can be used for a homemade cutter of this design.
Of course, with such a low-power laser it will not be possible to cut a metal sheet, and it will not be suitable for woodworking, but it is suitable for solving simple problems associated with cutting cardboard or thin polymer sheets.
Cutter test. Electrical tape cuts like a knife through butter
Using the algorithm described above, it is possible to produce a more powerful laser cutter, slightly improving the proposed design. In particular, such a device must be additionally equipped with such elements as:
- capacitors whose capacitance is 100 pF and 100 mF;
- resistors with parameters 2–5 Ohms;
- collimator - a device that is used to collect light rays passing through it into a narrow beam;
- LED flashlight with steel body.
Capacitors and resistors in the design of such a laser cutter are necessary in order to create a driver through which electrical power will flow from the batteries to the laser emitter. If you do not use a driver and apply current directly to the emitter, the latter may immediately fail. Despite the higher power, such a laser machine will not work for cutting plywood, thick plastic, and especially metal.
