Operating principle
After pressing the ignition button, the source of electricity starts, supplying high-frequency current to the working tool. An arc (pilot) occurs between the tip located in the cutter (plasma torch) and the electrode. Temperature range from 6 to 8 thousand degrees. It is worth noting that the working arc is not created instantly; there is a certain delay.
Then compressed air enters the cavity of the plasmatron. This is what a compressor is designed for. Passing through the chamber with a pilot arc on the electrode, it is heated and increases in volume. The process is accompanied by ionization of the air, which transforms it into a conductive state.
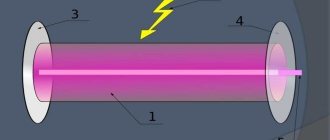
Through a narrow plasma torch nozzle, the resulting plasma flow is supplied to the workpiece. The flow speed is 2 – 3 m/s. Air in an ionized state can heat up to 30,000°C. In this state, the electrical conductivity of air is close to the conductivity of metal elements.
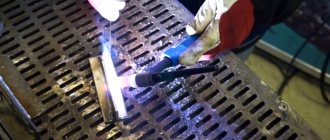
After the plasma contacts the surface being cut, the pilot arc is switched off and the working arc begins to operate. Next, melting is carried out at the cutting points, from which the molten metal is blown with supplied air.
You can read in detail about plasma cutting technology and working with equipment in the corresponding article.
Buy inexpensive equipment for cutting CNC sheet iron
1. Dimensions 3500*2200*1000. 2. Working field 3050*1550 3. Speed up to 15,000 m per minute. 4. Accuracy 0.1mm. 5. TNS - control of burner height by arc voltage 6. Can work with any source. 7. Collapsible table
The price of a CNC plasma cutting table is RUB 220,000. (20% discount for cash payment) For cash payment the cost is 175,000 rubles.
The price includes: 1. Collapsible table, 2. Electronics box with autonomous controller and TNS 3. Burner, wires, hoses. To operate, you additionally need: 1. Plasma current apparatus. 2. Compressor.
The cost of the portal without a table is 185,000 rubles. (20% discount for cash payment) For cash payment payment price 145,000 rub.
(this is the yellow thing in the upper videos, it includes a rack and a 3.4 m rail, the price also includes an electronics box, a torch, wires, hoses) To work, you additionally need: 1. A plasma current apparatus. 2. Compressor. 3. Assemble the table and install the portal on it
Electronics box assembly.
The composition includes: 1. Autonomous controller with TNS 2. Power supply 3. Drivers 3-4 pcs. Cost 35,000 rub.
The cost of an autonomous controller is 15,000 rubles. (more details here)
I also offer TNS for Mach3
price
5,000 rub.
(for orders of two or more pieces)
Safety rules when working with a plasma cutter
The plasma cutting process, if operating rules are not followed, is dangerous to the health and life of people. The main harmful factors are:
- Splashes of molten metal. During the cut, the plasma stream melts the metal and blows it out of the part being cut. Contact of molten drops with flammable substances leads to their ignition, and contact with skin causes severe burns, up to IV degree (charring). For protection, it is necessary to direct the plasma flow away from people and flammable materials.
- Harmful gases and dust. During cutting, the metal not only melts, but also burns. The resulting smoke is harmful to health. In addition, contaminants on the surface of parts burn. Therefore, the workplace must be equipped with exhaust ventilation and work in a respirator.
- Bright light. During the operation of electric welding and cutting with plasma formed by an electric arc, in addition to visible light, ultraviolet radiation appears. This type of radiation causes burns to the retina of the eyes. For protection, the workplace is fenced with portable shields, and the cutter must use a protective shield.
- Temperature. After completion of work, the edges of the part remain heated to a high temperature for some time and touching them can lead to burns. To avoid such injuries, cut parts should only be touched with protective gloves or after sufficient time for the edges to cool.
For those who like to burn on various materials
On the Internet you can see numerous homemade models of burners that are capable of creating designs on plywood, plastic, metal and even glass. Moreover, photographic similarity and some three-dimensionality of the image are achieved. The surface is cleaned, degreased, primed with white acrylic of the Kudo brand and, using a CNC laser burner, also called a pyroprinter, unique images are created. Sometimes the process lasts 6 or more hours.
The burner's operating speed is a stable 10 m/min, and programmers have ideas on how to raise it without interfering with the operation of the control unit. You can also control the burner from a laptop (Windows XP and 7) without using the LPT cable. This will turn burning into an exciting activity for children and teenagers using the capabilities of laser cutters.
Inverter
This unit can be taken from a ready-made welding machine. Its cost is relatively low, although it can be considered the most expensive investment in this project. Typically, when choosing this device, specialists focus on a certain power. It is determined based on the volume of work and its specifics.
Some experts prefer to create an inverter themselves, selecting parts for specific needs or using existing materials. However, as practice shows, it is much easier to use a ready-made unit, since it is more reliable, and certain standards were used in its manufacture.
Scheme
Like any electrical installation, a plasma cutting unit is assembled according to electrical diagrams.
Fundamental
This diagram shows all the elements of the installation, regardless of their location. The main purpose of this drawing is to show the connections between parts and make it easier to understand the operation of the installation.
The schematic diagram of the device shows the following elements:
- supply transformer with rectifier;
- oscillator;
- current relay;
- resistor that limits the pilot arc current;
- a contactor that turns off this arc;
- a starter that turns on the device;
- cutting button;
- compressor with control equipment.
Management
The control diagram shows all the buttons and controls that are located on the remote control or directly on the plasma torch:
- compressor activation buttons;
- air pressure regulator;
- in the presence of coolant, buttons and regulators of its flow;
- ammeter;
- voltmeter;
- water and air flow sensors;
- cutting control button (can be located on the plasma torch handle).
Information! All these elements are also shown on the schematic diagram.
Connections
The connection diagram shows the cables and hoses connecting all the elements to each other. It indicates the cross-section and length of the wires, as well as the connection location.
How to make a welding transformer
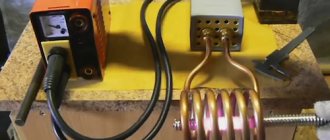
The plasma power source is a welding transformer. Like some other elements, you can make it yourself.
Required parameters
A transformer for plasma cutting differs from a conventional welder in the no-load voltage and is 220-250V. This is necessary to create and maintain an arc between the electrode and the part being cut. The power and current of the secondary winding depend on the expected metal thickness:
- 20A, 2.5 kW – 6 mm;
- 50A, 6kW – 12 mm;
- 80A, 10kW – 18-25 mm.
A power source is required with a “soft” characteristic; the operating voltage is 70V. A current of 5A is sufficient to operate the pilot arc. It is limited to a resistance of 30-50 Ohms, made of thick nichrome wire.
Information! It will not work to use a regular or inverter welder. These devices do not have enough voltage.
How to calculate
The calculation of the supply transformer comes down to determining the required sections of the magnetic circuit, the primary and secondary windings and the number of turns.
For a device designed to cut metal up to 12 mm at a current of 50A, an open circuit voltage of 200V and a mains voltage of 220V, these parameters are:
- magnetic core cross-section – 107 mm²
- primary winding – 225 turns of copper wire Ø4.7 mm;
- secondary winding – 205 turns of copper wire Ø5.04 mm².
Transformer manufacturing
Due to the fact that the transformer must have a “soft” characteristic, the coils are located separately from each other. When using an O-shaped core, they are located on different rods; on an W-shaped magnetic core, the windings are located along the middle part.
The coils are wound according to the calculated parameters on the frames of their electrical cardboard. The finished windings are wrapped with glass tape or keeper tape and coated with paint.
After winding the windings and assembling the magnetic circuit, a diode bridge of 4 diodes with radiators, assembled on a textolite platform, is attached and connected to the transformer. The assembled transformer is placed in the housing, and the outputs of the windings and diode bridge are connected to the terminals on the front panel. The connection is made according to the schematic diagram, taking into account the presence of ammeters, voltmeters, starters and other parts.
An oscillator connected in series with the welder has a high high frequency output voltage. Therefore, it is necessary to use high-frequency diodes in the rectifier or install a separate diode bridge, specifically for the pilot arc.
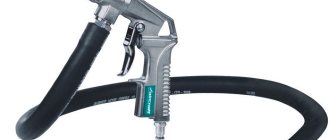
Compressor
According to the instructions, using a compressor implies that oxygen or inert gas will be used. In practice, more often it is connected to cylinders containing a special mixture. It is this mixture that provides a strong plasma beam with decent cooling. If the plasma cutter is used at home, then for economy and simplicity of the matter it is recommended to use a simple compressor. This component can be assembled on your own, where the role of a receiver will be played by a regular cylinder. The compressor is often taken from a refrigerator or from a ZIL car
It is important not to make mistakes with pressure regulation. This is done experimentally, by craftsmen, at the initial stage of work
What about interaction?
It’s surprising to listen to the statements of some craftsmen that Arduino is not suitable for CNC, especially since mach3 arduino symbiosis is impossible, supposedly they do not want to interact.
Others are sure otherwise: Arduino can be implemented for CNC using three options:
- Completely autonomous controller.
- The interpreter board is responsible for the movements, but they are calculated on the computer.
- Translator board (adapter) - acts as a virtual LPT port.
Many users on the network who have problematic electronics ask for advice on a program so that machines controlled by one can work smoothly and smoothly. The milling machines on the machine are designed to process the workpiece evenly, following the signals of the program block.
A laser router, even one made by yourself, will demonstrate compliance with all movement parameters.
How the device works
A plasma cutting installation is a kind of hybrid of electric welding and a gas cutter - the metal is melted by electricity, and the melt is blown out by a gas stream.
The main part of this device is the plasmatron. Inside it is a copper electrode with a rod made of a refractory metal - beryllium, thorium, zirconium or hafnium. At the end of the head there is a nozzle that forms a plasma flow. The nozzle is separated from the electrode by an insulator. The cut is made with reverse polarity - the electrode is the anode, and the nozzle and the metal being cut are the cathode.
The installation works as follows:
- when the unit is turned on, voltage from the welding transformer is supplied to the electrode and nozzle;
- with the help of an oscillator, an auxiliary electric arc occurs between these elements, limited by additional resistance;
- this arc heats the gas supplied to the plasmatron to 8000°C, which turns it into plasma and increases the pressure inside the head;
- a stream of air or other gas blows the plasma stream out of the nozzle;
- when leaving it, the plasma is compressed into a narrow beam, the speed of which can reach 1500 m/s, and the temperature 30000 ° C;
- when the plasma and the part being cut come into contact, the current begins to flow through the mass of the transformer;
- a current relay installed in series with the part turns off the oscillator and the pilot arc.
The thickness of the metal being cut depends on the current strength of the welding transformer.
Information! At a current of more than 100A, the plasmatron and the cable suitable for it need to be cooled with running water or other coolant.
Appearance
The plasma cutting installation consists of the following parts:
- a plasma cutter or plasma torch that creates a plasma flow;
- welding transformer feeding the plasma torch;
- an oscillator or arc ignition unit that supplies high voltage at the moment the cut begins to form a plasma flow;
- a compressor to create air flow through the plasmatron;
- cables connecting the welding machine, plasma torch and the part being cut;
- hoses through which air or other gas and, if necessary, coolant are supplied.
The plasma head looks like a torch for a semi-automatic welding machine. Cables and hoses are also connected to it, but instead of a wire, a stream of plasma heated to 8000°C comes out of the nozzle.
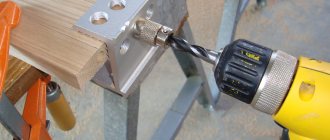
How to make a plasma cutter with your own hands
The basics of plasma cutting are clear, the design of the plasma cutter is also clear, and you can begin assembling it. By the way, you don’t need special drawings for this.
So what will be needed.
We need to find a source of electricity. The simplest option is a welding transformer or inverter. For many reasons, an inverter is better. For example, it has a stable current value, without drops. It is more economical in terms of energy consumption
You will have to pay attention to the current that the welding machine produces. Its value should not be less than 250 amperes. Compressed air source
The compressor remains unchanged here. But which one? The main parameter is air pressure. You will need to pay attention to him. 2.0-2.5 atm. - it will be fine. The cutter can be purchased at the store. And this will be the ideal solution. If you have a cutter for argon welding, then it can be converted for plasma cutting. To do this, you will have to make an attachment from copper in the form of a nozzle, which is inserted into the argon welding cutter. A set of hoses and cables for connecting all parts of a homemade plasma cutter. Again, the kit can be purchased in the store as a single connecting element.
Here are the four elements with which a homemade plasma cutter is assembled.
Auxiliary elements and materials
What else should you pay attention to when assembling a plasma cutting machine with your own hands? As mentioned above, the main characteristic of a plasma cutter is the diameter of its hole
What size should it be to ensure maximum cutting quality? Experts believe that a diameter of 30 mm is the optimal size. Therefore, when buying a cutter in a store, you need to pay attention to whether it comes with a nozzle with such a hole.
In addition, it is necessary to select a nozzle with a significant length. It is this size that allows the jet of compressed air to gain the required speed. This results in a neat metal cut, and the cutting process itself is quick and easy. But you shouldn’t buy a very long nozzle. Such a device quickly collapses under the influence of high temperatures.
As for choosing an electrode for a plasma cutter, you need to pay attention to the alloy from which it is made. For example, if the alloy contains beryllium, then this is a radioactive substance
It is not recommended to work with such electrodes for a long time. If the alloy contains thorium, it releases toxic substances at high temperatures. An ideal electrode for plasma cutting, the alloy of which includes hafnium.
Search for literature, drawings, models and other materials
Message from SladJhon : Please help me find information, diagrams, sketches, drawings of cutting tables for thermal cutting machines. The boss gave the task to design (in order to save money) and produce it on our own. Searches on the net didn't lead to anything (((
When searching for “cutting table,” did you really come up with nothing?
Image ImageImageImage
If we take as an example an ordinary 12-meter table with a width of 2.5 m, then we will need to make approximately 12,000 pins (cutting will take approximately 12 hours per hour, this is provided that we spit on processing the ends). To produce such a number of pins at L = 200, we will need approximately 2.4 km of material, which will weigh approximately 4 tons, if we take the cheapest steel, it will cost us about 2000 euros, but if something is not too much autogenous, then it will cost about 10,000 euros. These pins must be welded onto at least three greasy potholders, otherwise they will fly off very quickly during operation. In order to replace the worn pins, we will need to stop the machine for almost a week. And so, to summarize: We get cyclical costs, taking into account lost profits, more than 15,000 euros. Two such cycles and you can buy a good ceramic table.
As for the option with bimmetal pins, I find it difficult to estimate how much it will cost, and even taking into account royalties, I think no less than the above-mentioned option. And in general, this is some kind of alchemy, but the author of the patent, I think, has only seen pictures of the thermal cutting machine and does not understand at all how it works. A powerful jet in which a high-temperature reaction of metal combustion with abundant oxidation occurs will cover these pins with a thick layer of very hard slag, which will harden before the pin begins to straighten and will not allow it to do so. Moreover, the sheet may lose stability when the pin is bent and move, which will lead to marriage.
Whatever you say, the most rational thing is to use strips, which are usually cut from waste.
SladJhon, if you have plasma cutting, you might want to take a closer look at cutting on the water surface. Advantages: 1. Emissions of gaseous cutting products into the atmosphere are reduced by an order of magnitude (many people completely abandon local exhaust ventilation) 2. There are no thermal deformations of table structural elements 3. Thermal deformations of cut parts are reduced 4. Simplified cleaning of the table from slag (slag in the form of granules, and not a solid sintered mass) 5. Greater durability of the cutting table strips. Disadvantages 1. B o
Higher metal consumption of the bathtub compared to a traditional table. 2. High-quality painting of the bathtub and caisson structures is required. 3. Inconvenient to work with wet parts. 4. In winter, it is necessary to maintain a positive temperature of the water in the bath.
PS I don't have any drawings. But I saw it at several shipyards.
igorni
, it would be more correct to call it not cutting on the surface of the water, but cutting under water. Since the sheet being processed will still be completely immersed under water, this is, in principle, what happens in the vast majority of cases. And underwater cutting can be not only plasma cutting, but also any other type of thermal cutting and, in principle, in all cases the technology is the same, with the exception of small subtleties.
As for point 1 (dignity), this is incorrect. The thermal cutting process is an intense oxidation reaction in a stream of oxygen or compressed air. Combustion products cannot be less than when cutting in the open air, and local exhaust cannot be avoided during intensive cutting conditions. All underwater thermal cutting machines must be equipped with a powerful combustion product removal system.
Underwater thermal cutting is an excellent option, but the significant drawback is the higher cost of the equipment and it’s not just the table. Equipment for underwater thermal cutting costs 2.5-3 times more. And productivity is lower by about 10%. But the quality of the parts is much higher, which leads to a significant reduction in the cost of subsequent processing of the parts.
Pavel Samofalov, since during underwater cutting, the operator cannot visually observe the cutting process, then for underwater cutting appropriately adapted machines are needed - with emergency disconnection devices and shutdown of the cutter in the event of a collision with parts/waste - devices for positioning and tracking the position of the cutter under water - plasma cutter with plasma arc initiation device under water
Recommendations for working with devices for beginners
A correctly selected apparatus and the mode required for welding will help to carry out work without cracks and the formation of cavities, even with a metal such as aluminum, which is quite capricious for carrying out this kind of work.
Plasma welding. Video. Inexperienced welders may experience excessive metal spatter during the welding process due to high steam pressure. It is better for novice welders to select equipment that has a large nozzle and the largest hole diameter for the job.
Thanks to this, the steam pressure will not be so high, and the torch will be able to simultaneously cover both edges of the parts, which will increase the likelihood of obtaining a high-quality seam.
What is needed for a plasma cutter?
The easiest option to make a plasma cutter is to make the device yourself from an inverter. It is distinguished by a fairly simple design, operability and accessibility of the main parts.
Diagram of the plasma torch device.
Homemade plasma cutting equipment is not equipped with CNC. This fact can be attributed more to advantages than disadvantages. Of course, it will be almost impossible to make two absolutely identical products. On the other hand, there is no need to purchase one of the most expensive parts.
In addition, not every qualified specialist is able to independently make such a unit. Buying ready-made parts is practically the same as buying a new tool.
To assemble a plasma device, you will need the following elements:
- compressor for supplying gas under pressure;
- plasma cutter;
- inverter;
- protected electrical cable;
- hoses.
Compressors must be operated in compliance with a number of rules:
- operation in subzero temperatures requires preheating of the oil;
- The air filter should be changed regularly;
- it is necessary to control the oil level;
- Once every six months, a complete cleaning of foreign impurities should be carried out;
- Upon completion of work, the pressure in the system is released.
To assemble a plasma welding tool with your own hands, you can use a simple compressed air compressor. Air exchange is carried out through thin hoses with appropriate connectors. An electric valve is installed at the inlet to regulate the air supply.
The wire from the device to the burner of the device should be placed in the channel. It is better to place a large hose here so that the cable can fit in it. The passing air flow, in addition to its direct purpose, will also provide cooling of the wire.
The operation of a plasma welding cutter requires a current strength corresponding to the value generated by the inverter or transformer. In the second case, the installation will be cumbersome. The large weight of the transformer in combination with the cylinder or compressor will make the device immobile.
An important factor is the low efficiency of the transformer, which will result in high power consumption when cutting.
Plasma welding and cutting.
Using an inverter is much simpler, more convenient and more profitable in terms of electricity costs. As a result, using such a unit it is possible to ensure acceptable mobility of a tool capable of cutting metal up to thirty millimeters thick.
The plasma torch is the second most important element of this device. This unit has an extremely complex structure
In this regard, it is almost impossible to make it yourself, although drawings of such a part can be easily found on the Internet.
It is worth noting that the plasma torch operates under high pressure and temperature. If done wrong, it becomes dangerous. You can assemble such a part from ready-made elements sold in specialized stores.
Don't forget about the working gas. When manufacturing a plasma cutting device, you should determine its operating conditions. When processing ferrous metals, the use of one compressor will be sufficient. Copper, titanium and copper-based alloys will require nitrogen, and aluminum will require nitrogen and hydrogen.
Electronics development
You can assemble the board yourself or purchase a ready-made version, which is much more practical and profitable. The software is installed on it via a computer.
Programs are written using a simplified version of the C++ language.
But to create a CNC it is not necessary to know it, since there are already ready-made libraries in the public domain. In addition, there are many functions, classes, operators and methods for easier work.
CNC electronics include stepper motors, drivers for them, wires and the Arduino board itself.
Average cost of equipment
Today, stores offer a large amount of equipment for manual cutting of metals, which are offered at various prices. Moreover, the cost of these devices will be influenced by several factors:
- Type of equipment;
- manufacturer;
- maximum thickness of the required cut;
- device model.
You can avoid mistakes at the stage of choosing a tool for cutting metals, provided that you visit several stores and compare the conditions under which they are willing to sell this equipment to you. When considering various models of plasma cutters, you should immediately inquire about the prices of components, which you cannot do without if you have to repair this equipment. On average, the prices of spare parts for plasma cutters, taking into account the thickness of the cut, are in the following range:
- With a thickness of no more than 30 mm – 150–300 thousand rubles;
- With a thickness of no more than 25 mm – 81–220 thousand rubles;
- With a thickness of no more than 17 mm – 45–270 thousand rubles;
- With a thickness of no more than 12 mm – 32–230 thousand rubles;
- With a thickness of no more than 10 mm – 25–20 thousand rubles;
- With a thickness of no more than 6 mm – 15–200 thousand rubles.
Plasma cutter circuit and its operation
How to make a plasma cutter is well shown in some videos on the network. There you can also find important diagrams according to which the device is assembled. To read symbols, basic electrical engineering skills and the ability to understand symbols are required.
The plasma cutter circuit ensures that the device can actually perform the work. This happens as follows:
- The plasma torch has a process start button. Pressing the button turns on the relay (P1), which supplies current to the control unit.
- The second relay (P2) supplies current to the inverter, and at the same time connects the solenoid valve that purges the burner. The air flow dries the burner chamber and frees it from possible scale and debris.
- After 3 seconds, the third relay (P3) is activated, powering the electrodes.
- Simultaneously with the third relay, an oscillator is started, ionizing the air between the cathode and anode. An arc called a pilot arc is excited.
- When the flame is brought to a product connected to ground, an arc is ignited between the plasma torch and the surface, called the working one.
- The reed switch relay cuts off the supply of current that operates for ignition.
- The material is being cut or welded. If contact with the surface is lost (the arc hits an already cut place), then the reed switch relay is activated again to ignite the pilot arc.
- After turning off the button on the plasma torch, any type of arc goes out, and the fourth relay (P4) starts a short-term supply of purge air to remove burnt elements from the nozzle.
What are shields for?
The use of shields allows you to significantly expand the functionality of the router. Most often they are made to fit the board form factor. You can use several shields at the same time. The range of applications is very wide:
- Ensuring independent operation from a computer.
- Connecting peripheral devices.
- Output information to peripheral devices directly from Arduino.
- Simultaneous control of a large number of motors.
- Storage and processing of voluminous information.
- Connect to Wi-Fi.
- Connecting mobile network antennas.
- Playing music on Arduino, etc.
IMPORTANT . When connecting shields, you must be careful not to damage the Arduino board.
Plasma cutter assembly
Scheme of plasma welding with an open and closed plasma jet.
For a plasma torch, you need to select an electrode; it can be purchased from thorium, beryllium, zirconium or hafnium. Such materials are optimal for air plasma cutting. So-called refractory oxides appear on the surface of the electrodes during the cutting process; they prevent the electrode from being destroyed. When choosing, remember that some of these metals are dangerous for the welder. Beryllium causes the formation of radioactive oxides, and thorium causes toxic ones. It is best to use hafnium, it is absolutely safe for the operator.
When assembling, attention should be paid to the nozzle, with the help of which the cutting jet is formed. The jet characteristics, cutting time, and cutting width depend on the nozzle diameter.
It is best to use products with a diameter of 3 cm; its length should be significant to ensure a better and more accurate cut. However, you cannot take a nozzle that is too long; it quickly collapses.
A compressor is required to supply air to the structure. The operating features of the cutter suggest that gases will be used for protection and plasma formation, while the work is carried out at a current of 200 A, but no more. To operate the device, compressed air is used; it is necessary to cool the equipment during operation and to form plasma. This option allows you to cut workpieces whose thickness is 50 mm. For industrial equipment, compressed air is not used; oxygen, helium, hydrogen, argon, nitrogen, and their mixtures are used here.
A special cable-hose package is used to connect the power source, plasmatron and compressor. The assembly order is as follows:
- An inverter (or transformer) is connected by an electrical cable to an electrode to create an arc.
- Compressed air is supplied through the hose from the compressor, it forms a plasma jet inside the plasma torch.
Desktop
Plasma cutting of metal is used for processing sheet metal of fairly large sizes. The table should be large and height adjustable. For a homemade air plasma cutting machine, dimensions of 1300x1300 mm or slightly larger are sufficient. As a rule, larger sheets are not used in non-core workshops. But when building a machine with your own hands, the drawings can be changed to suit specific needs.
The platform is welded from a profile pipe (square) 80x80x4 mm or 10x10x4 mm. You can also use a rectangular profile, but a square is cheaper and easier to weld. The shape of the base is a regular table with four legs. Each leg must be equipped with a screw height adjustment system for precise leveling.
Working surface of the table - straight parallel slats
The guides are made from pipe with a diameter of 1 or 1.5 inches. They are equipped with rollers on bearings, which can be easily machined yourself from mild steel. A CNC plasma metal cutting machine will be highly productive only if feeding and moving workpieces does not cause difficulties.
Transformer based cutter
Like other components of the system, the power supply is assembled or modified with your own hands. Detailed instructions help you easily cope with this task.
Device diagram
The electrical circuit of the device includes the following components:
- welding transformer with rectifier;
- start relay;
- oscillator;
- a resistor that reduces the pilot arc voltage;
- start button;
- a contactor that deactivates the initial arc;
- compressor with controls.
A correctly compiled diagram should display all elements, regardless of their location.
What details will be needed
In addition to the welding inverter, to create the machine you will need:
- Holder with replaceable rod. When the current is up to 100 A and the thickness of the workpiece is up to 5 cm, the element is made of copper. The holder of a more powerful unit is equipped with channels for liquid cooling. To ignite the arc, leave a distance of 2 mm between the nozzle and the electrode. The main rod is made movable.
- PTFE insulator. Due to rapid wear, the part is replaceable.
- Housing with nozzle.
- Cables: power and for igniting the pilot arc.
- Hoses. In liquid-cooled units, the bare wire is located in the tube that supplies water to the torch. You will also need a separate hose to remove gas to the nozzle.
We recommend reading Features of setting up the Chameleon welding helmet
Plasma cutter assembly
Work begins with remaking the welding transformer. The number of turns of the winding is selected taking into account the future characteristics of the equipment and the parts being cut.
With a sheet thickness of up to 1.2 cm, a current of 50 A and an open circuit voltage of 20 V, set the following values:
- core cross-section – 107 mm²;
- the number of turns of the primary winding is 225, the secondary is 205.
After remaking the transformer, other elements are connected:
- Compressor with a capacity of 140-190 l per minute. The pressure generated by the unit must be more than 4.5 bar.
- Cables and hoses for connecting components. The cross-section of the supply wire depends on the power of the plasma cutter. At a current of 50 A it is 6 mm². The wire cross-section for the pilot arc is 1.5 mm². The recommended diameter of the air hose is 1 cm.
- Oscillator. When creating a plasma cutter from a transformer, you can use a car electronic ignition system as this block.
The air hose is connected to the compressor outlet. The start key wire is connected to the control unit.
Features of use
When working with a cutter from a transformer from a semi-automatic welding machine, carefully follow safety rules, which is explained by the influence of the following harmful factors:
- Melt splash. Under the influence of plasma, the metal is heated to extreme temperatures. The air flow blows it out of the cut line. Splashing some materials will cause them to catch fire. Contact of the melt with human skin leads to deep burns. Therefore, the plasma jet is directed in the direction opposite to the welder and flammable materials.
- Dust and air pollution with harmful gases. During plasma cutting, metal begins to burn. Smoke is dangerous to the human respiratory system. Therefore, a hood is installed above the desktop. The master puts on a respirator.
- Bright light. The plasma torch is a powerful generator of ultraviolet radiation, which causes burns to the retina of the eye. Therefore, the carver puts on a protective mask and equips the work area with a mobile shield.
- Temperatures. The edges of the resulting blanks retain heat for a long time. You can touch them only with gloves after the parts have cooled.
Guides and controls
A do-it-yourself CNC plasma cutter is practically no different from a factory cutter in terms of capabilities.
The cutting head must be able to move in three axes. You can make a mobile frame with your own hands without much effort. You will only have to buy stepper motors and shielded cables. Cable protection is necessary - the signal from the CNC is very sensitive and interference even from the inverter can affect the operation of the system. If the machine operates from a transformer, then cable protection is doubly necessary. The software unit is also susceptible to the influence of extraneous electrical fields; it is best to install it in a grounded metal box. The scheme is simple, but very effective.
You can buy motors, a power supply and other components for the coordinate system in online stores. The cost of an average quality set of 5 motors, a power supply and a controller (five-axis) is about 20 thousand rubles (at eBay prices). Compared to the cost of a factory machine, the price is minuscule.
Lead screws, limit switches and other accessories will also have to be purchased. Automotive Hall sensors can be used as limit switches. They are an order of magnitude cheaper than standard industrial ones, although in terms of reliability and efficiency they are at the same level.
You can mount control boards yourself if you have the skills to work with a soldering iron and some knowledge of electronics. But it will be cheaper and faster to use a factory assembly, for example AVR ATmega16 or analogues. They are quite affordable in price, and in terms of performance, they are quite appropriate on industrial-level machines.
The complexity of the control circuit and settings makes it appropriate to purchase a ready-made system. It is quite difficult to adapt it to a ready-made desktop and plasma cutter; it is better to do the opposite - first purchase a control system, and then develop and implement executing mechanisms. It will be justified in any case.