How to magnetize metal at home?
Man has been using magnets in various areas of his life for a long time. Often we do not notice their presence in the devices around us and the additional convenience of their use. Today, the vast majority of household appliances and appliances are created using magnets.
However, many unexpected problems arise in everyday life, especially of a technical nature. It happens that you need to maintain or strengthen the effect of a particular magnet, and especially vice versa - demagnetize it. Let's focus on the last problem - how to demagnetize permanent magnets?
After reading a selection of our practical tips, you will find out how, in what way, and whether it is possible to demagnetize “home” magnets without outside help.
Basic methods for permanent magnets
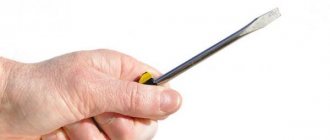
In everyday life, it is sometimes convenient to use magnetized tools, for example, a screwdriver, which will prevent the screw from falling off at the most inopportune moment and in a hard-to-reach place.
But the properties of a permanent magnet are not always useful or necessary. With the same files, drills, taps, etc. magnetized during work.
It will be obviously more difficult to work due to sticking metal filings.
In this case, there are several solutions to this problem. Let's note two of them.
Method 1. Heating to a temperature above the Curie point
The Curie point is the temperature at which the symmetry of ferromagnetic atoms is destroyed. Simply put, you take your magnetized tool and heat it up quite a lot. Strict atomic symmetry is broken, and the instrument loses its magnetic properties under the influence of heat.
Method 2 . Homemade degausser
This method will require the presence of an electromagnet operating on alternating current, in the form of any coil (hollow solenoid) designed for the existing voltage in the house. There are many reel options.
Suitable, say, is a coil from an old electromagnetic bell, a solenoid relay for a car starter, etc. The primary winding from some transformer is also suitable, especially if its frame is cylindrical. Secondary - can be wound up as unnecessary.
We place the demagnetized tool inside for a few seconds and turn on the “unit” to the AC power supply.
How to demagnetize a permanent magnet reliably, and at what voltage? There are a couple of nuances:
- We connect the coil, designed for 220 V, directly to the electrical network. A 110-volt coil can similarly be connected directly to the network, but not for long. We connect the 12 volt coil through a step-down transformer.
- When demagnetizing, first remove the tool from the coil and only then turn off the power supply. Otherwise, the metal may not be demagnetized.
If there are no mentioned solenoids (from an old coil or transformer winding), you can wind a small demagnetizer coil with your own hands. How to successfully demagnetize a permanent magnet with it? A number of parameters will need to be met:
The resistance of such a winding will be about 8 ohms if:
- the solenoid frame will be 80 mm long, with an internal diameter of 30-35 mm;
— at the edges of the frame, when winding, leave cheeks 80 mm in diameter and 5-6 mm thick;
- wrap approximately a thousand turns of PEL (or PEV) wire with a diameter of 0.7-0.9 mm around the solenoid.
For large plumbing tools, you will need a more powerful (larger diameter) demagnetizer. It can be mounted from the demagnetization loop(s) of an old picture tube.
The magnets are connected to each other - how to separate them
How to demagnetize a magnet from a magnet (disconnect), especially if they are powerful? Let us immediately make a reservation that it is useless to separate powerful magnets by simply breaking them, and you can get injured. In this case, you can also give at least two pieces of advice:
Method 1: Using diamagnetic metal sheet
- Using a metal wedge made of some diamagnetic material (duralumin, copper, etc.), try to widen the gap between the magnets, but be careful - do not use an iron hammer (it attracts).
- Insert a sheet (can be metal) into the gap that is larger in area than the magnets, which will serve as a guarantee that everything can come back and the magnets will attract each other again.
- Secure the lower magnet, and begin to move the upper one until you feel that it is freed from the attraction of the lower one.
Method 2. Using plywood
- To separate the magnets, a sheet of thick plywood (10 mm) is used. A hole is made in it for the magnet (if it is impossible to create a gap between the magnets). This sheet will serve as a kind of stop for one of the magnets during the separation process.
- Disconnection occurs in the same way as in the first example.
Everything described above are little tricks mainly for amateur locksmiths. And now a little about the twists and turns with magnets during shopping, which most of our lovely ladies so adore.
Shopping and magnets
Today, in the vast majority of supermarkets, special magnetic alarms are attached to goods, and sometimes it happens that a customer finds herself in an unpleasant situation after purchasing, for example, a new coat. The purchase is completed, but at the exit from the store this “stop light” still signals “theft” - the seller forgot to neutralize the sensor from the product.
Or the electronics may malfunction. Guard magnets are designed in a special way and vary depending on the product they “protect” - with visible or invisible labels (stickers), plastic clips, etc. And they are attached to clothes in different ways, and you can’t just unhook them, since when removed they can even ruin the material of the coat with paint.
But if this happens, and you come home with a working sensor, you still need to remove it from your new purchase, because the next time you go to the store wearing new clothes, it may not work in your favor.
But it is not necessary to physically remove the magnet from clothing (especially in inconvenient places).
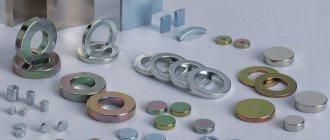
This problem can be solved in another way; the most effective and safest way is demagnetization with a so-called neodymium (which has the highest power) disk-shaped permanent magnet with a sufficiently large working area. It is on free sale. It is enough to move this magnet over the clip, and the sensor will be demagnetized.
You can answer the question in the same way: “How to demagnetize magnets on shoes”?
Conclusion
As you can see, there are a lot of ways to demagnetize any household magnets. If you can’t make a demagnetizer yourself, then you can contact the Internet and order it from the World of Magnets. They have a store in St. Petersburg.
Contact us!
Neodymium magnet: what does it mean and what is it made of, how to use
Neodymium magnet is the most powerful and permanent magnet, which contains rare earth neodymium, boron and iron. What is the complete definition of a magnet and its main advantages, what is its strength and what is its principle of operation? More on this later.
What it is
A neodymium magnet is a magnetic element that is composed of neodymium rare earth boron and iron material. It has a crystal structure, tetragonal shape and formula Nd2Fe14B.
Neodymium magnet is the most common type
It was first created by General Motors in 1982. It is the strongest permanent magnetic element, the power of which is several times greater than usual. Equipped with a large magnetic induction of 12,400 gauss.
How to magnetize a screwdriver at home
Anyone who often works with small screws or self-tapping screws has encountered the fact that at the most inopportune moment, the fastener inevitably falls. And it would be fine if it just fell, but no - it flies to the side and completely disappears from sight. After a dozen such accidents, work ceases to be enjoyable and the mood quickly deteriorates.
And to prevent this from happening, today we will learn how to magnetize a screwdriver at home and talk about special magnetizers for screwdrivers.
What is the cause of magnetization?
Before you become interested in how to demagnetize metal, you should understand the nature of this phenomenon. According to experts, magnetization is carried out by paramagnets, diamagnets and ferromagnets.
Products based on alloys of iron, nickel and cobalt have their own magnetic field, which is higher than the external one. Tools become magnetized if they are used near electric motors or other emitters.
As a result, they will take away some of the magnetic properties.
What it is?
The magnetic detector is a plastic clip. Inside it there is a durable metal rod and balls on a spring. The built-in springs of the magnetic-acoustic sensor operate at a frequency of 60 KHz. The rod passes through the fabric and connects two cone-shaped plastic balls. The spring in the design acts as a retainer.
Manufacturers of this type of protective devices equip the design with capsules with neon paint. If you do not carefully demagnetize the magnet on your clothes, you risk losing your new item on the very first day. If you forcefully open the tag by hand, the neon paint will flood the fabric.
At first it seems that the magazine sensor has nothing to do with the magnet. But that's not true. To attach or remove a magnet from clothing, you will need a powerful device. It is located at the store checkout and is responsible for both the clutch and the release of the clip. The magnet for removing anti-theft sensors opens the sensor where the rod is located.
Capsules with paint and springs tightly press the rod, thanks to which it is securely fixed and immobilized. When the removable device touches the clip, different polarities of the magnetic field arise.
At this moment, the pressure on the rod inside the protective mechanism decreases and the “lock” opens. Now you have learned about the principle of operation of an anti-theft clip and understand how to remove a magnet from clothes in a store.
About the use of magnetized tools
According to experts, some instruments are deliberately magnetized. These are mainly screwdrivers that are used when repairing mobile phones, computers and various household appliances. Such screwdrivers will become indispensable in situations where you need to tighten a screw, but there is no way to support it with your hands.
It is better not to subject watch instruments to the magnetization procedure, since this can stop their working mechanisms. It is not advisable to work with a magnetized drill or cutter, since small metal particles sticking to the working part of the tool will cause a lot of trouble for the master. Read on to learn how to demagnetize metal.
Introduction
In order for repairs, installation and other work to proceed quickly and efficiently, nothing should interfere, especially if it is a small screw that tends to fall off the screwdriver. For convenience, you can buy a special analogue with a magnetic tip.
But don’t throw your regular screwdrivers in the trash, because you can make these out of them too. To do this, most craftsmen use magnetizers, but there are also other ways to make such a miracle screwdriver. And for this you don’t need services, everything can be done easier and faster. Read on to learn how to magnetize a screwdriver at home.
About the special device
Magnetometers are available especially for this purpose, through which a tool can be both given a magnetic charge and removed. For those who do not know how to demagnetize metal, experts recommend doing the following:
- First you need to determine what voltage the magnetic field is at. This is a very important aspect, since a mistake can lead to the opposite result.
- You also need to measure the voltage on the magnet. It must have the opposite sign.
After these steps, you should touch the magnetometer area to the instrument, as a result of which the latter will be demagnetized.
DIY magnetizing device
course "Antennas" lessons "Electricity" "Assembling step-up blocks" on assembling voltage converters VK "Scientific Criticism" - device, magnet, device for magnetization, magnet, magnetize, residual magnetization, ferromagnetism, how to magnetize magnets, magnetization, magnetic, do it yourself , magnetization of magnets, #magnetizing #device #magnet #for #magnetization #remanent #magnetization #ferromagnetism #magnetize #magnets #magnetization #magnetic #with your own #hands #magnets #entertaining #physics #magnet #magnetize #Magnetize #Residual Magnetization #Ferromagnetism #How to Magnetize Magnets #Magnetization #Magnetic #Do It Yourself #Magnetizing Magnets #Fun Physics
Social comments Cackle
How to demagnetize metal using an electric motor?
First, the home craftsman should acquire a low-power asynchronous unit. In this case, the magnetization will be reduced by an alternating decaying magnetic field. Before you begin, you need to remove the rotor from the electric motor.
If you need to remove magnetization from tweezers or a drill, then you just need to insert these products into the stator for half a minute. If the stator windings are disconnected from the power supply, the rotation of the magnetic floor will begin to gradually fade away.
What other ways are there?
If you have a round magnet with a hole in the middle in your house, you can use it to demagnetize a screwdriver.
To do this, simply thread the screwdriver through the magnet, starting from the tip and ending with the bottom of the handle. This action is performed at a leisurely pace. As a rule, one time is enough to demagnetize, but you can repeat it if necessary.
If there is no hole or it is not wide enough, there is a second method. Position the screwdriver in relation to the magnet at the minimum distance at which it is not attracted to it. Then, making small “oscillatory” movements, move it from one pole to the other, gradually moving away from the center. The further away it is, the less vibration should be. After this it should demagnetize.
For the third method we will need a magnetometer. First, determine the level of magnetic field strength of the screwdriver. Then find a field with the same voltage on the magnet, but at a pole with the opposite sign. After that, all you have to do is press the screwdriver exactly to this part.
How to demagnetize metal at home
Craftsmen when working with various metals are faced with a problem - magnetization of tools. In some jobs, magnetic properties help with actions, for example, with a magnetic screwdriver you can install a screw in a hard-to-reach place. The build-up of metal shavings when using a caliper, file or drill can interfere with marking or a straight cut line.
How to demagnetize metal at home
The main reasons for metal magnetization
Magnets are media that create their own magnetic field. Main groups of magnets:
- paramagnetic materials;
- ferromagnets;
- Diamagnets.
Steel products based on alloys of iron, cobalt or nickel refer to substances whose own magnetic field is higher than the external one, i.e. to ferromagnets. The magnetization of a substance is considered to be the sum of the magnetic properties of particles per unit volume.
At the moment the Curie temperature threshold is reached, spontaneous domains with magnetization are formed, which spread until they are completely filled. Under normal conditions, it is possible to obtain a magnetized tool when working close to electric motors, magnetrons and other elements. The metal takes away the properties of magnetism from a nearby emitter, thereby becoming magnetized.
Magnetized screwdriverMagnetized paper clip
Working with small parts with a magnetized tool can cause a lot of trouble. Sharpening metals with increased magnetism properties is impossible to ideal sizes, because... the material is covered with shavings.
Using a demagnetization device
The demagnetization device comes in three variations. The basic elements can be selected at home, using simple methods that do not require much effort to manufacture. There are special devices that can both demagnetize and magnetize an element.
Magnetometer
Magnetometers are used in the following sequence:
- The magnetic field strength of the instrument is an important parameter that needs to be determined, because it is possible to get a negative result;
- the same parameter must be found on a magnet of the opposite sign;
- touching the tool to the area of the device will demagnetize it.
The process takes place within 10 seconds; at home, no connection to the electrical network is required. The functionality is checked as follows: the self-tapping screw is brought to the magnetized metal, and the level of magnetization is checked. Afterwards the demagnetization process occurs and is checked again.
Methods for demagnetizing metal
There are several ways to demagnetize metal structures. Devices are used depending on the frequency of use, purpose and power. Before you demagnetize metal at home, you need to understand the existing structures.
- An ordinary magnet is large in size; a tool is held over it at a minimum distance, on the verge of the attraction process. The magnet can be removed from an old speaker, most of which are round in shape. The process is carried out when the product is removed from the structure, loosening it; the further the tool is from the structure, the smaller the amplitude. The location of the axis on which there is no magnetic field depends on the design of the product.
- More frequent use will require a device operated at home from the mains. It is possible to make the device at home or purchase it at radio parts stores. The main component is a coil of wound wire connected to a transformer. The supply of alternating current allows you to demagnetize the element, direct current - vice versa.
Removing magnetization with a magnetometer
There are many variations and kits for demagnetizing metals in production.
Tunnel devices include a coil having an opening connected to a network.
The size of the hole can be different, depending on the purpose and dimensions of the parts being processed. Multi-band magnets driven by motion, rotation of which occurs with speed control, the impact and change in amplitude is carried out by moving the part away from the body.
Electromagnets operate from a 220 or 380 volt network and allow you to demagnetize an element with a tap for a certain time. Container mechanisms allow you to install the product to a device in which the necessary environment is automatically created.
How to make a demagnetization device at home
It is possible to make an electromagnet for demagnetization at home; for this you will need some materials and available tools. Operation occurs by controlling the current; constant voltage can magnetize the element, while alternating voltage, on the contrary, produces action.
Homemade device for demagnetizing metals
The coil can be made from parts of an old TV, or rather the demagnetization loop of a kinescope. It is important to maintain consistency during manufacturing for a correct process.
- The loop is folded several times until the coil reaches the required diameter. If one loop is not enough, you can sequentially add a second one; this design will allow you to work with large elements.
- A fuse and a button are connected for normal, uninterrupted operation.
- Designs for 220 Volts can be used constantly, those designed for 110 V are connected for a short time, 12 V are used through a transformer.
Installation for demagnetization from a transformer
The resulting mechanism is perfect for large parts. When working with small devices, you can prepare a mini kit at home.
For operation, any coil is used, for example from an old reel-to-reel player, connected in series with a transformer.
Use occurs by applying voltage, the part is placed near the mechanism, then removed, while the power of the device remains on.
Learning to make an electromagnet at home
This is taught from school. Objects that can “magnetize” are of two types - hard magnetic and soft magnetic.
The difference between them is not in density, but in the ability of the latter to quickly lose their properties. If you rub an iron object or move it over a strong magnet, it will “learn” to attract small objects.
And if you quickly rub the halves of the scissors, they can easily “pick up” the needles.
An electric current flowing in a wire creates a magnetic field around it. In order to concentrate it in an electromagnet, you need to wind the wire around a coil. The magnetic field of the wound wires, passing through the coil, will strengthen the strong magnetic field in it.
The term electromagnet refers to a type of magnet that operates using electric current. The strength of such a magnet directly depends on the amount of current flowing through it. It is also possible to change the poles of a magnet, changing the direction of the flow of electricity. It is the magnetic field generated by the passing current that makes it possible for an electromagnet to operate.
To create an electromagnet with your own hands, you don’t need much. Just stock up on a rod-shaped core and some wire that will later be wrapped around the core. The iron will begin to magnetize once the copper winding is connected to the battery. As soon as a shutdown occurs, the magnet will stop working.
So, how to create an electromagnet. First of all, you need to collect everything you need, namely: a steel nail, three meters of copper wire with insulation, a battery (possibly an accumulator), wires for connection and insulation.
You should start by stripping the ends of the copper wires. The insulation must be removed so that the wires can be connected to the battery.
Now you need to make several turns of copper wire around the nail. You must understand that the strength of the magnet directly depends on the number of turns performed, so you should not save. We must not forget about caution; the uninsulated end of the wire should under no circumstances touch the nail.
The direction in which the magnetic field will be generated depends on how the winding is made. Therefore, the wire must be wound in a single direction. If two different directions are made, the magnetic field will be weaker, and therefore the strength of the magnet will be lower.
Connect the bare ends to the battery or battery, and then insulate the bare sections. If all points are completed correctly, the magnet will begin to function. As soon as the polarity in the battery winding is changed, the polarity of the electromagnet will also change, but this will not affect the strength of its action in any way.
For greater magnet strength, you need to make a few more turns of wire around the selected rod. The distance of the turns from the nail will affect the effect on magnetism. If you start increasing the current, then watch the winding, the whole point is that part of the heat will be directed to the insulation, which can melt it and short-circuit the entire structure.
You can experiment with changing the core, changing the material and dimensions. Suitable material is not difficult to identify. Select the intended core and bring a regular magnet with it; if there is attraction, then this option is quite suitable.
Be healthy and happy!
Useful and relevant information
Winding
The copper wire is carefully wound onto the core, turn by turn. With such scrupulousness, the efficiency of the electromagnet will be the maximum possible.
After the first “pass” along the iron sample, the wire is laid in a second layer, sometimes a third. It depends on how much power the device requires.
But the direction of winding must remain unchanged, otherwise the magnetic field will become “unbalanced”, and the electromagnet will hardly be able to attract anything to itself.
To understand the meaning of the ongoing processes, it is enough to remember the physics lessons from the high school course - moving electrons, the EMF they create, the direction of its rotation.
After winding is completed, the wire is cut so that the leads can be conveniently connected to the power source. If it's a battery, then directly. When using a power supply, battery or other device, you will need connecting wires.
What to consider
There are certain difficulties with the number of layers.
- As turns increase, reactance increases. This means that the current strength will begin to decrease, and the attraction will become weaker.
- On the other hand, increasing the current rating will cause the winding to heat up.
That is why you should not rely on third-party advice from “experienced and experienced” people. There is a specific core (with its own magnetic conductivity, dimensions, cross-section), wire and power source. Therefore, you will have to experiment, achieving the optimal combination of parameters such as current, resistance and temperature.
The operating principle of the electromagnet is described in detail in the following video:
How to make a powerful electromagnet
In order to make a strong electromagnet , take an excellent magnetic circuit, wrap it with an insulated conductor and connect it to a current source. The power of such an electromagnet can be adjusted using different methods.
You will need
Description of the experiment
So, in the experiment we observe how a permanent magnet moves inside a hollow copper pipe at a constant speed. Let's fix an arbitrary point in the body of the copper tube and mentally draw a cross section. A magnetic flux created by a permanent magnet passes through this section of the copper pipe. Due to the fact that the magnet moves along the pipe, an alternating
magnetic flux appears in the cross section of the conductor, either increasing or decreasing, depending on whether the magnet approaches or moves away from the point where we mentally drew the section. An alternating magnetic flux, according to Maxwell's equations, generates a vortex electric field, generally speaking, throughout space. However, only where there is a conductor, this electric field sets in motion the free charges located in the conductor - a circular electric current arises, which creates its own magnetic field and interacts with the magnetic field of a moving permanent magnet. Simply put, a circular electric current creates a magnetic field of the same sign as a permanent magnet, and a certain dissipative force acts on the magnet, and more specifically, a frictional force. The reader may rightly ask the question: “Friction of what against what?” Friction occurs between the magnetic field of the dipole and the conductor. Yes, this friction is not mechanical. Or rather, the bodies do not touch. Well, let! There is still friction!
In general, in words everything looks more or less smooth, but can it be described in the language of mathematics? Let's get started...
How to magnetize metal at home
Craftsmen when working with various metals are faced with a problem - magnetization of tools. In some jobs, magnetic properties help with actions, for example, with a magnetic screwdriver you can install a screw in a hard-to-reach place. The build-up of metal shavings when using a caliper, file or drill can interfere with marking or a straight cut line.
How to check?
According to experts, the entire work will take no more than 10 seconds. To check the functionality, the magnetized metal must be brought to the screw. This way the master will see at what level of magnetization the tool is. If the result is unsatisfactory, the procedure should be repeated and then checked again.
Alternative option
Judging by numerous reviews, not everyone has the opportunity to get a low-power asynchronous electric motor.
Experts advise such craftsmen who do not know how to demagnetize metal at home to use a step-down transformer field. There must be an air gap inside its core.
You need to insert a magnetized tool into it for half a minute. It happens that the procedure does not produce results. In this case, it should be repeated.
Using a magnet
Often beginners are interested in how to demagnetize metal with a magnet. It is not difficult to cope with this work. The master should acquire an ordinary, but fairly large magnet, preferably round in shape.
Similar products are available in speakers. Next, a drill, tweezers or scissors are passed over the surface of the magnet. It can also be any other metal instrument.
The distance from the product to the magnet should be minimal.
About working with large batches of parts
There are times when it is necessary to remove magnetization from many metal products. This is possible through the desired temperature.
How to demagnetize metal by heating? According to experts, this will require heating the products to a certain state, which is also called the Curie point. Iron is heated to a temperature of 768 degrees. A ferromagnet will require a higher range.
Upon reaching the desired temperature threshold, spontaneous magnetized domains are formed.
The process goes as follows. First, one part is brought to the Curie point. Next you should cool it. It is important that it is not affected by external magnetic fields (the only exception is the Earth’s magnetic field).
Next, using a sensitive induction meter, the maximum magnetization is assessed. Next, in the control zone at a distance of no more than 2 cm from the part, the range of different values obtained by the MF-23 or MF-23M indicator is measured.
Magnetic induction should be +/- 2 mT.
About a homemade device for demagnetization
Judging by numerous reviews, tunnel devices can be used for this purpose. The design of such a device includes a coil connected to the mains.
There is a hole inside the coil where the workpiece should be inserted. Demagnetization can be successfully performed using a homemade electromagnet.
It is not difficult to make it from some materials and available tools.
The operating principle is to control the current. Magnetization is carried out by constant voltage, and by alternating voltage - the opposite effect. The reels are made from old TVs. It is enough to disassemble it and remove the demagnetization loop in the kinescope. Then it is folded at least twice. It all depends on what diameter the home craftsman needs.
Making a magnet at home
Man first became acquainted with magnets in ancient times. However, very quickly this natural stone ceased to satisfy people's needs. It was then that the technology for making magnets was developed. Of course, a lot of time has passed since then.
Technology has changed significantly, and now it is possible to make a magnet at home. You don't need any special skills or knowledge to do this. It is enough to have all the necessary materials and tools at hand.
So, making a magnet looks like this.
Soft magnetic materials
All materials capable of magnetization can be divided into soft magnetic and hard magnetic. There is a significant difference between them. Thus, soft magnetic materials do not retain magnetic properties for long.
You can conduct an experiment: run iron bars over a strong magnet several times. As a result, the material will acquire the properties of attracting other metal objects. However, the manufacture of a magnet that constantly possesses these abilities is impossible in this case.
Hard magnetic materials
Such materials are obtained by magnetizing an ordinary piece of iron. In this case, the properties are preserved much longer. However, they completely disappear when the object hits a sufficiently hard surface. Also, the magnetic properties are destroyed if the material is heated to 60 degrees.
What you will need
Making magnets with your own hands will not take much time and will not require any special expenses. For this you need:
- screwdriver;
- oiled paper;
- fuse;
- switch;
- copper wire;
- the strongest permanent magnet.
Method one
This method is considered the simplest. It is enough to hold a magnetized object several times in one direction against a permanent strong magnet. That's all.
However, it should be taken into account that magnets made using this method do not hold a magnetic field for long and very quickly lose their properties. Such products are suitable only for simple manipulations.
For example, such a magnet can help remove a needle that has fallen out of a crack or tighten bolts, but nothing more. Therefore, this method should not be seriously considered.
Method two
The production of permanent magnets can be carried out in another way. This requires a battery. With its help you can magnetize any suitable material. This is done quite simply and does not require special tools. An electromagnet gives a metal object magnetic properties.
Let's look at an example with a screwdriver. To begin with, the tool should be wrapped in an insulator, and then wound about 300 turns of wire. It is better to use the one that is used for the manufacture of transformers. After this, the wire must be connected to a battery or battery, preferably 5-12 volts. As a result of such manipulations, the electromagnetic field will magnetize the screwdriver.
Method three
Making a magnet may seem like a daunting task. Since the above methods do not guarantee that the properties will be maintained for a long time. A stronger magnet can be created using an inductor coil.
The metal blank must be small, since it will need to be placed inside the coil. After this, you should follow exactly the same procedure as indicated in the previous method. The only difference is that you need to make twice as many turns of wire, that is, 600.
Only in this case can a good magnet be obtained.
Method four
The manufacture of a magnet in this case involves the use of current from the electrical network. This method is quite dangerous, so all manipulations should be performed carefully and carefully. We will need a fuse, without which nothing will work. It must be connected in series with an inductor coil, inside of which there is a metal workpiece.
Of course, when such a design is connected to the network, the fuse will blow. However, during this short period of time, the metal workpiece will have time to charge, since in this case a fairly strong electromagnetic field is created. Here it is worth considering one nuance: the higher the current strength, the stronger the magnet will be. To wind the coil you should use only copper wire.
Finally
Making permanent magnets at home is a fairly simple process. However, you should be careful when using certain schemes.
Neodymium is considered the most powerful permanent magnet. You can make it at home, but this requires a piece of rare earth metal - neodymium. In addition, an alloy of boron and iron is used. Such a workpiece is magnetized in a magnetic field. It is worth noting that such a product has enormous power and loses only 1 percent of its properties over a hundred years.
Only ferromagnetic materials can be magnetized
The atoms align with the permanent magnet's field.
You can purchase a magnetized screwdriver or screwdriver bits, but there's no point in spending the money because it's easy enough to magnetize a screwdriver yourself. However, there is one condition: the drive shaft must be made of a ferromagnetic material, which means it must contain iron, nickel, cobalt or a rare earth element such as gadolinium or ruthenium.
Fortunately, almost all screwdrivers and bits are made from a steel alloy that contains iron, the most famous ferromagnetic material. Special screwdrivers made from non-ferromagnetic materials such as superhard titanium or titanium alloys cannot be magnetized.

