I've been into blacksmithing for a little over a year now and now that I've finally managed to make and get some good tools I can get into the actual stuff (I originally used a sledgehammer as an anvil and hit it with a small hammer). This project is a tutorial on how to make a knife out of iron with just a homemade forge, anvil, hammer and determination. I'm by no means a professional, I don't know what steel is best to use, and this is definitely not the only way to forge knives at home, but I managed to do it.
Modern Damascus steel is pressed patterned steel, which is the metal equivalent of layering different colors on top of each other to create a beautiful pattern. When a piece is placed in an etching solution, different metals will etch at different rates, creating a beautiful contrast.
The original Damascus steel was forged using a different and very specific process (albeit similar, which is why the modern definition arose), the essence of which only a few knew about, and thus Damascus gained a reputation as a metal with magical properties. The reason for this is similar to Katanas/Samurai Swords - the process produced a much more uniform and therefore workable steel than other methods that can turn fairly mediocre steel and various types of high/low carbon steel into a workable substance. This made it possible to create much more effective blades.
Bulat steel
The surface of the blade of damask steel has a pattern similar to Damascus, but these alloys should not be confused. The secret of producing real damask steel was also lost, but in the 1830s a method for producing Russian damask steel was invented.
This steel was produced at a plant in Zlatoust under the leadership of metallurgical engineer P.P. Anosova. In the modern world it is often called Anosov steel. But modern products do not exactly repeat the recipe of Zlatoust production.
The fact is that this production method was partially lost. Today, damask steel knives have high hardness and good flexibility. But in comparison with products from the past, they are slightly inferior in various respects.
Damask steel products.
Knife design and drawing
As mentioned above, first you should try to forge any unnecessary piece of iron more than once. And only then try to forge the simplest and most common form of a kitchen knife first.
Take this stage more seriously, don’t be afraid to draw on paper. “Estimate” how much metal you have; you should definitely take into account that a lot of it will go to waste and scale.
The Finnish blade is also quite simple in its design; you can choose it in the form of a “first-born”. They can also be used wonderfully in the kitchen or in other settings. And we guarantee you that if you succeed, the blade will become your favorite.
One rather important note: carefully study the characteristics of edged weapons, and be sure to adhere to certain rules when making them. It’s one thing to have a bladed weapon with you, but making one is quite another.
Or if you decide to give it to a loved one, then it will already be distributed and there will be an article for this, up to and including imprisonment. Be careful about this.
Drawing of a knife for forging.
Having drawn the future blade on a piece of paper, it may even be better to make a cardboard template out of it. You need to draw a drawing diagram, with the arrangement of all sizes and don’t forget about the handle. A template can be very useful when creating bevels, blades, and in general, the appearance of the product will be before your eyes.
Necessary tools for forging
The toolkit, to be honest, is rather huge, but each item has its own purpose. And if you don’t have it at hand in time, you can ruin the whole thing.
You can use both purchased and homemade ones, but you can’t make a drill or grinder yourself, it’s better to buy one. They will make your task much easier. The whole set roughly looks like this:
- hammer, preferably two types: heavy 3-4 kg and light 1-1.5 kg;
- an anvil, if a normal one is not available, as an option, use a sledgehammer or a piece of rail, at least for the first time of training;
- metallurgical pliers and small tongs;
- a vice, preferably a larger one, later you will find out what they are for;
- welding machine, if you don’t have one, stock up on a large amount of steel wire;
- a homemade furnace or forge capable of reaching welding temperatures;
- grinding machine or grinder, sandpaper of different grain sizes;
- large magnet;
- drill with drills.
In principle, almost the entire set of tools that will be needed to make a blade. You can pay special attention to the furnace; if the master has not previously even hardened steel, then you can either purchase it.
Tools for forging knives with your own hands.
But the price tag won’t be cheap or try making it yourself. There are ways to make your own muffle furnace online and on our website. Its temperature of 900-1200 degrees will be quite enough to sinter metal and it will be possible to forge anything.
Alloying Additives
To obtain certain properties of a metal, various chemical elements are added to it during manufacturing. The most popular impurities are:
- chromium. Increases the strength of the alloy and improves its resistance to corrosion;
- vanadium. Increases wear resistance, strength and enhances resistance to mechanical loads;
- manganese. Thanks to this element, you can create a blade of any shape. The steel becomes malleable when forged;
- nickel. Gives the alloy the same qualities as chromium, but much more pronounced;
- tungsten. Helps resist corrosion and makes the blade scratch-resistant;
- molybdenum. Makes it possible to use the blade under extreme conditions;
- silicon. Improves the malleability of steel, acts like manganese.
Do you love hunting?
Very! No...
Shutdown
Let the metal cool and start grinding. For this you will need a grinding machine. Remove uneven surfaces and excess metal. A forged knife should be shiny and perfectly smooth. The grinding process usually removes 1-2 mm of thickness, so after processing the knife will become noticeably thinner and lighter. At this stage the leg is sharpened. Finally, it is hardened.
https://moyakovka.ru/youtu.be/a3-TDGxvxlU
Hardening a knife begins with heating it to an orange color. After this, it is lowered into oil or water. Add 3 tablespoons of salt per 1 liter to the water. The oil should have a temperature of about 25-30 degrees, and the water - up to 25 degrees. After hardening, the blade is released.
To do this, you need to hold the knife over the flame and monitor its changes. Immediately after the surface of the knife is covered with a yellow-orange film, the knife must be removed from the fire and allowed to cool. Good luck!
Domestic knife steels
The hunter's knife is used in extremely unfavorable conditions. Not every steel can withstand such treatment. In hunting conditions, it is not always possible to provide proper care to the metal of the blade. For this reason, you should choose steel that can withstand such loads. Among Russian alloys, there are metals with good properties.
Product care
Features of care:
- After use, the blade must be wiped to remove any remaining moisture or dirt.
- It is important to learn how to sharpen a knife correctly. To do this, you need to use sharpening stones of different grits.
- Rust should be washed off with special chemicals.
- It is better to store the blade in a special case. It is important to protect it from moisture penetration.
Blacksmiths recommend sending blades to specialized workshops for resharpening. Only with professional equipment can you obtain high quality sharpening.
Knife forging is an ancient technological process for making edged weapons. With its help, blacksmiths create blades for hunting, fishing, cooking, etc. To save money, you can try to forge a knife from steel yourself.
Step-by-step instructions for making forged knives from different materials
When choosing a material for forging, if you do not know its steel grade, you can resort to the help of special reference books. Where even approximate knowledge will be very helpful in working with the selected material.
For an amateur, the first time will be quite difficult, but some people develop their hobby into a small business. And they perform all the manipulations automatically. But as a beginner, you don’t need to be afraid of anything, just be patient and everything will work out.
File blade
According to a special reference book, they are made of 9ХС steel, which is a tool alloy. It is hardened at 870 °C, and tempered from 180 to 240 °C.
Excellent forging at a temperature of 1180 °C and finished at 800 °C. Please note that all information is taken from reference sources. And this is only a small part of it.
Well, let's continue to the point:
- First of all, you definitely need to relieve the tension from the instrument itself. To do this, it is kept in the oven for 4-5 hours at a temperature of about 600 °C. Then gradually cool naturally during the day. If you cool it sharply, the result will not be satisfactory; it may crack or crumble.
- The next stage is direct forging, we bring the blade in the furnace to the required 1180 ° C, for this you can use a thermocouple in the furnace or use a special color table for this steel.
- When the heating reaches the required level, the workpiece is removed from the oven with tongs and forged (squeezed) over the entire surface; this must be done in one heating session.
- Then they begin to form the strip. The metal is heated again and a strip of the required thickness is forged. Experienced masters immediately make descents, but beginners should not do this yet. The workpiece is heated again and the shank is forged.
- Forging the shank is a simple task; along with it, the shoulders of the blade are shaped.
Homemade blade from a file.
Upon completion of all actions, the blade is left in the forge or oven until it cools completely. The forging algorithm for all knives looks approximately the same, but there are also significant differences. For this reason, let's consider another forging option.
Spring blade
To be honest, you can make a knife from a car spring without forging, just cut out the profile, make the RK, slopes and the blade is almost ready. But its thickness is of course too thick, usually about 10 mm. And yet, in order to make a real, reliable knife, it is better to forge it:
- To begin with, be sure to peel it off with a grinder to remove rust and soot from car exhaust, then cut it into the pieces we need.
- The next step is to weld the rod to the cut piece and heat it red-hot and begin forging, and so on several times until the required thickness.
- Then we cut off the welded rod and anneal it three times until it turns light red, and it’s best to check the temperature with a magnet. This process is called normalization, or more simply, stress relief from the metal. After each heating, we leave the workpiece to cool in the air and heat it again.
- After the normalization process, leaving the workpiece in the room until it cools completely, we take it out and, in principle, it is ready for removing carbon deposits. Then we mark it in accordance with the template and a grinder or on a machine with a grinding wheel we give it a shape, make descents, RC, etc.
Homemade blade from a spring.
The last stage will be the hardening and tempering of the blade, and, of course, the handle. It is up to the taste of the master, a mounted version or an invoice. Forged blades made from springs, quite rigid up to 60 HRC. This material is good for making hunting knives.
Blade from a drill
The peculiarity of forging a drill lies in a certain secret of the drill itself. The drills are made of P6M5 steel; a blade made of such steel will be wear-resistant and will be quite easy to sharpen.
The most interesting thing is that small-diameter drills are made entirely of this steel. But a drill with a large diameter and considerable length, the spiral working parts are made of P6M5, and the rest is made of ordinary metal. It can be assumed that in order to save money.
You need to clearly understand where one type of steel ends and another begins. This is done quite simply: you need to make a “grinder”, a thin cut along the entire length. Where it will spark strongly and the sparks will be yellow-orange, this is simple metal.
Where there are fewer sparks and the sparks are reddish, this is alloy steel. At this point we make a mark, a kind of division into the blade and its shank:
- We light the forge and place the drill there, it is advisable to make sure that the tail part does not heat up. Again we look into the reference book and see that the forging temperature is 900-1250 °C. But you shouldn’t forge at this stage. As soon as the steel reaches this temperature, you need to urgently remove the drill from the furnace, clamp the tail in a vice, and grab the upper part with an adjustable wrench. And start making movements that “unfold” the metal. Everything must be done very quickly, otherwise it will cool down and there is a risk of breaking it.
- By the way, don’t be afraid if you don’t succeed in turning the drill out the first time - heat it again and continue until you get a more or less flat workpiece. And start forging to the desired thickness. Watch the color of the metal, it may break when cold. Achieve a thickness of 4-5 mm.
- We forge the tip of the knife, and with careful blows we obtain a rounded blade shape. Again, this is the best opportunity for professionals to forge the RK and descent, but beginners should not do this yet. It is worth constantly monitoring the thickness of the blade and its color. The blows must be very accurate.
- Then we forge the shank, there is much less work here, according to the blacksmith’s taste - leave it thicker or stretch it longer.
Homemade blade from a drill.
When the metal has cooled, you can carry out roughing work and level the slopes. In general, we bring the matter to its logical conclusion and without fail harden the blade and release it.
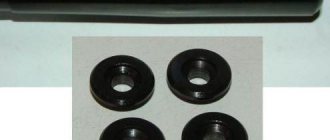
Bearing blade
Quite popular among people are self-made knives made from large-diameter bearings. But some skilled craftsmen can make a small blade from just one roller.
In this case we will need the rims themselves, and in practice people recommend an inner rim. For their manufacture, steel is used type ShKh15, which with proper heat treatment (hardening + tempering), the strength can be obtained 60-64 on the Rockwell scale.
In fact, forging a bearing rim is not much different from forging a drill bit. There is no point in describing it step by step; it will only result in repetition of the material. But let’s outline the nuances:
- The workpiece, unlike the drill, will not unwind, but will straighten out to a straight strip.
- The length of the workpiece must be taken with a margin of 1-2 cm, since the rod will be welded for ease of work.
- It is more convenient to make the handle overhead, less fuss with forging the shank.
Homemade blade from a bearing.
That's all the minor comments. And all other actions are absolutely the same. The steel is of very high quality, capable of working in aggressive areas, the chemical composition is very rich in additives. It will make the best hunting knife; all the necessary qualities will be present.
Blade made of cable
The steel in the cable does not always meet all the required characteristics for a good knife. And the forging process is quite difficult. But such blades are most often made because of the beautiful pattern that remains after forging. It resembles Damascus steel.
By the way, a lot of scammers take advantage of this and pass off such knives as rare versions made of Damascus steel. For beginners, rope forging will be quite problematic; it is not recommended to start with it. Well, let's see what happens:
- Forging a knife from a cable begins with heating it, nothing ordinary. But the handle of such blades is often made from the same cable, and the result is an all-metal knife. This is quite unusual and looks beautiful.
- Let's look at the problem mentioned above. It lies in the fact that when the hammer hits, the wire from which the cable is made “spreads” in different directions. There are two ways out of the situation. The first method, before you start working with it, you need to weld the cable along all the large grooves. And the second lies in the skill of the blacksmith, and welding takes place in the furnace.
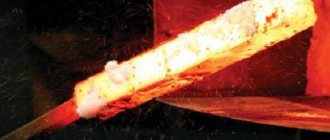
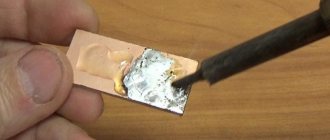
- We don't like easy ways and method number two is more professional and interesting. Having heated the cable to a bright red color, we take it out and sprinkle it with borax and put it back into the oven. This is preparation for forge welding.
- After the cable has been treated with borax on all sides, you can begin forging. Borax is a salt of tetraboric acid that aids in the welding process.
- We heat the cable to 900-1200 °C and strike it with a heavy hammer. We try to keep the cable fibers together. You can train as many times as you like, the main thing is to sprinkle it with borax.
The result will be a monolithic piece of steel, welded using a forge.
We forge a blade of the shape and thickness we need, then process it with final operations. Trim, cutting edge, etc. Blades made from cable are not often made; it is not very practical to use, but as a souvenir it would be very cool.
Homemade blade made from cable.
A few words about the handles for blades made using these methods. There is nothing unusual in this regard, it’s all a matter of the master’s taste. If you want, make it out of wood, or out of overlays.
Or maybe you want to make a special handle, from the horn or bone of an animal, this is also a completely individual matter. Forge to your health, take care of your nerves, do not forget to use reference materials on steel grades, and you will succeed.
Where are they used?
Basically, durable and reliable forged blades are chosen by lovers of hiking, hunting and outdoor activities. Such a knife will not break when cutting a branch, rope or butchering prey. Forged blades are less afraid of water, are not subject to rapid corrosion, and the blade retains its sharpness for a very long time.
Such knives are in demand among chefs of cafes, restaurants, and sushi bars. They can be universal-purpose or highly specialized, for example, for delicate slicing of fish and meat. The thin blade allows chefs to create culinary masterpieces. Steel kitchen knives are difficult to get used to, which is why professional chefs often work with the same tool throughout their entire career.
Collectors and retired military personnel who want to keep in shape are often interested in throwing specimens. The quality of the material from which they are made is crucial for the accuracy and range of the throw.
Sharpening angle
The working properties of a knife are determined by the correct sharpening angle. Sooner or later the knife will have to be sharpened. But many people don't know how to do it correctly. If the process is carried out incorrectly, the blade may lose its factory sharpening, and it will be very difficult to restore it.
The cutting edge of the knife is sharpened. This narrow strip should be straight on both sides. The smaller the angle formed at the cutting edge, the sharper the blade will be. But the knife will also become dull faster. The optimal sharpening angle for a hunting knife is considered to be 30-45 degrees.
The sharpening angle is determined for both sides, which means that on each side it should be around 15-20 degrees. When sharpened in this way, the knife will not be razor-sharp, but it will not become dull during prolonged use.
Knife sharpening angle.