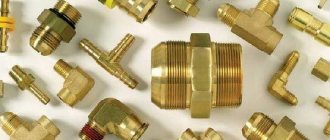
The technology for connecting steel pipes in polyurethane foam insulation provides for additional protection of the joint area using heat-shrinkable sleeves, shells or filling. The design of the pipeline elements allows these elements to be welded into a single system without any problems. Or insert various types of fittings into the highway:
- valves,
- taps,
- valves,
- metering and control devices.
But after welding, insulation of the joints of PPU pipes is required - installation technologies are described below.
Note! If the pipeline is laid underground without a channel, the joints are protected using heat-shrinkable sleeves. It is also possible to use metal casings, over which a layer of thermal tape is wound. If the gasket passes above the surface, then a galvanized steel coupling is used for insulation. This is permitted by GOST 30732-2006. As thermal insulation methods, polyurethane foam shells or filling with polyurethane foam components are used.
Preparatory work
Before installing the heat-shrinkable coupling, each pipe in the joint area is cleaned of rust and dirt residues. To do this, use a cord brush (for metal). If the shell or pipe is very dirty, they can be washed and dried with a gas torch. At the same time, make sure that the coupling placed on one of the working edges is covered with a protective film. The film can only be removed at the time of isolation.
Important to remember:
- the coupling is selected according to the diameter of the shell;
- if the shell interferes with welding, it is additionally removed;
- the total length of the free ends of the pipes is up to 300 mm (for lines with a diameter of 57-291 mm) or up to 450 mm (for lines with a diameter of 273 mm).
To eliminate the possibility of damage to the shell and leakage of the medium, an ODK system (operational remote control system) is installed at the preparatory stage. Before shrinking the thermal couplings, the edges of the PU foam shells of already welded pipes are cleaned and degreased. In this way, an absolutely clean surface is achieved on which the coupling will move and on which it will be seated - this is required by the instructions for insulating joints of polyurethane foam pipes.
Installing an insulating layer for the joint
Before starting connection work, it is necessary to prepare the pipes. To do this, before welding the joints, it is necessary to install an insulating coupling of a certain diameter on one end of the pipe.
At the same time, it is important not to disturb the protective layer on the surface of the waterproofing of polyurethane foam pipes. Work must be carried out gradually and carefully. After carefully installing the coupling, you can begin joining the pipes and their further welding.
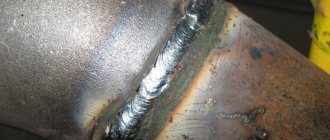
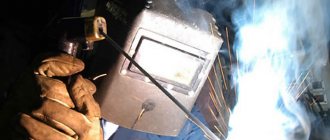
At the end of the welding processes, the welds should be tested for tightness. Next, it is necessary to combine the lines for the remote monitoring system, which also needs to be checked for reliable integrity of all connections.
Having waterproofed the joints, you can begin installing thermal insulation.
Standards for work
The performance of production work on insulating the connecting seams of polyurethane foam pipes is controlled by VSN 11-94 and 29-95. Also, the standards are determined by SP 41-105-2002. According to these standards, installation is permitted at ambient temperatures down to -14°C. If precipitation is observed, additional shelter must be installed.
Important! Even before the joints are insulated during the installation of polyurethane foam pipes, the tightness of the seams is checked. To do this, use a pressure test. Coupling protection is chosen as the optimal thermal insulation option. It meets the requirements of GOST 30732-2006, reduces the frequency of repair work on this section of the highway, and is a technologically advanced and durable material.
Types of pipe joint insulation
When installing main pipelines of urban heating networks, as well as when installing autonomous heating systems, several methods are used to seal the joints of polyurethane foam pipes:
- shell;
- coupling;
- pouring.
Each of them fits certain pipeline criteria: installation method, expected service life and operating conditions, type of outer insulating layer, design values of coolant pressure and temperature, and others.
Stages of work on insulating joints
Preparation
Taking into account the diameter of the line, the edges of the pipes are cleaned. The total length of the clean section should be 300 or 450 mm (to allow room for the coupling and its movement). Corrosion, dirt, and deposits are removed from the metal surface. The installation area is degreased, as well as the working ends of the shells and the inner surface of the coupling.
Important points:
- the surface of the shell itself is cleaned to a depth of 15 cm from each end. Be sure to degrease;
- at ambient temperatures below 0°C, it must warm up to 30-45°C (should become hot);
- the coupling is positioned in the center of the joint. Appropriate markings are made on the surface of the shell with a marker (not chalk!).
Make sure that the coupling surface is dry and clean. Remove the protective film and drill a hole with a diameter of 25 mm (it will be needed to check the tightness of the joint). The hole should be located at the top and 150 mm from one of the edges.
Preparing the edges of the insulation
Prepare the clean edges of the insulation - heat it with a burner to 50°C and stick on a mastic-based tape. They plan to overlap the tape with the coupling up to 10 mm. Remove the protective film from the mastic tape and make sure that no dirt or dust gets on the adhesive strip. Then slide the coupling over (guided by the markers) with the hole facing up and place it on the mastic tape. The circumference is heated with a burner until the PU shell is tightly compressed. As a result of correctly performed work, a tightly compressed barrel-shaped coupling is obtained.
Tightness
Now check the tightness - install a crimping device in the coupling hole. Air is pumped through the hole until pressure builds up. If necessary, repeat crimping. Difficult areas with air leaks are reheated with a burner and sealed. The edges of the coupling are then sealed with adhesive tape followed by heat shrinking.
Joint sealing methods
The method of installing PPU joints depends on:
- heating main construction method (underground, above-ground, ducted and ductless);
- estimated service life;
- working pressure;
- working environment temperature;
- external insulating coating.
Types of sealing of PPU joints:
- coupling;
- shell;
- pouring.
Coupled
The method is used when sealing joints of polyurethane foam pipes in critical systems. In addition, couplings are used in pipelines with labor-intensive construction and aggressive operating conditions. These include systems built underground without channels.
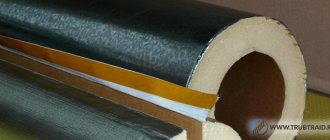
The coupling is a cylindrical heat-shrinkable sleeve. The material for the part is radiation cross-linked polyethylene.
The cuffs have a slightly larger diameter than the pipes, and when heated, they tightly grip the joint section of the pipeline. After heat treatment, liquid polyurethane is poured into the space under the coupling. After this, the hole for supplying the composition is sealed.
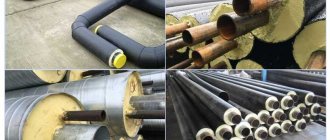
Shell
“Shell” – polyurethane half-cylinders. The products are fixed on the pipes with bandages or mastics and polyurethane is fed into the resulting mold. After this, the joint is sealed with adhesive polyvinyl chloride tape, subjecting it to heat.
The method allows you to evenly distribute the poured material. The shell is easy to install; its installation does not require lengthy preparation. The elements are produced in different thicknesses, including reinforced ones that can withstand extremely low temperatures.
Shell sealing is used for above-ground and underground ductless construction of heating pipelines.
Filling
The method is used with pipelines laid by underground channel, non-channel or above-ground routes.
Pouring involves the use of a galvanized steel casing, rolled or regular. The PU foam mixture is fed into the holes between it and the pipe. The feed holes are closed with covers on self-tapping screws. The waterproofing layer is heat-shrinkable tape, which is fused to the casing by heating with a gas burner.
The poured insulation method is more reliable than the shell method, but is inferior in strength to the coupling method.
Materials
The main material for insulation is polyurethane foam, a type of plastic. 85-90% of PUF is occupied by gas formed into cells, the remaining 10-15% is their thin walls. The insulation is poured in a thin layer sufficient for low thermal conductivity. Other material properties include:
- moisture resistance;
- impact resistance;
- light weight;
- immunity to decay and microorganisms;
- resistance to mechanical damage.
Polyurethane foam is created on the work site by mixing two liquids - polyol and polyisocyanate.
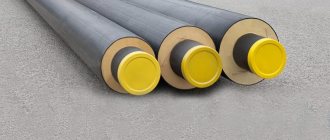
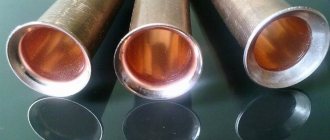
The shells are made from polyurethane foam. The surface of the products is smooth, the shape is precisely adjusted to the geometry of the pipe. Placed underground, the insulation does not absorb moisture and does not lose its thermal insulation qualities. Manufactured in accordance with GOST 30732-2001, the coating can withstand temperatures from -180 °C to +130 °C, and for a short time - up to +150 °C. The two shells are connected by a tongue-and-groove lock, which prevents cold from penetrating into the joint.
The couplings are made of radiation cross-linked polyethylene, resistant to corrosion, water, vapors, gases, acidic and alkaline environments. The material shrinks as the temperature increases, shrinking to almost the size of a pipe. The regulatory document is state standard 30732-2006. Thermal couplings operate at temperatures of -70 °C…+70 °C.
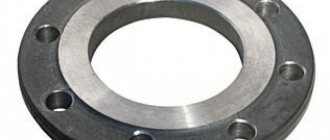
The material for the cast insulation casing is galvanized steel. Galvanization protects the body from corrosion damage. The product has the form of a rolled pipe made of thin sheet metal with a thickness of 18-40 microns. Steel parts are produced to match the geometry of straight pipeline sections, transitions, bends, and tees. The parameters of the casing are regulated by GOST 30732-2006.
Price
| Name of couplings | Price |
| Heat-shrinkable coupling 110*500 | 300 rubles |
| Heat-shrinkable coupling 125*500 | 330 rubles |
| Heat-shrinkable coupling 140*500 | 420 rubles |
| Heat-shrinkable coupling 160*500 | 480 rubles |
| Heat-shrinkable coupling 180*500 | 530 rubles |
| Heat-shrinkable coupling 200*500 | 610 rubles |
| Heat-shrinkable coupling 225*500 | 680 rubles |
| Heat-shrinkable coupling 250*500 | 850 rubles |
| Heat-shrinkable coupling 280*500 | 940 rubles |
| Heat-shrinkable coupling 315*500 | 1200 rubles |
| Heat-shrinkable coupling 355*700 | 1600 rubles |
| Heat-shrinkable coupling 400*700 | 2050 rubles |
| Heat-shrinkable coupling 450*700 | 2500 rubles |
| Heat-shrinkable coupling 500*700 | 3000 rubles |
| Heat-shrinkable coupling 560*700 | 3400 rubles |
| Heat-shrinkable coupling 630*700 | 4000 rubles |
| Heat-shrinkable coupling 710*700 | 5100 rubles |
| Heat-shrinkable coupling 800*700 | 6300 rubles |
| Heat-shrinkable coupling 900*700 | 7800 rubles |
| Heat-shrinkable coupling 1000*700 | 9300 rubles |
| Heat-shrinkable coupling 1200*700 | 14,000 rubles |
Design features and advantages of heat-shrinkable couplings
The internal diameter of the installation coupling installed at the pipe junction with a certain allowance must be commensurate with the PE shells being connected, therefore these products are produced in a line of standard sizes for all diameters of PU pipes (110 - 1200 mm). Convenient and quick installation of the heat-shrinkable sleeve is ensured by the special properties of the polymer from which it is made. This material is subjected to dosed exposure to gamma radiation, as a result of which the bonds of the molecules that form it are modified, and polyethylene acquires the ability to irreversibly decrease in size when heated.
The advantages of the technology for sealing welded pipe joints using dimensional cylindrical couplings are based on their multitasking. Installation of a heat-shrinkable coupling , capable of tightly compressing the surfaces of the shells of connected pipes, allows not only to ensure reliable waterproofing with minimal labor costs - its cylindrical surface is also a form for the manufacture of thermal polyurethane foam insulation. In addition, the modified polyethylene from which the couplings are made has the same physical characteristics as the shell material of PE PPU pipes, which ensures the tightness of their connection throughout the entire service life of the pipeline.
DIRECTORY
Instructions for installing coupling connections at the joints of pipes with PPU insulation in a PE shell (PPU-PE pipes)
Preparatory work for installation
The connecting coupling is installed on a polyurethane foam pipe in a PE shell before welding the butt joint of the steel pipes of the heating main. The packaging film should not be removed until the process of sealing the joint has begun! Be sure to check that the marking of the coupling used corresponds to the diameter of the sheath of the pipeline being insulated. The ends of steel pipes free from polyurethane foam insulation at the joint must amount to:
- no more than 300 mm for PPU-PE steel pipes with a diameter from 57 mm to 273 mm;
- no more than 500 mm for PPU-PE steel pipes with a diameter over 273 mm.
Necessary conditions for carrying out work
It is necessary to start insulating joints only after a technical examination of the welds of steel pipes. Work must be carried out at an air temperature of at least -10 C0, and also in the presence of special technological pits of at least 1.4 m (0.7 m in each direction from the joint) and 400 mm deep.
During precipitation, installation work is carried out only under temporary cover, which completely prevents moisture from entering the mounted elements.
When installing a heating main made of PPU-PE pipes, which is equipped with a system for online remote monitoring of the insulation condition (SODC), it is necessary to connect the signal conductors immediately before starting work on insulating the joint, then carry out the appropriate measurements (insulation resistance, integrity of the conductors). Work on connecting signal conductors at joints is carried out using the MRK-05 kit.
Heat Shrink Coupling Technology
Thoroughly clean the joint area from dust, dirt and moisture. The outer polyethylene shell of the pipe is cleaned to a distance that will be sufficient to move the mounted coupling along the cleaned surface, but not less than the length of the coupling itself. The steel pipe itself must be cleaned with a cord brush until a metallic shine appears.
At the ends of the pipes, it is necessary to remove a layer of polyurethane foam thermal insulation to a depth of 15-20 mm. If the thermal insulation of polyurethane foam gets wet at the ends of steel pipes, all moistened insulation is removed.
On both sides of the joint, the P/E pipe shell at a distance of 150-200 mm must be degreased with a solvent, then thoroughly cleaned with sandpaper, then re-treated with a solvent.
Using a regular tape measure, center the position of the coupling relative to the axis of the joint, then mark with a marker (it is prohibited to use chalk for marking), which should correspond to the intended ends of the coupling. In this case, the previously prepared surfaces of the shells on both sides should extend 20-50 mm beyond the dimensions of the coupling.
Next, heat the prepared surfaces of the PE shells on both sides of the joint with a soft flame to a temperature of 120°C using a propane torch. After heating, stick a specialized adhesive tape around the perimeter onto the warm surface of the outer shells, with the reinforcing layer facing outward, in compliance with the following conditions: overlap at the marks of 5-10 mm, overlap of the adhesive at the junction of 10-30 mm.
Unpack the coupling used in such a way that the outer surface of the packaging film is on the polyethylene shell of the pipe, but outside the area of the previously prepared and cleaned surfaces of the shells, and the movement of the coupling itself can occur on the clean inner surface of the package.
After the adhesive has cooled, it is necessary to slide the coupling onto the joint, positioning it in accordance with the previously applied marks. It is necessary to ensure that the inner surface of the coupling being put on is dry and clean. If this condition is not met, the shrinkage areas of the coupling at both ends of the coupling, 150 mm each, must be degreased, then cleaned with sandpaper and degreased again. Do not allow dust, dirt or moisture to come into contact with the surface of the adhesive tape.
Couplings with a diameter of more than 400 mm must be centered using wedges, ensuring an equal distance between the PE shell and the coupling along the upper and lower edges.
At a distance of 150 mm from the ends of the coupling, two holes D = 25 mm must be drilled from above. For couplings with a diameter of less than 315 mm, one hole can be drilled in the center.
Shrink the edges of the coupling. In order not to damage the coupling in use, it should be heated in a circular continuous motion evenly around the circumference of the coupling, while the flame of the propane burner should be soft yellow. Heating must be carried out until the surface of the coupling edge becomes soft to the touch (it is necessary to check the hardness of the surface of the coupling edge while wearing gloves). After the heated edge of the coupling has softened, you need to stop heating and proceed directly to shrinking the other edge of the coupling (shrinkage in spots and overheating of the coupling and shell should not be allowed). Thus, moving from one edge of the coupling to the other, gradually achieve complete shrinkage.
When heat shrinking couplings with diameters greater than 400 mm, the wedges are removed after reducing the gap between the coupling and the PE shell to 5-7 mm in its lower part. After removing the wedges, the process of warming up the coupling must be continued. After shrinkage is complete, the edges of the coupling will take the shape of a shell, and the adhesive should come out from under them. If the couplings have a wall thickness of more than 7 mm, then during shrinkage they require additional heating of the shrinkage points for 15 minutes (maintaining a temperature of 120°C). In this case, the tight fit of the surfaces must be controlled, without creasing or scuffing the edges of the coupling.
After the mounted coupling has cooled to 60 °C, it is necessary to reheat it. After shrinkage is completed, the coupling will have a barrel shape.
For couplings that have diameters of 400 mm or more, after shrinkage, the edges of the coupling must be tightened with bandage belts having a width of at least 50 mm, and the temperature of the coupling must be at least 110 ° C. The belts are removed after the coupling and polyethylene sheath have cooled to +40 °C.
The tightness of the coupling connection is checked by crimping after the coupling has cooled to a temperature of 40°C. A special device for crimping is inserted into the drilled holes, through which air is pumped directly into the coupling at a pressure of 0.3 bar. The coupling must be maintained under test pressure for 5 minutes.
In the event of a drop in pressure, you need to use a sprayer to apply a soap solution along the perimeters of the coupling-shell joints. Defective areas are identified by the resulting bubbles of soap solution. If defective areas are detected, it is necessary to reheat them with a soft flame of a propane burner and repeat the tests. When a satisfactory test result is achieved, the crimping device can be removed from the holes.
Joint thermal insulation work
In a clean container, you must put the amount of components A and B required by the volume of the joint being poured, in accordance with the proportions according to the technological instructions of the supplier companies. Then thoroughly mix all the components using a drill with a special mixing attachment.
After mixing, pour the mixture of ready-made polyurethane foam components into the joint through the holes. After filling, close the holes tightly with drain plugs. During the foaming process, a small amount of foam may flow out through the drainage holes of the plugs, this will indicate that the joint volume is completely filled.
After the foam has hardened, you need to remove the drainage plugs and clean the surface of the coupling adjacent to the filling holes from excess foam, then process the holes with a conical cutter or other cutting tool.
Special attention!
Component B used belongs to hazard class II, has a harmful general toxic effect and causes irritation of the upper respiratory tract. When working with it, it is necessary to prevent the component from coming into contact with open areas of the body. When pouring, be sure to stay out of the zone of possible foam splash. When working in enclosed spaces, it is necessary to provide forced ventilation in the work area.
Seal the holes with polyethylene (PE) plugs. To do this, it is necessary to heat the tool for welding plugs (either an electric device or a special metal device) to a temperature of no more than 240 ° C, while the polyethylene should not smoke. Insert the polyethylene plug into the inner cone of the tool, insert the outer cone into the filling hole and, pressing the plug, forcefully press the tool into the coupling hole. When the PE plug goes 2 mm deep into the cone, you need to remove the tool and press the melted plug into the coupling hole. After this, you need to hold the plug under pressure for 20 seconds.
Compliance with safety measures
- Persons who have studied this instruction and passed an exam on it, have undergone training, instruction and testing of knowledge on performing work using safe methods, have undergone fire safety training, and are authorized to service gas cylinders during work are allowed to carry out work on thermal and waterproofing of pipe joints with polyurethane foam insulation. power tools with an electrical safety group of at least 2.
- All work on the installation of polyurethane foam pipes must be carried out in full compliance with safety requirements in accordance with SNiP 12-03-99 “Occupational Safety in Construction”, “Fire Safety Rules”, “Safety Rules in the Gas Industry”.
- Before carrying out installation work on connecting pipes in polyurethane foam insulation in a polyethylene shell, the workplace must be cleared of flammable materials. To protect structures made of combustible materials, protective screens must be used. The work site must be equipped with fire extinguishing equipment.
- The tools and devices that will be used to perform installation work must be in good working order, inspected at least once every 10 days, and always immediately before use.
- It is strictly forbidden to use a faulty tool that does not meet safety requirements.
- All work on pouring polyurethane foam must be carried out in special clothing using personal protective equipment, which includes rubber gloves, a BKF gas mask or an RU-60 respirator.
- In case of poisoning by isocyanate vapors or its combustion products, it is necessary to immediately remove the victim from the danger zone and send him to a medical center to provide qualified first aid.
- It is imperative to have near the workplace the means necessary for degassing the chemicals used (5-10% ammonia solution, 5% hydrochloric acid solution), as well as a first aid kit with additional medications: 1.3% sodium chloride solution salts, 5% boric acid solution, ethyl alcohol, 2% baking soda solution.
- In the event of a spill of polyisocyanate, it is necessary to immediately cover it with dry sand or sawdust, neutralize it with a 5-10% ammonia solution (let it stand for at least 2 hours), then collect it and bury it in the ground. Burning sawdust with polyisocyanate is completely prohibited.
- If polyisocyanate (component B) gets on human skin, the affected area must be immediately wiped with a swab soaked in ethyl alcohol, then rinsed thoroughly with clean water. If large areas of the skin are affected, you should immediately take a warm shower with soap and then go to a medical center.
- If polyol (component A) comes into contact with human skin, the affected area must be immediately and thoroughly washed with warm water and soap.
- If polyisocyanate (component B) splashes into a person’s eyes, they must immediately be washed with a 1.3% solution of table salt, then with clean water, and then be sure to go to a medical center.
- If polyol (component A) gets into a person’s eyes, they must be immediately rinsed with a 1.3% solution of table salt, then with plenty of clean water.
- If polyisocyanate (component B) gets into a person’s mouth, they should immediately rinse their mouth thoroughly with water and then go to a medical center.
- If clothing is contaminated with polyisocyanate (component B), you need to remove it, take it out of the room, then degas the contaminated parts of the clothing and wash it. Degassing is carried out with a 5-10% ammonia solution (kept for 24 hours), followed by washing in soapy water and rinsing in clean water.
- If clothing is contaminated with polyol (component A), remove it and wash it with cleaning agents.
- The resulting production waste after installation work, in the form of polyurethane foam, should be destroyed by burying it in the ground in a landfill to a depth of at least 2 meters. If there are large pieces, it is advisable to pre-chop them before burying.
Installation process
Another advantage that a heat-shrinkable sleeve has is its ease of installation. Installation does not require electricity or other special conditions. You can shrink the product anywhere. To do this, it is enough to have a gas burner and a knife.
The coupling must be installed on the pipe before welding. After connecting the line and installing the SODC system, the seam must be thoroughly cleaned of debris and grease residues. This is necessary to ensure better interaction between the polyurethane foam and the metal surface of the pipe. For ideal adhesion and waterproofing of the joint, it is necessary to apply heat-shrinkable tape to the pipe areas where the edges of the coupling will be located.
Then the heat-shrinkable coupling is pushed onto the installation site and heated with a gas burner until it shrinks completely. The product must be heated carefully to avoid deformation. After installation, holes should be made in it to pour polyurethane foam between the product and the pipe. Upon completion of filling the joint with polyurethane foam, the holes of the heat-shrinkable coupling are welded with conical plugs.
Such insulation is not inferior in quality to factory products and will ensure long-term operation of your pipeline.
Installation method for heat-shrinkable sleeve
In this case, you must have the following equipment and materials:
- a coupling made of polyurethane foam; a pipeline of a certain diameter; butt joints of pipes made of polyurethane foam; a gas torch for welding; a soap solution for testing tightness; polyurethane foam in liquid form; a test plug.
First of all, you need to tighten the coupling onto one edge of the pipe. After joining the pipes, the coupling must be moved so that the connection line is located in the center of the coupling.
Having removed the protective layer from it, use a gas burner to heat it until it shrinks completely. An indicator of shrinkage is the transformation of the coupling into a barrel-like shape. In order to check the coupling for leaks, it is necessary to insert a test plug into the provided hole and pump it with air under a pressure of 0.5 atm.
To fully check the coupling for leaks, repeat the test after 5 minutes. If the pressure is constant, it means that the coupling has completely shrinked. When the pressure decreases during this time, it becomes necessary to check the quality of shrinkage of the coupling along the edges using a soap solution.
To eliminate poor fit of the coupling, it is necessary to install it more tightly.
After correct installation of the coupling, it is necessary to remove the test plug and fill the resulting hole with liquid polyurethane foam. This mixture should take a solid form after foaming. Next, all the holes from the inside must be sealed with polyethylene plugs and welded to the coupling, which will create high-quality waterproofing, as well as thermal insulation of the connected pipes.
This welding method using couplings ensures reliable resistance of polyurethane foam pipe connections to extreme environmental conditions - gusts of wind, rainfall, snowfall, severe frost and mechanical stress.
To produce polyurethane foam in the liquid phase, a special polyol is used in combination with polyisocyanate, which are components of a special foam package. When these components are combined, a liquid mixture is formed, which, after foaming and increasing in volume, subsequently hardens.
Foam packages for pouring polyurethane foam for the purpose of isolating joints are used because they make the work of builders easier when isolating joints, namely, the need for diluting a special solution and its unsafe distribution among different containers using watering cans is eliminated. As a result, the insulation process proceeds quickly, the quality of the seals becomes higher, and the presence of harmful factors is lower. If it is not possible to fill the polyurethane foam to insulate the pipe joint, you can use a polyurethane foam shell. Also, the use of such a shell is allowed for partial repairs of waterproofing joints.
The PPU shell has a long service life, and its strength properties and rigid structure prevent the formation of even the slightest shifts in the thermal insulation. One of the main tasks that determines the quality of a pipeline made from pipes with PPU insulation is the correct installation of joints. Such products are sold with non-insulated sections on both sides, which is necessary for ease of connection. If all work is carried out correctly, the pipeline will be reliably protected from aggressive environmental influences and will demonstrate maximum service life. The operation of the entire pipeline depends on the quality of sealing of pipe joints in polyurethane foam.