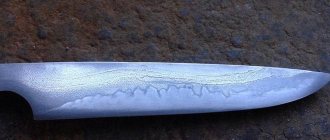
Sometimes brazing stainless steel is preferable to welding. Soldering is used for thin-walled products that are not subject to heavy loads, and in cases where they do not want to experience warping from heating.
It should be taken into account that some types of stainless steel require a certain approach, taking into account their composition and manufacturing technology. For example, cold-worked stainless alloys crack at high temperatures, so their soldering is carried out without loads, after first annealing the metal. There are other subtleties.
Features of alloys
Stainless steel cannot be soldered with aluminum and magnesium alloys. With other metals the process goes well, while the joint itself is characterized by increased strength.
Some stainless steel alloys, especially those containing more than 25% nickel, begin to release carbides at temperatures of +500-700 ℃. These chemical compounds reduce the corrosion resistance of the metal.
And the longer the soldering process at this temperature, the more intense the carbides are released. Therefore, soldering time must be reduced. Soldering at home is carried out with a soldering iron or a gas torch, and a soldering iron is used more often.
Solder selection
There are two factors influencing the choice of solder for stainless steel:
- the conditions under which the connection process is carried out;
- stainless steel composition.
If you have to work under normal conditions (in any room), then it is better to solder with silver solder, which contains a small amount of nickel.
When carrying out the soldering process in a furnace, that is, in the complete absence of humidity, copper, silver-manganese or chromium-nickel solders are used.
It should be noted that silver-based hard solders are the best option for soldering stainless steel parts.
After all, silver is also resistant to corrosion and has the same light color as stainless steel. But it should be noted that pure silver is not used in solders.
Zinc or copper is added to the alloy. The higher the percentage of silver, the higher the quality of the alloy. True, such material will have to be used at higher temperatures. Tin solders are rarely used when high strength is not required.
Table 1. Composition and properties of silver solders
| Solder test | Content of components, % | Temperature, °C | ||||
| Silver | Copper | Zinc | Cadmium | Start of melting | Complete meltdown | |
| PSr-80 | 80,0 | 12,4 | 7,6 | — | 780 | 800 |
| PSr-75 | 75,0 | 18,6 | 6,4 | — | 755 | 755 |
| PSr-70 | 70,0 | 30,0 | — | — | 770 | 780 |
| PSr-70 | 70,0 | 26,4 | 3,6 | — | 745 | 765 |
| PSr-65 | 65,0 | 35,0 | — | — | 790 | 810 |
| PSr-65 | 65,0 | 20,0 | 15,0 | — | 700 | 720 |
| PSr-60 | 60,0 | 24,8 | 15,2 | — | 700 | 720 |
| PSr-50 | 50,0 | 50,0 | — | — | 779 | 850 |
| PSr-50K | 50,0 | 16,0 | 16,0 | 18,0 | 650 | 670 |
| PSr-45 | 45,0 | 30,0 | 25,0 | — | 660 | 725 |
| PSr-25 | 25,0 | 40,0 | 35,0 | — | 745 | 775 |
| PSr-12M | 12,0 | 52,0 | 36,0 | — | 780 | 825 |
| PSr-10 | 10,0 | 53,0 | 37,0 | — | 815 | 850 |
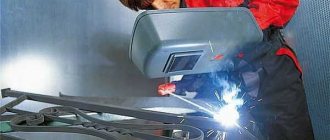
Welding technology
Welding of copper with a semi-automatic machine should be carried out at an angle forward; it is allowed to extend the electrode no more than 7 millimeters. The electrode can be graphite or carbon. It is better not to use tungsten electrodes when welding copper, as they are consumed too quickly. Additionally, filler wire is used. The wire can be made of copper, copper-nickel alloy, bronze or special alloys.
The filler wire must be fed from the edge of the welding zone. This is necessary to ensure that molten metal does not fall on the electrode. As for the welding mode, our recommendations, which we wrote above, are suitable here. Below is a table with approximate modes for welding copper in argon.
As you can see, the technology for welding copper and its alloy is not that complicated. Practice as much as possible before taking on a demanding job.
Flux selection
As for flux for soldering stainless steel, the best option here is borax. It can be used in paste or powder form. Borax powder is poured into the soldering zone of two workpieces and heated to a temperature of +850 ℃. This is the so-called light red heat temperature.
Once the flux has melted, solder is added to the area. If you follow the standards, then to work with silver solders, use flux No. 209 or 284 according to GOST, and for solders containing copper and nickel - No. 200 or 201.
Remains of flux after soldering are removed with water (cold or hot) or blown with sand. It is not recommended to use hydrochloric or nitric acid for this. This is a potent material that corrodes the solder layer and the stainless steel itself.
Preparation for welding
Copper or its alloys are cut into dimensional pieces using a grinding machine, pipe cutters, lathes and milling machines, as well as plasma arc cutting. Edges for welding are prepared mechanically. The parts to be welded and the filler wire are cleaned of oxides and contaminants to a metallic shine and degreased. The edges are treated with fine sandpaper, metal brushes, etc. The use of coarse abrasives is not recommended. It is possible to etch edges and wires in an acid solution:
75 cm 3 per 1 liter of nitrogen water;
100 cm 3 per 1 liter of sulfuric water;
1 cm 3 per 1 liter of salt water
followed by washing in water and alkali and drying with hot air. Structures with a wall thickness of 10-15 mm are preheated with a gas flame, a dispersed arc and other methods. The assembly of joints of parts for welding is carried out either in fixtures or with the help of tacks. The gap between the joined workpieces is kept the same throughout. The tacks must have a minimum cross-section so that they can be remelted during the welding process. The surface of the tacks must be cleaned and ensured that there are no surface hot cracks.
If welding is carried out in the lower position, then special devices made of graphite or copper are used to improve heat removal
When welding in the open air, the joint is equipped with removable screens
1 – gas flow; 2 – seam; 3 – screen.
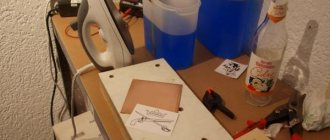
How to solder correctly at home
In order to properly solder two stainless steel workpieces together, you need to properly prepare for the process. To do this, it is better to use orthophosphoric acid or zinc chloride, which is usually called soldering acid, as a flux. A soldering iron needs a power of 100 W. As for solder, it is easier to solder stainless steel with tin at home.
The first stage of the process is to clean the edges of the two stainless steel parts. To do this, use sandpaper or a file with fine notches. Then you need to tinning the prepared edges.
To do this, the planes to be joined are treated with flux, then the solder is heated with a soldering iron, which is applied to the ends of the two workpieces. The solder should remain on the soldering iron tip, and from it should be transferred to the planes that are to be tinned.
If the tin does not stick to the stainless steel, then the procedure must be repeated, preheating the ends of the parts to be connected.
Once tinning has occurred, you can proceed to soldering by adding flux and solder to the joint area. At the end of the process, the acid is washed off with water.
Welding mode setting
To solder copper pipes and for welding, you need to set the mode correctly. The first thing you need to remember is that copper welding is carried out using direct current and straight polarity. But the value of the welding current changes. To find out what value of welding current will be optimal, multiply the thickness of the metal (in millimeters) by 100. You will only get an approximate current value; more precise settings will become available to you with experience.
Semi-automatic welding of copper is carried out in a protective gas environment. You can use argon, nitrogen, helium or mixtures of these gases. If you cook using argon or helium, the arc should be short, up to 3 millimeters. If you cook with nitrogen, the arc should be 10-12 millimeters. There are separate gas consumption standards. So, when welding copper with a semi-automatic machine, you should spend no more than 10 liters of argon per minute, no more than 20 liters of helium per minute and no more than 20 liters of nitrogen per minute.
The welding speed is not regulated in any way and is selected individually, based on the skills of the welder and the type of seam. If the part has a thickness of no more than 6 millimeters, then it can be cooked with argon without any problems without preheating. If the part is thicker, we recommend replacing argon with nitrogen or helium. Also, to weld thicker copper, the part needs to be heated (temperatures from 200 to 300 degrees will be sufficient).
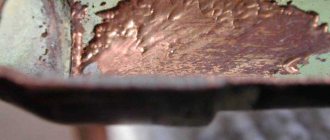
Connection with other metals
The connection of two different metals, for example, the soldering of copper and stainless steel, must be approached from the position of studying their properties. Metals have different melting points, so the soldering process is considered one of the most difficult.
Joining copper and stainless steel at home includes processing the workpieces, tinning the edges and the soldering process itself.
It should be noted that copper and stainless steel can be soldered with a soldering iron or torch. The first tool is low-power, so it cannot work with hard solders.
The soldering iron is also not used for soldering large contact areas due to the length of the process. In addition, the flux will oxidize even before it has time to fully warm up.
A burner is the best option. With its help you can solder not only stainless steel with copper, but also with brass.
By the way, when choosing solder, you need to pay attention to brass rods.
It is primarily the most common material for soldering stainless steel and can even be used in a joint without flux. It should be taken into account that brass is inferior to silver in many respects. But it is cheaper. It should only be used for soldering simple non-critical connections.
To obtain high-strength connections, it is better to use copper-phosphorus solder. It is more expensive, but this is a guarantee of high-quality soldering. But the best are silver alloys.
The process of soldering copper or brass to stainless steel is no different from others. It is necessary to clean the edges of the two metals, degrease them, and tinning each edge separately.
Next, you need to place two workpieces on the workbench so that there is a gap of no more than 3 mm between them. Flux is applied, heated, and then solder is fed into the soldering zone.
It should melt and spread along the border of the workpieces. As soon as the gap is completely filled, soldering stops. Metals cool naturally. The remaining flux is washed off with water.
Preparatory activities
To weld or solder copper, you must also follow the rules for preparing the metal before welding so that the result does not disappoint you. Depending on the type of part (pipe, sheet, workpiece, etc.), it is first cut into separate parts, if necessary. Copper can be cut using a grinder, pipe cutter or machine. Plasma arc cutting is also possible. Do not use a grinder or other similar tools.
Next you need to cut the edges of the part. This is done mechanically. You also need to clean the metal and wire from oxide film and dirt, the part should literally shine. Degrease the metal. Sand the edges by hand using fine-grit sandpaper. You can also use a brush with stiff metal bristles for these purposes.
Do not use a brush or coarse sandpaper that is too hard, otherwise you will damage the metal. Also recommends etching the filler wire and the part. Etching is performed in a special solution that you can prepare yourself. The main component can be nitric, sulfuric or hydrochloric acid. The acid is mixed with water and wire blanks are placed into the solution. After etching, everything must be rinsed in water and dried with hot air.
If the part has a thickness of more than 1 centimeter, then it must first be heated in an oven or using a gas burner. Next, the parts need to be joined to each other. There should be a small gap between the parts; its size should not change when re-joined. To accurately join the parts, you can use tacks. The tacks themselves must also be cleaned to prevent cracks from forming.
Sometimes additional devices are used during the welding process. For example, graphite or copper pads, as well as removable screens. Shims are indispensable when welding bottom seams (or increase heat dissipation), and removable screens will be needed when welding copper outside (they will protect the welding area from the wind).
Food solders
There are no differences in food soldering technology from standard operations. You cannot use materials and alloys that contain lead, for example, POS (tin-lead). Lead is toxic and there is a trend towards a sharp reduction in its use in soldering operations.
When phosphoric acid is used, the soldering itself must be carried out faster. The thing is that after 10-15 seconds a phosphate film will appear on the surface of the parts being joined.
It will make soldering difficult; you will have to clean the stainless steel again, removing this layer. So it is optimal if the flux is applied right before the operation.
Useful tips
Experts who have had the opportunity to solder stainless steel more than once assure that this process is not so complicated. Here are some recommendations from them when using a soldering iron:
- For soldering you need to use a soldering iron with a non-burnable tip;
- The power of the tool varies in the range of 60-100 W, optimally 100. You should not use higher than that, overheating of the workpieces means overheating of the solder, which will begin to boil. Below is also not desirable, because molecular bonds will not form between all the metals that participate in the soldering process;
- It is recommended to clean the tool tip after each operation. Sometimes you have to sharpen it;
- It is better to solder with tin rods or tin-lead rods. The second type is not used for joining food grade stainless steel. Pure tin solder will have to be heated well, at least to the consistency of softened plasticine. In general, the metal must be liquid; it is in this state that it can stick to the steel;
- Phosphoric acid is used as a flux. Rosin, due to its neutrality, is not used for stainless steel;
It is imperative to adhere to safety precautions, especially if soldering is carried out at home. It is necessary to use personal protective equipment, as well as organize ventilation of the room.
As you can see, there are many caveats. But taking them into account, we can talk about the high quality of the final result.
Welding difficulties
The high thermal conductivity of copper (6 times higher than that of iron) requires the use of a welding arc with increased thermal power and symmetrical heat removal from the welding zone. Recommended types of welded joints are butt joints and those with similar heat dissipation characteristics.
The high fluidity of copper (2-2.5 times higher than that of steel) complicates the welding of vertical and ceiling seams. It is possible only with minimal weld pool sizes and a short residence time of the metal in the liquid state. When welding butt joints in the lower position with guaranteed penetration, in order to avoid burn-through, it is necessary to use pads made of graphite, dry asbestos, flux pads, etc.
The active ability to absorb gases (oxygen and hydrogen) during melting, leading to weld porosity and hot cracks, requires reliable protection of the weld metal and welding materials from contamination with harmful impurities.
Due to the tendency of copper to oxidize with the formation of refractory oxides, it is necessary to use filler material with deoxidizing gels, the main ones being phosphorus, silicon and manganese.
The large coefficient of linear expansion of copper (1.5 times higher than that of steel) entails significant deformations and stresses, and the formation of hot cracks. They can be eliminated by preheating structures: copper up to 250-300°C, bronze up to 500-600°C