What to do if your favorite piece of jewelry is broken? Of course, such a situation is possible and often even the high cost of jewelry cannot protect you from this. Sometimes the situation develops in such a way that there is no opportunity or desire to take the product to a repairman for repair. Then you have to figure out how to solder gold at home.
You may think that it is impossible to do this on your own, but in fact it is not. Of course, without professional methods, you are unlikely to be able to solder a ring or other massive product, but you can easily learn from finer details, for example, soldering a gold chain.
Soldering Basics
Soldering metals together means creating a strong connection between them. Soldering most often involves heating two metals until they melt and mix together. In order to accomplish this, a third metal is used, the melting point of which is much lower, which allows it to penetrate the pores of the main two.
The third metal is called "solder" and usually has a melting point 40 degrees lower than the base metal. This type of solder is called refractory solder. Low-melting solder has a melting point 50 degrees lower. Previously, soldering with mercury-based solder was used, but this is now prohibited due to its high toxicity.
For high-quality soldering, it is necessary to prepare the metal surface. The fact is that when heated, an oxide film is formed on it, which prevents the solder from penetrating into the pores of the metal. To prevent this and improve the strength of the seams, it is necessary to use a special liquid called “flux”. Each specific metal uses its own flux, which contains alcohol.
Soldering gold at home
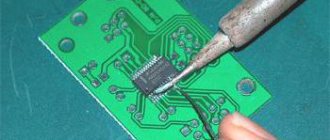
Soldering copper with a gas torch - solder.
To solder copper, you can use copper-phosphorus solder. The melting point of copper-phosphorus solder is low. Copper-phosphorus solder has such a feature that it does not require additional flux to work, since it contains phosphorus, which performs all the necessary functions. The solder is very hard, it is almost impossible to bite off a piece for soldering. I use side cutters to break off pieces from the rod. The process is not simple - the pieces fly in different directions.
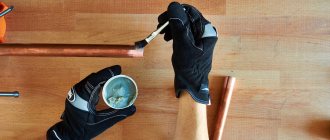
Before soldering, it is best to bleach copper in lemon juice. Dilute ordinary citric acid in warm water and throw in copper blanks.
Copper can also be soldered with silver solder in places where the soldering point is not visible. There are also special copper and silver pastes for soldering.
Materials used for soldering
To ensure that the soldering area does not stand out against the background of the main product, the solder used must match the color of gold. There are different solders for each shade of different samples. In addition, an important characteristic of solder is its elasticity, fluidity and strength. One of the varieties of such solders are gallium-based alloys. For the most common samples, solders containing copper, silver, gold, gallium, tin, indium, and nickel are used. The flux has the form of a paste and consists of borax and boric acid.
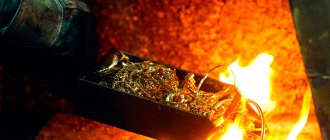
Solder can also be made at home. To do this, we place gold - 58.5%, silver - 11.5% and copper - 18.6% into the crucible. For high-quality soldering, the proportions must be observed as accurately as possible. Next, you will need to add either brass 13.5% or cadmium 11.2% to this composition.
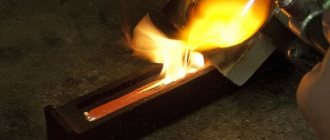
We melt gold, silver and copper using a gas burner. Add a fourth ingredient of your choice to the melted mass. After the ingredients are completely mixed, pour it all into a container. Using auxiliary tools, we give the alloy the desired shape and put it away for storage.
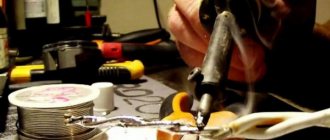
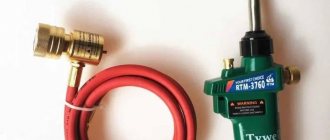
Soldering copper with a gas torch.
Do not pay attention to the fact that the burner in the photo is professional. I prefer to solder copper with just such a gas torch (with a cylinder). We take wire 1 mm thick or thicker. We prepare pieces of copper-phosphorus solder in advance. You will understand what dimensions are needed for the frame after you look at the photos. It all depends on the volume of additional elements that you will attach to the frame. First solder the frame circumference, then solder the jumpers. You can solder several joints at once. We do everything carefully - do not “burn” the wire itself. The solder should spread evenly along the wire, filling the joint.
After annealing, copper becomes soft. To give the copper some rigidity, flatten the entire frame a little with a hammer on an anvil. You can process the frame with a file and polish the copper.
Let's try it on.
I prepared the spirals for this decoration in advance. Watch the video.
Next, we act according to the plan (if there is one, of course).
We limited the edges of the cabochon with a spiral. Next, we secure the cabochon with braid so that it does not fall out.
Watch the video with examples of braids.
As a result, we get a pendant like this.
Don't relax - we're not done yet. Let's look at another example. At first, everything was the same as before.
Immediately fasten the cabochon with 1 mm thick wire to the frame. We fix the cabochon in the right place.
An unexpected decision. Yes!?
Well, then we give free rein to our imagination!!!
I used “old” spiral scraps.
Well, I had a blast!!!
Cool, yeah!? I'm not talking about pendants, but about the method of assembly with the frame!
Watch video tutorials on soldering
I patinated, polished and then varnished the pendants (copper). To patina (aging) copper, you can use regular ammonia, which is sold in pharmacies. Pour the ammonia into the jar and hang the product ABOVE!!! ammonia solution.
You can also use special universal solutions for blackening.
For polishing, we use a machine grinder (you can use a screwdriver or drill) with attachments. We use polishing pastes.
Copper will darken over time. To avoid this, you can coat the entire product with a special Tsapon varnish.
Products are ready!!! You can wear, give or SELL! Read where and how to sell handmade jewelry on my website Making money with handicrafts!
POPULAR MASTER CLASSES: DIY crystal pendant. DIY wire pendant. DIY wire pendant. Master Class.
Pin the Pin below as a bookmark to your Pinterest board!!!
How do you like the master class!? Did you like it!? Don't be lazy, share with your friends on social media. networks!!! I will be grateful.
How to solder gold at home?
Soldering gold step by step will look like this:
- we prepare or buy solder suitable for the required gold standard;
- apply flux beyond the boundaries of the soldering area and wait until it spreads over the surface;
- you will need to get a fevka - a bent tube with a hole at the end to supply a narrow jet of flame from the burner;
- we join the parts to be soldered and after heating them, introduce solder;
- After cooling, remove excess solder using a needle file.
This type of soldering can be done independently. If the work is done carefully, no seam should be visible in a small area.
Connecting different metals
Laser soldering is suitable for joining metals and alloys that differ in chemical composition. We use laser soldering machines to repair fine jewelry, watch clasps, necklaces and other miniature metal objects. Laser soldering technology is good because it simplifies the process of joining dissimilar metals and a reliable weld is formed.
Our laser soldering machines are constantly in operation; In addition to jewelry repair, we carry out numerous orders for high-quality repair of eyeglass frames.
Electroplated gold
Of course, gold jewelry has a very high price. In order to put cheaper analogues on sale, gilding of base metals was invented.
Costume jewelry is inexpensive jewelry. They are usually made of bronze, copper, brass and an alloy in varying proportions of zinc, tin, and iron.
Metals and their alloys in the final product will differ in strength and color. Recently, to reduce the cost of the technological process, jewelry has even been made from plastic.
Video:
The result is a nice little thing that will easily lose the color of the coating under the influence of air and humidity, oxidize, or even break completely.
In order for jewelry to be used for a long time without losing its decorative properties, it is sprayed, most often from precious metals - gold and silver.
Forming a precious surface on a base metal can be done mechanically and galvanically.
IMPORTANT TO KNOW: Using borax for brass soldering
With the mechanical method, gold is applied in the thinnest plates using glue or other fixatives.
The result of this titanic work is gold leaf, which is usually used for church domes.
A gold layer can be electroplated using an electric current.
The part is placed in an electrolyte solution between two gold plates, the plates are connected to a positive current source, and the electrically conductive wire on which the decoration is suspended is connected to a negative one.
The current removes tiny particles of gold from the plates and deposits them on a negatively charged particle.
Electroplating can apply a layer of different thicknesses, it all depends on the processing time. The minimum time for the required thickness of the deposited layer is 30-40 minutes.
The result is that our cute decoration has become gold and, of course, more wear-resistant.
The attitude towards galvanically made gold is twofold - some consider such jewelry to be cheap, but for others it is a completely justified way to produce jewelry.
You can electroplate gold at home. A similar experiment, however, not with the use of gold due to its high cost, but with nickel or copper, is demonstrated in chemistry lessons in high school.
Video:
As we have discussed, technologically soldering gold surfaces is not difficult.
Mastering gold soldering is quite difficult only because the cost of solders and consumables is very high, and besides, you are unlikely to deliberately damage the jewelry in order to practice soldering on it.
For those who want to learn how to solder gold surfaces, we can recommend mastering the soldering of small copper parts (radio components or wiring) and, having acquired solid skills in the soldering process itself, take on the repair of gold jewelry.
Fast execution of orders using high-tech equipment
Handling a laser machine requires skill and experience, but work using the new technology is completed faster than traditional methods.
We carry out most repair work using laser soldering in the presence of the customer. This also applies to those operations that were previously difficult, required preparation and took a lot of time. Repairing a miniature lock, fastening a stone, joining a broken gold chain or a broken eyeglass frame is done quickly.
Would you like to know more about our services? Call! Jewelry House “Gold and Style” will be happy to answer all your questions.