During the renovation of various buildings, before plastering walls and ceilings, they must be carefully prepared for this type of work.
This preparation depends on the level of the previous cladding and the top layer of coating. In this regard, the question often arises: is it possible to plaster walls and ceilings using paint?
To answer this, you need to find out several important points regarding the painted surface.
Is it possible to apply plaster over paint?
Perhaps, by applying plaster to the paint layer, we are connecting the incompatible. And it happens that we pair two materials that get along with each other.
The possibility of a positive decision depends on several factors:
- compositions of paint and solution;
- condition of the old coating (paint film);
- the size of the thickness of the plaster layer (the weight of the coating depends).
There are circumstances in which plastering over old paint finishes is definitely not possible. Therefore, only in some cases do we answer the question “is it possible to plaster?” - Yes.
You can plaster over paint if the following conditions are met:
- compatibility of paint film and plaster compositions;
- creating an intermediate layer of material that is equally compatible with both of them;
- performing high-quality preparation of painted walls for plastering;
- The humidity in the room should not be high.
In what cases is plaster over old paint acceptable?
Each of the listed conditions needs a detailed explanation so that there is no desire to do without observing them. If the conditions are not met, after work, the paint layer may become insidious and the plaster coating will begin to fall off.
When painting, a film forms on the surface. The qualities and properties of the film depend on the chemical composition of the binder, as well as on the physical properties of fillers and additives.
We are considering two options from the main paint films:
- film formed as a result of dehydration of oil paint;
- film formed as a result of polymerization of a water-based composition.
oil and water-based paint
The condition of the paint film can be different: the film may already be in a state of destruction - peeling off, moving away from the base, or tenaciously clinging to it and being intact and durable. Only in the second case is it possible to plaster the painted surfaces. However, at the same time, observe the measure, limiting the load on the paint from the plaster.
Plaster mortar is a material of high self-weight. With a smooth paint film, creating a connection that can withstand high tearing forces is an impossible task, so the thickness of the plaster solution laid on top of the paint should not be exceeded, applying up to:
- 30 mm cement-sand mortars;
- 40 mm gypsum solutions.
It is important to reinforce the plaster layer if the thickness is more than 10 mm!
Is it possible to apply plaster over water-based paint?
In some cases, the water-based paint composition allows it to be used as a base for plastering. It will easily “stick” to itself compounds that have a low dead weight, and will calmly react to the proximity of clay or cement. However, he “dislikes” gypsum. Therefore, they must be connected using a primer as an intermediary.
water-based paint on the wall
Plaster over oil paint
Problematic type of coating. Surfaces painted with an oil mixture are smooth. Therefore, plaster solutions do not “stick” to them. Additional effort is required to create conditions under which the wall plaster will adhere to an oil film.
Advantages and disadvantages
When planning to paint walls indoors, you need to take into account all the pros and cons of the materials used, first of all this concerns the paints that you choose.
The most popular at the moment are water-dispersion options, among which are:
- Latex;
- Acrylic;
- Vinyl;
- With a combined composition;
- Latex-acrylic.
You can consider the advantages and disadvantages of painting by analyzing each of the paint options. So, latex paints have an even and dense layer of application, they are elastic and waterproof, which allows you to wash and clean the surfaces that are painted with it. The disadvantages include high cost. If you apply latex paint as an exterior finish, it will fade very quickly in the sun, but indoors it will last for many years.
Acrylic paints are durable, vapor-permeable and have a long service life, which is their undoubted advantage. Acrylic can be used to paint walls both indoors and outdoors. Surfaces with acrylic paint are easy to clean, and the brightness of the colors does not fade over time. This option is most often used for finishing work.
This coating makes the wall spectacular and beautiful, and all this at an affordable price, which is an undoubted advantage of using vinyl paints.
If we are talking about paints with a mixed composition, then most often they are intended for those rooms where unfavorable conditions are observed, which is their undeniable advantage. Latex-acrylic paints are highly durable, waterproof, easy to maintain and look great, which also puts them among the paints that do not have significant drawbacks.
Modern paints are produced without strong odors so that workers do not experience discomfort during repairs, but when using enamel, a strong unpleasant odor cannot be avoided, which makes you think carefully when choosing such paint for any coating.
How to plaster a painted wall
If you do decide to apply plaster over paint without removing it. It is necessary to strictly follow the technology. Let's consider sequentially what types of work must be performed so that the new coating is durable and tenaciously held on the wall.
Examination of a painted surface
What is this, what is it for? As is already known, the treatment of surfaces painted with oil compositions differs from the treatment of walls painted with water-based compositions. Therefore, first we determine what kind of base the paint film has.
To figure out what was used to paint the walls, you can use the following techniques:
- see whether the surface is glossy or matte;
- run your hand over the surface, check what trace remains on the skin;
- wet the coating;
- rub it with sandpaper.
Water-based paint looks like whitewash. Whitewash, when passed over it with your hand, leaves a whitish mark on the skin. When soaked, the whitewash darkens, the water-based emulsion remains the same color, however, when soaked, it “foams”, and if rubbed with a sponge, it will be partially erased. On sandpaper (after rubbing), the water-based film leaves smeared marks, while oil and enamel coatings leave small fragments and particles. Enamel paint compositions have a glossy surface, whitewash and water-based paints have a matte, porous surface.
checking paint adhesion to surface
Most often, oil and water-based bases are used for painting. Oil forms a dense, non-breathable film to which the plaster solution does not “stick” well. Water-based emulsion, on the contrary, with its pores allows air to pass through well, and plaster solutions adhere more firmly to it.
Preparatory work
The purpose of such work is to take measures to eliminate all defects that contribute to subsequent peeling of the plaster coating, increase adhesion, and strengthen the plaster mortar with reinforcement.
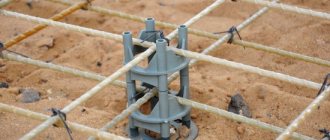
concrete contact applied to oil paint
- Check the condition of the paint film by tapping the surface of the wall. Areas where the coating moves away from the base or crumbles are cleaned with a spatula. Loose pieces of paint can be removed more easily if the painted wall is wetted.
- To increase adhesion to a wall coated with an oil or enamel paint base, notches of such depth are applied to the finish so that the underlying material is also “touched” by them.
- The surface is treated with sandpaper to get rid of the thinnest glossy smoothest layer. Sandpaper is chosen with a grain size of 60-80.
- The resulting dust is removed from the wall. Wipe the top with a cloth and dry. In a kitchen where tiny beads of grease have adhered to the finish, degreasing is required.
- The surface is coated twice with a primer. The first pass is performed with a composition that seals the pores and penetrates deeply. After drying, concrete contact is applied, which contains quartz sand grains. In this way, grip is increased. Please note that application requires a special concrete contact compound designed for application over alkyl or oil coatings (different from concrete intended for priming).
- For additional reinforcement of the plaster coating, a plaster mesh is screwed to the wall. For interior work, a mesh made of PVC or propylene is suitable; it is not screwed on, but pressed into the solution, as when reinforcing wet facades. It is important that the solution goes not only into the cells, but also between the mesh and the wall. It is better to attach the metal mesh to the ceiling with self-tapping screws.
Painting
Below we consider three options for painting decorative plaster:
| Type of painting | Peculiarities |
| In one pass | It is a standard option when the surface is painted in a single color. |
| Dry brush | It is a relief coloring, as a result of which the recesses are darker, and the protrusions are a tone or two lighter. This allows you to make the surface more voluminous. |
| Blur | With this type of painting, the deepening of the texture is emphasized, and not the depressions, as when painting using the “dry brush” method. |
Below we will take a closer look at all these color options.
Paint roller with tray
Tools
You need to start work by preparing the following tools:
- long-haired paint roller;
- roller tray;
- hard paint brush;
- damp cloth;
- fine grit sandpaper.
As for the paint and varnish material, polymer water-dispersion compositions are used for these purposes.
In this case, it is necessary to pay attention to the scope of their application.
For exterior work, façade paint should be used. Decorative plaster or wallpaper for painting should always be painted exclusively with interior paint, i.e. intended for interior work.
Plain painting of plaster
Plain painting
First of all, let's look at how to do a single-color painting with your own hands. This work is carried out in the following sequence:
- You need to start work by preparing the paint and varnish material. To do this, the composition should be thoroughly mixed. If the coating is white, then to give it a certain color it is necessary to perform tinting, i.e. add the required amount of color.
To determine the proportions of the latter, you should first tint a small amount of paint, and then add the color to the main part of the paint material. In order for the color to be uniform, the composition after tinting must be thoroughly stirred;
Tinting paint
- Then the liquid must be poured into the roller tray. It should be noted that the tray is a practically necessary tool in this case, since it allows you to dispense a set of paint with a roller and press the tool onto a special platform.
- After this, you need to dip the roller into the tray and treat the plastered surface with it. The composition should lie in an even layer, without drips. At the same time, it is necessary to ensure that all the indentations of the texture are painted. As necessary, the roller should be dipped into the tray and squeezed out.
- A few hours later the procedure is repeated again.
This completes the work.
Dry brush painting
Dry brush effect
So, we figured out the monochromatic coloring. Now let’s look at how to paint decorative plaster in two colors with a “dry brush” effect.
To do this you need to do the following:
- first of all, the plaster must be painted in the main color according to the scheme described above;
- after this you need to wait until the coating dries;
- then you should prepare the paint by adding a little less color to it so that it is a tone or two lighter than the background;
- Next, a second layer of paint is applied using a brush or short-haired roller. The painting tool should pick up a minimum amount of paint, which will allow you to paint only the protrusions of the texture.
Blurring a painted surface
Blur method
To implement this method, it is advisable to use different paint coatings:
- for the background it is better to use expensive waterproof paint;
- For the second layer, it is more advisable to use a composition intended for dry rooms. As a rule, the price of such coatings is much lower.
Instructions for painting using this method look like this:
- first of all, you should apply a base layer of moisture-resistant paintwork, which should be lighter than the tint;
- after the surface has dried, a tinting layer of paint and varnish material is applied, which should completely cover the surface, including the recesses;
- After the second layer has dried, the protrusions should be rubbed with a hard, damp sponge. If the second layer is also moisture-resistant, you can use sandpaper soaked in water. The only thing is that the work must be done carefully so as not to erase the first layer.
As a result, the dark layer should remain only in the depressions.
Blur example
It should be noted that this method is more labor-intensive and time-consuming. However, in this way you can achieve a very interesting result.
These are, perhaps, all the original and at the same time quite simple ways of painting a plastered surface.
In what cases should you not apply plaster to old paint?
Applying plaster to a base coated with paint was previously considered unacceptable. The use of modern means and methods of combining paint and mortar has introduced some restrictions on the conditions under which plastering is not permitted.
You definitely cannot plaster a painted surface if:
- the paint layer is destroyed or fragile (paint can be easily peeled off with a spatula and falls off the walls);
- if, in order to level the surface, it is necessary to apply a layer of plaster thicker than the dimensions indicated above;
- if the paint on the wall is water-based and the plaster solution contains gypsum;
- in rooms with high air humidity (moisture penetrating through the pores of the plaster will cause it to peel off);
- plaster the oil film directly (a primer is required to increase adhesion).
poor adhesion of paint to the surface of the base
In such cases, they either take measures to change the initial conditions (for example, replace gypsum compositions with cement, clay or acrylic), or completely remove the paint film. You can level the wall, for example, with dry plaster - plasterboard.
Methods for selecting colors
Kohler is an enamel with a rich color that is used to create a shade of your choice. It consists of pigments, special additives, fillers, synthetic resins, and water.
Colors are used for white enamels, decorative plasters, putties, water-dispersion, alkyd paints.
Sometimes, to create a bright pattern, undiluted color is used without adding base paint to highlight elements of the facade or certain areas of it.
The variety of color options does not allow you to quickly make a choice, and therefore manufacturers offer the use of color standards. 2 scales are used, which help to produce coloring at a high level.
RAL and NCS are the main scales that are used to select a color palette.
RAL includes 210 shades, and NCS - 1950 colors. Some manufacturers develop their own color scale, but, regardless of the selection method, you need to select the desired color option in advance. You can choose a shade if you compare the sample with the wall surface.
With the help of color, it is possible to obtain unique shades for finishing facades, because you can mix shades of different colors and in different proportions. Colors can be mixed with nitro enamels, alkyd and water-dispersion enamels. The color palette will please everyone.
You can select the color manually, but it is difficult to prepare the same shade when re-making the mixture. The selection can be made using a computer, special tinting machines that are available in construction shopping centers, or a catalog.
To carry out the work, manual and automatic dispensers and electric drills are used for mixing compositions. If the painting area is large, then complex numerical control equipment can be used.
All types of surfaces can serve as a basis for painting: brick, concrete, plastered.
Options for proportions and the main advantages of colors
The tinting paste contains a pigment that gives a bright shade.
You can create rare and interesting color schemes.
You can create shades yourself by mixing several shades of different colors in different proportions, because there are not a very large number of color options in stores.
The question of how to tint paint is asked by many people who decide to make the facade of their house colored, painted in a rare color.
It makes sense to do tinting if the amount of work is small and the solution is prepared 1 or 2 times.
Tinting is a simple process, but there are a number of things to consider. It is necessary to observe the correct dosage, because inaccuracies in mixing the composition can lead to changes in the shade and texture of the mixture.
Before starting work, the color is diluted with water, and then mixed and added to the white base, which must also be thoroughly mixed. It should be taken into account that enamels after drying have a different shade than in their raw form.
Basic proportion options
To obtain a color intensity of 10%, you need to mix 1 kg of paint and 100 g of color, and for an intensity of 5%, use 50 g of color per 1 kg of white base. There are 2 types of colors sold in stores: a colorant with rich, bright colors and a liquid color that creates pastel shades.
The amount of pigment should be: in water-based paint - no more than 20%, in oil paint - no more than 1.5%, and in other types of paints - up to 7% of the color.
The color contains inorganic and organic pigments that have different properties. It’s good if the pigment combines both types.
Organic pigments have bright shades, but fade in the sun, while inorganic pigments are resistant to natural factors, but do not have a bright color range.
The main advantages of tinted paints:
- long service life;
- resistance to abrasion and fading;
- color brightness;
- affordable price;
- large palette of colors;
- saving money.
Paint tinting is needed when you are not satisfied with the color scheme offered in stores. Effectiveness and sophistication can be given to the facade if you paint it with tinted enamel with carefully selected shades.
How to remove old paint from walls under plaster
Removing paint is a troublesome task. The paint can stick to the base firmly in some places, but in others it easily crumbles when using a spatula. Depending on the condition of the paint coating and the capabilities of the finishers, different methods of cleaning the surface are used. Similar methods are used when removing decorative plaster.
Removal is performed:
- mechanically;
- thermally;
- chemically.
Mechanical method
Classic scraping (manual or mechanized) or grinding (abrasive removal). Performed manually or with electric or pneumatic tools. Usually the removal starts with it.
Simple, inexpensive tools include spatulas and scrapers. These tools have thin, wide blades that slide under the paint layer. The tool itself is held at a slight angle to the surface being cleaned, so when pressed, its action resembles that of a wedge that converts longitudinal force into transverse force. Paint that adheres weakly peels off easily.
removing paint with a spatula
To make the “swing” wider, a scraper or spatula is attached to an elongated handle. The telescopic handle allows you to work with this tool from the floor, even when cleaning the ceiling. You can make a scraper yourself or purchase one. Replacement blades are produced for scrapers. For our work, it is not necessary to buy the most durable thin blades. Enough cheap Chinese ones. Working with a spatula or scraper is quiet and does not disturb neighbors.
If the bond between the paint and the base is strong, its layer is separated using carpentry tools - a chisel and a hammer. Here, instead of manually pressing “to the wedge,” a striking force is applied, since the end of the chisel handle can be lightly tapped with a hammer. The disadvantage is the small size of the peel-off coating. Therefore, it would be rational to first clean (where possible) the wall with a spatula.
removing the coating with a chisel and hammer
The old paint layer can also be removed using a drill, for example, using a long bolt with a piece of chain attached. In this case, the layer is knocked down by chaotic impacts of the chain links. But along with the paint, the underlying plaster often peels off. The method is dustier and noisier. In terms of cleaning speed/operation safety ratio, it is optimal.
Conclusion
When answering whether it is possible to apply plaster over paint, finishing craftsmen can express opposing opinions, since everyone has their own experience of working with such walls. In some cases, you can apply the solution by following the recommendations given in the article. In other cases, it is better to avoid the risk, remove the paint film and reliably plaster the painted ceiling and walls. If you are doing it for yourself and you don’t mind spending a little more time, we recommend that you clean the wall completely before plastering.
We have considered a rather controversial question, which is difficult to answer without examining the condition and quality of the paint coating in the room being repaired. Before applying plaster, the walls must be carefully prepared. Then repairs will not be needed for a long time.
Recommendations
Before you clear the walls of anything unnecessary and prepare them for painting, remove everything from the room so that nothing gets in the way during the renovation. If you are missing some tools, you need to buy them or ask for a loan, otherwise nothing may work out.
When the process of cleaning the walls has begun, it is important to know that this is one of the longest stages of renovation, and you need to be prepared for this both physically and mentally. Once you have completed the cleaning, you need to putty all the uneven areas and wait until the material takes well and hardens.
Only after this can you sand the walls and level them. If everything went well, then you can start priming, but in the case where there are obvious irregularities, it is better to repeat the puttying procedure again than to live with crooked walls later.
The paint you use to paint the room should not only be the right type, but also the right color. For dark rooms, light colors are mandatory, but in sunny rooms you can afford rich and bright colors, which will give the room an unforgettable atmosphere.