Beginning builders or people who do their own repairs often ignore some stages of the work, considering them a waste of time and money. But the durability of the coating depends on external factors, the professionalism of the craftsman and the quality of the materials used. Therefore, if you skip any step, you should not expect a satisfactory result.
What is a primer
This is a building composition in the form of a liquid, which is used to treat walls, floors, and ceilings. Performs the following tasks:
- enhances adhesion - the adhesion of dissimilar materials, in this case between
- processed surface and finishing;
- strengthens the foundation;
- levels the layer;
- protects against corrosion;
- saves paint consumption.
The composition of the mixture depends on its intended purpose and the type of surface. It applies to:
- concrete;
- brick;
- tree;
- drywall;
- old paint.
The primer composition must be kept in a well-closed container in a cool, dark room.
Acrylic
This drug is considered universal and is the most popular. It is suitable for any surface. This can be chipboard, concrete, wood, brick wall, drywall. The product has high penetrating abilities. Therefore, priming of walls before plastering is very often done using acrylic compounds. Penetrating deep into the pores of the base, the material increases adhesion several times.
The only place where it is undesirable to use acrylic primers is on metal surfaces. Over time, rust may appear.
The meaning of priming
Man began priming surfaces at the beginning of his historical journey. Artists were the first to do this - without a special primer it is impossible to put paint on canvas. The primed surface not only held the paint firmly, but also allowed the master to work comfortably - the base of the painting became dense and uniform in roughness. The same functions are inherent in modern primers. Padding:
- saturates the wall surface with moisture before applying plaster, which prevents it from taking water from the solution;
- creates a film with deep penetration into the wall (up to 1 cm), which significantly improves adhesion between its surface and the plaster;
- removes dust, including in places inaccessible to a brush or vacuum cleaner;
- muffles color spots on the wall (but not a transparent primer), turning its surface into a more monochromatic one, which is very important when wallpapering concrete;
- creates a smooth, easy-to-finish surface.
Before plastering
When redecorating an apartment or house, you should not miss one important nuance: the walls must be treated with a primer before plastering.
And let some experts prove that previous generations did not prime, and the plaster lasted for decades. One cannot agree with them for one reason: in the past, walls were reinforced with plaster mesh (metal), which rusted, and traces of rust very often made their way through the decorative coating of the walls.
Today, even concrete can be plastered without reinforcement thanks to a properly selected primer. Priming walls allows you to:
- Saturate the walls with moisture, as a result of which the chemical reactions of hydration of cement or gypsum are not interrupted due to lack of water (as is known, a number of wall materials - concrete, aerated concrete, brick, etc. - have the property of capillary suction of water molecules from the solution);
- Increase the strength of the wall surface while simultaneously creating good adhesion with the plaster solution. Deep penetration primers are absorbed into the wall material up to 1 cm, leaving a continuous film on the surface. When applying plaster, the film adheres to particles of cement or gypsum, providing a strong connection between the wall and the plaster;
- Bind dust, which actively counteracts any connecting processes;
- Achieve savings in the family budget. A wall treated with a primer has a smoother surface and good adhesion, which allows layers of plaster to be applied evenly. Therefore, it will be required less when compared with the consumption of a wall not treated with primer.
When plastering concrete, you need to be very careful when choosing a primer. They have their own primers on sale here. So, under gypsum solutions you need to use only a “concrete contact” primer, which binds dust, saturates the wall with moisture, and forms a film with high adhesive properties (due to the presence of quartz sand).
For information: a primer with “concrete contact” properties can also be used when laying plasterboard with ceramic tiles; during plastering work on polystyrene foam; when leveling walls with plasterboard using gypsum-based glue.
It is not recommended to use “concrete contact” under cement mortars.
What types of primers are there?
Types of wall primers are specifically designed for treating vertical surfaces, interior and exterior. They can be different in characteristics, method of application, basis, level of protection from negative factors.
Acrylic
It is a mixture of acrylic and latex. It increases the fixation of finishing materials on the surface. Widely used by professionals and beginners to perform construction and repair work. Varieties of acrylic primers have appeared that are in great demand - impregnating, penetrating deep into the layer, special, universal and others. Each drug has its own spectrum of action - enhancing the adhesion of materials, penetrating into the thickness of the surface, provided that non-standard materials are used in the work. It is used for surfaces with a reduced absorption coefficient of liquids.
Deep penetration before plaster
The first class of primers is a deep penetration primer.
Visually reminiscent of milk with a weak neutral odor. After application and drying, it leaves a durable film on the surface, thereby strengthening and removing dust from the layer.
A deep penetration primer is suitable for treating loose surfaces, which allows you to strengthen the wall and reduce paint consumption.
It works best to create a reliable base for heavy types of wallpaper.
Mineral
A primer based on mineral components is used for the initial treatment of surfaces for the purpose of leveling.
A primer based on mineral components works with surfaces made of specialized mineral materials: concrete, brick, plaster, as well as gas silicate and expanded clay concrete blocks.
Cement is used as a binder in such cases.
Adhesive mixtures
The use of such a primer will help improve the adhesion of the finish and the base. It is advisable to use adhesive primers when working with plastic, steel, tiles, and glass.
Antifungal primer
Types of primers differ from each other in the way they act on the surface. The primer is a liquid mixture that is applied to the required base - wall, floor, etc. - in order to improve adhesion to finishing materials (wallpaper, paint, putty). A finish without primer will last much less time. It strengthens old and loosely structured surfaces. Some modern paints will not adhere to the base without first applying a primer.
Fungus and mold have caused significant inconvenience to humanity for many years. Antifungal primer will become your faithful assistant in the fight against them. To avoid undesirable consequences, if you find mold on the wall, stock up on antifungal primer. It has proven itself to be an excellent means of prevention, used during the finishing of a room - in cases where fungus appears in the layers of thermal insulation. It is produced on an acrylic, mineral or alkyd base. The main component of the primer, the fungicide, prevents harmful microorganisms from forming in the treated surfaces. Among such primers there are also products with concentrated substances. They will help remove fungus, mold, and lichens from concrete or brick surfaces. Before applying any of the primers, dry and clean the required surface. Mold can be washed off with a cleaning agent or warm water. It is recommended to use a blowtorch or a hair dryer when cleaning. The primer is applied with a roller, natural bristle brush or airbrush. Wear protective clothing and a respirator for work, and gloves on your hands.
Isolating for color matching
This substance makes it possible to even out the colors of the final paint. In addition, during operation it will allow you to maintain the brightness and saturation of the applied color longer. It is used for both internal and external surfaces subject to painting or plastering.
Universal for plastering and painting
A universal, deep-penetrating primer designed for indoor and outdoor use and in areas where strong adhesion is expected. A universal option is used for walls before painting or plastering, as well as wallpapering. Additionally, it can be used for treating facades and floors.
Selection parameters depending on surface type
An important factor when choosing can also be the type of surface itself on which the primer will be applied.
Concrete
Concrete contact or primer for concrete is designed to ensure sufficient adhesion to concrete. This is important for the subsequent application of putty or plaster on concrete and other surfaces that do not absorb moisture.
Tree
A primer for wood is also necessary, since it often acts as an antiseptic, which allows you to protect the wood from all sorts of destructive influences. This is most relevant for wooden surfaces located outdoors.
Gypsum
Gypsum putty or gypsum coating is a surface characterized by increased absorbency, which requires the use of a specialized primer.
Brick
There is an opinion that it is possible to apply plaster or paint to a brick wall without prior priming, since high-quality adhesion will be ensured. However, it is recommended to prime the brick base, since not all building mixtures include primer additives, which can lead to accelerated cracking and destruction of the entire layer.
Primer during plastering
After priming, begin plastering. First, make the first filling cast, which covers the entire space. The layer is leveled, allowed to dry and also covered with an impregnating liquid. This is done in order to bind the components and strengthen the plaster on the surface.
Many professionals prefer to add primer directly to the plaster mixture. This gives it additional beneficial properties.
Preliminary treatment of the wall with soil liquid is mandatory if the goal is to obtain a good finishing result. Surfaces are primed before plastering, puttying, painting and even whitewashing. During multi-layer application of the solution, each layer is also impregnated with soil. This allows you to significantly strengthen the dried plaster, reduce finishing material and achieve those qualities of the finished surface that will satisfy the owner of the room.
How to calculate primer consumption
The required amount of primer depends on many indicators - the concentration of the solution, the type of primer, the type of surface being treated, as well as its ability to absorb liquid. For example, the consumption of a deep penetration primer mixture is 1 kg per 5-7, and a strengthening mixture is 1 kg per 5-15.
In order to calculate the amount of soil to treat the surface, you need to measure the area of the walls being treated and multiply this figure by the material consumption rate provided on the label. Usually the surface needs to be primed 2-3 times, so this figure needs to be multiplied by the number of layers.
It is also necessary to check how the wall absorbs moisture; to do this, you need to spray water on it from a spray bottle; if it is immediately absorbed, then the degree of absorption is very high, and 1.5-2 times more primer will be required than normal, and if it immediately drains, then very low and less soil will be required.
Price of finished work
Very rarely, priming of walls is carried out separately from other finishing work; usually the package of services also includes plaster or putty. The cost of finished priming work includes the cost of material: the average price of strengthening soils for 10 liters is 300–500 rubles, and deep soils are 500–700 rubles per 10 liters, as well as the work itself. The price of services for priming walls from repairmen ranges from 50-100 rubles per hour.
Polyvinyl acetate compounds
These are synthetic materials based on polyvinyl acetate dispersion or latex.
The primer is suitable before painting, but can also be used before plastering. Drying time is almost instantaneous - 15-30 minutes. These are the fastest drying compounds among others. However, their cost is an order of magnitude higher than that of their analogues. The price of one liter of the composition is about 520 rubles.
Preparation for application
The primer goes on sale in a dry and ready-to-use state, which can be applied immediately. They also sell concentrated solutions, which are brought to readiness by diluting with water.
A ready-to-use product (for example, an acrylic primer) is stirred so that all components are correctly distributed throughout the composition, and then the required amount is poured into a container and processed.
Water-dispersed soil concentrate is diluted in a ratio of 1:4 (add 4 parts of water to one part of concentrate). The required amount of concentrate is poured into a clean container, and then water is added - thus obtaining the necessary portion of soil to treat a certain surface area.
The two-component primer is diluted in the following sequence: first, the hardener is introduced, and then the thinner is added to obtain the desired viscosity.
Dry soil is diluted with water in a ratio of 1:4. Alkyd primer compositions are diluted with solvent 649, 650, xylene, solvent (the proportions are indicated on the packaging). Oily soils are diluted with drying oil.
It is important to remember that the instructions for diluting the composition are consistent with the requirements of GOST; deviation from the proportions may lead to a violation of the work technology, and the base will not acquire the necessary qualities.
Briefly about the price-quality ratio
All primer compositions supplied to the market are conventionally divided into 4 groups:
- inexpensive materials, more often used in the decoration of public spaces, when cost is more important than quality;
- high quality materials from a domestic manufacturer or together with foreign production;
- primers presented by well-known international companies (ATLAS, JOBI, DUFA, TIKKURILA, OPTIROC);
- elite imported materials, supplied to order with additives that can be used to regulate the drying speed of the composition.
If finances allow, then it makes sense to use the primer composition of the second and third groups in various combinations.
General application technology
Priming the surface before finishing is an indispensable condition for successful repairs; this procedure cannot be skipped. Before you start working, you need to prepare the following tools: brushes, a roller with a telescopic extension, a primer tray. A stepladder will not hurt - it is convenient to work on the walls in the upper part and the ceiling.
Next, prepare the surface: wash off the whitewash, remove old wallpaper, clean it of dust, dirt, and oil stains. After reading the instructions for diluting the primer, prepare it and, after pouring a small amount into a tray, begin priming. You can work with soil at temperatures from 5 to 30 degrees and air humidity up to 75%.
The surface is coated thoroughly, leaving no gaps and no smudges. In places that cannot be reached with a roller, they work with brushes. After treatment, the surface must dry (the drying time of the primer is indicated on the packaging). If necessary, apply a second coat of primer.
Primer Application Methods
The primer is applied to the surface to be treated in different ways: manually (brush, roller) or using automated means (spray gun, spray gun). The choice of method depends on the scope of work. If we are talking about processing one or two walls, it is better to prime with a roller. When you have to do a lot of priming, you can’t do without a spray gun. On the primer package, the manufacturer indicates acceptable methods of use. The user himself chooses a method of surface treatment that is convenient and accessible to him.
How to apply with a brush
Brushes for applying primers are used in cases where it is necessary to treat minor areas of the surface. The tool is not effective over large areas. As a rule, brushes are used to prime areas that are difficult to reach with a roller or sprayer.
The technology of applying primer to the surface is no different from the same work with paint. The brush is dipped into the soil, then pressed against the walls of the container to drain off excess material. On the surface, use a brush to fill the space, without smudges or gaps. You need to work carefully so that the primer does not drip onto the floor, splash on other walls, windows, clothes, or get on open areas of your hands or eyes.
If the material gets into your eyes, immediately wash them with plenty of water. If during work the soil gets on the window glass, then the drops are also immediately removed with a damp cloth, otherwise, after drying, difficult-to-remove stains will remain on the glass. Applying primer over large areas with a brush is labor-intensive and time-consuming work. It is better to do it with a roller.
How to apply with a roller
Working with a roller is much faster than using a brush. The tool covers a large area in one pass and applies the primer evenly to the surface. Roller processing has its own characteristics.
To work, you need a special tray into which primer is poured in portions. The roller is dipped into the liquid and rolled on the ribbed part of the tray so that the excess material drains off and the roller itself is evenly saturated. Then they transfer the tool to the surface and roll a section of it, trying to apply the primer evenly. At the same time, omissions and smudges are not allowed.
The next batch of soil begins to be applied next to the previous one, gradually entering the previously treated area. To avoid any gaps, add a little color to the primer that is close in color to the main color of the finish. This way you can control the priming process and avoid omissions.
To reach the ceiling and upper parts of the wall with the roller, a telescopic extension is attached to the tool. In places where it is impossible to reach with a roller, cover the base with a brush.
When working with the tool, make sure that the primer does not drip onto the floor, clothes, body, or get into your eyes. Gloves and goggles are used to protect the body and eyes. The floor is covered with plastic film, paper, cardboard.
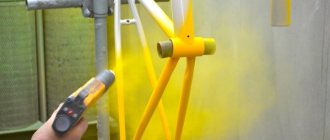
How to apply by spray
The most effective way to prime large areas is to spray with a spray gun. The primer is prepared in the usual way described above. The main thing is to choose a nozzle that matches the grain size, viscosity and fluidity of the material. To apply primer, use nozzles from 1.4 to 1.8 mm and a needle along the diameter of the nozzle.
The next step is to adjust the shape of the torch (with a special screw) and the volume of applied primer on the sprayer. Set the supply air pressure within 3–5 bar. Apply the composition to the probe and evaluate the quality of the spray. The prepared primer is poured into a paint sprayer and, taking precautions, the material is applied to the base. They work quickly with the spray gun, apply the primer evenly, and do not stay in one place for long, otherwise there will be smudges. After coating, wait for the soil to dry and begin further processing.
Removing whitewash from the ceiling
Not only the walls need high-quality treatment, so the preparation of the ceiling is also necessary.
- The surface is moistened with water using a roller or spray. Before the liquid evaporates, the ceiling is cleaned with a scraper.
- If water-based paint was used, then instead of water, prepare a solution of laundry soap and soda (1/2 piece plus 5 teaspoons per bucket of water). In this case, wait until the paint gets wet, then scrape it off with a spatula.
Another interesting way is to use a paste made from flour. This “jelly” is spread on the ceiling with a roller, then wait until it dries. The whitewash and paste are cleaned off with the same scraper.
How long can it take to plaster?
It all depends on what kind of primer you used.
Thus, acrylic primer dries in 8 hours, while oil, glyphthalic or contact primer takes a much longer time to dry, about 24 hours. Mineral soil dries in different ways, it all depends on the thickness of the applied layer - from 3 hours to a day. Phenolic soil takes approximately 15 hours to dry. Quick-drying primers are also sold; after treating them, walls can be plastered in 6-7 hours. Alkyd primer dries in 10-12 hours. And perchlorovinyl primer, when applied in 1 layer in summer in hot weather, dries in 60 minutes.
Polyvinyl acetate primer dries in half an hour.
You can treat the walls with a primer yourself. It’s better not to be lazy and spend a little extra time so as not to be disappointed with the result. Moreover, applying a primer is not so difficult; minimal skills in working with a brush or paint roller are enough, although for large-scale work it is better to use a professional spray gun.
Perchlorovinyl
Such soils are widely used for concrete and brick surfaces. The drug dries quickly. Reviews say that the product becomes solid within an hour after application. In terms of characteristics, perchlorovinyl compounds are not inferior to their polyvinyl acetate competitors. Its main disadvantage is its high toxicity. This makes it unsuitable for residential premises.
It is better to prime concrete walls before plastering in residential buildings using safer products. These can be acrylic and emulsion primers. They have no odor and are harmless to people and animals.
Making your own primer
There are 3 recipes for preparing primers. All of them are easy to make with your own hands.
To improve adhesion
It can be applied to any glossy surface, for example, metal pipes, sheets of tin.
- Bring 1 liter of water to a boil in an enamel bowl, place 250 g of potassium alum.
- Pour 200 g of dry paint glue into a separate bowl and pour in 2 liters of water.
- Place the dish with glue on the stove, light the burner, add a grated piece of laundry soap (70%), mix thoroughly.
- Grind 2 kg of chalk to a dust state.
- After dissolving the soap, pour in 30 ml of drying oil and 2 kg of chalk powder and mix.
- If the primer is too thick, add water.
To increase strength
- Pour 7 liters of water into an enamel bucket or pan, place it on the stove, light the fire and wait for the water to boil.
- Rub 1 piece of laundry soap (65%) on a grater.
- Pour soap into boiling water and turn the heat to low. Continuously stir the mixture with a wooden spoon.
- After the soap has completely dissolved, pour in 500 ml of wood glue and add 100 g of copper sulfate.
- Mix the mixture thoroughly for half an hour. It is impossible for lumps to appear.
- Then strain the hot mixture through a sieve and cool.
This primer can be applied to walls made of concrete and brick.
Deep penetration
- Pour 1 liter of PVA glue into an enamel bowl, gradually add 8 liters of water, stirring until the mixture becomes homogeneous.
- Add 1 trowel of cement and mix thoroughly.
- Strain through gauze folded in 2 layers and prime the walls.
- The prepared mixture is immediately applied to the walls.
Tools
We already know which primer is better. In addition, we found out what is the best way to prime a brick or block wall before applying plaster. The amount of material has been determined, all that remains is to prepare the tools that will be needed in the work:
- To perform cleaning you will need a dustpan and a broom; you can use an industrial vacuum cleaner;
- when working at height you will have to use a stepladder;
- gloves, a cap, and goggles will be needed as protective equipment;
- To remove drips from the walls, prepare a damp cloth;
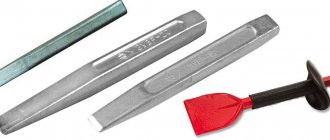
- To remove defective areas, you should have a hammer, chisel, and sandpaper at hand;
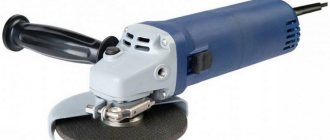
- roller - selected taking into account the material from which the wall is built. For example, priming a brick wall is best done with a roller that has a long or medium pile. Concrete walls are easier to handle with foam or velor rollers;
- to work in hard-to-reach places you will need a paint brush;
- cuvette for rolling and squeezing the roller.
It is more convenient to work with a brush in small areas. With its help, you will treat even small cracks and small recesses with primer as much as possible. The roller is used on large, flat surfaces because it has a certain contact area.
There is another option for applying primer - a sprayer. Its use is justified over large areas. In addition, in the accompanying instructions, the manufacturer always indicates how this or that primer is applied.
The best primers from the store
1. Acrylic - it is applied to wooden, concrete, brick, plastered walls, and chipboard.
It has no odor; after applying it to the walls, they “breathe.” It is not suitable for smooth surfaces. 2. Alkyd - it is used to treat wood surfaces, which then swell somewhat, so wallpaper sticks well to them. It may contain mixtures that prevent corrosion and mold from appearing.
3. Glyphthalic - suitable for metal. But it is only suitable for dry rooms.
4. Perchlorovinyl - it is universal, suitable for wooden, brick, plastered and metal walls. It is toxic, which is why only outdoor walls are treated with it.
5. Polyvinyl acetate, it includes polyvinyl acetate dispersion and latex. It can be used to cover any surface, but only polyvinyl acetate paint can be applied to it.
6. Phenolic - it is applied as the first layer on walls made of metal and wood. But since it is poisonous, it can only be applied to external structures.
7. Polystyrene - it is also used to cover external walls; it cannot be used indoors. It is applied to plaster and wooden walls.
8. Aluminum, it is used to treat wood surfaces and protects them from fungus.
9. Epoxy is applied to concrete surfaces for better adhesion and to protect the metal from corrosion.
10. Shellac is used to treat wooden walls to prevent resins from escaping from them.
11. Mineral is made of cement, gypsum, lime. It is covered with concrete and brick.
12. Universal.
Pros and cons of using primer
So why do you need wall primer? To answer this question, you need to understand what advantages and disadvantages this procedure has.
The benefits of using a primer include:
- Walls treated with primer are well protected from damage that may occur, for example, when removing old wallpaper.
- The primer layer increases the moisture resistance of the walls, reliably protects the treated surface from destructive processes, the appearance of dampness, mold, and mildew.
- The antiseptic components included in the composition have a specific odor that repels harmful insects and microbes.
- The final layers applied over the primer will be more resistant to various influences and will last longer.
Common Mistakes
Even though the task is not too difficult, common mistakes are common. The first of them is the use of dispersion and water-emulsion pigmented paint. It does not perform all the functions that are required. Also, you should not use it even as a second layer - this leads to the formation of various stains. The main mistake is applying one layer, because almost always two are required.
Not everyone knows whether it is necessary to prime a wall before plastering, so they do not do this work. This approach is also wrong.
Remember that priming the walls always precedes plastering. This is the only way the walls will be able to keep the coating for years. Treating the surface with a strengthening mixture is a common practice for many advanced builders.
Is it necessary to prime aerated concrete before plastering?
Priming walls made of aerated concrete is normal practice for walls followed by plastering. The treatment will facilitate subsequent work and improve the characteristics of the unit during its operation. This need arises as a result of the porous structural structure.
Expert opinion Vitaly Kudryashov builder, aspiring author
Ask a Question
The gas block, due to its porous structure, has a high absorption rate. Primed in 2 or 3 layers.
Useful tips
Arm yourself with useful recommendations from professional craftsmen: this will help you achieve the highest quality results when carrying out finishing work. Plastered surfaces will be reliable and durable if the material is selected correctly:
- When purchasing, choose water-soluble formulations. They have a breathable texture and do not accumulate moisture.
- If the composition contains solvents, they are not suitable for processing foam.
- Before applying primer, it is important not only to clean the base, but also to wipe it with a damp cloth to remove dust. Otherwise it will be on the surface, which will affect the color of the base.
- The primer must be diluted in strict proportions. Do not compromise the consistency: this will affect the consumption and absorbency of the walls.
- The layer of application of the composition should not be dense. It is important to maintain uniformity over the entire surface being processed.
- The primer can only be applied to a dry base.
- The most difficult to reach places can be treated with a spray bottle.
- If the surface being treated consists of several materials of different composition, use a universal primer or separate compositions (if you have the finances).
- Wear protective glasses and gloves when working. If liquid gets on your skin, wash it immediately, otherwise it will be difficult to remove.
- If the soil has an odor, buy a respirator. Special clothing is recommended: if it gets on it, it will leave stains.
- When finished, wash your roller and brush immediately. If the primer dries out, you will have to change the roller coat and throw away the brush.
Sources
- https://otdelkasten.com/pokraska-sten/kak-nanosit-na-steny-gruntovku
- https://StroyGuru.com/remont-kvartiry/steny/zachem-nuzhna-gruntovka-sten/
- https://otdelkasten.com/pokraska-sten/luchshaja-gruntovka-dlja-sten
- https://stenamaster.ru/vidy-gruntovok-ih-primenenie-261.html
- https://mastremont.ru/kakoj-gruntovkoj-obrabotat-steny-pered-shtukaturkoj/
- https://cozzyroom.com/remont/gruntovka-sten.html
- https://odissey2000.ru/staty/kak-gruntovat-steny-instrukciya-po-pravilnomu-naneseniyu-gruntovki
- https://otdelkasten.com/shtukaturka-sten/gruntovka-sten-pered-shtukaturkoj
- https://diy.obi.ru/articles/gryntovka-dlya-sten-pravila-vibora-i-ispolzovaniya-20910/
- https://GidPoKraske.ru/gruntovanie/gruntovochnye-raboty/gruntovka-sten-pered-shtukaturkoj.html
- https://dekoriko.ru/gruntovka/pered-shtukaturkoj/