DIY kitchen meat hatchet
DIY kitchen meat hatchet.
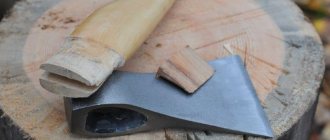
How to make a kitchen hatchet with your own hands. DIY camping hatchet. These instructions will help you make a good, strong, small but heavy hatchet. You can use it to chop meat, firewood, take it with you on a hike, and so on. The metal must be hardened, so that the ax does not become dull for a long time. The author used a plow from a tractor as material. Making an ax is not difficult; you can draw out the necessary profiles with an ordinary grinder. For ease of work, of course, it is advisable to have a belt sander, but this is not necessary.
Materials and tools for homemade work:
— a source of steel with a high carbon content (the author used a tractor plow); — grinder with cutting and grinding discs; — a set of files; - wood for making handles; - epoxy adhesive; - drill with drills; — it is advisable to look for material for making pins; - sandpaper of different grain sizes.
The process of making an ax:
Step one.
Hatchet profile First of all, imagine what your hatchet should be like. It is advisable to draw it on thick cardboard and cut it out. This will give you the opportunity to hold it in your hands and evaluate whether it will be comfortable. Next, we transfer the profile to the metal and cut it out. To work, you will need a grinder with a cutting disc.
Step two. Grinding and setting the blade profile
After working with a grinder, the profile needs to be thoroughly sanded in a circle, remove burrs and smooth out other irregularities. The metal here is quite thick, you won’t be able to make a serious mistake, so work only with an angle grinder.
You will also need to thoroughly sand the entire surface of the metal, as there will likely be rust, dirt, and so on. This can be done using the same grinder, installing a grinding attachment on it.
Next, you can begin making bevels, that is, forming the profile of the blade. If you want the sharpest possible ax that will practically cut rather than chop, make the bevel as far as possible. That is, the blade should be as thin as possible. And if you think about constantly chopping something with an axe, subject it to heavy loads. Make the bevel smaller.
The author forms the bevels with a grinder, although this is done more professionally on a belt sander.
To form the bevels you must first place everything on the axe. Draw a line up to which the bevel will extend, and also divide the future blade into two parts so that you are guided by this center line when working with an angle grinder.
Finally, you will need sandpaper to smooth out any rough spots left by the grinder. Files will also come to the rescue here.
Step three. Drilling holes
Before we harden the steel, be sure to drill holes in the workpiece for the pins. The author decided not to install them, but this is highly recommended, since the handle turns out to be strong, and the appearance of the ax becomes more attractive.
Even if you don't put pins, you will still need to make holes, since thanks to them the handle will stick well.
Step four. Metal hardening
If you need a really strong ax, harden the metal. It will be problematic to heat such a piece of iron to a bright yellow color; you will need a powerful oven. However, you can try to harden only the blade. The author uses goal for such purposes. The author cools the metal in water.
In general, the hardening method described above is questionable, since not all of the metal is heated, and no one tempers it. It is recommended to use oil instead of water, since water cools the steel very quickly, and this can cause the workpiece to crack or become deformed.
Source: oleor.ru
Care Tips
A few care tips:
- The appliance is not stored near other kitchen utensils. Can be hung on the wall using special loops on the handle;
- Wash after use with dish sponges and detergents. The use of abrasive cleaning agents is prohibited;
- A cutting board is used for work. Usually wooden or plastic. The cutting edge can easily be damaged on a stone, glass, or ceramic surface;
- the metal part is treated with kerosene, the blade is lubricated with vegetable oil.
Kitchen hatchet made from a saw blade
Hello everyone, today we will make such a useful thing for the kitchen as a kitchen hatchet. Using this homemade product, you can chop or cut vegetables, meat, bones and other products. The author used an old saw blade made of thick steel as the material. As a result, the hatchet became weighty, which makes it convenient. The product was also quenched and tempered, which made the steel durable. The handle covers are made of wood, which is impregnated with epoxy resin; as a result, such a handle will not be afraid of water. The only drawback of the chosen steel is that it rusts, but if the ax is used often, over time the steel will become covered with a patina. You can make the patina yourself, using etching and so on. If the homemade product interests you, I suggest you study the project in more detail!
Butcher Ax Options
The device is:
- kitchen;
- professional.
The characteristics of the working area, weight, and blade width play a big role in the choice. Consider the purpose of the work.
Kitchen
Has a medium size. Works great with:
- bird;
- rabbit;
- small and medium-sized pieces of pork, beef;
- small bones.
Blade width – 15 cm. Sharpen on both sides. This helps to chop the fibrous product, even without skill.
You can use a device with a blade width of 17 to 20 cm. This option is close to the professional model. With his help:
- chop bones;
- separate the pulp;
- tendons are cut out.
Kitchen hatchet.
Professional
Differs in blade width. It ranges from 25 to 35 cm. The blade is all metal. Thanks to this, the product is very resistant to mechanical stress.
The handle is based on hard wood. A special liquid is applied to them to prevent drying out. The professional model promotes:
- chopping fish and meat of various densities;
- maintaining the integrity of the pulp.
Communities › Do It Yourself › Blog › A simple DIY kitchen knife-hatchet in an evening.
The knife is made from a 2 mm thick circular saw. The knife turned out to be 31 cm long and 8.5 cm wide. Handle thickness 22 mm. The handle is made of oak, impregnated with linseed oil and a piece of beeswax.
I printed a 1:1 picture from the Internet of the model I liked and the one that is realistic for my capabilities. I cut it out with a small grinder.
Sanding the edges with emery, where it is not possible to reach, then manually with files. Grinding the surface with a grinding machine.
Rivets made of 4 mm wire.
Tags: kitchen hatchet, do it yourself, from a saw, simple
Comments 27
I made three knives from saw blades, the first one was clumsy due to inexperience, the second one was made from a piece of a thick disk 5mm thick, the metal is a bit soft (although the disk was without soldering) it lies in the form of a blank waiting for its use, the third one was more or less a success, but it also seems a little soft, hardening yet I haven’t mastered it... By the way, I wanted to make the same cleaver, but the disk ran out))) Then, if I succeed, I’ll post pictures of the knives. Another spring from ZIL 131 is lying, waiting for its turn...
Bones for broth are definitely good!
The first photo is valid...
the knife is garbage but the main thing is the process (((
Was he boiling something out of her ass? :))))
Wrap it up so it doesn't rust.
What about the strength of steel? On which bone will the first nicks appear and will it become dull?
I sharpened it at 30 degrees, but to chop bones you would need 45-50 degrees then it’s normal, but to chop meat the knife still needs to be heavier, with a blade thickness of about 4-6 mm, but here it’s 2 mm, that’s why I sharpened it by 30 degrees, but during the sharpening process I will reduce the angle
What about the strength of steel? On which bone will the first nicks appear and will it become dull?
Source: www.drive2.ru
Homemade hatchet knife using simple tools
Greetings to those who like to work with metal, in this instruction we will look at how to make a hatchet knife with your own hands. With this device you can chop branches, sharpen sticks, cut and more. This knife is also useful for culinary purposes. The knife is made of high-quality steel and is hardened, so it keeps its edge for a long time and does not become dull when cutting fairly hard materials. But here everything will depend on the correctness of the hardening.
Making such a knife is not at all difficult, as it might seem at first glance. The author makes it using available tools, and everything turns out quite well. The blade is cut using a grinder, with the help of which the bevels are formed and the main grinding takes place. As for hardening, if you don’t have a furnace, that’s also not a problem; you can handle the task with a gas burner. When making the knife, the author damaged the handle, so part of it was made from cold welding. But with a skillful approach, you can make the overlays entirely from wood, as was originally planned. So, let's take a closer look at how to make such a knife!
Materials and tools used by the author:
— high-quality high-carbon steel (tool steel or from a car spring will do);
- a wooden board for making overlays;
- copper tubes, brass rods (or other parts for making pins);
- epoxy glue for the handle (the author did not use it);
- cold welding (used to finish the handle).
— welding machine (optional);
— grinder with cutting and grinding discs;
— gas burner, refractory brick and oil for hardening;
- varnish, oil, paint or other for the handle;
The process of making a knife-axe:
Step one. Preparation of material
Functions of an ax for chopping meat
The functionality of the device depends on its size and shape:
- A device with a wide blade and heavy weight does not cut. He cuts any pieces and bones. This helps maintain the integrity of the pulp of the connective fibers;
- The middle handle ensures perfect balancing. High-quality cutting of bones occurs. To do this, you do not need to debone the carcass first. A high-quality device will not leave crumbs and splinters in the pulp.
Advantages and disadvantages
The tool has a number of advantages:
- the ability to chop the hardest products, as well as frozen pieces;
- ability to perform the functions of a meat grinder;
- ease of care;
- the blade does not require regular sharpening;
- very strong steel.
The disadvantages include:
- fragility of the handle made of soft wood;
- the use of great physical effort at work;
- large mass.
The hatchet is heavy and bulky.
Main stage of work
In order to make a cleaver, you will first need to arm yourself with a pencil and draw a sketch on paper. After this, you need to make a blank. In our case, the ideal source would be a large-diameter steel saw blade. The blade of the future cleaver should be drawn on it. You can cut the workpiece along the contour using a grinder. Now all that remains is to sand and clean our workpiece, giving it the required shape.
You will need to drill several holes in the tail of the cleaver. This is where the handle will be attached. Each should be carefully processed with a round file. When everything is ready, you can move on to creating the blade and cutting edge. We harden steel in the most accessible way - heat it and then dip it in oil. After this, we grind with sandpaper and polish the product.
Characteristics of a meat ax
Its main difference is its wide blade and curved handle. They sharpen mainly on one side. Double-sided sharpening is a rarity. Options:
- blade length – 13.5 – 18 cm;
- handle length – up to 30 cm;
- It is based on alloy steel (it is durable and resistant to corrosion).
A convex cutting edge can:
- split the bones;
- penetrate the pulp without difficulty.
The curved shape of the handle with a thickening at the tip prevents injury to the hand. Hardwoods are the best materials for handles. The strength of the blade depends on its special hardening. It chops thick bones without splinters. Also suitable:
- frozen meat;
- fish.
You can make a hatchet with your own hands.
The final stage of work
There is very little left. At the final stage of work, you should find a fairly hard type of wood and cut a handle for the cleaver from it. We cut, clean, polish and attach to the knife using rivets. Can be coated with mineral oil for better protection. If everything was done correctly, the end result will be a very neat and functional kitchen cleaver.
Need something else interesting? Then look at a simple and effective way to get rid of scratches under the car handles, which everyone is already tired of.
Did you like the article? Then support us, click
:
Source: novate.ru

