You will notice that many of them have the standard anvil shape, while others are simple sheets of iron. Here's a good reminder of what the most important features of anvils are:
- They must be stronger than the metal they are working with
- They have enough mass to distribute the applied force evenly across them
- The anvil's workspace is at least wide enough to accommodate the portion of metal you are working with
Moroccan anvil
This blacksmith shows the kind of DIY ingenuity we prefer. He appears to have removed the base of the anvil, presumably for safer use. You will notice that his shoulder is still slightly curved while the hammer is in contact with the surface of the anvil. Over time this keeps him from putting unnecessary strain on his shoulder
Making an anvil
How to make an anvil? The sequence of operations is as follows. First you get a horn. To do this, one of the ends of the workpiece is gradually processed with a grinder to an approximately conical surface, after which it is ground and sharpened to the appearance of a truncated cone. Then the sharp part is adjusted with a file. The tail is also obtained by mechanical processing in the same way.
For a tabletop anvil from a channel, it is impossible to make the above elements, since the composite version does not have a section body to securely fasten them.
The next stage is to design the support paws with your own hands. For a rail anvil there is no need for this, since the headrest already has technological protrusions. Using them, you can drill the mounting holes required for fastening with your own hands. In the channel profile, all holes are drilled in the conditionally lower flange. Considering the large weight, a long anvil is secured with six bolts, a short one - four are enough. Bolts from M16 and higher are suitable for fastening.
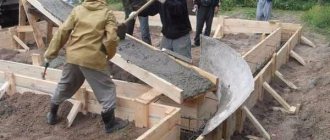
An important point is the installation of the anvil in the workshop. Since the product experiences significant dynamic vibrations and vibrations during use, a wooden base should be installed under it, which will successfully dampen vibrations. It can be made from an oak stump or a dry wooden block, and the ratio of height to cross-sectional size should be no more than 1.5:1. The weight of the deck/stump must exceed the weight of the assembled equipment by at least 10 times. Such an improvised chabot is buried into the ground at least half the height, leveled, after which the soil is thoroughly compacted. When pouring a concrete base, you should treat the wood with an antiseptic before installation.
A blacksmith's anvil, made by hand, is not inferior in durability to professional samples.
Myanmar anvils
Another example of an anvil in the form of a steel pillar, but this time it is supported by wooden supports around its base. A steel cylinder, hand-made wooden supports and a hole in the plywood base - all this you can easily install at home
Classification of anvils
The types of anvils and their shapes are different. They are classified:
- by weight: for example, a 10 kg anvil can only be used for hot forging with a hammer weighing no more than 1 kg (this is the ratio of weights that is considered optimal);
- by the presence of a blacksmith's horn: the anvil is two-horned or one-horned. in the simplest cases, an anvil of a simple configuration is used, but much cannot be done with it;
- according to the shape of the supporting part - with or without paws, on a solid base;
- according to the presence of a hole and its shape - steel anvils with a round and/or square blind hole;
- with or without a tail.
Such a complex design and shape of the equipment is determined by the variety of forging operations that can only be performed using an anvil.
Double anvil
Download GOST 11398-75 “Forging tools for hand and hammer work. Two-horned anvils."
Traditional components of a blacksmith's anvil:
- horn, which is a cone-shaped process on one or both of its lateral ends. It can be removable or non-removable. In the first case, several sets are made with different base diameters, which makes it possible to do such forging transitions on this element with your own hands as curling, rolling, and bending. The removable horn is equipped with a threaded part (the thread must be self-locking) and is screwed into the body of the anvil;
- tail: a protrusion, square in plan, placed on the side opposite the horn. The cross-sectional size and reach approximately corresponds to the parameters of a horn. Using the tail, bend at an angle of 90°;
- holes, and in a classic anvil there should be two of them: a square one - for installing some kind of backing stamp, and a round one - for fixing the opposite end of the wire during its curling.
In factory conditions, anvils are made of 35L steel, for example, at JSC Glazovsky.
One-horned anvil
A simplified mini-anvil can be made by hand either from a wide equal-flange channel GOST 8240, or from a piece of steel rail, and experts believe that not a railway, but a crane rail KR120 or KR140 is suitable for these purposes.
Download GOST 11397-75 “Forging tools for hand and hammer work. The anvils are one-horned.”
Indian anvil
To complete our tour of the world of anvils, take a look at a photograph of an Indian blacksmith transforming a pistol barrel into a plowshare. His anvil is on the ground just behind his campfire. He forges steel while squatting.
Thanks for exploring some examples of anvils around the world. If you have any photos that you would be happy to share from your travels, post them in the comments
Author - Terran
Anvil elements
A blacksmith's anvil is a mandatory attribute of his workshop. With its help, a number of technological operations with metal are performed. This tool is used for forging, giving metal the required shape, hardening, etc.
This item is made of durable alloy steel, and its weight can exceed 300 kilograms, especially if we are talking about a stationary forging anvil.
It must be stable and durable, as it bears significant loads. Hitting the anvil with a hammer produces a smooth, clear sound. A dull ringing indicates the presence of cracks or voids in the instrument.
As noted earlier, there are one-horned and two-horned models. Why does the anvil have this shape? The point is this: the horn allows you to make bends with the necessary curvature, and the flat surface serves to do the main work.
Anvil mounting diagram.
The main elements of the device include:
- horn;
- shank;
- recess for forming holes;
- holes for installing tools and other forging equipment on the anvil;
- face;
- shoe;
- platform for cutting metal.
The protrusion on the side of the instrument is called a horn. Its shape varies depending on its purpose. In one-horned models it is cone-shaped. Used in forming metal bends and rolling out rounded parts.
The second horn is used in bending products at angles less than normal and is made in the shape of a truncated cone.
A face is a flat surface. It is on it that the main operations are performed.
The classic type of anvil always has holes. One of them is square - used as a tool holder, for example, a hammer. It is usually located at the end of the device. The second is round, fixes the wire when curling it, and is located near the horn.
The anvil should absorb the impulse from a blow to the front part. For these purposes, the device is installed on a durable wooden or sand cushion.
It is important that the face is positioned strictly horizontally. This will allow you to do the work with the highest quality.
Many people are interested in the question of how to set the anvil in height. The height of the anvil from the floor is correct if the hammer strikes the casing horizontally. In addition, it is important that the blacksmith does not have to make additional efforts to adjust the blow, bend down or lift the tool too high.
Making an anvil with your own hands
The design of the anvil is quite simple. Its manufacture by hand does not require drawings, special skills or special tools and equipment. By and large, the device is a monolithic device with a special shape and planes that meet certain requirements.
At the moment, forging equipment is presented quite widely in specialized stores. There you can choose any tool, including an anvil, from a huge assortment of varieties. So does it make sense to make this device yourself?
When answering this question, you need to decide for what tasks the tool will be used. In professional production, you should definitely choose a factory model. Its advantages include compliance with all necessary standards, as well as manufacturing features using casting technology.
Such an instrument is highly hard, has regularly shaped horns and perfectly straight side edges.
However, the price for a good model is quite high, especially in the case of large-sized options. However, there is no alternative to such devices; making them by hand is definitely not possible, because the weight of a forge anvil can reach 300 kilograms.
But for homework, a small-sized, lightweight anvil is perfect. You can just do it yourself. The described option is unlikely to have a negative impact on the quality of work.
One of the arguments in favor of hand-making the device is the fact that high demands are placed on anvils. For example, the edges of the device must be strictly straight and undeformed.
During constant use of the tool, quite often the edges become uneven. Of course, everything depends on the type of material used by the master in his work. Nevertheless, this defect must be eliminated. There are two ways to correct such a defect: buy a new device or repair the old one.
Naturally, repairs will cost less than purchase. It should be noted that restoring a hand-made anvil is a simpler task. So this is a great opportunity to save money once again.
Now we can safely move on to the question of how to make an anvil for forging metal? There is no point in providing any standard dimensions or drawings. There are a large number of different options for this equipment. Everyone can choose what suits them best.
The main goal is to understand and master manufacturing technology. The master will decide all other points himself, especially since on the Internet you can easily find various photographs of anvils and use them as a template when creating the most optimal version of such a forging device.
First of all, the issue related to installation should be resolved. In the case of a stationary option, as noted earlier, a massive stump should be used. But in the case of a portable model, a metal frame welded from corners is used.
Do not forget that it needs to be resistant to serious shock loads. This problem is solved by installing additional ribs in the frame, providing increased rigidity.
Although, of course, there are other methods to strengthen the structure. It all depends on the ingenuity of the master and his preferences.
If the base for the anvil is a stump, then it should be tightened with metal rings. Simply burying part of the tree's base in the ground is not a good idea. Even if properly treated with antiseptics, it will begin to deteriorate over time.
It is advisable to use a metal barrel placed in a hole as a base. Sand should first be poured into the barrel. The amount of sand depends on the preference of the blacksmith. As for the wood, it is selected from strong species. Which has already been mentioned earlier.
Installation of the device on the base is implemented in several ways. The most reliable option is fastening using metal brackets. They must be secured between the side surfaces of the hemp and the tool.
A similar installation method can be implemented using fittings. It must be bent into an “G” shape and welded to the base. Then, when the device is installed on the stump, the reinforcement is driven into its sides. As a result, any possibility of the device falling on your feet is eliminated.
This type of fastening will be very effective. The forging device will be securely connected to the base and will not lose grip even after a long period of use.
The second option is simpler. It consists in drilling holes in the sole. Bolts are subsequently inserted into them and screwed directly into the stump. The disadvantage of this method is the loosening of the tool after impacts. To avoid having to tighten the bolts from time to time, it is better to use staples.
According to industrial technology, forging anvils are made of 35L alloy steel. At home, an anvil is usually made from a rail or channel. One of the sides of the selected material will be used as a base.
You can make a face by welding a metal plate of the appropriate brand. You can do without it. In this case, you will have to spend a lot of time and effort on grinding one of the sides of the rail.
A handmade rail anvil will last a very long time. It is perfect for almost any household needs or small workshop.
It is worth noting one nuance: making such a forging tool from a channel is not the best option. On the one hand, it is simpler and more convenient to process. However, its strength characteristics are not high. As a result, the service life of the device will be short.
You can make a horn from an elongated part of the rail, treating it accordingly. However, you will have to spend not only a lot of effort, but also consumables, for example, angle grinder discs. This problem is much easier to solve by welding this part to a ready-made tool. Don't forget about the insert that is welded.
Thus, it can be noted that the best manufacturing material is rail. The characteristics of this material meet all the requirements, and it is quite cheap, perhaps the craftsman even already has it in his household.
The manual version will not be a replacement for a full-fledged factory device, but in case of small volumes of work it will be an excellent choice. It is important that during manufacturing no special skills, specialized tools or any drawings are needed.
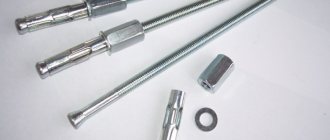
Materials you will need:
- a piece of rail up to three hundred millimeters long;
- profile pipe;
- stump.
The necessary tools are a grinder and welding, depending on the type of structure.
Finally, after all the manufacturing work has been completed, the instrument can be given a nice final look through painting.
As you can see, every person can cope with the manufacture of such a simple but very important tool. This does not require the use of specialized equipment and does not require special skills. In addition, the materials used to create such a device are not so difficult to obtain.
The only problem may be the processing of the rail, in particular its grinding. The material from which it is made is highly durable, so you will have to spend a lot of disks on processing.
However, the result is worth it, because the end result is a reliable and durable anvil made by yourself. She, without any doubt, can become the pride of the workshop.