The car body is constantly exposed to the destructive effects of moisture, dirt, and chemicals that are sprinkled on the roads in winter. The problem is aggravated by vibration loads. Therefore, even with careful care, the appearance of cracks and holes eaten by corrosion is inevitable. There is only one way out - welding the car. However, this does not mean that you need to go to a car repair shop. Minor damage can be repaired by welding the car body yourself.
Features of car body welding
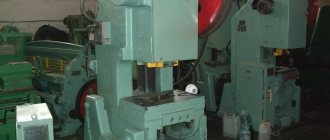
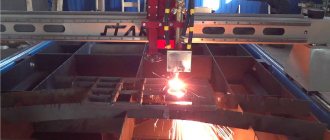
For car body repairs, you will need high-quality welding equipment. The work is carried out in a room where it is possible to connect energy-intensive equipment to the electrical network. A highly qualified performer is required, as welding of thin metal will be required. A universal method for repairing a car body has not yet been invented, therefore, depending on the location and nature of the damage, different technologies are used. Connections are made by gas, manual, semi-automatic welding.
Wings and sills are most often repaired by spot welding. The lap joint is used to restore the integrity of the load-bearing elements. Butt welding is used when replacing damaged elements.
Do it yourself
If you want to take on body repairs yourself, you will need basic skills and the welding machine itself. It's no secret that the best solution is to replace the body rather than repair it. But sometimes there are no other options.
Proposing to consider the process using the example of using a semi-automatic machine. Still, this is a more suitable option for working specifically with a car body.
Which welding method is better to weld a car body?
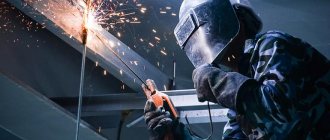
If you have a simple welding machine, repairs are done manually using ordinary electrodes. However, the applied seams are rough and there is a high probability of burning through thin metal. Therefore, this method is recommended to carry out repairs in places not visible from the outside. For example, under the wings, in the trunk, underbody.
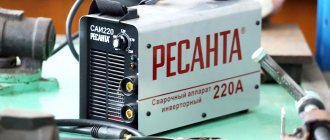
High-quality welding of the car body is performed semi-automatically. With its help, even a beginner can join metal 0.8 mm thick without the risk of burning. If carbon dioxide is replaced with argon, welding of stainless steel and aluminum will be available. Therefore, when thinking about which device to choose, preference should be given to a semi-automatic device.
Replacing a rear view mirror: how to remove and disassemble
At the same time, semi-automatic devices are stationary devices. This is due to the impressive weight of the equipment and the substantial size of the device. But when it comes to performing body repairs, this does not play a key role. You probably have enough space in your own garage to place a welding machine there. Otherwise, this type of device has predominantly strong points, being ahead of its conventional competitors in many respects.
But some are confused by the price and the same massiveness. That’s why they prefer inverter welding devices. I’ll tell you about them separately.
Inverters
Such devices help speed up the process of body welding work. The device operates under conditions of high-frequency current up to 2000 Hz. The advantages include compact size, high speed and the ability to weld even if the network voltage is low.
In the case of self-welding, beginners should give preference to inverters, since they are much easier to work with, require less skills and do not require a person to have certain qualifications. If you are just learning the basics of welding by working on your own car, it is best to take an inverter. But it also has its drawbacks. They manifest themselves in a hefty price tag, high sensitivity to dust, and the inability to weld metal whose thickness exceeds 3 millimeters.
The choice is yours. It is not necessary to buy equipment. Nowadays the practice of renting is widespread. Or ask your friends and acquaintances.
Preparatory work
Before welding, dirt and dust are removed from the surface and cleaned of corrosion. You can use a gas torch to clean hard-to-reach places. It is impossible to reliably weld rusty metal.
When preparing a semi-automatic machine, you need to make sure that the guide channel corresponds to the diameter of the selected wire. Depending on its size, the required welding tip is installed. There should be no metal splashes in the device nozzle. If they are detected, they are cleaned with sandpaper.
Before repairs using a welding inverter, you must check:
- Is the electrode securely fastened?
- is there any damaged insulation on the cable and holder;
- cable fastening strength;
- proper grounding of the device.
Basics of arc welding when repairing engine components
Semi-automatic is also the most suitable welding machine for household electric welding of engine elements, but only with the mandatory use of argon. Using argon welding, it is quite possible to weld almost all metals used in a car engine: cast iron, stainless steel, aluminum or ordinary steel. A list of engine parts that can be repaired by welding is presented below:
- Cylinder blocks.
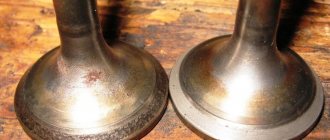
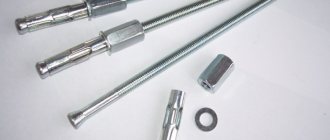
- Valve guides.
- Cylinder heads.
- Intake valves.
- Intake and exhaust manifolds.
- Covers and caps for chambers for adjusting ignition timing.
- Water and oil pumps.
- Pistons and piston pins.
- Valve seats and inserts.
- Pipelines and much more.
The heart of the car
How to weld a car body with a semi-automatic machine
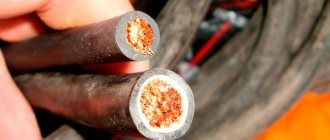
To weld a body with a semi-automatic machine, you need to prepare a wire with a diameter of 1 mm, coated with copper, coarse-grained sandpaper, a pressure-reducing reducer, and a 20-liter carbon dioxide cylinder. The work is performed in the following sequence:
- The repaired areas, cleaned with sandpaper, are pressed tightly against each other. It is possible to use clamps, bolted connections, and self-tapping screws.
- On the front panel of the machine, switches set the welding current value and wire feed speed.
- A reducer is installed on the gas cylinder and connected with a hose to the burner.
- The nozzle is unscrewed from the burner with pliers, and the tip is removed.
- A spool of wire is inserted into the apparatus. Its end is inserted 15 - 20 cm into the supply channel.
- A tip is put on the wire and a nozzle is installed.
- Switches set the polarity of the current so that the holder is connected to the plus and the burner to the minus. For uncoated wire, the polarity is reversed.
- After connecting the device to the power supply, the holder with the burner is brought to the place to be repaired. When you press the button on the holder, the supply of wire and carbon dioxide is turned on.
- To weld a long seam and not overheat the joint, the parts are first tacked in 3 - 4 places. Then, at intervals of 7 - 10 cm, stitches 2 - 4 cm long are applied.
- After a five-minute break, when the seams have cooled, the gaps between them are boiled.
Frame diagnostics
- If there is a suspicion of frame distortion, then you need to take diagonal measurements between control points (see “Measuring body geometry”) to determine exactly where the displacement occurred.
- For long frame vehicles, there are several methods of measuring the frame to determine distortion. All methods use a straight line as a reference coordinate and compare the frame to that line to determine the straightness of the frame. Methods for determining a straight baseline include using a laser beam, pulling a cord.
- Using a laser is a precise method. The laser is aligned to one end of the frame, approximately 5 cm from the edge of the frame, and directed along the frame to the other end, the same distance from the edge of the frame. A piece of flat material, such as cardboard, is held against the frame. This is done at several points along the frame. The measurements are recorded and, ideally, should be consistent at all points. Deviation will mean the frame is bent. You can also check the height. If it deviates up or down, this means there is a bend in the frame.
- The cord method is a similar method to the laser, except that the laser is replaced by a cord.
- The plumb line test does not require special equipment and is suitable if there are too many obstacles along the frame that interfere with the measurement and are difficult to dismantle. The method uses a plumb bob to mark points on the workshop floor and a string to connect these points. Symmetrical points are selected on the bottom of the frame beams. A plumb line is lowered from the outside of the symmetrical points to make chalk marks on the floor. The dots are connected. All diagonals should intersect the center line if the frame is level. The tolerance for each test depends on the frame size, but 6mm is generally considered the maximum.
Welding a car body with an electrode
Welding of body elements (bodywork) with electrodes is chosen when there are no high demands on the aesthetics of the seams. To create a strong connection, it is necessary to correctly select the type of electrodes in accordance with the grade of steel. It is better to use an inverter for welding, as it has no problems with igniting and maintaining the arc. Therefore, the quality of seams depends little on the level of skill.
To avoid temperature deformations, you need to cook the car body in stages:
- first tack;
- then overlay stitches 2 cm long at intervals of 6 cm;
- final welding of the perimeter.
Between stages, breaks are taken, waiting for complete cooling. When welding thick metal, it may take several hours. Forced cooling is unacceptable, as it causes metal deformation.
Possible problems
Body welding work is not always carried out without associated problems. Even experienced service workers can have difficulties. The list of the most common problems includes:
- Incorrect current selection. Occurs if the current supply rate exceeds the norm. For this reason, burns appear, which can only be restored by overcooking.
- Problems with the feeding mechanism. Occur if the wire has not been secured correctly. Semi-automatic welding in normal condition is carried out with a sliding wire. If it breaks, a mistake was made.
- Insufficient gas flow. Occurs if the gas supply was configured with an error. The problem is eliminated in the gearbox of cars.
To minimize the risk of problems, equipment functionality is checked before welding.
How to treat the body after welding
After completing the repair, it is necessary to clean the welding seams from slag, since the metal underneath quickly oxidizes. In areas hidden from view, a metal brush is sufficient. In open areas, the body is processed after welding using a grinder with a grinding wheel or a flap attachment. To clean hard-to-reach seams, use a grinding machine with a burr.
Cleaned surfaces are degreased with acetone or gasoline, then treated with an anti-corrosion compound or acid primer. Epoxy putty is used to protect against corrosion. Thanks to its dense structure, it reliably protects the metal surface from contact with moisture and air and is used as a leveling layer.
After applying a thin first layer, it is left to dry for a day. You cannot use a hairdryer to speed it up, because after the top layer dries, the putty inside will remain damp, since the moisture has nowhere to evaporate. Scores are then applied to roughen the surface using 120-grit sandpaper. After applying 2 - 3 layers, preparations for painting are made.
Automotive seam sealant is used to protect seams that are invisible from the outside in easily accessible areas. If necessary, it is smoothed with a spatula and painted. The sealant is applied to hard-to-reach places using a pneumatic sprayer through a plastic tube.
After welding work, it is necessary to treat the body against corrosion
Rules for metal preparation
In order to obtain the highest quality welds, it is necessary to fulfill a number of conditions, namely:
reduce the humidity level in the room where the welding process will be performed to the minimum possible. This action is necessary in order to reduce the risk of electric shock to the person who will perform the work. In addition, a decrease in humidity will have a positive effect on the welding seam, since there is less risk of microscopic droplets of water getting into the seam with the formation of micro-sinks, which can subsequently lead to the destruction of the seam;
clean the metal to be welded. In this case, cleaning means the complete removal of paint and varnish coatings, the removal of corrosive formations and the removal of those body and other elements that can significantly complicate the welding process;
in some cases (especially with a large degree of corrosion damage) it is recommended to treat those edges where welding will take place with special primers
However, one should resort to this method of strengthening the metal very carefully, since excessive application of any coatings to the metal can lead to increased melting or burning of the metal.