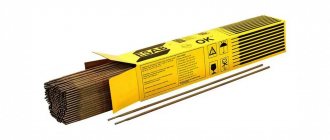
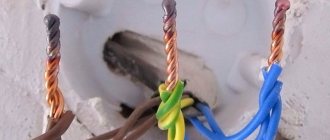
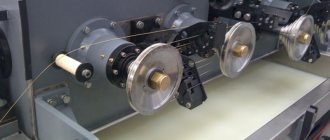
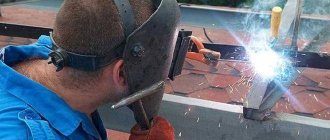
When installing electrical wiring, you often have to lengthen the wires and make a lot of strong connections that do not increase the resistance of the copper wires. A copper wire welder will help you quickly connect the ends. The technical characteristics of the cables do not change.
Amateurs do little welding of copper contacts. They can remake the welding inverter by replacing the electrode. Electricians connect copper wires all the time. It is beneficial for them to purchase a welding machine. Those who love tinkering will make a device from available materials. The created equipment will help you quickly weld wire.
Welding copper wires
Welding technology
Welding connects strands of copper wires. The operational characteristics of the cable do not change. The difficulty lies in the electrical and thermal conductivity of copper. It is difficult to heat it up in a short area. The copper welding machine has low current. The operating voltage of the equipment is from 12 – 14 V.
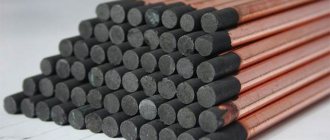
The welding process itself is highly productive and simple. A graphite electrode is used, connected to the “plus” and a clamp extending from the “minus”. Creating a wire connection takes little time.
- Strip the insulation and clean the ends on both wires to be connected approximately 100 mm.
- Make a tight twist.
- Trim the end so that both ends of the copper cores are in the same plane.
- Use pliers to tighten the twist, leaving the end 10 - 15 mm.
- Move the graphite electrode to the end of the wire for a second.
The first time, a rainbow droplet of molten copper may not form at the end of the twist. Welding should be repeated 2–4 times until a ball is formed.
You cannot keep the electrode pressed against the twist for a long time. Copper wires heat up quickly and transfer heat further. The insulation will begin to burn. It is necessary to cook in short touches up to a second in time.
After cooling, the exposed wires are insulated with heat shrink tubing or electrical tape.
Basic copper welding methods
To weld copper structures, it is necessary to comply with the requirements of copper welding technologies. The following welding methods are available for copper workpieces:
- inverter;
- semi-automatic;
- argon;
- gas;
- carbon electrodes.
Inverter
It is relatively simple to weld copper with an inverter, since it provides stable current and voltage parameters and can have a number of presets. It is also compact in size and light in weight.
The seam is formed in small sections, the length of which is from 30 to 40 mm. It is important to take breaks during work to prevent overheating of the metal with penetration and deformation. The angles of inclination of the electrode above the surface should be from 100 to 200.
Inverters generate constant voltage; it is permissible to connect wires in direct or reverse polarity. When welding, it is necessary to correctly set the parameters for current and voltage depending on the parameters of the workpieces.
Semi-automatic
To create long seams, it is recommended to weld copper semi-automatically. Due to the uniform feeding of the wire, a reliable, uniform connection is formed. To prevent the formation of pores, transverse vibrations of the wire or workpieces should not be allowed.
Semi-automatic welding of parts with a thickness of more than 6 mm is carried out only after removing the edge with a blunting of less than 4 mm. Typically, wire with a diameter of 2 mm is used. Recommended settings:
- voltage 30 V;
- welding current 300A;
- flux grade K-13 or AN26;
- wire type M1-3.
Semi-automatic welding machine
Argon
When welding in an argon protective atmosphere, tungsten wire is used, the power connection is in reverse polarity. Docking of thin structures is carried out without preheating.
The seam is formed from right to left, while the electrode is held at a right angle to the surface of the workpiece, and the rod - 150. The average gas consumption ranges from 7 to 18 l/min. The welding current is selected independently in the range of 80-500A.
Argon welding TIG mode
The TIG mode is used for automatic or semi-automatic welding. Advantages:
- small heating zone;
- eliminating the formation of defects in the structure;
- high speed of weld creation;
- simplicity of technology.
Gas welding
Gas welding is performed with a torch. The technology is quite complex to form high-quality, precise seams, so it is mainly used to join massive parts. The complexity of the process is the selection of the optimal gas flow:
- for workpieces with a thickness of up to 1 cm, the flow rate is up to 150 l/min;
- with a thickness of more than 1 cm, the flow rate should be increased to 200 l/min.
To ensure uniform heating of massive parts, the simultaneous use of two burners is allowed. To improve the quality of the seam, you need to use boron-containing fluxes.
The composition of the filler wire must be identical to the composition of the structures being welded. In the absence of complete analogues, you need to choose the closest one.
Carbon electrode
The process of welding with carbon electrodes is universal, since it is possible to ignite an arc between two electrodes, a workpiece and an electrode, an electrode and a mass. The technology is similar to the torch welding process.
BrKMts3-1 brand wire is used. Current and voltage parameters are selected depending on the technical features of the structures and their composition.
Carbon electrodes for welding
Carbon electrode inverter
Welding copper with carbon electrodes requires skills in carrying out such work. The features of the process are as follows:
- the inclination of the electrode above the workpiece surface is no more than 300;
- range of welding currents from 35 to 130 A.
Advantages of the method
The device for welding copper strands is convenient. Its advantages:
- high performance;
- technical specifications are preserved;
- the connection does not require additional parts;
- welding produces a strong connection.
When twisted and connected through terminals and busbars, copper gradually oxidizes. Contacts have to be cleaned periodically. Soldering increases resistance and the contact area heats up. Welding leaves a uniform structure of copper wires.
The complete process of welding copper wires, from stripping to cooling, takes 2–3 minutes.
Features of copper welding
Features of welding copper structures:
- heated metal reacts with oxygen and forms a refractory oxide film, so it is necessary to use various methods to counteract the occurrence of such a reaction;
- copper has a high coefficient of thermal expansion, 1.5 times higher than that for steel alloys, therefore, after cooling, the deposited metal is subject to significant shrinkage;
- in direct contact with oxygen, molten copper absorbs oxygen and hydrogen, which leads to the formation of a heterogeneous brittle phase with pores and defects;
- due to good thermal conductivity, copper structures quickly heat up and cool down, which negatively affects the mechanical properties of the weld;
- high fluidity complicates the process of welding massive parts - it is impossible to ensure complete fusion on one side of the structure, as well as to create a vertical or ceiling seam;
- When the heating temperature increases above +2000C, the plastic and strength characteristics decrease and are completely lost by +5500C.
The influence of impurities on the weldability of copper
Impurities in copper negatively affect its properties, as they can lead to embrittlement, reduced ductility, and the creation of internal defects. When welding, the material may contain phases with a melting point different from pure metal, which increases the complexity of welding work.
Impurities are almost always present in pure metal, so in fact, welding of alloys is necessarily carried out in a protective atmosphere or using fluxes. It is important to use additives based on aluminum, manganese, and silicon. They will allow you to obtain a homogeneous structure and achieve the necessary technical characteristics of the weld.
Requirements for a homemade welding device
An electrician constantly repairs electrical wiring. Purchasing special equipment is worth it. An amateur, he does renovations in his own house occasionally. It is more convenient for him to use a welding inverter with a current of up to 100A, or to make a device with his own hands.
A homemade welding machine must meet the following requirements:
- have a clamp;
- work from a 220V network;
- transformer power from 600W;
- withstand short-term overloads;
- the electrode is firmly fixed in the handle;
- adjust to the operating modes of welding copper wires;
- It is advisable to have a push-button switch on the holder.
The main requirement for a welding machine is safe operation. All contacts must be insulated. Before connecting to the network, the equipment must be connected to ground.
The twist is not easy to accurately bring to the electrode and press for the required time. For novice specialists, it will be easier to cook if you press the end of the connected wires and turn on the current by pressing a button.
Assembling the device yourself
What you need to pay attention to when choosing a welding machine
It is best to select a suitable device based on the required functional features. Therefore, you need to focus, first of all, on the following characteristics:
- household or professional device . A specialized welding machine costs much more than a compact household welding machine, whose resource is tens of times less.
- Is specialized equipment required ? The inverter welding machine is universal. Using classic electrodes, you can weld or cut carbon steel, and using copper-carbon electrodes, you can solder strands of copper cables. If highly specialized work is not required in non-trivial conditions (which require increased ergonomics from the equipment), then it is recommended to purchase a modern version of an inverter welding machine.
- power . If the arrays of materials that are supposed to be welded are large and the machine is supposed to be used frequently, it is advisable to buy powerful equipment (for example, 10 or 12 kW). However, for common household purposes, 4-5 kW will be sufficient.
- additional functions . It’s good if the welding machine has a “hot start” option, protection against electrode sticking, and smoothing out power supply fluctuations. In addition, especially for inverter devices, it is extremely important to have the ability to regulate the current strength. Important parameters are the compact size and the presence of a reversible belt. The modern welding process has become much more efficient, and in connection with this, the device must be easy to handle and light in weight.
How to choose a device?
Apparatuses for welding copper strands are included in the household network. They supply a direct current of 12–36V to the electrode.
The length of cables with pliers and a holder at the ends should be within 3 - 4 m. It is difficult to work with short wires and the welder’s movements are limited. Long ones have high resistance, the current value decreases.
The connected ends are in different places. The electrician constantly moves around the room. A long cable from the power source to the equipment and a compact device hanging on the shoulder greatly simplify the process of moving from one point to another.
general characteristics
The base of any wire is a metal core, which can be monolithic or twisted from wires. For internal wiring, a core consisting of copper or aluminum is used.
At the same time, copper wires are more technologically advanced, more resistant to corrosion, and less brittle than aluminum wires.
Copper is a capricious and difficult metal to work with; its melting point is 1085 degrees Celsius. When heated to 300 degrees, it will become brittle.
If we talk about welding work on copper parts, they can be done with both direct and alternating current. When manually arc welding twists, there is a possibility that the metal will be coated with alloying particles.
The properties of Cuprum allow the use of affordable inverters with simple functionality. After all, to create strong twists on the wires, the voltage is selected, which is 12-36 Volts.
Device for welding from improvised means
You can make a simple welding machine yourself. Most often, a broken microwave is used, in which the primary winding of the magnetron remains working.
- Cut the secondary winding and remove it.
- Wind a new one with a wire with a cross-section of 6 mm2, you need to lay at least 16 turns, more is better. The output current will be 14 - 18A. It is optimal for welding wires with your own hands.
- Connect a multi-core copper cable with a cross-section of 10 - 12 mm2 from the device to the handbrake.
- Insert a graphite electrode into the copper tube on one side and weld the cable to the other end.
- Use pliers instead of a clamp. Attach the wire from the “plus” to one handle.
- Connect the wires to the microwave outputs on the back wall.
Before fixing the graphite electrode, the copper tube is given the appropriate shape and a longitudinal cut is made for fixation.
By making your own welding machine, you can save on purchasing an electrode. It is a massive piece of graphite. You can replace it with a brush from an electric motor. Contacts from trolleybus rod pantographs are best suited. They are easy to find at final stops, where drivers constantly change brushes and throw away old ones. For convenience, recesses are made in the graphite electrode into which the end of the twist is inserted.
do-it-yourself twist welding machine requires a holder . It is made from a piece of wood. A file handle is suitable. A hole for the cable is drilled along the axis. Everything is well insulated. Experts recommend a holder for cored wire welding. It has a wide opening and a socket for connecting a cable.
A broken microwave is not always at hand. Electricians can easily calculate and make both windings themselves and select the right rectifier. The assembled apparatus will speed up their work on site.
Advantages and disadvantages of wire welding machine
- the device cooks quite well, the voltage is enough to ignite the arc and the transformer does not heat up from the microwave, but if you have a larger trans, it is better to wind the secondary winding with a 10 sq. mm wire.
- The device turned out to be very compact, although I won’t say that it is light, because... A microwave transformer usually weighs 3-5 kg
- The device lacks a switch, because It is difficult to immediately hit a hole in graphite with a twist. It would be more convenient to first insert the twist into the hole and then turn on the welding, it would be better to place the button on the graphite terminal holder, I think I will implement this in the future...
Tools and accessories
Soldering, like any other technical process, involves the use of certain tools and accessories. You will need a few tools: a soldering iron, a knife, pliers, a file, sandpaper. There are even fewer accessories - soldering flux and alcohol or gasoline are enough. Nevertheless, all of these are important components of the process and the choice of both must be taken extremely seriously. Both the mechanical and electrical reliability of the soldered joint will depend on the quality of the soldering iron and the availability of the necessary accessories.
Soldering with crucible and torch
For large volumes of work, it makes sense to perform them using a crucible, which is a hollow metal cylinder with a handle filled with molten solder. The crucible can be used as an attachment to a powerful soldering iron or heated using a gas burner (Figure 6).
Figure 6. Electric and gas crucibles for soldering wires
The large volume of metal in the crucible does not allow it to cool quickly, so a heated crucible can solder several strands in succession. The main advantage of this soldering method is that tinning and soldering of the twist occurs almost instantly when the flux-coated conductors are completely lowered into the solder bath.
Solder selection
Choosing the right solder for soldering twists is the most crucial moment. The final result depends on the solder. In the process of using different brands of solder, I tried to identify a pattern between the quality of soldering and the percentage of tin. However, such a relationship could not be found.
The only thing that can be said with complete confidence is that the solder must have flux inside. This is not surprising: the soldering method does not require the application of flux to the twists, but flux is necessary.
It is most convenient to use solder in a wire 1mm or so thick. It is sold in spools or plastic tubes.
By and large, you will have to choose solder by trial and error; I don’t see any other method. Well, here are a few examples of solders from several manufacturers:
This solder is well suited for soldering twists. And it’s better not to take the one below - it solders thin strands of 2 wires 1.5 mm² well, but it will only ruin thicker strands.
Here's another pretty good REXANT solder:
When choosing solder for the first time, the best option would be to buy a small tube for testing. Well, remember which of the purchased brands soldered well and which ones poorly. Actually, this is such a simple science.
In addition to solder, it is good to have a cleaner on hand - regular alcohol. Many copper strands, even new ones, are covered with layers of oxides or other deposits that make soldering difficult.
A good cleaner option is TAGS flux - it perfectly cleans the surface of copper conductors and in addition helps the soldering process.
Carbon welding at home
It is quite difficult to make the device yourself. An inexpensive inverter offered on the construction market will allow you to weld copper at home. The model range offers distinctive characteristics of power and output voltage of the variety; this condition allows you to choose a device that suits your pocket.
When welding small copper parts, a low power inverter is sufficient. The connection is made from the home network; modern devices do not put increased loads on household wiring.
The most affordable graphite devices allow you to connect wiring and repair a damaged car radiator at home.
Where can it be applied?
If you acquire a machine specifically for welding twists, it, of course, can be used in other areas. The range of work will expand from welding wires in distribution boxes, panels and cabinets to repairing electrical appliances and household equipment.
Don't forget about safety precautions. Even if at first glance it seems that the device is simple, this does not mean that it is safe. To avoid getting burns during welding, all work should be done in a special protective mask and gloves.
In addition, make sure that the devices you are repairing are de-energized.
Soldering process with an electric soldering iron
The entire technology of soldering wires with a soldering iron can be divided into several successive stages. All of them are repeated in a certain sequence:
- Training of conductors. When soldering wires, they are freed from insulation. After this, the oxide film is removed from them mechanically. You can use a small piece of fine-grit sandpaper. The metal should shine and be light.
- Tinning. Heat the soldering iron to the melting temperature of the rosin (it begins to actively melt when touched). Take a conductor, bring it to a piece of rosin, heat it with a soldering iron so that the entire stripped part of the wire is immersed in rosin. Then take a drop of solder onto the soldering iron tip and spread it over the treated part of the conductor. The solder spreads quickly, covering the wire with a thin layer. To make it distributed faster and more evenly, the wire is turned slightly. After tinning, copper conductors lose their redness and become silvery. This is how all wires that need to be soldered are processed.
Tinning wire - The tinned conductors are folded together, straightening them with your fingers so that they fit snugly against each other. If the soldering needs to be long, you can twist it. Holding the conductors, take solder onto the tip, press it to the soldering site, applying some force. At the same time, the soldering area heats up, the rosin begins to boil, and the solder spreads. When it covers the entire area and flows between the conductors, we can consider that soldering the conductors with a soldering iron is completed. They are held motionless for some time - until the solder cools down (to speed up the process, they blow on this place).
That's all. In the same way, you can solder two or more wires, you can solder a wire to some contact pad (for example, when soldering headphones, you can solder the wire to a plug or to a pad on a headphone), etc.
After you have finished soldering the wires with a soldering iron and they have cooled down, the connection must be insulated. You can wrap electrical tape, put it on, and then heat up the heat shrink tube. When it comes to electrical wiring, it is usually recommended to first screw on a few turns of electrical tape, and then put a heat-shrinkable tube on top, which is heated.
Differences in technology when using flux
If active flux is used rather than rosin, the tinning process changes. The cleaned conductor is lubricated with the compound, and then heated with a soldering iron with a small amount of solder. Further everything is as described.
Soldering twists with flux - faster and easier
There are also differences when soldering twists with flux. In this case, you can not tin each wire, but twist it, then treat it with flux and immediately start soldering. The conductors don’t even need to be cleaned—the active compounds corrode the oxide film. But instead, you will have to wipe the soldering areas with alcohol to wash away the remnants of chemically aggressive substances.
Features of soldering stranded wires
The soldering technology described above is suitable for monocores. If the wire is multi-core, there are nuances: before tinning, the wires are untwisted so that everything can be dipped in rosin. When applying solder, you need to make sure that each wire is covered with a thin layer of solder. After cooling, the wires are twisted into one bundle again, then you can solder with a soldering iron as described above - dipping the tip into solder, heating the soldering area and applying tin.
When tinning, multi-core wires must be “fluffed”
Is it possible to solder copper wire to aluminum
Aluminum cannot be combined directly with other chemically active metals. Since copper is a chemically active material, copper and aluminum are not joined or soldered. The point is too different thermal conductivity and different current conductivity. When current passes, aluminum heats up more and expands more. Copper heats up and expands much less. Constant expansion/constriction to varying degrees leads to the fact that even the best contact is broken, a non-conducting film is formed, and everything stops working. That's why copper and aluminum are not soldered.
If there is such a need to connect copper and aluminum conductors, make a bolted connection. Take a bolt with a suitable nut and three washers. At the ends of the connected wires, rings are formed according to the size of the bolt. Take a bolt, put on one washer, then a conductor, another washer - the next conductor, a third washer on top and secure everything with a nut.
Aluminum and copper conductors cannot be soldered
There are several other ways to connect aluminum and copper lines, but soldering is not one of them. You can read about other methods here, but bolted is the simplest and most reliable.

