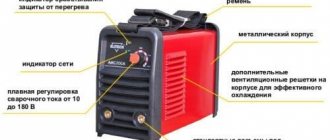
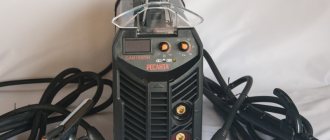
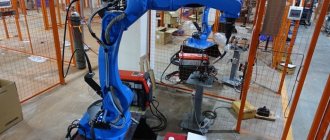
It is well known that the repair of welding machines in the vast majority of cases can be organized and carried out independently. The only exception is the restoration of the electronic inverter, the complexity of the circuitry of which does not allow for a full repair at home.
Just trying to disable the inverter protection can baffle even an electrical specialist. So in this case, it is best to seek help from a specialized workshop.
Frequent malfunctions
The main manifestations of problems with electric arc welding machines are:
- the device does not turn on when connected to the mains and started;
- sticking of the electrode with a simultaneous hum in the area of the converter;
- spontaneous shutdown of the welding machine in case of overheating.
Repairs always begin with an inspection of the welding machine and checking the supply voltage. Repairing transformer welding machines is not difficult, and they are not picky about maintenance. With inverter devices, it is more difficult to determine a breakdown, and repairs at home are often impossible.
However, if handled properly, inverters last a long time and do not break down. It is necessary to protect from dust, high humidity, frost, and store in a dry place. There are the most typical malfunctions of welding machines that you can fix yourself.
Rules for caring for semi-automatic welding machines
Welding machine maintenance
Even the highest quality and reliable equipment can fail as a result of improper use or improper care. All this fully applies to the welding machine, as well as the main welding components - cables, torches, electrode holders, wire feeders, etc. Timely and regular maintenance will not require significant time and financial costs, but may well eliminate them, because in this case, the welding equipment will almost certainly work longer than the service life established by the manufacturer.
The main rule that must be observed when servicing any electrical unit is that it must be completely de-energized. In this case, it is not enough to turn off the power button on the device (if there is one). Be sure to remove the plug from the socket.
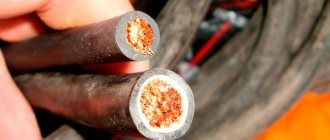
Direct maintenance of the welding machine should begin with an inspection of the plug and power cable. The contact surfaces must be clean and the insulation undamaged. Plaque, carbon deposits and rust should be removed using sandpaper or a stiff brush. Restore damaged insulation by checking the condition of the wires, and if necessary, replace the power cable or plug. The welding and return cables are checked in the same way. In this case, pay special attention to the connecting terminals and plugs.
After that, you can deal with the source. The housings of modern high-quality welding machines are quite sealed, but almost all of them are equipped with an air cooling system. The air at the welding site is usually difficult to call clean. As a result, sooner or later dust, metal filings and other small debris accumulate inside the device. It can be removed by removing the casing and blowing out the internal surfaces with a compressor. Caked dust can be carefully removed with a brush or soft bristle brush.
If the cooling system is equipped with a filter element, you can look inside the case less often, but you need to check the condition of the filter more often and change it periodically. Otherwise, as with excessive dust on the internal elements of the device, the cooling efficiency decreases and the source overheats. In addition, compressed dust can accumulate moisture, which can result in a short circuit. As a result, all this usually leads to premature failure of electronic components.
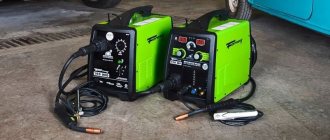
In the case of servicing a semi-automatic welding machine, the wire feed mechanism also needs to be cleaned of dust and metal filings formed when the wire is pulled through the rollers. Usually, to gain access there is no need to even partially disassemble the device - for the convenience of replacing the coil, the compartment is equipped with an opening door.
If you use a welding torch in your work, you need to frequently check the condition of the nozzle, which sooner or later becomes clogged with drops of the melt formed during welding. This may eventually cause it to fuse to the center electrode. To prevent this, it is necessary to use special sprays and ointments that prevent the formation of plaque, and also systematically clean the nozzle mechanically using a file or needle file. It is advisable to do this every time after welding is completed.
In cases where serious damage to components or welding equipment is discovered during maintenance, it is better to replace them. Their further use will significantly deteriorate the quality of welding and is also unsafe.
The device does not start
In this case, first of all, you need to make sure that there is voltage in the network and the integrity of the fuses installed in the transformer windings. If they are in good condition, you should use a tester to ring the current windings and each of the rectifier diodes, thereby checking their performance.
If one of the current windings breaks, it will need to be rewinded, and if both are faulty, it is easier to replace the entire transformer. The damaged or “suspicious” diode is replaced with a new one. After repair, the welding machine is turned on again and checked for serviceability.
Sometimes the filter capacitor fails. In this case, the repair will consist of checking it and replacing it with a new part.
If all elements of the circuit are in working order, it is necessary to deal with the mains voltage, which can be greatly underestimated and is simply not enough for the normal functioning of the welding machine.
Electrode sticking (arc interruption)
The cause of electrode sticking and arc interruption may be a decrease in voltage due to a short circuit in the transformer windings, faulty diodes or loose connecting contacts. A breakdown of the capacitor filter or short circuit of individual parts to the body of the welding machine is also possible.
Organizational reasons due to which the machine does not weld as it should include the excessive length of welding wires (more than 30 meters).
If sticking is accompanied by a strong hum from the transformer, this also indicates an overload in the load circuits of the device or a short circuit in the welding wires.
One of the repair options to eliminate these effects could be restoring the insulation of connecting cables, as well as tightening loose contacts and terminal blocks.
Spontaneous shutdown
In some cases, repairs can be carried out independently if the device begins to turn off spontaneously. Most models of welding machines are equipped with a protective circuit (automatic) that is triggered in a critical situation, accompanied by a deviation from normal operation. One of the options for such protection involves blocking the operation of the device when the ventilation module is turned off.
After spontaneous shutdown of the welding machine, first of all, you should check the state of the protection and try to return this element to working condition.
If the protective unit is triggered again, it is necessary to proceed to troubleshooting using one of the methods described above related to short circuits or malfunctions of individual parts.
In this situation, first of all, you should make sure that the cooling unit of the unit is working normally and that overheating of the internal spaces is excluded.
It also happens that the cooling unit does not cope with its functions due to the fact that the welding machine was under a load for a long time that exceeded the permissible norm. The only correct solution in this case is to let it “rest” for about 30-40 minutes, and then try to turn it on again.
In the absence of internal protection, a circuit breaker can be installed in the electrical panel. To maintain normal functioning of the welding unit, its settings must correspond to the selected modes.
Thus, some models of such devices (welding inverter, in particular), in accordance with the instructions, must work according to a schedule that requires a break of 3-4 minutes after 7-8 minutes of continuous welding.
Rules for warranty repair of welding equipment:
Warranty repairs are carried out when:
- The occurrence of a malfunction due to the fault of the manufacturer.
- The presence of a passport, a mark on the date of sale, the stamp of the “Northern Electrical Engineering Company” and the signature of a warehouse employee.
- Availability of a completed warranty card from the trade organization that sold the product.
- A fully completed Certificate of Malfunctions and Defects of the Product by the buyer with signatures of the officials of the organization responsible for its operation.
Paid repairs are carried out when:
- If a malfunction occurs due to the fault of the Buyer.
- Violation by the buyer of the operating, transportation and storage conditions specified in the passport or instructions.
- The presence of mechanical damage to the equipment, foreign objects and traces of liquid inside the case, the presence of signs of opening, self-repair, changes in electrical installation, design, replacement of product elements, etc.
- Violation of integrity or absence of seals.
The diagnostic period takes from 1 to 5 working days, depending on the type of product.
ATTENTION!
The equipment is accepted for diagnostics in a form free from dust and dirt. The repair period is determined by the complexity of the repair, the availability of parts and components. The warranty period for the operation of the equipment corresponds to that specified in the passport.
Repair of welding equipment is carried out at the address: Moscow, Baikalskaya street, building 7.
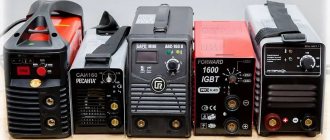
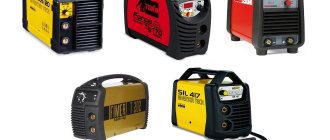
We accept for repair almost all types of welding equipment presented on the Russian market:
- Fast and Furious (Russia)
- Don (Russia)
- Telwin Tecnica (Telwin 164 and others, (Italy);
- Blueweld (Blueweld 164 and others, (Italy);
- Fubag (in 160, 170, etc. (Germany)
- Helper (Helper 210 and others. Italy).
- Resanta (Resanta 190, 220, 250 Latvia)
- Torus (Torus 200 and others. Russia)
- GYS (Gys 161, 165, 195, etc. France)
- AWI
- FoxWeld
- Brima
- SVARIS
- SKAT
- PROS
- Plasma
- Summer resident
- Rainbow
- Selco
- Inverter
- Invermig
- other foreign and domestic manufacturers of welding equipment
Malfunctions of inverter devices
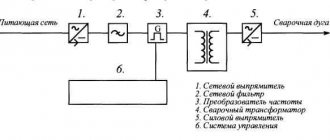
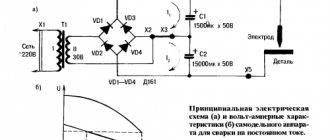
Before repairing an inverter welding machine with your own hands, it is advisable to familiarize yourself with the principle of operation, as well as its electronic circuit. Knowing them will allow you to quickly identify the causes of breakdowns and try to eliminate them in a timely manner.
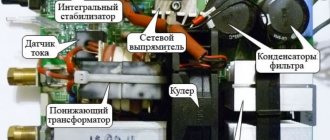
Electrical diagram
The operation of this device is based on the principle of double conversion of the input voltage and obtaining a direct welding current at the output by rectifying the high-frequency signal.
The use of an intermediate high-frequency signal makes it possible to obtain a compact pulse device that has the ability to effectively regulate the output current.
Failures of all welding inverters can be divided into the following types:
- malfunctions associated with errors in choosing the welding mode;
- operational failures caused by failure of the electronic (converter) module or other parts of the device.
The method for identifying inverter malfunctions associated with disturbances in the operation of the circuit involves sequential execution of operations carried out according to the principle “from simple damage to more complex damage.” The nature and cause of breakdowns, as well as repair methods, can be found in more detail in the summary table.
It also provides data on the main welding parameters, ensuring trouble-free (without turning off the inverter) operation of the device.
Features of operation
Maintenance and repair of inverter-type welding machines differs in a number of features related to the complexity of the circuitry of these electronic units. Repairing them will require certain knowledge, as well as the ability to handle measuring instruments such as a digital multimeter, oscilloscope and the like.
In the process of repairing an electronic circuit, a visual inspection of the circuit boards is first carried out in order to identify burnt or “suspicious” elements within individual functional modules.
If during the inspection no violations can be detected, the troubleshooting continues by identifying violations in the operation of the electronic circuit (checking voltage levels and the presence of a signal at its control points).
To do this, you will need an oscilloscope and a multimeter, which you should start working with only if you have complete confidence in your abilities. If you have any doubts about your qualifications, the only right decision is to take (take) the device to a specialized workshop.
Specialists in the repair of complex pulse devices will quickly find and eliminate the malfunction, and at the same time carry out maintenance of this unit.
How to clean a gas burner nozzle
It is necessary to clean the gas burner nozzle more often than the feed mechanism and power element of the semi-automatic welding machine. This is due to the fact that during welding, a large number of molten metal particles settle directly in the nozzle itself, which, after complete cooling, form a strong, hard crust. As a result of this, when a large number of molten metal particles accumulate, the gas nozzle may stick directly to the copper tip itself.
To clean the nozzle, you must first remove it directly from the gas burner itself. Then you need to take a rounded file and use it to remove the metal crust that has accumulated on the surface of the nozzle. To perform this work, it is recommended to use files with large notches. After removing the crust, the parts of the cleaned burner can be treated with a special liquid that prevents splashes from accumulating on the surface of the nozzle.
To improve the welding quality of a semiautomatic welding machine, it is necessary to constantly clean its feed mechanism, power elements, and the torch nozzle from contamination. At the same time, many experts, in order to improve the quality of welding, recommend cleaning the gas burner nozzle each time before using the welder.
