Metal window grilles can increasingly be seen both on the windows of the first floors in urban high-rise buildings and private households.
Property owners, when deciding to install metal bars on their windows, are primarily guided by the safety factor of their home.
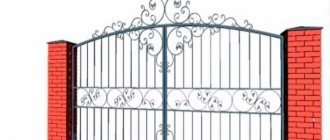
Recently, such a protective structure with forged parts has become a façade decoration for any building. In fact, the price for a beautiful wrought iron grille is quite high, but a home craftsman can save a lot on installation costs by installing it himself.
Is it possible to bet?
Almost all types of windows allow the installation of protective metal grilles over them. However, when planning such work, you need to take into account the design of the window, the material of the frame and the type of sash: pivoting, tilting and tilting. This is important in order to properly secure the structure without damaging the frame material, and also so that after installation you can fully use the window.
The main types of metal grilles that can be installed on windows:
- Deaf, rigidly fixed to the wall . Advantages: the most reliable in terms of protection, easy to install and has a low cost of production and installation. Disadvantages - does not allow installation on swing doors that open outward and are prohibited in houses with one fire escape exit.
- Hinged, opens outwards with built-in lock . Advantages: the most popular, good functionality, can be opened remotely, does not interfere with the operation of the window, provides the highest degree of protection. Disadvantages: more expensive to manufacture and install, require the installation of locks.
- Sliding with a shutter mechanism that can open inside the room . Advantages: good functionality, does not interfere with the operation of window sashes. Disadvantages: less durable, complex and expensive to manufacture, not for self-installation.
In addition to external grilles, there are also internal ones, which are located between wooden frames and installed indoors.
Window designs and building types
Since the design for all types of metal grilles is the same, they can be used for any model of window systems . This is explained by the fact that a window grille consists of a main element - a frame, onto which protective rods are attached in a certain order and which is firmly fixed to the walls near the window opening.
Important ! The protective grille is never fixed to the window frame.
Considering that the wall material of buildings is different, the methods of fastening such a structure differ from each other:
- Wooden walls . Through holes for installing mounting bolts of the required diameter are drilled in the wall next to the window. From inside the room, a metal “heel” in the form of a square 5 cm larger than the diameter of the mounted bolt is welded to the bolt, which will not make it possible to pull the grille out of the wall. If it is impossible to weld the “heel,” a hole is made in it, inserted into the mounting bolt and secured with a regular nut.
- Brick and block walls . 15 mm holes are drilled through, into which iron pins are inserted with access to the street up to 3 cm. On the inside, the pins are fixed with a “heel”. The gaps between the wall and the rod are sealed with cement mortar, and the base of the structure is welded to the outside of the pins.
- Cinder block walls are weaker, so it is not recommended for them to install heavy forged gratings, which can be torn out along with a piece of the wall. It is also important to correctly calculate the number of fasteners. For the bottom and top there are 2 elements each, for the sides - from 3 to 4 elements.
Two-frame grille
Tools such as those listed above, as for wood finishing, you will need:
- bars with a section of 45x20 mm;
- slats 10x20, 20x20 and 30x20 - they are needed for internal filling. The thickness of the bar determines the massiveness of the lattice, which means its ability to serve as a stiffener;
- a block for edging around the perimeter, its thickness depends on the thickness of the slats that are used to make the lattice.
Frame assembly
The first thing you need to do is assemble the frame; it is often rectangular. To connect frame components to each other, you can use different connection methods: “tenon and groove”, “miter”, dowels or PVA, even just self-tapping screws
Popular articles Forcing hyacinths by March 8
Rectangular grille made of two frames
Filling
The frames are filled with slats in a mirror image, since they will overlap one another.
After filling, the wooden lattice for the gazebo is trimmed around the perimeter of the frame if there are protruding elements. You can fill the slats with nails, and it is better to use galvanized nails; they will not rust on the street, which means they will not spoil the appearance of the frame.
Using mirror elements when creating the top trellis of a gazebo
Technical characteristics: weight per m2 and others
The characteristics of the gratings must correspond to their main purpose, performing security and decorative functions and at the same time correspond in weight to the wall material.
Therefore, such metal structures must have strength, reliability, wear resistance, durability and not violate the rules of industrial safety at the site .
Based on weight, the gratings are grouped:
- Lightweight, without frame and decorative elements up to 10 kg/m2.
- Medium-heavy, blind or hinged design made from rods and a corner as a frame, without decorative elements, up to 18 kg/m2.
- Heavy, sliding or swing type, forged decor up to 25 kg/m2.
- Extra-heavy, complex forged structures with several doors and a huge number of decorating elements, over 25 kg/m2.
Important ! Extra heavy metal gratings are not allowed on wood or cinder block walls. Its weight can be determined independently, taking into account the class of metal, D of rods, and frame design.
The maximum distance between the vertical bars should not be higher than 15 cm, and the frame should be attached to anchors embedded in the wall at least 150 mm or to iron embedded elements.
Facade installation
Aluminum and plastic ventilation grilles are easily installed on the facade using self-tapping screws.
An additional fastening system may be required to install steel members. To decorate a wall covered with siding, it is better to use plastic ventilation grilles. Choosing the right ventilation grill means creating a high-quality and efficient air exchange system. The main thing to remember is that for installation outdoors it is better to give preference to aluminum or steel models, and for installation inside a building - plastic ones.
This is the house that you built. We provided it with all the necessary amenities, equipped it with appliances and, of course, like every modern residential building, it also has a ventilation system. And when installing it, it is mandatory that workers or you yourself install special ventilation grilles. Some people think that these duct parts are just for looks, but in reality they serve quite a few functions.
External metal façade ventilation grilles
What metal alloys are used and why?
For the production of metal window grilles, ordinary, special and reinforcing steel is used . The most effective special steel, but it is usually not used for residential buildings, for the reason that it is an expensive material. It is used more for objects with an increased security system: banks, jewelry stores and commercial enterprises.
Characteristics of materials for window grilles:
- Round steel rods are made of forged steel; they lend themselves well to forging; you can make twisted patterns. It is important to choose rods with a thickness of more than 2 cm so that they cannot be cut through with hydraulic shears.
- Reinforcing bars are stronger than steel and can be used with a thickness greater than 1.4 cm. Their only drawback is that it is impossible to make curved elements from them; the product can only have clear straight sections.
- Special steel is the most durable material, not inferior to reinforcing steel, but at the same time twisted parts can be easily made from it. To crack such a grid, you will need a plasma cutter.
- A square with a side of 1.2 to 1.6 cm. Very durable and attractive rolled metal.
- The strip is 0.8 cm thick, 2.2 cm wide, less durable than square and rod, but has a lower cost and is used in budget protection options.
External façade ventilation grilles description and purpose
The ventilation grille is a frame of square, rectangular or round shape. To protect against precipitation entering the channel, movable or fixed blinds are provided. On the inside there is a fine-mesh mesh that prevents the entry of insects and rodents. The manufacturing method is regulated by GOST 13448-82 “Ventilation grilles”.
The size depends on the installation location. For private houses 150x150 go 200x200 mm. There are manufacturers who produce gratings 6000x6000 mm. They are used to protect ventilation ducts of public buildings with artificial supply and exhaust ventilation. The grille is fixed to the ventilation duct with four self-tapping screws.
Varieties
All metal window grilles are classified into two large groups - stationary and removable , which differ from each other and have different advantages and installation tolerances.
Most of the installed grilles in the housing stock are stationary, which are permanently installed once and for all.
They perfectly handle the protection function and can be solid, hinged and sliding, both simple and forged with a complex shape.
Advantages of stationary metal window structures:
- the highest level of protection against illegal entry into the facility;
- ease of installation process;
- affordable manufacturing process for home production;
- low prices for installation and production, with inexpensive components;
- a huge number of options and a high degree of external design.
Minuses:
- installation restrictions due to fire safety conditions;
- inconvenience of servicing the window structure, especially for blind options;
- low maintainability; in case of failure of some elements, the grille will need to be dismantled and replaced completely.
Removable models do not have the disadvantages of the first option; they are fastened to through studs and secured from the inside with nuts, which allow you to quickly dismantle the protective iron structure. Most often they are made solid, but can be sliding or swinging.
Advantages of removable window metal structures:
- high maintainability, the possibility of partial repair and replacement of damaged parts;
- accessibility for maintenance and repair of the window unit;
- ease of installation and dismantling in case of a fire hazard;
- low cost;
- a large number of external design options.
The disadvantages of this type of protective window grilles include a lower degree of protection and the possibility of dismantling by intruders.
Subtleties of choosing an external ventilation grille
How to install ventilation pipes on the roof
There are five criteria that you should rely on when choosing a particular model.
- Adjusting blinds. This will allow you to direct the air flow to certain rooms.
- Compliance with the façade. By color and shape.
- Live section coefficient. It represents the volume of air masses that the grille is capable of passing through. The optimal indicator is a value within unity.
- Availability of exact dimensions of the opening.
- The last criterion is rather a common mistake of inexperienced buyers. In addition to external grilles, you can find internal, ceiling and many others on sale. Therefore, if in doubt, it is better to contact a consultant.
If you need to install or replace a façade grille yourself, owners often prefer steel or aluminum models. How they differ and what advantages they have can be found out below.
Aluminum structures
Aluminum facade ventilation grilles are the most durable products. They have many advantages and high strength characteristics.
Advantages:
- Anti-corrosion properties.
- No loss of natural color over years of use.
- Resistance to mechanical damage.
- Resistant to sudden temperature changes.
- The service life is from 10 years or more, under favorable conditions - from 30-50 years.
- Fire safety.
Among the disadvantages, one can highlight the high price in comparison with plastic and iron counterparts.
Iron structures
Steel ventilation grilles are coated with a zinc layer for reliability. This provides protection against electrochemical and physical influences.
The abrasion of the zinc layer begins already in the first years of operation. Not many products last at least 10 years in good condition. At the same time, installing a steel structure is several times more difficult than an aluminum structure due to its greater weight.
Steel ventilation grilles
The advantages include high strength and resistance to mechanical stress.
Knowing the above tips, you can choose the right external ventilation grill and reliably protect the ventilation in your home for many years to come.
We also recommend watching:
- Why is ventilation needed in a room without windows?
- Steel panel heating radiators Kermi (Kermi)
- Which air heater to choose for supply ventilation?
- Steel panel radiators Purmo
Can I do it myself?
The process of producing metal window grilles is not complicated; if you have the necessary tools, a home craftsman can handle it on his own.
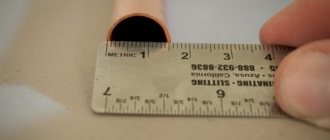
To do this, you will need to take accurate measurements of the technological opening , determine the fastenings, the type of structure and its appearance, and carefully make a sketch with dimensions.
In order for it to be strong, it will require stiffening ribs. It is quite possible to make them from profile corners.
What will it take?
First of all, you need to prepare a tool . Difficulties for many performers will arise when making forged products, so it’s easier to order them online, it will be much cheaper than making a completely forged lattice. In addition, you will also need a steel rod, preferably square, at least 12 mm, a corner for the frame and fasteners.
Equipment and accessories for the manufacture of metal window grilles:
- A table with a metal tabletop made of 5 mm metal, preferably larger in size than the window opening.
- Vise for fixing parts.
- A bending machine can be made primitively from a pipe D=100 mm, which is fixed on a concrete surface, with a welded pipe with a hook for bending the rod. With this machine you can make a variety of spirals.
- Welding machine.
- Bulgarian woman with various circles.
- Electric drill/hammer.
- Anvil and hammer for making forged parts.
- Forge/forge furnace for hot forging of parts.
- Blacksmith's tongs.
- Wrenches and adjustable wrenches.
- Measuring set: tape measure, ruler and corner.
- Files and brush for metal.
How to cook?
After all the tools and consumables have been collected and prepared, they begin to prepare the components of the structure .
They are cut out according to the drawings using a grinder. If the design is complex and has many decorative elements, they are bent on a special machine.
Technology for assembling a protective and decorative metal grille on a window:
- Welding of structural elements is carried out according to working drawings.
- For the best result and to ensure the quality of work, all elements are put together in the form of a puzzle on a table with a metal surface or on a platform made of non-flammable material.
- The frame is pre-welded. At the same time, it is important to ensure that there is no skew, checking for right angles and equal diagonals.
- When creating a frameless structure, in particularly stressed areas near the lock and steel hinges, reinforcement is carried out by additionally welding sections of iron strips in these places.
- After preparing the working components with a 45° cut, they are first welded using a spot method - tack welding, and only later using a continuous weld.
- Install the hinges and lock on the steel swing sash. They are welded in the opposite direction, as a result of which the structure will not be removable.
- The frame frame is filled with straight lintels and forged parts.
- The welded structure is carefully protected from scale and rust.
- Prime the grate and give it time to dry.
- Apply paint and varnish material intended for metal and external use.
Examples of making window grilles - step by step
Work on the manufacture of any grille begins with measurements of the window or window opening, depending on how it will be attached to its permanent location. Some versions of grilles are attached directly to the window frame, if it is wooden, others - to the walls of the window opening.
The window grille can be made on the basis of a metal frame or without it, and also have a complex intricate pattern or a completely simple one that does not play a decorative role. These two options will be discussed further.
An easy-to-use grille without an external metal frame
The first version of the window grille is made without a frame, only from reinforcing bars and steel strip. Such a model, if you have certain equipment, can be made independently, saving quite a decent amount. Simple, without complex forging and welding elements, the grille is perfect for installation on wooden windows of a country house. The vertical pieces are spaced far enough apart that they will not block the natural light entering the house through the window. However, such a distance between the bars will not be enough for an ill-wisher to penetrate between them.
Before you start manufacturing the product, you need to draw up a sketch of it, which will show not only the geometric pattern, but also the dimensions between all the elements of the lattice. In this case, the dimensions of the parts must be adjusted to the window frame.
So, the manufacturing process of such a lattice is carried out as follows:
| Illustration | Brief description of the operation performed |
| Illustration | Brief description of the operation performed |
| To work, you will need a metal strip 40 mm wide and 4 mm thick. Its total length will depend on the width of the window opening and the number of bars in the grille. In addition to the strip, you will need smooth reinforcement with a diameter of 14 mm - its length depends on the height of the window and the selected number of vertical elements. The third material that needs to be prepared will be a threaded rod with a diameter of 10÷12 mm. Each frame will require four pieces of stud, the length of which will depend on the thickness of the window block. If a grid of larger sizes is made, then more transverse strips are installed on it, and threaded rods are prepared according to their number, since two fasteners are required for each long strip. | |
| In this model, the master used two long metal strips, the size of which is 5 mm less than the width of the window opening. These strips become the horizontal basis of the grille - they are fixed in the upper and lower parts. The third strip can be installed in the middle part of the product and additionally connect all or only a few middle reinforcement rods together, giving the lattice special rigidity. In this model, an additional reinforcing bridge is welded in the center of the grille. | |
| The next step is processing the metal strips cut to the required length, since their edges on both sides will need to be rotated 90 degrees. To carry out this operation, the edge of the strip, approximately 100 ÷ 120 mm, is placed on a durable table with a metal table top and securely fastened - tightened with two clamps through a strong metal gasket strip, or clamped in a powerful vice. | |
| Then the free edge of the strip is grabbed with a powerful gas wrench and carefully turned 90 degrees. To perform this work, you will have to apply a certain force, and in order not to accidentally injure your hands, working with metal should always be carried out in construction gloves. | |
| Such manipulations must be performed on each side of the long metal strips prepared for the grid. When making such bends, which will then become mounting pads when attaching the finished grille, it is important to ensure that both sides are turned at the same angle and are in the same plane. | |
| The next step on the finished strips is to mark for drilling holes with a diameter 1÷2 mm larger than the diameter of the selected reinforcement bars. In this case, it is necessary to drill holes with a diameter of 15÷16 mm. It is best to perform such an operation using professional equipment. However, if there is none, then before perforating the centers are marked with a core, and then the metal part is placed on a reliable base that has a hole, over which drilling is done with an electric drill with a metal drill installed in it. Then the strip is moved and the next hole is made - and so on until all are done. | |
| The holes are usually located at the same distance from each other, as in the presented model. If it is intended to recreate a different geometry of the lattice, then the holes must be drilled according to a pre-developed sketch. | |
| This illustration shows the assembly of a grille, in which two transverse strips are provided for rigidity and reliability, and then a jumper insert will then be welded in the center. Reinforcing rods are inserted into the drilled holes. | |
| The entire structure must be assembled in free space to make it convenient to align and fix the reinforcement sections. In addition, the surface on which work will be performed must be non-flammable and durable. | |
| Having assembled the lattice into a common structure, its elements are fastened together by welding, and the joints are welded not with a spot, but with a continuous seam. Thanks to such measures, the grille will be more reliable and durable, since all gaps will be closed from moisture and dirt getting into them, that is, the connection points will not become centers of corrosion. As already mentioned, several vertical rods in the center can be additionally connected with a jumper - this will only increase the reliability of the grid. | |
| Next, on the mounting areas obtained by bending the edges of the strips, markings are made (10÷12 mm from their edges) for welding the threaded rods. The length of each pin should be equal to the thickness of the window block, plus 30 mm for fixing the grille with nuts from the inside of the room. | |
| The studs are welded to the side of the metal strip with which it will be pressed to the window frame. For welding, a continuous seam is again used. A nut is immediately screwed onto the welded stud. | |
| The finished grate must be cleaned of rust with an iron brush, and the slag must be chipped off at all points of the welded joints. Then all surfaces should be wiped with a degreasing compound (solvent) and dried. After this, the finished product is painted in the selected color with enamel paint for external work. If you do not want to carry out these lengthy activities, then you can purchase metal paint, which does not require preliminary surface preparation and is designed to protect metal parts from rust, but this will cost much more. | |
| The next step will be to mark the window frame to drill holes through which the grille will be attached to the window block through welded pins. To make this marking easier, dark paint can be applied to the ends of the pins. Next, the grille rises to the window block and is pressed against it with the ends of the pins, which should leave marking points on the frame. Then through holes are drilled along them. To drill holes, use a wood drill, the diameter of which must exceed the diameter of the stud by 2÷2.5 mm, so that it fits freely into its “socket”. The length of the drill must be at least 10 mm greater than the thickness of the window block. | |
| The last step is to install the grille on the frame. To do this, the stud pins are inserted into the holes of the window block, then wide washers are put on them from the inside and the nuts are tightened. To ensure that the grille holds securely and cannot be twisted in any way, the threads on the pin can be knocked off or a nut can be secured to it by spot welding. | |
| The result is such a simple, but quite reliable lattice, which can only be opened by cutting or removing it along with the frame. |
According to the assurances of the craftsman who manufactures these products, the material for six gratings, plus drills, cost him about $100, while the finished products would have cost three to four times more. He did all the work himself.
It is clear that not every home has a welding machine, and because of the three to five gratings, purchasing one is completely unprofitable. However, in this case, you can proceed as follows - having prepared all the necessary material, cut it into pieces of the required size, mark and drill the required holes in the parts. After which it is quite possible to turn to a welder, who will complete the job. Naturally, the master will have to pay, but the total amount will still be one and a half to two times less than when purchasing ready-made gratings.
Window grille in a metal frame with figured elements
The second version of the grille, enclosed in a frame made of a metal square, is more complex in design, but also more aesthetically pleasing in appearance. Therefore, it can be installed on the window of not only a country house, but also a reputable mansion, as well as first-floor apartments. However, in order to completely produce this version of the grill yourself, you need at least a little experience with a welding machine, solid mechanic skills, as well as some additional tools.
Prices for paint for iron
paint for iron
Work on the manufacture of this version of the window frame takes place in the following order:
| Illustration | Brief description of the operation performed |
| Illustration | Brief description of the operation performed |
| The first step when working on a lattice that has a rather complex pattern made up of round or square reinforcing bars is to carefully work on a sketch, which is drawn up on a scale of 1:10. The sketch is drawn on a sheet of paper according to the dimensions taken from the window opening, and then from it it is necessary to calculate the length of each piece of reinforcement intended for the manufacture of shaped parts of the grille. | |
| In accordance with the drawn up drawing, all structural elements are prepared. First of all, a profile metal pipe is cut, having a cross-sectional size of 15 × 25 or 20 × 30 mm, with a wall thickness preferably 2 mm. Thinner walls (1.5 mm) sharply reduce the strength of the structure, and in addition, it is very easy to burn through them when making welds. The edges of the pipes cut for the grating frame are cut at an angle of 45 degrees. | |
| After cutting the metal, the angled edges of the workpieces are adjusted as accurately as possible, cleaned of rust and prepared for assembly and welding work. | |
| Next, the frame parts are laid out on a prepared rigid stand or a stable, durable metal table. The corners of the frame are secured with welding points so that the structure still retains a certain degree of freedom and its rectangle can be accurately aligned along the diagonals. | |
| The corners of the frame must be perfectly straight, that is, 90 degrees. First, the frame is aligned by eye and using a regular construction square - this will not be difficult to do, since the corners are not yet connected by a continuous weld. | |
| And an accurate check of the squareness of a stuck frame is very simple: to do this, you need to measure its diagonals and compare the readings received - they should be exactly the same. | |
| If the required rectangularity is achieved, then in order to carry out subsequent actions with the frame it must be given rigidity. To do this, the master used a square rod with a cross-section of 12×12 mm, sections of which were temporarily spot welded at the corners of the frame. Such an operation is a temporary measure to fasten the structure, and these “struts” will be needed only until permanent parts are welded to the frame, which will make the structure rigid. After this, the corner joints of the frame are welded. Welding must be done very carefully, otherwise, if there are sagging, the grille on the window will look unsightly. Therefore, if any have formed, they must be cleaned with a grinder. | |
| Next, the frame is turned over, and on it, in accordance with the drawing, markings are made for installing the following parts, which must be attached to the sides of the frame. In this lattice, these are two transverse and two longitudinal crossbars, which are placed parallel to the main sides of the structure. | |
| By the way, to help when laying the crossbars inside the metal frame there will also be diagonal “struts” temporarily welded in the corners on the bottom side. First, metal reinforcing bars 12x12 mm squares along the long side of the frame are laid out on them and welded. They are welded to the inside of the narrow sides of the frame, closer to the lower edge of the wall. Then, rods are installed on top of them, parallel to the narrow sides of the frame. They are welded to the longitudinal reinforcing squares and to the internal surfaces of the long sides of the frame. | |
| Now that the structure has a certain rigidity, decorative shaped parts can be attached to it. But first they need to be made. And they are made from the same square, with a cross-section of 8×8 or 10×10 mm, or from round smooth reinforcement of class A-I with a diameter of also 8÷10 mm. | |
| The manufacture of these shaped elements will require a certain skill and some tools and devices, as well as the ability to quickly calculate the length of the reinforcement section in order to make each of the “snails”. | |
| An experienced master offers his own way to determine this parameter. Using it, you may not be able to obtain a perfectly accurate value, but small errors in this art are quite acceptable. The illustration shows a 50-centimeter segment divided into five parts, that is, 100 mm each - it is presented to visualize this distance. A decorative detail is drawn next to the segment, the line of which is also divided into sections of 100 mm - this is how the approximate length of the reinforcement required for the manufacture of this element is quickly determined. You can check the accuracy by taking a piece of string or a piece of aluminum wire, laying it along the line of the curly design, and then measuring with a tape measure. | |
| The drawing is drawn up, but the reinforcement needs to be bent so that it repeats it. To do this, the rod must be heated very strongly, red-hot - this can be done if the master has at least a small forge. In principle, a gas cutter is also suitable for this. Some craftsmen perform a similar operation using cold forging, but this is a more difficult task. | |
| The reinforcement section is taken with special tongs, and its free end is heated over an open fire, and then using a hammer it is given the desired flat, rounded or cone-shaped shape. To do this, during the molding process, the reinforcement is turned on the anvil and first one or the other side is exposed to blows. | |
| Forming continues until the desired result is achieved - this process can be carried out as long as the metal has a certain plasticity acquired by heating and gradual cooling. Usually a small hook is formed on the edge - it will be needed to further give the workpiece a curved shape. | |
| Next, while the rod has not yet completely cooled down, its end is hooked into a special device for twisting the so-called “snail”, and with the help of a metal grip one side of the reinforcement is given the shape of a spiral of the required size. | |
| If necessary, a similar operation is performed on the other side of the segment. Thus, the desired shape of the decorative element is obtained. Using a similar bending device, you can unscrew several different shapes of lattice parts, more compressed or stretched. | |
| As the next decorative element of the grille is manufactured, it is laid out on a drawing drawn in a 1:1 ratio - it is possible to carry out the necessary precise adjustment of the parts. After this, the parts are fastened with spot welding, and then welded with a continuous seam on the inner wrong side, that is, on the side that will be turned towards the window. | |
| In the manufactured lattice shown as an example, the central part is decorated with one large element assembled from six reinforcing rods bent according to the pattern. This part of the lattice is assembled from parts laid in two layers. | |
| First, three lower elements are laid, then two on top, forming a pattern, and the final one is a curl, laid in the middle part from left to right in the illustration. All parts are welded together at each intersection on the reverse side. | |
| It is impossible not to recall two more ways of connecting elements of an ornament: using intercepting staples and rivets. These fasteners will provide additional decorative details and will also make the grille more durable. The bracket is closed on the inside of the grille using a hammer, then it can be secured by spot welding. The rivet is inserted into the hole prepared for it, heated and flattened with a hammer. | |
| The next step is to weld the finished shaped element to an internal frame made up of a reinforcing square. It is also fixed at each point of contact with frame parts. The welded slopes can then be carefully cut off, and then the remaining weld marks can be cleaned with a grinder. | |
| Then six prepared forged rods are welded, two of which are located on the sides of the central decorative element at the bottom, and two at the top of the frame. The remaining two short ones connect the central decorative part of the lattice with the middle of the narrow sides of the frame. | |
| The last decorative elements to be welded to the lattice structure are curls on one and the other side of the rods, in the upper and lower parts. The next step is to weld the so-called “ears” or pins necessary for fastening the finished product in place to the frame from the inside by welding. The choice of these parts will depend on the method and location of attachment. The structure can be fixed on the wall, on the slopes of the window opening, or on the window frame. Some craftsmen prefer to embed fasteners into the wall. These parts are made from a metal strip 4÷5 mm thick, 40 mm wide, or from a reinforcing rod with a diameter of 12÷14 mm. |
Painting of the grating can be done immediately after manufacturing, chipping of scale, cleaning of welds and general cleaning of the product from rust. The painting procedure can be carried out later, after the structure has been fixed in the window opening: everything will depend on whether it is planned to use electric welding during the final installation, which will certainly damage the applied paint.
For painting, it is recommended to choose compositions specifically designed for metal products installed outdoors.
If you plan to mount a grille with shaped elements, but there is no way to make them yourself, then you can order these parts from an experienced craftsman, providing him with your material and a design sketch. One way or another, this option will again be cheaper than buying a ready-made grille.
However, if you try and use your ingenuity, then perhaps you will be able to come up with some of your own solutions for making decorative elements for the grille. Proof of this is the video presented to the attention of readers:
Tools and accessories for installation
After the grille has been assembled and painted, installation begins. To do this, you will need to additionally purchase 10x12 mm mounting threaded rods in an amount of 6 to 8 units, depending on its area. Recommendations for the established fastening scheme: sides 1-2 pcs.; top and bottom 2 pcs.
Equipment and tools you will need: a level, a tape measure, a corner, an angle grinder, a hammer drill and a welding machine .
Important ! The work performer must know the safety rules when handling welding and power tools, and also be equipped with welder’s protective clothing: a canvas suit, canvas gloves, canvas boots, a welding helmet and a cap.
Types and installation locations
The term facade grilles includes not only modifications for external installation, but also for internal ones. Its type directly depends on the specific installation location. There are three main types:
- External - installed only on the outside of the facade. Protect ventilation ducts from rainwater, debris, insects and rodents. Since external grilles are constantly exposed to the external environment, they are made of aluminum alloy. For fastening, dowels and screws will be used. The ventilation hole is covered with a fine-grained mesh. Most often they are installed on the back side of the building, where the air exchange and air conditioning systems are located. Read our article on how to install an air conditioner on a ventilated façade.
- Internal - installed only on the outlet openings of ventilation ducts indoors. They protect against insects, rodents, and debris. Internally, the gratings are not exposed to aggressive environmental influences. For their production, in addition to aluminum, plastic or wood are used. They are attached to the wall with dowels and self-tapping screws. Installed in the kitchen, bathroom and toilet. In public buildings, the location depends on the ventilation map.
- Transfer air vents - installed on interior ventilation openings for natural air exchange. Wooden, plastic, and stone ventilation grilles are used in apartments and private houses.
Features of self-installation
There are several options for installing protective grilles on windows:
- Using pins .
To do this, holes are made in the wall with a depth of at least 15 cm and a diameter 2 mm less than that of the pins. The pins are driven in so that at least 3 cm remains on the surface. After this, holes are drilled on the frame at the appropriate points. They put the frame on the pins, cut off the excess material and weld it to the frame. After processing the welding seam, it is painted to match the frame. - Through-wall fastening is considered the most reliable, but unaesthetic type of fastening, since the pins pass through the wall and are fixed from the inside to a washer, which will need to be masked with special decorative overlays.
For this option, initially choose the length of the pins greater than the wall thickness by 40-50 mm, weld them to the frame, drill holes through them and insert them into the wall. On the reverse side, they are fixed for welding or secured with nuts, washers and “heels”, which are subsequently covered with trim or decorative overlays.
It is very important that when fastening the pins do not end up in the areas where the hinges are located , since the latter will not function well.
Possible difficulties
Despite the apparent simplicity of such a protective window structure, in order for it to fully fulfill its protective and decorative functions, it will be necessary to carry out a large complex of complex work, starting from the correct choice of design, consumables and selection of the necessary tools and equipment.
This work should not be started by performers who do not have experience in plumbing and welding and are not familiar with the rules for the safe operation of welding and electrical equipment.
The main difficulties and mistakes that performers make during the manufacture and installation of protective metal window grilles:
- The type of structure was chosen incorrectly; a blind version was installed in places where such structures are prohibited by fire safety requirements.
- The installation was carried out without taking into account the functioning of the hinged sashes, as a result of which the window will no longer open, it will be impossible to maintain it, and the room will lose its only source of ventilation.
- When manufacturing the frame, a fragile material was chosen that is not capable of performing a protective function.
- When making the frame, diagonals and 90° angles are not maintained.
- The distance between the vertical beams of the frame is more than 150 mm.
- The rods were not rigidly secured to the wall surface.
- Metal components were not cleaned after welding.
- Anti-corrosion treatment of metal components and painting of the structure were not carried out.
- The window is not completely covered with bars, only half or 2/3 of the height.
- The number of attachment points is incorrectly selected, less than 6 for small windows and less than 8 for large ones.
- Large gaps are left between the frame and the wall, which can be used by intruders with a burglary tool.
Preparation for making the grating. Useful recommendations for performing work
Any work requires some preparation, and if the tools were discussed earlier, then it is necessary to say a few words about what materials may be useful in the manufacture of the grating.
General rules for preparing for the manufacture of gratings
The choice of material and its quantity will directly depend on which grille model is chosen, as well as on the planned size.
So, the preparatory work is carried out in the following order.
- The first step is to determine the parameters of the future grid. To do this, you need to take measurements from the window opening. In this case, the specific location of the grille is taken into account, since it can be fixed on the walls around the window opening, inside it - in the middle of the slope or close to the window frame, or even fixed on the frame itself.
If the structure will be fixed to the walls around the opening, then it is recommended to immediately mark the boundaries of its location on them with chalk, according to which the dimensions will be taken.
If the grille frame will be mounted in a window opening, in slopes, then its sides should be less than the height and width of the opening in a specific installation location (taking into account that slopes often have angles converging inward), by about 10 mm, since it should fit into the opening is free.
Welding machine prices
welding machine
- The next step is to make a sketch drawing of the product based on the measurements taken, on which all dimensions are immediately entered. To make the work easier, experienced craftsmen advise making it on a scale of 1:10. The drawing must be accurate, since, based on it, it is much easier to calculate the amount of materials required for the manufacture of gratings. When drawing up a drawing, we must not forget that the elements used in the structure must give it rigidity, otherwise the lattice may warp.
- Next, the material is selected and its quantity is calculated for the manufacture of one lattice. If the size of the windows in the apartment (house) is the same, then the resulting amount of materials is multiplied by their number.
- For the manufacture of window grilles, the following are usually used: a metal square 10×10 or 12×12 mm, a smooth or corrugated reinforcing rod with a diameter of 10÷12 mm, a metal strip 3÷4 mm thick of different widths. For the frame under the grille, a corner of 40×40 mm, a square or rectangular profile with dimensions of 25×25, 3030, 15×25 or 20×30 mm can be used. If you decide to make swinging grilles, then you need to stock up on the required number of hinged hinges and locking mechanisms.
If sliding structures are made, then, in addition to the materials mentioned above, you will need rivets to create hinge units, as well as wheels, with the help of which it will be easier to move and expand the grille.
- The prepared material is cut using a grinder according to the dimensions taken from the drawing. If you plan to decorate the lattice with shaped elements, they are bent from smooth reinforcement using a special device, according to the prepared sketch. How the rods are bent into certain shapes will be described in detail in the table below.
- Decorative and protective grilles are painted with a special metal paint, which can be applied without removing rust from the products. If you choose another version of the paint and varnish composition, then the grille will have to be cleaned, primed, dried, and only then painted.
Recommendations for installing grilles
Installation of grilles on windows can be done in different ways - using reinforcement sections driven into the window slopes, “ears” made of a metal strip, a threaded pin and other methods. However, in almost each of the options there will definitely be welding operations.
- Fastening the grille by welding . To carry out this process, pieces of reinforcement are used - pins with a diameter of 10÷12 mm. For them, holes with a depth of 100÷120 mm are drilled in the slopes. The optimal number of pins for one frame is six, but if the opening is high, then it is best to take eight fasteners.
Then, holes of the same diameter as the reinforcement sections are drilled in the grille frame. When installing the frame, the holes in it and the slopes must match.
Next, the frame is installed in the window opening, pins are driven into the wall through the holes in it - they should protrude from the frame by 25÷30 mm.
The next step is to weld these units, and the protruding ends from the inside are cut flush with the surface of the grille frame using a grinder.
You can do it differently without damaging the grille frame. First, pins are driven into holes drilled in the slopes, to which the frame is attached and welded. Installation by welding is used most often than others, as it can be called the simplest and most reliable. It is used for fastening blind or swing grilles that have a common frame. However, driving pieces of reinforcement into walls is only possible if the walls have a sufficient degree of strength.
- Screwing the grille with hardware. In this option, metal “ears” made from a 4 mm strip, measuring 40x50 mm, are welded to the frame, in which holes are drilled. Then, the frame is installed in its future location, and through the holes in the “ears” on the slopes, the places where holes for anchor fastenings should be drilled are marked. After this, the frame is removed and drilling is done. Then the grille is returned to its place, and anchor bolts are driven through the “ears” into the holes in the wall and finally secured.
- Fastening grilles through a wall or wooden window. In this case, threaded pins are welded onto the grille frame. Their length should be 30÷50 mm greater than the thickness of the wall or window frame. Then, the grille frame is applied to the wall, and the location of the pins is marked on it. Using these markings, through holes are drilled with a diameter equal to the diameter of the pins. Next, the grille pins are inserted into the holes, a wide washer is put on them from the room side, and then a nut is screwed and “locked” onto them. From inside the premises, such fasteners will not look aesthetically pleasing, so you will have to come up with camouflage devices for them, which will also protect the protruding ends of the pins.
Now that all the main general nuances have been considered, we can move on to describing the grating manufacturing process.
Advantages and disadvantages
A grille, manufactured and installed in accordance with all requirements and in places that need protection, carries only advantages, the main ones of which are :
- Highest protective functions.
- Modern design.
- High functionality, the ability to open and remove for maintenance work on the protective structure itself and the window unit.
- Advanced control capabilities, including controlling the operating level of the grille from a distance.
- Good maintainability.
- Long service life of more than 20 years.
- Available consumables for DIY production.
- There is a large selection on the market of ready-made grilles for standard windows from different materials.
The disadvantages of installing metal ones include the unpleasant associations that many users have with window grilles, a significant price, especially for forged and multifunctional grilles, and the need for periodic maintenance to combat rust.
Grate collection
First, you need to prepare the slats for installation, make the appropriate grooves in them, so that later you can assemble a single structure without problems. First you need to make the calculations correctly. All bars must be evenly distributed over the entire area of the frame.
At the joints of the grille slats, you need to make notes for future grooves.
How to assemble a grill
The depth of the grooves should be at least 5 mm for both the longitudinal and transverse rows to ensure a uniform plane of the future product.
The grooves at the joints must match perfectly to create a beautiful structure. Therefore, taking measurements is of particular importance. To avoid mistakes, it is best to check your calculations several times.
Cuts for grooves of the correct depth can be made using a hacksaw or milling machine.
The essence of the work, instructions
If you fill it carefully, you may not even notice the difference. Next, the grooves must be cleared of excess wood; for this it is best to use a chisel and a hammer.
Using smooth blows, you need to knock out the excess that will interfere with joining the slats. After this, the grooves are ground for tighter contact with each other.
Stages of doing the work yourself:
After preparing the bars, you can begin installing a single structure:
- Prepared slats for the grill are placed in pre-marked positions.
- To begin with, lay the first row and attach it to the frame using self-tapping screws 16 mm long. They are best suited for this situation, providing a secure fit without coming out.
How to make a decorative lattice on a gazebo yourself
- As the second row is being installed, wood glue is applied under each bar at the joints, after which the rail is put in place and secured at the edges with self-tapping screws.
After this, you need to give the glue time to dry.
Average prices in the Russian Federation
The cost of producing gratings directly depends on the production process, the materials used and the complexity of the design. The cheapest options for welded blind structures made from reinforcement cost the buyer from 800 rubles. per m2 , the most expensive forged gratings start from 4000 per 1 m2. The cost of the finished product is also affected by the quality of the paint and anti-corrosion coating, as well as the presence of locking devices.
The cheapest options are painted with GF primer and HV/PF enamel, the most expensive ones are protected with WS-Plast patination technology. The latter option increases the cost of the finished product by 900 rubles/m2, and swinging grating options will be 1000-1200 rubles/m2 more expensive than fixed options.
Note ! The cost of installation depends on the complexity of the design, the cheapest welded ones from 300 rubles/m2, the most expensive swing forged ones from 1500 rubles/m2.
Average cost for manufacturing/installation of gratings depending on the design per 1 m2:
- welded, reinforcement, rectangular mesh, without frame, blind, 860/300 rub./m2;
- welded, fittings, rectangular, frame, blind, 1130/400 RUR/m2;
- welded, reinforcement, patterned mesh, frame, blind, 1380/400 rub./m2;
- welded, medium-heavy, frame, swing, 1960/550 RUR/m2;
- forged, patterned, framed, blind, 4400/1200 RUR/m2;
- forged, patterned, framed, hinged, 5600/1600 RUR/m2.
The final cost of installation will be influenced by transport tariffs , so within Moscow the final price for delivery increases by 1,500 rubles, and in the region, based on the transport tariff plan, 25 rubles/km. Many companies undertake installation with a minimum order of 3,000 rubles, and the cost of installing gratings on the second floor increases the total by another 200 rubles/m2.
Design selection
There are three types of grating designs: adjustable, non-adjustable and inertial. The first ones are equipped with movable blinds, thanks to which you can control the incoming air. The latter do not have moving elements.
Inertial models automatically close the ventilation shaft when air movement stops.
Several types of gratings are in special demand on the market.
- Rectangular plastic models for supply and exhaust ventilation. Support ceiling and wall installation.
- Exhaust plastic models. For wall mounting. They have additional elements that prevent the possibility of reverse air draft.
- Ventilation door models. For air circulation in the room.
- Metal and aluminum models for outdoor installation.
And if everything is simple with all models, then external products require separate consideration. And we are talking not so much about the installation of an external ventilation grill, but about the subtleties of its choice.
Required Tool
For those involved in repair work, there will be no problems with preparing the required tools. The following units will be needed:
- grinder or reciprocating saw;
- welding machine;
- chalk for marking;
- roulette;
- metal square;
- hammer;
- brush;
- primer;
- dye;
- brush;
- fasteners;
- solvent;
- hammer drill
Not everyone has a welding machine at their disposal, so you can rent one at a hardware store.
Sliding internal models
Internal window bars are also quite popular among owners of summer houses and private cottages. Equipping a window with non-removable products is a simple method, but not entirely successful from a fire safety point of view. Therefore, manufacturers of window grilles offer to install a sliding model on at least one window.
This design can slide apart depending on the installed guides, providing access to the window.
Internal sliding models, consisting of two halves, can be placed directly into the opening.
There are two types of sliding products: blind type and screen type. In both cases, it is important that the mechanism that ensures the movement of the grille along the window is made of high-quality materials.
Internal sliding models are difficult to install, which can be attributed to the obvious disadvantages of this design. To close your window with bars, you will need the help of craftsmen with a special tool.
Advantages of internal sliding systems:
- Space saving. The assembled product occupies a fourth of the window.
- Internal grilles are less susceptible to corrosion, unlike outdoor ones.
- Versatility. Not only windows protect, such structures can be placed on the balcony.
- Reinforced sliding grilles are often used in banks and other commercial establishments.
Many owners opt for internal grilles, justifying their choice with a higher degree of protection. If you can dismantle them with a grinder or open a padlock, then with internal ones it is almost impossible to do this.
Advantages and disadvantages
Any product has a number of positive and negative aspects that are important to know about before purchasing.
In this case,
the advantages include:
- Safety. Since before the production of a particular grille design, preliminary calculations for strength and resistance to burglary are carried out, it can be argued that the protection of the home will be performed at a decent level. And this is especially true for those whose home is located on the ground or first floor. And if under the windows of your apartment on the second floor there is a canopy or other elevation that provides easy access, you should also think about installing bars;
- Reliability. Since the cross-sectional diameter of the rod is often at least 12-16 mm, it will be quite difficult to bend such a product with “bare” hands. Especially if there are transverse elements that give the structure special rigidity;
- The vast majority of installed gratings are welded. This explains their affordable price.
The disadvantages include:
- Less attractive and decorative appearance than forged structures. However, we can say that this is a rather controversial point. Firstly, today the variety of designs of welded gratings is more than sufficient. Secondly, if necessary, you can always add forged elements for beauty.
Photo of window bars
No. 4. Welded grating coating type
You will see the grille many times every day, so it should not only be impenetrable to thieves, but also quite aesthetically pleasing. To cover the structure use:
- nitro enamel is inexpensive, dries quickly, has a wide selection of shades, however, the coating must be applied in several layers to obtain a dense structure and the desired color. The main disadvantage is low resistance to weathering. Nitro paints cannot be used to cover surfaces previously painted with oil or alkyd paints;
- Oil paint is rarely used for industrial finishing of gratings - it is used when the grating needs to be repainted. The composition has a strong unpleasant odor and takes a long time to dry; over time, the coating loses its shine and fades. Oil paints have low adhesion to metal;
- Polymer powder based paints are the best option for grilles. They tolerate humidity, precipitation, temperature changes, and exposure to aggressive substances well. Treatment with such compounds is possible only in production conditions. Polymer powder is applied to the surface of the grate, which melts under the influence of high temperatures in special furnaces. As a result, polymer particles sinter with each other and with the metal, forming a durable coating. There are a lot of shades, incl. imitation of bronze, silver and gold.
When choosing the color of the grille, be guided by the facade of the building and the style of the house. White and black grilles are considered classics, and designs of light shades absorb less light, seem less bulky, and harmonize well with white plastic windows. Grilles in red and brown shades harmonize well with brick facades; black and bronze ones will also look good.
Sketching
When making window grilles with your own hands, a sketch must be prepared, and you need to remember that in order for the grille not to change its linear dimensions, it must have a sufficient number of stiffeners. It is preferable to use a frame made of corners for this; the corners can be mated using rods.
If the lattice is more complex, with unique shapes, then the structure should have not only horizontal, but also vertical elements, the pairing of which should be carried out at the greatest number of points.
Preparatory work
- Before starting work, it is necessary to take measurements from the windows. The width of the bars is equal to the width of the window opening minus 5-6 cm. The height of the bars can be slightly lower than the window, while the gap between the bars and the window opening should be such that it is impossible to crawl through it.
- After taking measurements, a sketch is made to scale, where the main and decorative elements are drawn. If the gratings have a complex pattern, it is necessary to measure the largest holes on the drawing and, multiplying the measurement results by the scale, find out their real size, so that after manufacturing it does not turn out that an intruder can enter the house through them.
- If swing grilles are made of two leaves, it is necessary to provide a place for attaching a lock on each leaf. You can make one sash rigidly fixed, and the second swinging, which will make the structure more rigid while maintaining fire safety. In this case, the swing sash should be located near the fully opening sash of the window.
From tools and auxiliary materials you will need:
- Grinder and metal circles;
- Welding machine;
- A hammer drill with a drill diameter that is 1-2 mm smaller than the diameter of the corrugated rod for pins;
- Hammer;
- Cutting a corner or metal strip for attaching hinges;
- Primer and paint for metal.
Accommodation
Depending on the location of installation, window grilles can be external (most often), internal, or installed between frames. Since double wooden windows are becoming increasingly rare, installation between frames is also rare. Internal grilles are often installed if they are removable or the window opening is deeper in the room.
But it is also possible to install it from the inside to prevent children or mentally unstable individuals from falling out. In other cases, external fences are preferable.
The production and installation of window grilles is an additional protection for housing and the safety of people. It is important to correctly select a design that suits specific conditions and carry out installation correctly.
Gable Vent Size for Siding
We have already determined that facade ventilation grilles for siding are necessary. But what size should the hole be for attic or attic ventilation?
Currently, when determining the size of the ventilation grille for siding, they are guided by the collection of provisions of the State Construction Committee dated 1964. The document states that the total cross-sectional area of all ventilation openings should be in the range from 1/300 to 1/500 of the floor area of the attic or attic.
In accordance with the provisions of the same obsolete regulatory document, the air mass must be updated 2 times/hour during the most unfavorable weather period. Thermometer readings in a non-residential attic in winter should differ from measurements taken outside by 5 - 6º C.
With quite reasonable requirements for air quality and temperature, the requirements for the size of ventilation grilles for siding seem irrelevant. Many different construction and finishing materials have appeared that have better performance and technical characteristics. They can meet air quality requirements with different vent sizes.
Protection from wind, atmospheric water and heat loss increased the tightness by an order of magnitude, while at the same time turning into an impenetrable barrier to air flow.
Finishing
The installed structure necessarily requires additional processing - at least painting. It’s better to also treat it with an antiseptic, which will protect the metal from corrosion.
Using paint, you can hide welding areas, this is especially true if you have abandoned decorative elements that can hide them.
The paint also serves as a protective coating that protects the metal from weather and moisture, thereby extending the life of the structure.
In the photo you can see a design option for the grille.
For sliding structures, you need to additionally install runners with which it can move.
Sliding grilles must be equipped with a burglary-proof mechanism, since opening such a structure is much easier than a stationary one.
Runners can also be visually hidden using decorative elements such as flower pots.
How to ventilate a gable wall
In order to ensure ventilation of the attic or attic, as well as ventilation of building structures, different technological methods are used. The most effective are:
- Installation of a ventilated pediment.
The method consists in arranging ventilation gaps between materials with different thermal characteristics. To do this, it is enough to leave a distance of 3-5 cm. In this way, spaces are formed between the wind protection and the insulation, the brick or foam concrete wall and the thermal insulation.
- Installation of ventilation grilles for siding.
This technique is aimed at creating movement of air mass through the room and reducing pressure in the attic or attic. Dormer windows can be cut into the slopes, but the easiest way is to install them on the pediment - you get a pediment ventilation grille for siding.
- Installation of ventilation valves.
Ventilation valves are used for both supply and exhaust types of ventilation with natural and mechanical impulse. They work in tandem with or without fans. In terms of functionality, they are equal to auditory windows.
The ventilation options listed above do not exclude one another. It is important to choose the method of roof ventilation that will be the best option for a particular home.
Let us consider in more detail the main methods of installing ventilation grilles for siding, their features and disadvantages.
Installation of gable ventilation grille
Ventilation gaps between materials with different thermal technology are created by installing a wooden block on brick and foam concrete surfaces. An exception is if the surface of the roofing materials is very uneven, requiring correction by installing a false wall.
To install the frame on brick and concrete walls and foundations, a block with a thickness of at least 2-3 cm is used. It can be fastened in different ways:
- vertically,
- horizontally.
The vertical method of installing ventilation grille frame elements for siding is also used when diagonal installation of siding is intended.
To equip the frame, which plays the role of the walls of the ventilation ducts, not only a coniferous timber is suitable, but also a metal profile with gear brackets, which are made specifically to simplify the installation of the gable ventilation grille and adjust its position.
The front ventilation grille is installed in the following ways:
- in two levels, if polyethylene film is used in the arrangement of the pediment as wind protection and waterproofing.
- In one level, if a diffuse membrane is used, capable of independently letting moisture out when excess pressure occurs in the thickness of the insulation.
Transparent grilles
Currently, there is a lot of interest in a new product in the family of window grilles. This design is a transparent panel made of polycarbonate.
At this stage of testing, the following characteristics were identified:
- The material completely transmits daylight.
- It has a strength exceeding metal by 250 times.
- Elastic material is tensile, but at the same time exhibits high elasticity.
- It is made of a non-flammable composition and melts slowly in the presence of an open fire source.
- Does not emit harmful substances into the atmosphere.
- It is not destroyed under the influence of chemical media.
- The parts are easy to clean.
- No special maintenance required.
- The design does not interfere with the appearance of the window and the entire façade of the building.
- No permits are required for installation.
- It is not destroyed by ultraviolet rays of the sun.
- The entire structure is light in weight.
- Conveniently installed at any time of the year.
Types of installation of transparent grilles
The design consists of polycarbonate lamellas 6 mm thick. Their width is 40 mm. The length corresponds to the dimensions of the object at the installation location.
The lamellas are attached inside two side steel profiles, closed with a decorative plastic box. The profiles, in turn, are fixed to the window opening using anchor bolts.
The following structures are installed in the following places:
- from the facade,
- inside the window frame,
- from the side of the room in front of the window.
- The lamellas are arranged horizontally or vertically, depending on the taste of the customer.
The structures are provided with an emergency release mechanism for fastening the slats with a mortise lock. It is located on the side of the room and is in an inaccessible place. This function provides the possibility of unhindered evacuation in case of emergency.