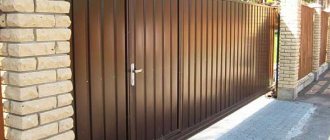
More than one owner of a private house has wondered how to weld a gate from a profile pipe.
After all, such a simple element helps to increase the comfort and safety of your home. For this task, a profile pipe is often used because it has the necessary technical characteristics:
- has a low cost;
- stands out for its reliability and durability during use;
- characterized by low weight;
- almost not subject to corrosive formations;
- perfectly tolerates any mechanical loads.
Almost any home craftsman with welding skills can weld this structure from a professional pipe, and he will not need the help of specialists in this matter. Also, this work does not require special knowledge and skills. Basic concepts about the welding process, using a drill and an angle grinder will be quite enough. And on top of all this, you will need minimal ability to create a drawing.
Before you begin construction, you should carefully study all the pros and cons of such a building. And so, the advantages of an entrance gate made of a profile pipe are as follows.
- Minimal ease of manufacture and installation.
- Low level of complexity of excavation work. They all boil down to creating holes for pillars - pipe supports.
- Long term of use.
- Low cost and good resistance to corrosion processes.
- Presentable general view of the pipe structure.
Also, before you pick up a welding machine and drill, you need to remember the disadvantages of such construction. There are not many of them, but it is important to know them.
This design can become deformed due to mechanical stress. There is no soundproofing at all. If even minor damage occurs to such a structure, the result will be corrosion.
How to choose the size of a gate made of corrugated sheets?
There are no strict mandatory standards or restrictions regarding the size of gates. However, when choosing them, you need to consider the following:
- The optimal width of a gate made of corrugated sheets is 1.0 m. This opening width allows you to easily bring furniture or other large items onto the site. Moreover, if it is larger, this can lead to rapid wear of the hinges or skewing of the gate cloth.
- The height of the gate should not exceed 2.0 meters. If the fence around the site is high, then such a gate made of corrugated sheets will not look very good. In this case, in the opening between the support pillars above it, it is better to install additional crossbars with a metal profile insert. This will allow you not to overly weigh down the canvas of the gate itself.
Naturally, there are exceptions to these rules. For example, if your height or the height of someone in your family is above 2.0 meters, then making a gate from high-height corrugated sheets will be simply necessary. However, you should not forget about using special hinges and strengthening the frame with additional cross members.
Top ↑
Drawing and preparation
Any work begins with a drawing. First you need to decide on the installation location and dimensions. The gate can be placed next to the gate or separately from it, its height can be equal to or less than the height of the fence. With a very high fence, the door can have a height of no more than 2 m (rarely 2 m 10 cm), a lintel can be made higher and sheathed in the same way as the fence. The width is 0.9-1 m (a smaller width is inconvenient when entering with cargo or bags, a larger one also creates inconvenience when opening, requires a more massive frame, and there is a possibility of distortion during operation).
Then you need to think over the design of the door and support posts and draw installation diagrams and a drawing of the door structure. This must be done in advance, think everything through, calculate the required amount of materials, purchase and bring them.
Don’t forget about PPE: for welding work, a canvas suit and gloves, a mask with tinted glass are required; boots; for other work - glasses and gloves, rubber gloves and a respirator for painting work.
What tools will you need?
List of tools and consumables:
- garden auger, bayonet shovel, crowbar;
- concrete mixer or container for mixing concrete for installing racks;
- shovel for loading sand and cement, metal buckets;
- welding machine. For a home craftsman, it is enough to have an inverter welding machine with a welding current of 160-200 A. You can invite a welder - but you can also learn how to weld simple products yourself - it will always come in handy. A welding machine in the estate will quickly pay for itself - there is always enough small welding work when arranging a garden;
- tools for drilling holes and tightening screws - drill and screwdriver;
- level, cord, plumb line, construction square;
- metal ruler 1 m long, tape measure 5 m long;
- clamps - they are used to assemble the frame during welding, and temporarily secure the frame when installing the lock and hinges;
- brushes;
- grinder, metal cutting wheels, grinding wheels.
Selection of material
To make a gate from steel profiles, the following materials are required:
- steel pipes with dimensions of at least 80×80 mm for supporting pillars of light gates made of corrugated sheets, at least 100×100 for heavier models; wall thickness of at least 4 mm; you can use a structure of two U-shaped channels welded in the shape of a pipe. If one of the pillars also serves as a support for the gate frame, then a pipe with an even larger cross-section is used;
- steel pipes 60×40 or 40×40 mm for welding the wicket frame, 40×20, 32×32 mm for lintels;
- colored roofing screws complete with a rubber washer;
- material for covering the frame - metal sheet 2-3 mm thick; or corrugated sheeting with a plastic coating with a wave height of 10-12 mm, sheet thickness of 10-12 mm; or polycarbonate, end profiles for polycarbonate, special adhesive tapes for closing the ends of polycarbonate; if necessary, ready-made forged parts;
- small bushes of steel sheet 4-5 mm thick;
- bricks;
- roofing felt;
- loops;
- lock;
- sanding paper;
- cement, sand and crushed stone for concrete;
- gravel or crushed stone (middle fraction);
- weatherproof paint for exterior use;
- anti-corrosion primer;
- electrodes.
Installation of support pillars
The first and one of the most labor-intensive stages of work is the installation of support posts on which the metal profile gate will be supported, with your own hands. This is not difficult to do, but it will take quite a lot of time, especially when it comes to brickwork.
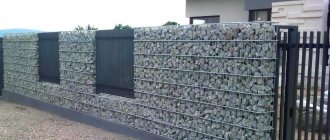
There are two options for installing a fence made of profiled sheets. The first and simplest is the option of attaching the fence to poles made of metal pipes dug into the ground. In the second option, a fence with a gate and a wicket made of corrugated sheets is attached to pillars made of brick or stone.
Top ↑
Using metal support posts
The use of profiled sheets for the manufacture of entrance groups has become so widespread because making wickets and gates from corrugated sheets is very simple and inexpensive. Therefore, in the vast majority of cases, metal pipes are used as supports. They are much easier, cheaper and faster to install than brick ones.
a profile pipe of 80x80 mm with a wall thickness of 3-4 mm is best suited . To install them, holes are dug in the ground with a size of at least 300x300 mm and a depth of at least 1.0 m.
Previous Next
Gates and wickets made of corrugated sheets - photo of installation on metal poles
The depth of the holes depends on the type of soil where the pillars are installed. If the soil is rocky, then 70 cm will be enough. But if the soil is clayey, the depth of the holes should be no less than the freezing depth of the soil. In most regions of the middle zone it is 1.2 m.
be careful
Installing a gate made of corrugated sheets on insufficiently deepened pillars in heaving soil leads to serious deformations of the frame and canvas, the correction of which is often impossible.
Top ↑
Support pillars made of brick or stone
In this case, the dimensions of the foundation must be larger than the cross-section of the support column. Typically, such pillars are made of 1.5 bricks, that is, 390x390 mm. Therefore, the foundation must be no smaller than 500x500 mm. Since it is much more difficult to make such posts for a gate from corrugated sheets yourself, this option is chosen less often.
The brickwork itself does not withstand bending loads well, so to give the pillar additional strength, a metal pipe is installed in the hole before the foundation is poured with concrete. Around it the masonry is made of brick or stone. Metal embeds are welded to the same pipe, which are removed outside the masonry. Gates and wickets made of corrugated sheets will subsequently be installed on them.
Classic gate made of metal profiles - photo of installation on poles using an external frame and mortgages
The top of metal support posts should be capped to prevent moisture from entering the post. If you plan to install lamps near the gate, then before concreting the pillars in them, you need to tighten the wire in a corrugated pipe.
Top ↑
Support materials
The stands for making gates are made of round or square steel pipes with massive shells (from 3 mm). The round cross-section is inconvenient to weld; it is difficult to attach hinges and locks to it. It is easier to connect a square, and it is easier to attach hardware to flat walls. Sometimes a metal profile in the form of an angle or channel is attached to a profile pipe by welding, then the filling of the sash is obtained in the frame.
Wooden posts for supports are used if a fence made of boards, bars or other lumber is built at the dacha. More often, the racks are made of coniferous timber, impregnated with protective compounds. The treatment protects the wood from fungus, moisture, bugs and fire. Areas in the ground are also protected with a layer of roofing felt to reduce the risk of rotting.
There are combined options, when the fence is made of wood and wood is used to fill the sash, but the posts for hanging the sash are made of metal. These can be pipes installed in the ground and concreted if the soil is not prone to heaving.
Preparing parts for the frame
While the concrete mixture in the foundations of the support pillars gains the necessary strength, you can start assembling the gate itself. Before you make a gate from corrugated sheets with your own hands, you need to make a frame for it.
For the frame, take a profile pipe 40x40 mm or 60x30 mm . A light small gate can also be made from a 40x20 pipe, but then to give the frame the necessary rigidity, the pipe must be placed with its narrow side facing the corrugated sheet metal sheathing.
A layer of crushed stone is poured into the bottom of the pit and thoroughly compacted. Then the pillars are installed strictly vertically, using a level, and the hole is filled with concrete mixture. Gates and gates made from metal profiles can be hung on concreted pipes no sooner than after 5-6 days. This time is necessary for the concrete to gain at least 20-30% of its strength.
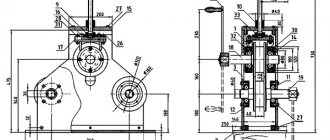
In order to avoid mistakes when preparing parts, before cutting the pipe it is better to first draw a sketch or make a drawing of a gate made of corrugated sheets with all the necessary dimensions. An example of such a drawing is given below.
Detailed drawing of a metal profile gate
The prepared pipe is cleaned of rust using a metal brush and cut into pieces of the required length. To assemble, the edges of the workpieces are cut at an angle of 45°.
In addition, in order to make a gate from corrugated sheets, it is necessary to cut one or two crossbars, depending on its height, which should fit closely between the large sides of the frame. This will make the structure more rigid and subsequently make it easier to install the lock.
Top ↑
Welding the gate frame
The workpieces are connected to each other by welding. To prevent the frame from being deformed, before making a gate from a profiled sheet, the blanks must be secured from a profile pipe in a homemade jig .
It's very easy to make:
- Take an OSB sheet with a thickness of at least 10 mm or a sheet of thick plywood.
- A canvas is cut out of it, the width and height of which must be at least 50 mm larger than the planned dimensions of the gate.
- Clamps are prepared that will hold the frame elements, pressing the metal profiles to the surface of the sheet. There should be twice as many clamps as welds.
Before welding a gate from corrugated sheets, all angles are carefully checked and the diagonals of the frame are measured. One or two crossbars are installed between the upper and lower lintels of the gate frame. Then clamps are installed, which should be located a short distance from the welding site.
Diagram of how to weld a gate from corrugated sheets using a jig made from an OSB board and clamps
After fixing all the frame elements on the jig, you need to once again check the angles and parallelism of the opposite sides of the frame. Then you can start welding. In this case, the clamps cannot be removed until the seams have completely cooled down - otherwise, temperature stresses in the metal can deform and even destroy the metal. After welding is completed, all joints are cleaned.
Thanks to this welding technology, even a complete beginner can make a gate from a corrugated sheet with his own hands. At the same time, even if you have some experience in welding, I do not recommend neglecting the fixation of the workpiece. Remember that making a new frame after accidental damage to the old one will take longer and will cost more than making a simple jig.
Drawing for swing metal gates with a wicket made of corrugated sheets (click to enlarge)
In small summer cottages, gates with a wicket made of corrugated sheets are often installed. All operations for assembling the wicket frame built into the door leaf are performed in the same way as those described above. The design of the gate is subject to change, in which an opening must be provided for installation. In addition, the need to build in a gate imposes certain restrictions on its height.
Top ↑
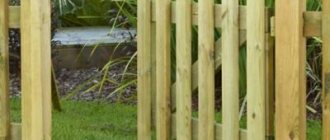
Wooden gate photo
To make a wooden gate with your own hands, boards or picket fences of various widths are used; there are no gaps between them or, conversely, large distances are left. The gate itself is painted the same color as the fence, or made contrasting. Black hinges and locks work well with pieces with a natural wood grain. As for the frame, it does not have to be wooden - a metal profile will do. An interesting option is a gate made of panels installed horizontally
Installation of fittings on metal profile gates
After assembling the gate frame, but before covering the frame with a metal profile, hinges and plates are welded to the gate for installing a lock and handle, if necessary.
The hinges for the gate made of corrugated sheets are installed towards each other and secured with welds 1-2 cm long. The hinges are placed so that the sheet cannot be removed after final installation. With this installation, the gate can only be cut with a grinder. Attach the loops at a distance of 25-30 cm from the upper and lower edges of the canvas.
Installation of hinges on a gate made of corrugated sheets
When choosing a lock for a gate made of corrugated sheets, you must pay attention to the operating conditions specified by the manufacturer in the passport. The lock must be designed for outdoor installation . When choosing a lock core, preference should be given to those that can be opened from the inside without a key. This will save you from problems if the water in the castle freezes in winter.
When opening the door inward, the lock can be either mortise or overhead. If the gate opens outwards, only a mortise lock is placed on it. The lock and handle for a gate made of corrugated sheets are usually installed at a height of approximately 90 cm.
Of the mortise locks, the most convenient are special narrow-profile locks designed for installation in profile pipes. The very principle of their installation partially protects them from moisture and dust, which increases their service life.
Narrow-profile lock for a gate made of corrugated sheets
Before cutting the lock into a gate made of corrugated sheets, you need to mark the location for its installation: a rectangular slot for the body and a circle for the core. In addition, it is better to immediately mark the attachment points for the handle. Next, the installation process is quite simple:
- Using a grinder, cuts are made along the long sides.
- Using a drill, holes are drilled along the short sides as close to each other as possible. It is necessary to drill not along the marking strip itself, but slightly inside the rectangle.
- To install a mortise lock in a gate made of corrugated sheets, the hole is brought to the desired shape using a file.
- Round holes for the core are cut out using a metal burr. If it is not available, you can also use contour drilling and finishing with a file.
- Holes for mounting screws are drilled.
- The area around the lock is cleaned of rust, primed and painted.
- The lock is installed on a gate made of corrugated sheets, but without linings - they are installed after the frame has been covered.
This completes the installation of the lock in the frame. However, since putting a lock on a gate made of corrugated sheets is only half the battle, the work does not end there. It is necessary to install the counter part into the support column. This stage is performed after installing the gate on the posts.
A clear example of how to insert a lock into a gate made of corrugated sheets (click to enlarge)
Additionally, a lock or latch can be installed on the gate made of corrugated sheets. Such solutions make sense both from the point of view of increasing safety and for convenience - especially if the gate is often used. In this case, it is easier to close it with a latch than to fiddle with the lock every time. You can also immediately purchase a lock with a latch and not install it separately.
Previous Next
Classic latch and already installed narrow-profile lock with handle for a gate made of corrugated sheets
Top ↑
How to install a gate made of corrugated sheets on support posts?
After several days have passed, the concrete mixture in the foundations of the support pillars has gained some of its strength, and the assembly of the frame is completed, you can install the gate from corrugated sheets.
To do this, place a wooden block under the frame. Using a level, the gate is set strictly vertically and the places where the second halves of the hinges are attached are marked on the support post. It must be remembered that for normal opening in winter, the canvas must be 100 mm higher than the surface of the track. Especially if you are installing a gate to a dacha made of corrugated sheets, where snow is rarely cleared in winter.
Having marked the installation locations of the hinges, they are temporarily attached to the support posts using electric welding. After checking the opening and closing of the gate, the hinges are welded with a continuous seam.
Consider
Installing a gate made of corrugated sheets with your own hands requires care and repeated double-checking, since without a “fresh look” from the outside it is easy to make a mistake.
If the gate is installed correctly, it should not open or close spontaneously. To prevent it from opening in both directions, a limiter is welded to the support opposite the hinges.
When the welding work is completed, all seams are cleaned using an angle grinder, and rust is removed from the frame and primed. Then they are painted twice with metal paint for exterior use. The main part of the lock installed in the frame must be covered with film or construction tape.
Metal profile gate frame mounted on poles
This is the penultimate stage before sewing, since you need to install a lock on the gate made of corrugated sheets and in the support post. To do this, the bolt is smeared with toothpaste and the lock is closed. After this, the place where the locking device should go will be marked on the pole.
If the lock is simple and there is no receiving block, then you just need to drill a hole of the desired shape and finish it with a file. If there is a receiving block, then you must first mark its location based on the location where the crossbar enters, and then, again, drill a hole of the desired shape. Then holes for fasteners are drilled and the mating part is installed.
Top ↑
Wooden gate for a summer residence step by step instructions with photos
A wooden garden gate looks great - step-by-step instructions with photos will help you make it quickly and easily. The structure will require larch boards. This type of wood is preferable, as it is less susceptible to rotting and has a decorative cut. If desired, you can replace it with pine.
Thus, you need to prepare:
- larch blanks measuring 2000 x 140 x 20 (10 pcs.);
- pine boards 2000 x 150 x 50 (2 pcs.);
- loops (2 pcs.);
- metal toothed plates (6 pcs.);
- brass plates (4 pcs.);
- brass screws (40 pcs.);
- corner;
- latch;
- door handle;
- priming;
- protective agent;
- yacht varnish;
- chisel and hammer;
- hacksaw;
- drill;
- screwdriver;
- jigsaw;
- plane;
- bubble level;
- pencil and brush;
- skin;
- rope.
It is advisable to sketch out a diagram of the gate in advance in order to have an idea of the installation steps.
The gate is made as follows:
Make sidewalls . Loops are attached to them.
Align elements vertically using a level.
Support boards and attach to concrete pillars.
Treat the wood with several layers of antiseptic and protective composition, and cover with yacht varnish.
Install the support bar using self-tapping screws.
Assemble the frame , fastening the corners with brass strips and self-tapping screws.
Strengthen the structure with metal toothed plates , which are pressed into the wood and nailed.
This plate will make the gate reliable and durable.
Adjust the hinges for the gate.
Mount the hinges on the support bar.
Insert the frame into the opening to check the size fits.
Make a strut , which will give rigidity to the structure.
Attach the brace to the frame using plates.
The result is a strong frame for the gate.
Fix the frame to the hinges and cover it with boards. The first workpiece is installed on a support, which is leveled.
There are 2 screws for each sheathing board, 3 for corner boards.
Sew all the boards.
Drill the holes for the self-tapping screws in advance and countersink them so that the caps are slightly buried in the material.
Mount the handle. For ease of work, we advise you not to fasten the second board from the edge yet - through the opening it is easy to reach both sides of the gate.
Using a pencil and string forming a compass, draw circles at the top of the structure.
Using the resulting lines, make cuts with a jigsaw , process the cuts in the same way as the workpieces, only finish with not one, but two layers of varnish.
Install a brass angle that will prevent the hinges from aligning.
Secure the rubber fastener with a self-tapping screw.
These step-by-step instructions with photos will help you make a wooden gate for your dacha without much difficulty.
Sewing a gate made of corrugated sheets
After the paint has dried, the gate canvas is sewn up with a profiled sheet. As a rule, wall corrugated sheeting C-20 or C-21 with a thickness of 0.5-0.6 mm is used for this. The use of sheets with a lower wave height is not recommended.
To fasten the corrugated sheets, roofing screws are used, less often - special rivets. Sometimes bolted connections are used for this, but this is not recommended, since in this case the necessary protection against corrosion is not provided for the web at the point where the bolt passes through the corrugated sheet. The sheets are fastened through each wave horizontally and into each transverse beam vertically.
A gate covered with corrugated sheets with closed corners
If desired, all sides of the gate made of corrugated sheets are covered with special square strips in the color of the corrugated sheet. This gives it a finished look and, in addition, provides additional protection for the frame from moisture.
After sewing the fabric, linings for the lock are installed, as well as a handle for the gate made of corrugated sheets.
Top ↑
Wicket design made of corrugated sheets
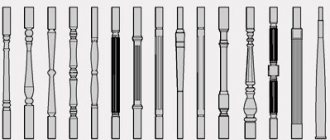
After the frame is ready, it's time to think about the design. Despite the comparative simplicity of the design, there can be a lot of design options, including the use of decorative elements.
The simplest gate made of corrugated sheets is a rectangular frame made of a profile or round steel pipe, onto which a profiled metal sheet is attached. Such a gate is perfect for a fence made of corrugated sheets - it will fit especially well into the usual blind fencing of a summer cottage or personal plot. This solution also looks good with a fence made of brick or stone, including when used as supports for pillars made of these materials.
Previous Next
Classic versions of gates made of corrugated sheets
The gate does not have to be rectangular at all. It can be made arched, but this will require minor changes to the structure of the frame. An arched gate under corrugated sheeting looks especially good with a small rounded canopy or canopy.
Beautiful gates made of corrugated sheets of original shapes with forging and canopies
In order to highlight the entrance group in a fence with solid sections made of corrugated sheets, you can leave an opening in the middle of the gate with a decorative steel grille or polycarbonate strip inserted into it. In addition, street lamps can be installed on support poles.
A gate made of corrugated sheets with forging will look even more beautiful. In this case, the profiled sheet will serve as a kind of background for decorative forged parts. In addition, if forged elements cover the entire opening, they strengthen the frame of the gate and make it more resistant to burglary.
Previous Next
Elegant gates made of corrugated sheets with forging elements - photos of four design options of varying complexity
A forged gate from corrugated sheets can be made with your own hands without any problems. Nowadays, ready-made decorative forged parts can be purchased at almost any building materials store. The main thing is not to overdo it with forged elements, so that the gate canvas does not look colorful and overloaded with decor.
To begin with, it is better to draw a sketch of the design of the gate. The parts purchased in accordance with the sketch are laid out on the canvas and welded to the frame, starting with the largest and ending with the smallest. However, such gates made of corrugated sheets with forging elements look much worse than the products of real specialists.
A gate made of corrugated sheets with forging - a photo of some forged elements made on production lines, as well as a simple sketch that can be implemented using them.
Firstly, professional artistic forging allows you to produce very elegant and thin elements that cannot be produced industrially. Secondly, the range of ready-made elements is very limited. And thirdly, a forged gate with corrugated sheets, made by a professional, can reflect any idea and is stylistically integral, unlike composite products.
Finally, the gate can be either a separate object or part of the gate. Thus, swing gates with a wicket made of corrugated sheets are often used. This decision is justified if for some reason you are very limited in the size of the entrance group - for example, you are replacing an old gate and want to install new ones on the same support pillars.
Built-in wicket inside a gate made of sliding corrugated sheets
However, this solution has certain disadvantages. In particular, gates with a built-in wicket made of corrugated sheets are heavier and place more stress on the hinges. In addition, the operation of such a gate can cause certain difficulties, since its opening is limited from below and above by the gate frame. As a result, it is easy to get caught on the lower profile, and to hit your head on the upper profile.
Top ↑
Standard design diagrams
Regardless of the materials used, the structure of the wicket - like the gate - consists of a frame and decking. If we are talking about a metal gate, then the frame is metal, and the filling of the plane can be metal or from other building materials.
Mandatory elements of a gate made of a pipe or other type of metal profile:
- base for installation - supports fixed in the ground, to which the structure is attached using the canopy method. The base can be the masonry of the boundary wall, existing fence supports, or gates;
- rectangular or shaped (with a complex configuration) frame with additional reinforcing elements - braces;
- filling gaps in the frame. It can be composite or integral. For a metal frame, the filling is usually made from a solid metal panel (corrugated sheet, flat sheet) or wooden boards.
The standard design also includes locking elements. For metal gates, a metal box is usually used, inside which the lock and/or latch mechanism is hidden. If you do not want to install relatively complex mechanisms, installing a conventional deadbolt is acceptable. For its fastening, reinforcement of the frame is provided at the fastening point and at the place where the locking bracket fits.
Below are typical drawings of a pipe gate.
With one support and incomplete covering of the opening. The support pillar is buried in the ground and concreted
With two supports and a rigid frame with braces. The opening is covered by 95%, the supports are fixed on a prepared base (concrete, stone)
Built into swing gates, the frame is partially integrated with the gate frame. The supports are concreted in the ground
With straight frame elements, complementing the basic design of swing gates
Considering the above diagrams, the basic designs can be divided into two groups:
- separately located gates can rest on supporting fence posts, be located next to the gate or at a distance from it;
- combined with the gate structure. In this case, the gate may have common supports with the gate or be part of one of the gate leaves.
Based on appearance, design and partial construction, models with solid and lattice (partial) filling of the frame are distinguished. Any sufficiently durable and practical materials are suitable for complete filling: wood, metal, polymers (including polycarbonate), and less often glass. Lattice structures are divided into products with a rectangular or shaped frame. The simplest option is a chain-link mesh or similar attached to a frame. The appearance of forged and welded artistic products is limited only by the imagination of the master.
Lattice products can be supplemented with transparent or opaque sheet filling of the frame.
Cost of a gate made of corrugated sheets
How much it will cost to install a gate will depend on how much of the work was done independently, without the involvement of specialists.
When making your own gate
If you did all the work on installing and assembling the gate yourself, you will only have to pay for the materials that were needed for this.
Usually the final cost is up to 2000-2500 rubles. But you don’t have to make the gate yourself. You can buy gates made of metal profiles in the construction departments of most supermarkets. Ready-made gates made of corrugated sheets can also be purchased from specialized companies engaged in the manufacture of metal structures. There you can order the production of such a product according to your own sketch, while receiving free technical advice. When such a gate made of corrugated sheets is installed, its price will be from 4,500 rubles, excluding the cost of locks and hinges.
If for some reason you also had to hire specialists to install a gate made of metal profiles, the price of such work in different regions of the Russian Federation will be from 2100 to 2500 rubles. And this also does not include the cost of installing a lock.
Useful article? Save it on social networks so you don’t lose the link!
Top ↑
Team oprofnastile.info
Read on topic:
How to make gates from corrugated sheets with your own hands?
Do you want to make a gate from corrugated sheets yourself? Then read the step-by-step instructions: from marking the frame to installing hinges and locks.
Drawing of swing gates made of corrugated sheets
Are you looking for a detailed drawing of swing gates made of corrugated sheets? Sketches, installation diagrams, drawings of various types of swing gates made of corrugated sheets are in the article.