The foundation is used as the base of the building. There are several types of it. For example, the tape one resembles a reinforced concrete tape of a zigzag closed shape. It is laid under all load-bearing walls of the structure. Such a foundation is optimal for most structures, as it bears loads well, increases the structure’s resistance to shrinkage and reduces the possibility of misalignment. This design allows the construction of buildings and structures from wood, concrete, monolith and slabs. In this case, materials will be used sparingly, since not the entire area under the foundation is poured, but individual strip trenches.
Any foundation requires good strength, this is achieved by reinforcing tapes using cohesive reinforcement. How to knit reinforcement to the foundation manually?
Features of choosing rods
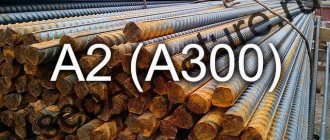
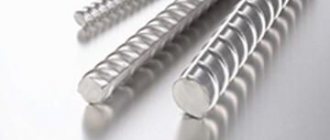
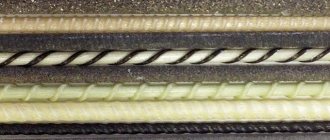
To create a strong foundation frame, you will need ordinary metal rods connected into one spatial structure. In order to increase the durability of the foundation, reinforcement is used; it can withstand the main loads. To arrange the foundation, you need to choose the right one. There are metal reinforcement bars with two indicators:
- indicator K – shows resistance to metal corrosion;
- indicator C - for connecting rods by welding.
Attention! Metal fittings should always be taken with an indicator. Before attaching it, you need to select the type of assembly. Usually knitting is used for this purpose, so using usually knitting with wire you can connect all the rods.
What provides the protective layer?
The location of the elements of the reinforcing frame before concreting can be verified, maintaining the required distance to the walls of the formwork and the base. But the possibility of displacement of individual elements from the flow of fresh concrete when filling and compacting the volume cannot be ruled out. At all stages of obtaining a reinforced concrete structure, the position of the metal elements and the entire frame will remain stable if clamps of the protective layer of reinforcement are used. The saying about a small, but no less expensive, spool is very relevant when applied to them.
Positive qualities of products and benefits from their use:
- The clamps are made of durable plastic - a material that is resistant to corrosion, temperature changes, and the effects of aggressive substances.
- The strength of the products allows you to maintain stability of geometric shape and size, and create a reinforced reinforcing frame for loaded structures.
- Versatility - they can be selected for any type and size of reinforcement, various methods of its fastening, and ensuring the required thickness of the protective concrete layer.
- Plastic supports for reinforcement are also used when concreting structures with a frame base made of composite materials.
- Mass produced retainers are interchangeable.
- The metal frame of the future reinforced concrete structure is assembled easily, quickly, without the use of welding or wire to fix a certain position of the rods relative to each other and the formwork.
- They prevent the frame mesh from appearing above the concrete surface and keep it in a fixed position.
- Support for metal reinforcement prevents concrete from cracking because it minimizes bending and deformation of the rods under the significant weight of the structure.
- They help maintain a constant required thickness of the protective layer.
Made from plastic, the fasteners are a consumable item that remains in the poured concrete. Very rarely, being an element of the formwork, the support for the reinforcement can be reusable. Working with such a product (for example, a cone-type reinforcement clamp) involves dismantling and filling the remaining cavity with solution.
The orientation of the reinforcement affects the classification of the fasteners used with it, which can be:
- support – to fix the position of the frame in the horizontal plane;
- wall - for vertically directed reinforcement (the most used is the star reinforcement clamp);
- universal – combining the capabilities of the first types;
- special - for use in special cases and specific situations; Such fasteners include plugs and tubes, which create the necessary cavity in the concrete and provide the required distance to the reinforcement from the surface of the future product.
The optimal principle for placing clamps in the body of the future product is a checkerboard pattern. With this arrangement, the recommended interval between them is 50-90 cm. The specific value is selected taking into account the dimensions of the metal frame, the cross-section of its rods and the design features of the clamps themselves. According to building regulations, the usual consumption of reinforcement clamps is 4-10 pcs/m2.
Mesh on plastic supports for reinforcement, arranged in a checkerboard pattern, every 80 cm, consumption 5 pieces per square meter.
Knitting methods
To work you will need:
- plastic clamps;
- wire;
- clamps with a metal core.
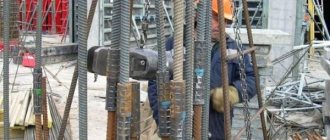
They mainly use a proven method - wire connection. Clamps also have a place in connecting reinforcement; they can be fastened faster and do not require additional assistance. One of the disadvantages of such knitting is poor fixation, this is visible only when forces are applied to the frame before pouring. When the mixture hardens, the clamps are as strong as wire.
There is a small recommendation. If there is hesitation in choosing a connecting element, you should take clamps with a metal interior. This method combines the properties of wire and a regular clamp, the connection is strong. Once the connection and type of reinforcement have been selected, you can begin to select the tool.
Definition and role in reinforcement cage
“Frogs” made of reinforcement are elements of reinforcement of reinforced concrete structures that play the role of a spatial frame, holding the top layer of the reinforcing mesh at the required distance from the bottom. In addition, with the help of such elements, the load is evenly distributed over the entire area of the frame.
The installed shaped elements perform a number of important functions.
- They hold the upper reinforcement cage.
- Give increased rigidity to the reinforcing structure.
- Reduces the time required to form a connection between the upper and lower mesh.
- They are the main structural units for creating multilayer systems.
- Prevents the possibility of frame deformation.
With the help of such clamps, the risk of falling and bending of the upper installed mesh is eliminated. The integrity and reliability of the structure is formed.
The “frogs” are installed on the lower mesh and secured with a knitting wire. After they are secured, another layer of reinforcement is placed on top. The height of the elements provides the required design parameters.
Necessary tools for fastening reinforcement
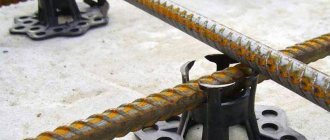
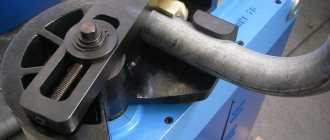
To facilitate the process of tying the rods, you can use a special tool. With its help, you can speed up installation and increase the strength of the bonded connection. If you use a high-quality tool, this will ensure speedy installation of the base. The main tools for tying rods are:
- construction crochet hook;
- special gun for mating;
- drill with attachment;
- handmade hook.
In some cases, you can use bosses - these are plastic fasteners, but they require a prepared base and are not practical to use. Any tool is used as a "winder" after tying with wire. But the gun also performs another function - it can grab a structure and tie it up on its own.
Such a gun can be used constructively for large volumes; it is not suitable for a strip base. Professionals often choose a crochet hook. It can be used in all structures where reinforcement needs to be tied. This tool is compact and well suited for a tape base. You can make a hook yourself by attaching a hook to the handle.
To make the work go faster, you can use a regular drill with an attachment. With its help, the connection will be well fastened; it winds until it stops. There is one drawback - the bulkiness of the element; in strip foundations this method can be inconvenient. A drill with such an attachment can be made manually. To do this, you need to take a powerful screwdriver and insert the hook bit. The only thing that all tools must do is wind the wire on the rods. So, the choice depends only on the available materials and preferences.
Determining the quantity of consumables
Before starting work on reinforcing a strip foundation, it is important to correctly calculate the amount of necessary consumables - steel rods - smooth or corrugated, and wire. Known rules for installing reinforcing bars will help you determine the required parameters.
Determining the amount of reinforcement for reinforcement
Let's calculate the amount of materials for reinforcing a strip foundation using the example of building a house with wall dimensions in plan of 6x8 meters and one transverse partition. The width of the trench will be 0.4 meters, depth - 1.9 meters. First, let's calculate the number of longitudinal rods.
To obtain a frame with maximum strength characteristics, it is advisable to lay the reinforcing bars in four threads - two at the bottom and two at the top. To strengthen the corners, it is advisable to bend the ends to a length equal to 40D. With a rod diameter of 16 mm, the size of the bent ends will be equal to 40x16 = 640 mm.
Based on the specified parameters, the required length of the rods will be equal to:
(6+1.28)x2x4+(8+1.28)x2x4+(6+1.28)x4=58.24+74.24+29.12=161.6, where
The first bracket is the length of the rods for a wall 6 meters long, taking into account the bends at both ends, the second bracket is the same value for a wall 8 meters long, and the second bracket is the length of the rods for the partition. The number of walls of each length is two, the number of rods for reinforcing each of them is four.
The next stage is the calculation of transverse horizontal and vertical rods. The total length of the reinforcement is:
(6+8)x2+6=34 meters.
Reinforcement of the strip base
Short rods are installed in increments of 0.5 meters, which means the number of horizontal and vertical pairs will be equal to:
34x0.5=68
The length of the rods should provide a gap between the armored belt and the boundaries of the reinforced concrete foundation of the house, equal to at least 5 cm on each side. Accordingly, the length of the horizontal rods is equal to
40-5-5=30, vertical 190-5-5=180.
The total length of the reinforcement for the jumpers will be equal to:
(68x0.3x2)+(68x1.8x2)=40.8+244.8=285.6 meters.
Based on construction standards, for longitudinal reinforcement the diameter of the rods is chosen to be 12-20 mm; for horizontal and vertical lintels, the diameter of the rod can be reduced to 8-10 mm.
Calculation of reinforcement for strip foundations
Tie wire is installed at the rate of 0.3 meters for each mounting unit. Taking into account the need to attach the vertical and horizontal jumpers to the longitudinal rods, the number of ligaments will be equal to 68x8 = 544. The total length of the required binding wire is 544x0.3=163.2 meters.
Choosing a pattern for knitting
Knitting reinforcement for the foundation with your own hands is simple, the main thing is to adhere to the basic rules. First you need to install the frame. You can apply the following strip base scheme: the number of belts also depends on the height and length of the base. If you make a simple design, then no additional rods are used, the diagram will correspond to a cube with 8 fasteners in one part. It is important to choose the right indicators that correspond to the distance through which the reinforcement is knitted in the base. Usually taken from 10 to 30 cm, this distance depends on the forces acting on the structure.
If necessary, you can strengthen the structure by adding additional rods. In order to correctly tie the reinforcement, you need to do the following:
- Take a piece of wire 25-30 cm.
- Fold the rod in half.
- Bring the whole side under the joint of the rods.
- Hook the loop with a hook and bend the reinforcement.
- Then place the free edge on the hook.
- Turn clockwise all the way and twist until the element locks.
- Remove the hook from the connection.
There is one caveat when knitting a connection: you should not twist the wire too much, it may not withstand the load and break. If you have a screwdriver and a special attachment in the form of a hook, this will simplify winding, and if you rent or buy a gun, you can quickly complete all the steps for tying the reinforcement.
The more practice, the better the quality of each hand-tied connection.
Other types of reinforcement fastening
There are other types of binding for connecting reinforcement bars into a single frame - welding and plastic clamps. You can use these types of connections, but experts often choose the usual wire knitting. Why do builders make this choice? Plastic clamps are a reliable and fast method of tying rods together in a structure. Plastic quickly connects elements and does not require additional components. tools and is also durable after the concrete mixture has hardened. But it has a number of disadvantages:
- cannot withstand different temperatures;
- the price is more expensive than wire;
- unstable connection before pouring concrete.
This connection is quite expensive, and the strength can quickly evaporate before pouring the mixture; under any load, the rods can lead, break the structure and ruin the entire foundation. Such fastening cannot be done in winter; the clamp may not withstand low temperatures. It is more often used in small-volume structures, where all work is carried out quickly.
Why choose knitting rather than welding? Welding requires a welding machine and experience in such work; the connection also turns out to be reliable. This knitting of the frame provides a good connection with a minimum of cost and time. There is a significant drawback to this method of installing reinforcement - the structure can reduce its strength. This occurs due to high temperatures during welding and deformation of the base of the joint. At the first frost, the connection may crack. This connection is used in factory conditions and for large volumes of work, with all calculations and with a specialist. Therefore, the choice is often made towards wire knitting. Plastic reinforcement: how to knit correctly?
How to knit reinforcement to the foundation manually? An alternative option for tying reinforcement is fiberglass. It is in no way inferior to the functions and strength of metal, and its cost is lower. Plastic knitting differs from wire knitting. Before knitting, you need to make thorough calculations on the distribution of forces and loads.
The distance for such knitting should be from 150 to 350 mm; if the structure is light, then 600 mm is accepted. When pouring the base, plastic bosses are used; they help the structure not to sag while pouring the mixture. The style of work is identical to that with wire; special clamps or wire are used. But all work is carried out according to careful calculations.
Important! In order for the fiberglass structure to be stable, it is necessary to use metal elements - they will help prevent the frame from sagging and the occurrence of deformations. Knitting reinforcement is a fairly simple process, but still requires attention to detail. The strength of the entire foundation and building depends on the correct knitting. There are different types of knitting and patterns, but by following the basic rules, you can easily assemble the frame and strengthen the foundation.