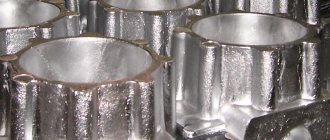
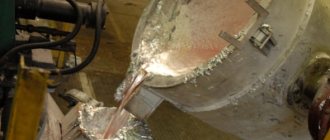
The aluminum casting procedure can be done at home. There are many different methods that have their own pros and cons, so sometimes making a choice can be difficult. This article will address the question: “How to cast aluminum at home?”
An interesting fact is that aluminum is the most popular metal in the world. It is widely used for industrial production in various spheres of life. He did not bypass various home productions either. What is the reason for such high demand? Light weight and excellent characteristics, easily malleable, and is a ductile metal. But despite the wide range of processing techniques, this issue sometimes creates difficulties. For example, making a mold is sometimes an overwhelming task.
To begin with, we should recall some of the properties of aluminum. It melts at a temperature of 660 degrees, and its boiling point is 2500 degrees. The main feature that is worth paying attention to is the extremely rapid oxidation in case of contact with air. Knowing the properties of aluminum, you can cast it even at home; many people independently create various devices that help in this matter. But more problems arise precisely at the moment of making the mold for pouring.
How to cast aluminum at home?
The technology for producing aluminum at home is almost identical to industrial methods. Therefore, at low tide, they require the use of factory methods with minor adjustments to the scale of production and home conditions. The most common technology for casting aluminum at home is the use of molds.
Aluminum casting molds
Considering all of the above, you need to select the necessary equipment (a furnace for scrap aluminum) and build a mold for casting (how to do this will be discussed later).
The process itself will consist of several stages:
- Cleaning scrap from dirt, impurities and various fillers that can affect the final purity of the alloy. At the same stage, it is necessary to grind the aluminum to a small size.
- The melting process is carried out using a pre-selected method. Complete melting of the metal allows you to remove all unnecessary additives from the metal mass. And also at this step the molding mixture is selected.
- The final step is to add the aluminum to the prepared melting mold. Next, you should wait until the mass hardens and after that you can release the alloy from the mold.
This will complete the casting process. Throughout the entire procedure, you should follow safety rules when working with hot metal.
Reverb melting crucible
The reverberant melting crucible has served as a standard in aluminum production almost from day one. The variations in execution are impossible to list, as are all the types of scrap that were processed. Some models of this unit are stationary, tilt, front load, top load and multi-chamber models. Each of the listed models has its own strengths and weaknesses.
Front loading melting furnace
Front-load dryer (Figure 3) - a front-loading or front-loading oven is a device equipped with a door across the entire width of the oven to provide full access to the inside of the oven. Loading is done using a forklift or, more commonly, using a special loading machine. The advantage of this type of device is considered to be the ability to completely unload the furnace during continuous operation, as well as the ability to work with the highest possible productivity. The weak point of the oven is that it requires several loading operations to completely fill it due to the internal geometry of the oven. This furnace is suitable for large and medium-sized manufacturers for various smelting specifications.
Figure 3 – Front-loading melting furnace
Vertical loading melting furnace
Vertical loading (Figure 4) - a top (vertical) loading oven is a device with a removable lid to provide full access to the inside of the oven. Loading is done using a gantry crane and a loading bucket. The advantage of this type of model is the ability to fully load it in a very short time. The furnace is designed to be completely unloaded after each melting cycle, with the ability to easily change melts. The weakness of this furnace is the loss of heat when the lid is removed, which requires special control of the sequence of loading and melting operations.
This model is good for large aluminum processors, for large volumes, for processing a wide variety of scrap/scrap.
Figure 4 – Vertical loading melting furnace
Multi-chamber melting furnace
A multi-chamber melting furnace (Figure 5) is a complex of various chambers designed for special tasks of physically changing the processed scrap. Cameras are uploaded in a variety of ways, including uploading through the receiver, as well as uploading through the main portal.
Figure 5 – Multi-chamber melting furnace
The receptacle feed furnace includes an external receptacle for supplying feedstock. The standard set of processed materials includes extruded scrap, shavings and trimmings, bagged scrap, as well as material with low weight parameters and low relative density. This type of raw material requires rapid immersion below the crucible level to avoid oxidation and metal loss.
This type of furnace is recommended for use in the production of a limited number of smelts with a standard alloy recipe. The difficulty of multi-purpose application lies in the limited possibility of changing the recipe in this furnace model. The model can be a different combination of chambers, depending on the intended raw materials and the available area for placing the furnace.
Preparation of materials for casting
The first step is to prepare aluminum scrap. It is important to understand that aluminum comes in different types; for example, if you take a wire, you may get one that bends very easily, or you can choose one that is practically resistant to physical impact.
If you are going to do aluminum casting, then you should choose one that is softer; it is this material that contains a small amount of oxides.
The second stage is the selection of gypsum. It is from this that the mold is made if work is done at home. The most profitable brand is gypsum. However, the cost of such a product is quite high and it can be difficult to find, so the use of white gypsum is allowed.
It can be purchased at any building materials store. But beware of materials like alabaster. It is extremely similar to plaster and is what the seller can recommend as a replacement, however, for our purposes it is impossible to use.
At the third stage, you need to select wax; it is the best option for casting small parts. Pure wax is quite expensive and can only be purchased in large quantities, which makes no sense, so it is best to purchase regular candles, no matter what type. It is with their help that the molds will be manufactured.
The last thing we need is a container for melting aluminum made of something durable, because it will have to withstand heating to high temperatures. And you can’t do without the main thing – the temperature source.
To do this, you can use anything, even a gas forge, even a homemade stove, it doesn’t matter. All we need is to reach the desired temperature.
Aluminum casting at home from mold to melting
Pouring construction plaster into a mold
You should not mix large amounts of gypsum. It should be enough for half the mold. But before you knead it, the mold needs to be greased from the inside. Any thick lubricant like grease or lithol is suitable for this.
First, the mold is filled halfway.
PHOTO: YouTube.com The form is filled halfway, after which it is slightly leveled
Now you need to place the part molded from plasticine in plaster and slightly press it. The part must be sunk to the top level of the plaster. Now we just have to wait for the alabaster to dry. After this, small indentations are made in it using a drill. Subsequently, they will not allow the parts of the formwork to move relative to each other.
PHOTO: YouTube.com Holes are necessary so that parts of the form do not move in relation to each other
Lubrication comes into play again. It is applied to the entire horizontal surface. Now you can mix the plaster again and top it up. The casting mold is almost ready.
PHOTO: YouTube.com Grease will prevent the mold halves from sticking together
Making molds for casting
In home production, it is not profitable to use industrial molds for casting aluminum. The process will be complex and expensive, and the devices themselves take up a lot of space.
In order for the aluminum to take the desired shape, you can resort to using dirt or making a mold yourself. The first option assumes that the user must dig a hole of a specific shape into which aluminum will be poured.
But we will go the other way and make the molds with our own hands. To do this, you can use polystyrene foam, from which you simply cut out the desired shape. Casting aluminum into foam is safe and effective.
Aluminum casting using gasified models
You can also use gypsum or cement, but using the second method is impractical, since the shape will only have a rectangular appearance. Using gypsum you can create any configuration.
General information #Metal casting_innov_description
2.1 Description of purpose #Metal casting_innov_purpose
The following are produced by injection molding:
- car engine parts (including aluminum blocks, carburetor parts);
- parts of plumbing equipment;
- parts of household appliances (vacuum cleaners, washing machines, telephones);
- instrument parts
- ship parts
- aircraft parts
- Aerospace parts
- car parts
- motor housings
- parts for energy industrial
- parts for centralized heating of apartments and houses
Injection molding is also used in the production of computers, smartphones and other electronics.
Almost any aluminum part can be cast using injection molding machines. Because injection molding can produce parts with high tolerances for porosity and product density.
2.2 Materials used #Metal casting_innov_materials
The injection molding method is used for alloys of non-ferrous metals (based on zinc, aluminum, copper, magnesium, tin-lead alloy) due to their low melting point, as well as for some steels. The most important property of the metal that is supposed to be used for casting is its fluidity. The alloy in molten form should flow as easily as possible from one crucible to another, while filling its smallest recesses. The higher the fluidity, the thinner the walls can be made of the finished product. It’s much more difficult with metal that doesn’t flow well. Under normal conditions, it manages to set much earlier than it fills all the gaps in the form. It is this difficulty that industrialists encounter when casting metal alloys. The most in demand in industry are metals that have a low melting point, since their production is less expensive. The lower the melting point of a material, the easier it is to cast.
2.3 Description of the technological process #Metal casting_innov_processes
Modern foundry production, in addition to the traditional technology of pouring liquid metal into sand molds, also uses other high-tech, productive casting methods:
- vacuum;
- centrifugal;
- under pressure;
- centrifugal;
- shell;
- multiple;
- mercury;
- by lost wax models;
- electroslag.
The following production technologies are most often used on an industrial scale today:
- in metal forms (cocol);
- static casting;
- injection molding;
- into shell forms;
- into lost wax models.
Die casting
- The first stage is opening the mold and lubrication. This is necessary so that the finished casting easily moves away from the mold cavities and the metal in the piston does not solidify before it is pressed. A film is also formed, which helps stabilize the temperature and protects the surface of the mold, which increases the service life of the tooling.
- The second stage is closing the mold. The clamping force of the mold is the characteristic that, according to modern classification, gives the name to the entire machine, that is, for example, if the injection molding machine is called C300D, then its clamping force is 3000 kilo-Newtons or 300 tons and it is an analogue of the 711A08 injection molding machine according to Soviet classification. In other words, such a machine is capable of containing metal, which creates a force that tends to open a mold of three hundred tons.
- The third stage is pouring metal into the piston. After lubricating the mold and piston, the worker scoops the required amount of metal from the furnace and pours it into the neck of the piston.
- The fourth stage is metal pressing. The piston, under the influence of pneumatics, into which nitrogen is usually pumped, makes a translational movement and pumps metal into the pressing chamber.
- The fifth stage is the removal of the finished product.
2.4 Seriality (#Metal casting_innov_serialization)
This method of manufacturing blanks is characterized by high productivity. But sometimes, in order to reconfigure a line to produce a new workpiece, it is necessary to invest significant funds, since the equipment and tooling are very expensive (metal injection molding).
Homemade stoves
There are practically no requirements for the furnaces in which aluminum will be melted; you need to reach a temperature of 600 degrees and that’s it. The need for a stove arises from the fact that an open fire does not provide such a temperature, which is why it is necessary to create a closed space heated to such a temperature.
You can make a stove from old pots. This is done quite simply: you need to take a pan with an air hole made on the side, supply air (for example, using a hose from a vacuum cleaner), put coal into the device and set it on fire, the air supply begins to hold the flame, the container is lined with coal on all sides and to exit the lid opens a little smoke.
Regardless of the molding of the product, the temperature throughout the oven will be at the same level.
An excellent option would be to use a gas burner.
Gas stove
You should know that this method can be used when casting small piece products. The oven can be built using two tin cans inserted into each other. With this use, only the lower container heats up, and the outer one acts as a shell that retains heat. The structure can be covered with a lid to remove combustion products.
Second phase
Firing the workpiece in a muffle furnace. We set the firing mode to 350 degrees, it takes 5 or 6 hours for firing. After six hours, remove the pan from the oven. In this case, no cooling is required. We send aluminum to the furnace to melt. Aluminum is used grade AL-9. This is the most suitable grade of aluminum, excellent for casting products. Fill the bottom of the bucket with sand and place the hot mold there. We install the sprue on the casting hole. It can be made from sand and liquid glass. Fill the bucket with sand to the border with the sprue. In this case, coarse sand is good; condensation does not form in it, unlike fine sand. You can start casting. All preparatory steps have been completed. Don't forget to remove the oxide film before starting the process. The middle part of the sprue needs to be heated with a burner. This way the metal will shrink better.
It's time to break the structure.
As we can see, the mold poured perfectly. Of course, there are marks from the joints, but this is not a problem; they can be easily removed with a Dremel. The sprue can be removed, we are preparing for turning the product.
Casting errors
Casting aluminum into plaster molds is often accompanied by three main errors that arise when the work is carried out incorrectly.
- Before making plaster molds, you need to make sure that all the moisture has evaporated, otherwise it will disappear under pressure and turn into steam, which will remain on the aluminum in the form of pores.
- If the mold heats up slightly, the aluminum will not be able to fill it completely and some areas may remain empty.
- A common method of hardening is immersing hot metal in water. In the case of aluminum, this cannot be done; the internal structure of the metal will be damaged.
Knowing these mistakes, you will be able not to repeat them and avoid unpleasant incidents during the casting procedure and the manufacture of a mold for aluminum casting.
Crucible and auxiliary equipment
A tin can can withstand one heat. Its further use is possible, but with the risk of being burned through. In this case, molten aluminum runs the risk of getting inside the stove, which can not only lead to clogging of the burner nozzles.
To work in a furnace running on coal or liquefied gas, and indeed for reusable melts, it is advisable to make a special container - a crucible. It is made of steel. A piece of pipe with a welded bottom will do. A good option is made from a cut-off fire extinguisher or a small-sized oxygen cylinder with an oval arch. It is advisable to make a side gutter for easy pouring of a thin stream.
What additional equipment may be needed for aluminum casting? Reliable pliers or their version with clamp fixation will come in handy. Ideally, the crucible can be equipped according to the principle of industrial designs: with side grips of a removable suspension and a lower fixed stop for ease of turning it over. You need a spoon with a long handle to remove slag from the surface of the melt.
Features of work
- The poured mass cools down for a very long time, and this process should not be forcibly accelerated. Hardening should occur naturally, then the structure of the blank will be uniform throughout its entire thickness. You will have to wait at least a day, since the top hard crust is not yet an indicator that the paraffin inside has hardened.
- The material used is characterized by significant shrinkage. In other words, in the central part of the mold the mass will “sag” somewhat during the cooling process. When calculating the dimensions of the required workpiece, this should be taken into account and paraffin should be poured with some reserve in volume.
Since you will have to manually cut out a part from a finished sample, it is clear that in the absence of experience (and perhaps even ability), it will not be possible to do everything accurately the first time, especially if you need to cast something of a rather complex configuration. But a rejected “blank” has only one path – to be melted down.
In order not to waste time, it is advisable to prepare two of them. If the first one is spoiled, then with the second one, taking into account the experience gained, the work will go more successfully. Considering that candles cost pennies, this will not “hit your pocket.”
Mold making
There are enough recommendations for its preparation. One simple way is to make it from plexiglass. This “aquarium” is assembled by fastening cut pieces of hardboard using plasticine. They also seal all joints.
Making a part template
A “blank” is placed at the bottom of the “aquarium”. To prevent it from moving during the process of pouring the solution, it is fixed with the same plasticine.
It should be taken into account that all other work is done quickly, since the plaster sets well. But this material is not used in its pure form. Its mixture with sand of the smallest fractions (50 to 50) is used. Otherwise, water will remain in the gypsum mass, which will begin to evaporate after pouring aluminum. This will cause pitting in the finished part.
The mixture is diluted to a medium-thick sour cream, after which the solution is loaded into the mold. You need to cook it so much that the “blank” is completely covered with it. In this case, it is not worth saving on material, especially since its price is low. To remove air bubbles, if there is no vibrating table, the mold must be shaken thoroughly by hand.
After the poured mass has hardened, the “aquarium” is dismantled. All that remains is to remove the paraffin from the plaster. It's easy to drown it out. For example, place a plaster template, bottom up, on a sheet of iron, and place it on an open fire. But this does not guarantee the “cleanliness” of the insides of the form. If the part is not just a metal plate or something similar, but has protrusions, cutouts, and so on, then a different method is used.
An unnecessary metal container is taken, into which a plaster template is placed and water is poured. The dish is placed on the fire, and when the liquid boils, the paraffin will begin to collect at the top (float). But it’s unlikely that you’ll be able to wash the container afterwards.
After the melting process is completed, the gypsum is dried. The temperature should be low, otherwise the material may “burn out” and become deformed, especially thin parts of the template.
What you can make from aluminum with your own hands - Metals, equipment, instructions
Nowadays, we throw a very wide variety of packaging products into the trash every day, but some products can be a good source for doing various kinds of crafts with your own hands.
So, as an example, you can take an empty tin can of lemonade or beer. For the most part, crafts made from tin cans serve as decoration, but if you use your imagination and imagination, you can build something useful and usable for your home.
What can be cast
You can cast a lot of useful things that people are happy to buy.
“WARNING VICIOUS DOG” or “VIDEO SURVEILLANCE” signs
"MAIL" signs
"ADDRESSES AND NUMBERS" signs
Signs “CAFE, BARS, OFFICES”, etc.
This is not a complete list of what can be produced. You can even cast molds for casting lead products (weights, car weights, battery terminals, etc., etc.)
I even came across a video where some friend from Kenya quite professionally pours dishes on his knee.
Of course, I didn’t plan to cast dishes, but the question of making all kinds of plates and molds for casting lead products really interested me.
I never advertised my products, people themselves appreciated them and began asking me to make the same ones for them.
That's how the business started. My town is not big, but there are quite enough orders.
Standard prices
| Product | Production time | Price |
| Bronze blank 3 kg | 2-3 days | 1620 rub. |
| Cast stand blanks | 5 days | 450 rub. |
| Iron casting | 5 days | 90 RUR/1 kg |
| Aluminum casting | 5 days | 290 RUR/1 kg |
| Bronze casting | 5 days | 540 RUR/1 kg |
Senior Specialist. Assistance in estimating the cost and production time of products made of bronze, aluminum and cast iron.
We use several technologies that have proven themselves in the production of aluminum alloys throughout Russia. They allow us to produce both single castings and set up serial production of aluminum parts to order.
We will need:
- molding container;
- sand;
- Styrofoam;
- stove with burner;
- tool for processing foam and finished castings.
First of all, we start working with a template or drawing; I will tell you using the example of casting a souvenir. Prepare the template and cut it out. This is necessary in order to quickly transfer it to our foam. If you draw well, then you can draw the detail directly on the foam, it doesn’t matter. After which, we need to cut out our blank. This takes most of the time, since the work is painstaking, and the defect is practically impossible to fix (you can cut out the damaged part and glue a piece of new polystyrene foam with glue and try to cut it out again).
Next, I used a drill (engraver) and processed the edges more clearly, cut out holes and the product acquired a recognizable appearance. Here, by the way, I didn’t succeed the first time, since the cutter cuts the foam like a knife through butter and, due to torsion, is pulled further into the depths, so be careful and don’t overdo it. Otherwise you will have to start from the beginning, which is what I had to do!
