During finishing work and construction, clear geometry is sometimes needed: perpendicular walls and other structures that require a right angle of 90 degrees. An ordinary square cannot check or mark corners with sides of several meters. The described method is excellent for marking or checking any angles - the length of the sides is not limited. The main tool for measurements is a tape measure.
We will look at accurately marking right angles, as well as a method for checking already marked angles on walls and other objects.
Pythagorean theorem
The theorem is based on the statement that in a right triangle, the sum of the squares of the lengths of the legs is equal to the square of the length of the hypotenuse
. This is written as a formula:
Sides a and b are legs, between which the angle is exactly 90 degrees. Therefore, side c is the hypotenuse. By substituting two known quantities into this formula, we can calculate the third, unknown one. Therefore, we can mark right angles and also check them.
The Pythagorean theorem is also known as the “Egyptian triangle”. This is a triangle with sides 3, 4 and 5, and it does not matter in what units the lengths are. Between sides 3 and 4 is exactly ninety degrees. Let's check this statement with the above formula: a²+b²=c² = (3×3)+(4×4) = 9+16 = (5×5) = 25 - everything converges!
Now let's put the theorem into practice.
Checking the verticality of the walls
Now that we have built our rectangle, let's check the walls. The point here is that the resulting square may not work out due to the curvature of the walls and you will have to move its edges away from the wall. We check using a rule with a bubble level or a rule with a bubble level or plumb line leaning against it, which is not entirely convenient. Let's see how to check a wall with a rule and a bubble level.
From the edges of the rectangle we look at the possibility of vertically aligning the walls
The bottom edge of the rule is placed on the edge of the rectangle. The rule is set vertically, the bubble level is closely adjacent to the rule. It is important that the rule and level are clean, that there are no layers of dry plaster - this is a priori.
We walk along the walls, especially in the corners, and look at the possibility of leveling them. If somewhere it is impossible to set the rule vertically from the edge of the rectangle, because a wall is in the way, the edge of the rectangle must be moved to the distance required to level the wall and install the beacons.
It should be remembered that the beacons are 6 mm thick. Look through the walls based on the fact that beacons will need to be placed on it.
The edge is moved away from the wall parallel to the opposite edge by the same distance at both ends.
Checking right angle
Let's start with the simplest thing - checking a right angle using the Pythagorean theorem. The most common example in finishing and construction is checking perpendicularity
walls Perpendicular walls are walls located at right angles of 90° to each other.
So, we take any tested internal angle. On the walls (at the same height) or on the floor, mark segments of arbitrary lengths on both walls. The length of these segments is arbitrary; if possible, you need to mark as many as possible, but so that it is convenient to measure the diagonal between the marks on the walls. For example, we marked 2.5 meters (or 250 cm) on one wall and 3 meters (or 300 cm) on the other. Now we square the length of the segment of each wall (multiply by itself) and add the resulting products. It looks like this: (2.5 × 2.5) + (3 × 3) = 15.25 - this is the diagonal squared. Now we need to take the square root of this number √15.25≈3.90 - 3.9 meters should be the diagonal between our marks. If the measurement with a tape measure shows a different diagonal length, the angle being checked is rotated and has a deviation from 90°.
Right angle diagonal calculator
Extracting the square root has never attracted me - an ordinary person cannot do without a calculator, and besides, not all mobile devices have calculators that can extract it. Therefore, you can use a simplified method. You just need to remember: a right angle with sides of exactly 100 centimeters has a diagonal of 141.4 cm.
Thus, a right angle with sides of 2 m has a diagonal of 282.8 cm. That is, for every meter of the plane there are 141.4 cm. This method has one drawback: from the measured angle it is necessary to set off equal distances on both walls and these segments must be multiples of a meter. I won’t claim it, but in my humble experience, it’s much more convenient. Although you should not forget about the original method completely - in some cases it is very relevant.
The question immediately arises: which deviation from the calculated length of the diagonal is considered normal (error), and which is not? If the angle being tested with marked sides of 1 m is 89°, then the diagonal will decrease to 140 cm. From understanding this dependence, we can draw an objective conclusion that an error of a few millimeters in the diagonal of 141.4 cm will not give a deviation of one whole degree.
How to check the outer corner?
Checking the outer corner is essentially no different, you just need to extend the lines of each wall on the floor (or ground, using a cord) and measure the resulting inner corner in the usual way.
Squats burn calories and can help you lose weight
Because squats work multiple muscle groups at once, this exercise causes your body to increase its production of anabolic hormones. These are hormones that help you lose fat and build muscle.
A 2014 article in the Journal of Strength and Conditioning Research compared the squat as a free-weight exercise to the leg press. Although both movements use the same large muscle groups, the body's response is different.
The study found that at the same intensity, squats recruit more muscles and produce a greater hormonal and physiological response, such as greater muscle activation, than the leg press.
Russians were reminded of the end of “coronavirus” benefits on April 1
Big mistake of believers: what people often do wrong on Parents' Day
Creating a bright image is real art therapy: sharing ideas
Squats, as a strength training exercise, can be an important part of any successful weight loss plan. Regular strength training helps speed up your metabolism and reduce body fat.
A 2013 study published in the Journal of Sports Science and Medicine looked at the health benefits of an eight-week regimen of bodyweight squats. It was found to reduce body fat percentage and increase muscle mass in participants.
How to mark an acute angle
Much less often there is a need to create acute angles, in particular 45°. To form such figures, the formulas are more complex, but this is not the most problematic. It is much more difficult to connect all the lines drawn or stretched with cords - this is not an easy task. Therefore, I suggest using a simplified method. First, a right angle of 90° is marked, and then the diagonal 141.4 is divided into the required number of equal parts. For example, to get 45°, you need to divide the diagonal in half and draw a line from point A through the division point. This way we get two 45 degree angles. If you divide the diagonal into 3 parts, you get three angles of 30 degrees. I think the algorithm is clear to you.
Actually, I told everything that I could tell, I hope I presented everything in understandable language and you will no longer have questions about how to mark and check right angles. It is worth adding that any finisher or builder should be able to do this, because relying on a small construction square is unprofessional.
When renovating, building or making furniture yourself, it is often necessary to check or construct a right angle. In any case, the accuracy of the measurement is very important, but if the sides of the angle are several meters, it will be difficult to do this using a square. Today we will look at several universal methods for measuring right angles using a tape measure.
Welding products from metal corners
In the manufacture of various metal structures, rolled steel angles (angles) are among the most commonly used materials. In addition to welding corner pieces together, it often becomes necessary to weld a corner to a pipe or to a flat surface. Such compounds are used in construction and installation work, in the manufacture of furniture and crafts.
Types of connection
Welding steel products using angle iron comes down to several main types of connections:
- butt welding of billets from angle bars;
- welding corner blanks at an angle of 90 °;
- welding of angle steel with other products.
When creating a structure, a good welder solves at least two problems. The first is to weld a strong product that can successfully withstand certain loads. The second task is to ensure that the completed work looks aesthetically pleasing. After all, the work of a true master is always pleasing to the eye.
Let's look at typical examples showing how to weld iron corners to each other, as well as to other surfaces.
Butt joint
You can butt weld pieces of corner profiles. This type of welding is often required to lengthen an existing piece of steel. The technology for making such a connection is simple and basically does not differ from the butt connection of sheet blanks. But there are still some features.
Pythagorean theorem
The Pythagorean theorem, known to everyone since school, will help you check a right angle. Let's remember the definition: “In a right triangle, the square of the length of the hypotenuse is equal to the sum of the squares of the lengths of the legs” ( a 2 + b 2 = c 2 ), where a and b are the legs, and c is the hypotenuse. Substituting two quantities known to us into the formula, we obtain an unknown third.
Now let’s return to our measurements and apply the theorem in practice.
In order to check the angle, we mark arbitrary segments on both walls; it is advisable to measure them larger to make it more convenient to measure the diagonal between them. Once you have marked these segments, square the length of each and add them up. Take the square root of the result (for convenience, you can use a calculator). Now we measure the length of the diagonal between the two segments with a tape measure; it should coincide with the result obtained. If the measurement results in a different number, then the angle is not 90 degrees.
Possibility of precise measurement in internal corners
When measuring the distance between opposite walls in a room, it is quite difficult to obtain accurate data due to the inability to completely bend the tape measure in the corner. Of course, this is not a problem if you use a laser rangefinder, but you have to accept some error.
But, as it turned out, there is a way out. It is enough just to know the dimensions of the tape measure body and place it close to the wall. And then you just need to add this number to the result. By the way, some manufacturers indicate on the tape measure the width of its body precisely for this purpose.
To measure or copy a round object, you need to wrap a tape measure around it. And to make it easier to read the results, there is a special marking on the back of the canvas with a separate zero.
In general, the presence of markings on the back side is now considered a rule of good form among well-known foreign manufacturers. Often here you can see the vertical arrangement of numbers - for more convenient height measurement.
Egyptian triangle
Also, do not forget about such a geometric figure as the Egyptian triangle - a rectangle with lengths of sides 3, 4, 5, and it does not matter in what quantities, because between the legs of length 3 and 4 the angle is exactly 90 degrees. Let's check?
a 2 + b 2 = (3 2 + 4 2) = (9 + 16) = 25; √25 = 5.
How to check an angle using the Egyptian triangle?
Measure a 3 meter long section on one wall and a 4 meter long section on the other. Now we measure the distance between these two marks in exactly the same way as in the method with the Pythagorean theorem. If the resulting result is a multiple of 5, then there is no doubt that the resulting angle is 90 degrees.
Surface preparation
Before starting work, the surfaces to be plastered must be freed from the old coating. Layers of poorly adhering plaster must be knocked off with a chisel; the remaining parts should be notched for better adhesion to the new plaster.
Next, the surface is dusted with a damp brush or construction vacuum cleaner. Dust settled on the walls will prevent reliable adhesion of the plaster to the walls, so the surfaces must be cleaned as much as possible. In damp rooms it is also necessary to treat the walls with an antifungal compound.
The primer for the surface is selected depending on the material of the walls. Brick walls absorb moisture poorly, so to treat them it is enough to use a universal acrylic primer. Concrete walls, due to their porous structure, on the contrary, strongly absorb moisture from the plaster mixture and for their treatment it is necessary to use special adhesive primers of the concrete-contact type. For porous and fragile gas silicate walls, mineral primers are suitable, they fill pores and cracks, creating a resistant film on the surface.
Priming the walls is a mandatory step when plastering walls! The primer provides better adhesion of the mixture and the working surface, reduces material consumption and facilitates the application of plaster.
To protect the plaster layer from cracks, a plaster mesh is used, which acts as a reinforcing material. Plaster mesh differs in type of material (metal, basalt, polymer) and cell size. If the planned thickness of the plaster layer does not exceed 2-3 cm, you can use basalt or polymer mesh. If the layer thickness is more than 3 cm, it is necessary to use a metal mesh, which is attached to the walls with dowel nails and a wide washer.
How to measure an angle using a tape measure
You can make your own square for measuring angles:
- We connect two slats, one perpendicular to the other.
- We measure 60 cm on one rail, 80 cm on the other, cut off the excess.
- We nail the third rail to one mark.
- We measure the hypotenuse and nail the strip to the second mark.
- We check the dimensions again and, if necessary, fix them in several more places.
- Trim off the excess ends.
As you can see, knowledge of a few simple school theorems can help in both construction and repair. Knowing a few simple tricks, you can always easily create or check a right angle.
A construction tape measure for an electrician is as essential a tool as a voltage indicator. Even those professionals who have axle builders and laser rangefinders in their tool kits always have an ordinary tape measure in their pouch.
You can’t do without it either when marking electrical wiring routes or when installing socket boxes. However, not everyone is familiar with all the secrets and additional features when using a construction tape measure.
How to correctly bend a metal pipe, corner or strip profile?
Sometimes it may be necessary to bend a metal pipe, metal corner or strip profile at home. Let's find out how this can be done without resorting to the services of a specialist.
https://www.youtube.com/watch?v=oT8_D6E7r8U
Before starting manipulations, you need to take into account that you can work with a profile up to 5 millimeters thick, as well as a pipe up to 15 millimeters in diameter, even if the workpieces are cold. Bending larger workpieces without preheating may result in cracks or tears.
We bend the strip profile
If it is necessary to bend metal strips, they must be fixed, for example, in a vice, having previously placed metal corners, saving the vice from damage and the profile from deformation (in the case of corners, we increase the area of pressure on the point of the metal strip).
Then, with precise blows of a hammer, the profile is bent to the desired angle. To avoid damaging the metal and get an even bend, it is better to hit not the profile directly, but a flat wooden block placed on it.
In order to correctly bend the profile, giving it the most complex design, before work you need to put marks on it in the places of future bends.
It should be remembered that a perfectly right angle is almost impossible to obtain at home and the minimum bending radius, despite all the skill of the master, will still remain.
We bend the pipe
Pipes in a cold state are much more difficult to bend, because when bent, it has an inner side that contracts, and an outer side that expands significantly; when stretched, a cold pipe can become deformed and simply burst.
To prevent this from happening, you should fill the pipe with dry sand, which will distribute the pressure and make the bend more natural, preventing it from breaking. To do this, pour dry, homogeneous sand into the pipe, after closing the outlet with a wooden or plastic plug (can be purchased at metal stores for your pipe diameter). When filling in sand, the pipe must be tapped to compact the contents, and then the entrance must be closed.
After this, the pipe is bent by tightly holding one of the ends in a vice and using physical force. It is advisable, of course, to use a pipe bender (a special machine for bending pipes) for this, since in the case of a vice, special requirements are placed on their support (the support point must withstand significant shear loads and lifting off the ground).
Copper and aluminum (the most flexible) pipes are the best to bend. They are most often used in plumbing - here you cannot do without a specialized tool (most often, plumbing pipe benders work with radial curvature of pipes).
The situation is more complicated with steel or galvanized pipes.
The former are much more difficult to bend, but it is not recommended to bend galvanized pipes at all, since small cracks in the upper protective layer will form at the bends, and the pipe will rust, and when heated, the zinc may evaporate and corrosion will still begin at the bend, even if there are no cracks.
To successfully bend steel, cast iron pipes, as well as pipes made of various alloys, you can heat the area of the future bend with a blowtorch. However, it must be remembered that by heating the pipe excessively, you can significantly change the structure of the metal and increase its fragility.
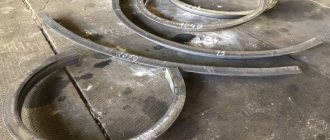
Bend corner
With corners, as with pipes, the situation is more complicated than with simple strips.
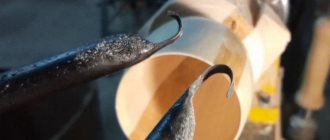
The most effective option for obtaining a curved metal corner would be the following operation: at the required bend location, a cut is made on one of the edges of the metal corner, and then the product is bent here like a regular strip of metal (as long as this allows making a cut).
To get the correct bend angle, you will need some practice and correct calculation of the cut section, since the final bend angle will depend on it.
A more difficult option would be to bend the corner without making cuts. In this case, as with a square profile, the bending angle will be insignificant, since sharp corners will lead to cracks in the material. Such bending requires a strong lever and reliable support with fixation of the product. If the edges of the angle are more than 15 mm, heating of the bend will be required.
conclusions
It is not so easy to bend a pipe or strip profile at home in a high-quality manner. But, as in any business, skill and knowledge of the basic features and rules of the process are important here. After trying a few times, working with different materials, you will soon become an expert in this field and add a new skill to your home crafts collection.
What to do if the geometry of the room is broken and what are the consequences?
If the geometry of the room is broken and the angle in the right places is not 90 degrees, the deviations are significant, about 1-2 cm per meter, then it needs to be leveled. This is called plastering work. A separate article will be written about the alignment of corners (put a link here - approx.), and then we will talk about what else incorrect geometry can cause.
The floor covering will not be laid evenly - this happens all the time, and there is nothing terrible about it, the main thing is to try to “push” the trimmings under the furniture or into places where they will be least noticeable.
Laying laminate flooring in a room with incorrect geometry
In the picture above you can see that the laminate will be laid with undercuts, they can be larger or smaller, but on 2 sides of different sizes. This happens all the time when the geometry of the room is not aligned. The same applies to floor tiles. To avoid this, you need to align the geometry, and this is a lot of expense and the work of a professional.
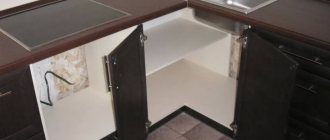
We seemed to have sorted out the angles and decided that a 90 degree angle is required only in two places: in the kitchen, where the cabinets will stand/hang, and in the bathroom, where the bathtub will be located.
Now let's look at the verticality of the walls, this is also important and again especially important in the same two places: in the bathroom (now in the entire room) and in the kitchen, on 2 adjacent walls with cabinets. Other places are optional, but in a budget renovation the vertical walls are not displayed everywhere.
Where geometry, vertical walls and 90 degree angles are required
The geometry of the room in budget renovations is mandatory only in 2 places, and the rest is optional. The first place is the kitchen, namely 2 walls where cabinets and a bathroom will hang, preferably the entire one if tiles are being laid. You can try not to level it under PVC panels, but again this will be of worse quality. You don’t have to level it at all, but the quality will be even worse! In general, I hope the idea is clear: if you want good quality, you need to level it up.
Leave your tips and comments below. Subscribe to our newsletter. Good luck to you and good luck to your family!
Details and subtleties of the process
Leveling corners with plaster
Let's look at everything you need to know before starting work:
- For finishing work, you should use a mixture made on a gypsum basis. This material is convenient to use in work; if you follow the technology, it will show its strength and will serve for many years. The thickness of the mortar on the walls is approximately 5 cm, and for local recesses up to 7 cm. For the ceiling, the figure does not exceed 3 cm.
- The plaster should be applied to concrete, brick, sand-cement, gypsum surfaces. The solution cannot be used for wood bases, since the materials simply will not bond together normally (poor adhesion).
- The surface should be treated with various impregnations and other compounds in order to prevent the formation and development of mold and mildew. To improve adhesion, pre-prime the surface containing the gypsum solution.
- When preparing the mixture, you should strictly follow the instructions indicated on the packaging by the manufacturer. The ratio of powder and water is indicated on the pack of material. It is important that all proportions are observed, and if there is not enough liquid, then add a little more, because otherwise the solution will be difficult to apply and there will be a high probability that everything will crack after drying. If you add a lot of water, this will not allow you to fill the voids and gain the required strength for the solution.
It is better not to use industrial water to make the solution, as it may contain various impurities, which sometimes negatively affect the quality of the solution. Since the solution itself is thick, we recommend using a construction mixer, namely an attachment that is inserted onto a hammer drill/drill, and stir the solution from time to time for 2-4 minutes.
But before you start making even and right angles with plaster, you should perform a number of preparation steps.
Preparatory work
The instructions for performing preliminary work are as follows:
Clean the base from the old coating layer, which is weakly adhered to. The rule should be applied horizontally and vertically to the corner, and the longer it is (100-200 cm), the more accurately the result will be recorded. Bulges and bumps should be knocked down with a chisel, and what cannot be removed will serve as a definite starting point for leveling work.