Surfaces made of dissimilar materials are difficult to connect. Each type of raw material has not only a different structure, but also excellent operating parameters. For the procedure to go without complications, you need to know how to firmly glue the rubber to the metal. In the review we will consider in detail the suitable substances.
Composition characteristics Source nauka.ua
Composition characteristics
Metal and rubber parts cannot be fixed with universal mixtures. A rubber-based product will help connect surfaces with different adhesion. The glue hardens evenly, maintaining the elasticity of the seam. The substance allows you to firmly bond materials with different structures.
The composition for rubber and metal penetrates into the smallest cavities and cracks, filling the space with a fixing mass. To enhance or change the initial characteristics of the base raw material, the following is often added to the mixture:
- vulcanizers;
- plasticizers;
- polymer resins;
- cross-linking ingredients.
Safety precautions when working with glue
The adhesive mass contains various components that evaporate during the polymerization process, leaving a strong, durable seam. Therefore, when working with adhesives, you must follow the following safety rules:
- Carry out gluing in a well-ventilated area.
- Use protective equipment (gloves, goggles, respirator). In case of contact with skin or eyes, immediately rinse the affected area under running water.
- To apply the adhesive in doses, use a dispenser tube, brush or spatula. Place items stained with glue on a special stand, and immediately close the tube with a lid.
Adhesives for bonding rubber to metal substrates may contain substances that irritate the respiratory tract and can cause eye burns or burning of the skin.
If during work the mass gets into exposed areas of the body and your health worsens, you should urgently seek medical help.
Types of glue: TOP-8
Construction and hardware stores offer a huge variety of fixing solutions. Not every option on sale is suitable for gluing metal to rubber. Let's look at eight popular types.
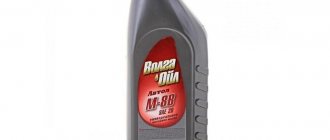
«88»
The solution consists of phenol-formaldehyde resin, ethyl acetate and rubber. Viscous beige mass suitable for dissimilar surfaces. The universal substance is used for both small household work and large industrial repairs. According to the type of gluing, cold and hot types are produced.
Glue “88” has high thermal and moisture resistance. After drying, the seam can withstand temperatures ranging from -30 to +85 C. The fixing composition quickly sets, after which it is not afraid of mechanical stress. The ingredients are safe for humans and pets, so can be used indoors.
Option for rubber and iron Source kraski-net.ru
The product has many modifications. If you need to glue rubber to metal, then “88-SA” will do. The composition can withstand severe frosts (down to -50 C), while maintaining its original elasticity and strength. For repairing equipment and cars, we recommend using a very strong type marked “M”. For wet conditions, the “NT” and “NP” options are used.
When stored open for a long time, glue “88” thickens. To restore the original fluidity, you can dilute the mass with ethyl acetate (1:1). The product is ready for use after 10 hours.
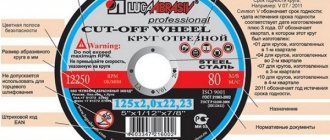
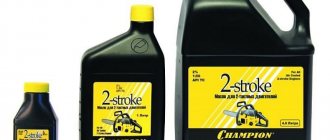
«4508»
If you need to glue rubber to metal with glue, then it is better to opt for a heavy-duty waterproof boat type. A rubber-based substance firmly connects surfaces made of different materials. After drying, a transparent elastic seam appears, resistant to mechanical stress and heavy loads.
The fixing composition is not destroyed by high temperatures (up to +50 C). The product is applied using cold technology. If the glue has thickened, then nefras will help restore fluidity. The only drawback is the strong chemical smell, so you need to work outdoors.
Composition for gluing Source prom.ua
How can you glue metal to rubber?
When choosing a product for durable gluing, you need to pay attention not only to adhesive properties, but also to additional characteristics:
- Temperature operating conditions. If the glued elements are subject to heat, heat-resistant adhesives should be used. Heat-resistant adhesive will help secure the gasket to the oven door, restoring the oven's seal.
- Humidity in the place where the glued product will be used. Here you need to pay attention to water resistance.
- Elastic properties of the seam after curing.
- Connection load.
- Degree of adhesion to bonded surfaces.
After hardening, the seam must ensure a tight connection, not lose its properties at high and low temperatures, and not peel off from the base.
An important factor when choosing is aesthetics. If the rubber-metal connection is in plain sight, then you need to use transparent adhesives, which after hardening will be visually invisible.
It is not advisable to choose universal adhesives: they are not always effective when connecting rubber elements to metal ones. The packaging or instructions should indicate that the product is intended for gluing rubber to metal substrates.
There is a large selection of adhesives on the market, but it is better to buy proven, well-proven compositions.
How to use it correctly
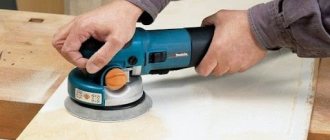
Before gluing, the surface must be prepared. Remains of rust are removed from the metal using a grinding machine or sandpaper. Dust is wiped off the rubber, dirt is removed, being careful not to damage the base. Both materials are degreased with alcohol or acetone.
Cold way
Gluing dissimilar surfaces is easier to do using the cold method. The glue is applied in a thin layer to both parts. To distribute the mass evenly, use a brush or narrow spatula. The elements are pressed tightly against each other. For reliability, take a special vice (clamps) or place a heavy object on top. The workpiece is left for half an hour.
After 30 minutes, the sagging from the seam is cut off with a construction knife. Uneven edges are smoothed with sandpaper or lightly sanded. The item is ready for use within a day.
Cold method Source activefisher.net
How to glue rubber to metal: instructions for use
First you need to clean the gluing areas from dirt and clean the painted base. The second stage of preparation is degreasing, which increases adhesion. Then you will need to do the following:
- lubricate both parts with a thin layer of adhesive mass (approximately 2 mm);
- Place the parts tightly together and hold until the glue hardens (you can use a vice or a press);
- Sand off the protruding frozen mass with sandpaper or cut it off.
It is advisable to start using the glued item no earlier than one day after the repair.
What kind of glue should it be?
A composition with increased adhesive characteristics is capable of firmly gluing, the seam of which will be reliable and elastic. Additionally taken into account:
- operating temperature of the glued part;
- indoor humidity;
- load exerted on glued surfaces;
- what elastic properties should the part have after gluing;
- chemical aggression towards treated surfaces.
Be sure to read the instructions; the manufacturer must indicate in it that the composition is suitable for rubber and metal alloys. After drying, a high-strength, water-resistant seam should be formed that maintains its strength at low and high temperatures.
To glue parts in cars, you should buy products like “liquid rubber”; they create a single plane with the treated surface, which makes the seams visually invisible. When gluing silicone rubber, a mixture is used, the packaging of which states that it is for elastic materials.
Which brands to target
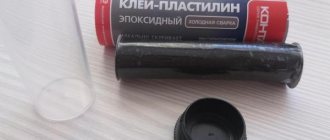
Poxipol “Cold welding” (gray)
A special two-component adhesive that is brought into working condition after kneading with wet hands.
A low-cost, short-curing two-component epoxy composition made on the “two in one” principle. It has an extremely short time of sufficient polymerization; it reaches a solid state within 10 minutes. Final polymerization occurs after 60-80 minutes.
The term “final polymerization” in this context means that the epoxy joint can be drilled, milled, sawed and cut with a special metal tool. However, for complete polymerization, when the hardened glue can withstand the maximum loads inherent in its capabilities, at least a day must pass.
Does not collapse upon contact with low temperatures, up to minus 40°C degrees, and high temperatures, up to plus 180°C degrees. If the bonding field is properly cleaned, it can even be used on water and high pressure gas pipelines. The gray color of this cold weld makes it invisible on steel, cast iron and iron.
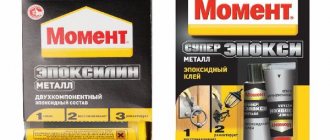
EpoximaxX 1.2 kg
Epoxy two-component liquid adhesive. Can be applied with a brush. It is a modification, specially designed for metals, of the classic EAF. Maximum temperature of use is 120°C degrees. Minimum – minus 40°C degrees.
Useful to know > Completely transparent epoxy resin crystal - crystal resin
Total curing time is 3 hours. Tensile strength reaches 60-80 MPa, the spread of 20 units is due to the difference in materials on which the glue can be applied. But the strength of the adhesive seam is such that the rupture often occurs not along the gluing line, but in the material being glued together.
Weicon RK-1500
Two-component epoxy-based constitutional adhesive. The time for reliable fixation of the bonded surfaces begins within 5 minutes. You can glue products made of aluminum, steel, titanium, as well as these metals in their combinations. This glue is simply unique in terms of the strength of the adhesive seam: it can withstand tensile loads of up to 26 N per mm2. Operating temperature range from minus 50°C to plus 130°C degrees.
Due to its high adhesion, it can be used without preliminary mechanical treatment of surfaces, if this is not possible or there is no time for it. Although, of course, abrasive processing is desirable, as it increases the adhesion of the glue and the material being glued. In addition to metals, the composition can be used to fasten products made of ceramics, glass, and hard plastics.
Strong steel stick renewal composite
Chemically resistant two-component epoxy adhesive created using the two-in-one cold welding principle. A multilayer bar, which, after cutting off the required amount, is kneaded with wet hands and an adhesive seam of the desired configuration is formed from it. For sufficient sealing, 40 minutes are enough. For full – 12 hours.
Operation in contact with caustic substances in the form of alkalis, acids, including concentrated ones, as well as with ethers and alcohols is allowed.
Description
Sealants for metal are viscous, paste-like or tape-based compositions based on polymers or oligomers. They form a sealing layer that is reliable, durable and durable. The substances adhere well to different materials, therefore they are used in various industries and construction, simultaneously performing several functions. Mixtures combine metal surfaces or metal with other materials and protect processed products from aggressive environmental influences.
Choosing what to glue rubber at home
What to glue with?
If everyone learned how to glue paper using PVA back in school, then you have to learn how to glue stone, wood, leather, and rubber much later. How to glue a bicycle tread tube with wet rubber - that is the question if you get interested in cycling seriously.
This sport is associated with extreme breakdowns, extreme repair conditions, and sometimes you even have to be able to glue the metal of the wheels with rubber. What glue to choose? It is difficult for a modern person to do without knowledge and skills in the field of glue and gluing unusual materials.
In the case of a bicycle, rubber is the material that has to be glued most often.
How to seal the tread on a bicycle
Wheels damaged in mountainous areas should not become an obstacle on a country road. You need to take a repair kit with you on the road. You can buy it at a specialized point of sale and not worry about anything. Or you can assemble it yourself, it’s even necessary. Which set will include only the essentials? Of course, the one that is made with your own hands.
Buy or assemble a repair kit
The set for eliminating punctures in wheels is completely uncluttered, as can be seen in the photo, and will become a reliable companion even on a long journey. Rubber is not the most durable material, no matter how you look at it. The wheel tube will be left without air in a matter of minutes if the weather conditions are harsh and there are many kilometers behind.
A kit for repairing small punctures is inexpensive and affordable for everyone.
Typically this set consists of:
- rubber patches;
- glue for rubber;
- a piece of sandpaper;
- sideboards.
The kit may only include rubber patches and glue - this, by and large, is really enough. But there aren’t many of them there – rubber patches and glue. So you will either have to constantly spend money, buy a kit, or find the components yourself. What is more convenient is a matter of personal preference. An old camera can sometimes become a source of spare scraps, and the necessary glue can be found if desired.
It's easy to seal a puncture
When the tire is flat, you need to find the puncture site and clean it of dust. Ideally, in accordance with the instructions, it is also necessary to degrease this area. Regular acetone or solvent or nail polish remover will help with this.
But you can do without this, it is not necessary to glue everything strictly according to science - the patch will last a little less than we would like, the glue will fix it a little worse, but the tightness will be restored. Surfaces must be dry.
What most interferes with the bonding of surfaces is dirt, dust, and moisture.
After wiping the puncture site, you should clean it with sandpaper - microscopic grooves will appear into which the glue will flow, providing a tighter fixation. Now you can apply the glue. You need to give it a little time to attach to the surface. Rules for handling glue are always specified in the instructions. Then, you should select a patch of the required size. Carefully remove the foil from it and attach it to the puncture site. After installing the patch, you can continue on your way.
Beading is not always included in the bike kit. You can glue the patches by removing the protector, or without removing it. This tool is designed to remove the tire from the rim. It is believed that gluing will be more convenient this way and a well-placed patch once will be more useful than a sloppy applique. Naturally, it is better to glue everything at home or, in general, contact a specialist. But there are few ideal circumstances on the road, although they do happen. The camera is sometimes hard to sleep
Emergency sealant
Despite the fact that a set of patches will save you from many troubles, it is not a panacea for all ills. Wheels can often be damaged in such a way that a small patch will not help. You will need two patches, and then only to get home or to a car service center.
You should always check before you go for a ride whether you have rubber, tools and glue with you. It is a good habit to take a first aid kit for your bike on the road. It would be a good idea to buy emergency sealant just in case.
Only with him it’s practically unimportant what kind of puncture happened this time.
One tube of liquid substance will save the situation if the rubber is seriously damaged. The substance was developed taking into account the fact that the wheel is a clever design, and gluing patches is sometimes problematic. Alternative methods of sealing also exist, although they are associated with some discomfort.
Rubber for vulcanizing bicycle wheels
Car wheels are usually repaired using vulcanization. Is it possible to repair the tires on a bicycle yourself if the puncture is serious? It turns out yes. And it’s easy to do this with your own hands, especially at home, which will become clear after watching the video.
In the case of a bicycle, raw rubber, which can be easily purchased at specialized sales points, will help get rid of serious punctures. Raw rubber is a reliable sealant. For a good ride and decent savings, it is very important to actually know how to apply raw rubber. In fact, this is vulcanization at home.
Before you begin repairing the camera, it is advisable to soak the purchased substance in gasoline. It would also be good to wipe the puncture site and sand this sector - sand it with a piece of rubber. The patch should be slightly smaller than the damaged area. It is applied to the desired area and heated. Heating temperature – 140-150 degrees. This is how raw rubber turns into regular rubber. This patch is more reliable and durable than those with glue.
It can be difficult to repair damage this way. The raw rubber is usually heated with a special device – a vulcanizer. Only after trying to do this in practice, examining the properties of the material, can you decide for yourself whether it is necessary to invest money in it. For starters, a regular hairdryer with its stream of hot air will do. And the job will be done; the protectors will still last for some time.
Important points
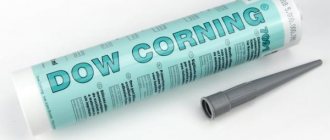
When looking for a topical sealant, it is important to remember that it must be a special solution designed for bicycle treads. It's better to buy a good thing - the camera will last longer. It is not recommended to glue silicone glue to rubber, although this sealant dries at room temperature.
It does not have the flexibility and elasticity that rubber has. The wheel will most likely burst. Silicone adhesive developed for construction needs. It will disrupt the complex balance of the tread chambers. Silicone sealant and emergency sealant for protectors do not replace each other. Any sealant, like patches, disrupts the tread pattern.
Sometimes a puncture is a reason to replace the tires.
EAF with fillers
An excellent way to fasten dissimilar metals together that cannot be joined by welding or soldering is to use a regular two-component EAF with metal filings from the two parts being fastened. To do this, use a regular velvet file to rub a little, literally 3-4 mm3 of sawdust from both parts that must be glued together, for example, aluminum and steel. The sawdust is mixed with each other, added to the epoxy compound (component A), mixed well with it, and only after that the hardener (component B) is added to the mixture of resin and sawdust.
Before doing this, it is advisable to heat the mixture to about 40°C degrees, so that the sawdust does not have time to lie under the influence of its own mass in the lower layer of glue. After adding the hardener, mix everything well. Active polymerization will begin within 5 minutes after such mixing.