What is the root of the problem?
It is necessary to warn that if you are determined to independently study the metalworking process, then you should pay special attention to the purchase of a welding machine. A qualified specialist can work without any problems with any device, with transformers that do not have a mode setting function, with inexpensive inverter models. A beginner in this business is recommended to purchase a modern model, which is more expensive in cost, but prevents the element from sticking.
If you don’t have the financial means to buy or you inherited an old modification, then study the reasons for sticking, which we described below.
Electrode coatings: what are they?
To understand the problem of why the consumable sticks, you need to consider the types of electrode coatings. Most often on the market there are products with rutile and basic coatings. In practice, the difference in the use of these treatments is significant.
The base coating is used to create an even seam. Electrodes with a basic coating can guarantee the creation of a durable seam that will be resistant to corrosion and various loads. Even if the finished metal product needs to be operated at low temperatures, this will be possible with the creation of a seam using an electrode with a basic coating. Piercing is recommended before using the conductor. Don't forget to clean the metal base and remove dirt.
Rutile-coated conductors are often used by beginners because they are easy to weld. With their help, it is possible to create strong connections even on a contaminated base. If it is possible to clean the metal, do so, but even otherwise it will be possible to make a reliable connection.
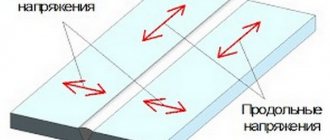
Rutile consumables are designed for welding with direct or alternating current. The work produces little dirt, which is why they are popular in welding circles. When choosing the type of coating, it is important to determine the parameters of the future seam. For example, the characteristics include permissible tensile strength, ultimate fluidity, viscosity indicators and other parameters.
Improper storage and why the electrode sticks when welding
Every welder must follow the rules for storing electrodes. They are designated by the manufacturer on the packaging. The main requirements are temperature and humidity. As for large suppliers, they most often fulfill these requirements. Handicraft distributors do not focus much attention on this, so the electrodes may become unusable when they are sold.
Electrodes must be available for use in accordance with their expiration date. Otherwise, the surface lubricant will crumble. Most often, the tip, which is responsible for the quality of welding, suffers. Such electrodes will definitely stick. It is important to know that after opening the package, after 8-10 hours, it is recommended to additionally dry the consumable. This will reduce the risks of the negative effects of high humidity. When drying, the moisture evaporates and the electrodes restore their properties.
Main causes of sticking
First of all, you should pay attention to the welding inverter. If it is of low power, it will not be able to produce enough current to weld thick parts. There are many other reasons why the electrode sticks during welding, these include:
- raw electrodes;
- chipped coating or its low quality;
- the core material is not suitable for the metal being welded;
- large voltage drops in the network can lead to low welding current or its sharp surges;
- a welder with low qualifications, for fear of burning a hole, sets a very low current on the welding machine;
- failure of device or inverter settings;
- When connecting, the phases are reversed, welding is carried out with a current of reverse polarity. This rule does not apply when welding aluminum and its alloys;
- the integrity of the welding cable may be compromised;
- pay attention to the heating of the welding holder, at a very high temperature, it is necessary to connect it to the cable;
- poor quality of preparatory work, parts are not cleaned of grease or rust;
- the possible reason is the low qualification of the welder and the inability to maintain a normal level of electrode combustion;
- The reason may be that the electrode is heavily soiled.
As you can see, the electrodes stick either due to non-compliance with the technology, or due to some defects in them themselves.
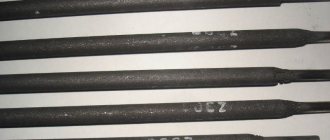
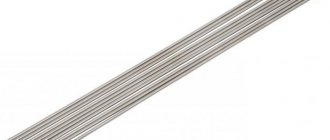
Raw electrodes
The welding electrode consists of a steel core and powder coating. The coating material is quite hygroscopic and, when stored in high humidity conditions, absorbs water vapor from the air.
If stored for a long time, even in a moderately humid room, the coating may also become damp.
If the electrodes were sealed in vacuum plastic packaging at the manufacturer's factory, they will not be exposed to moisture. But if the film is even slightly torn during transportation, the electrodes will inevitably become damp.
The damp coating begins to conduct electric current, as a result the arc does not ignite, and the electrode sticks to the workpiece.
Low quality
Why does the electrode stick if it is dry? It may not be of sufficient quality. Welding materials purchased in random places or from hand are often manufactured in violation of technology, the material of the rod does not meet the requirements of the standards, and the coating does not adhere well to the core and crumbles. In this case, sticking will also be frequent. It happens that the rod material is not suitable for the alloys being welded. Incorrect selection of consumables leads to constant attenuation of the arc or even the impossibility of igniting it .
Experienced welders check the quality of suspicious materials this way: they drop a rod from a height of 1.5 meters onto a flat concrete floor. If the coating has crumbled or peeled off, it is clearly not worth using such products.
In searching for the cause of electrode sticking, you can go through all the options. But quite often welders are faced with basic low-quality consumables. Even if you set the welding mode correctly and comply with all storage conditions, low-quality electrodes will stick. This cannot be corrected, so when choosing consumables, pay due attention to the choice of manufacturer.
The market may offer counterfeits under brand names. The only way to prevent the purchase of such electrodes is to check the documentation. If you are purchasing products to create strong seams in structures for which you are responsible for the integrity and safety, be sure to check compliance with GOST.
To make sure that there is lubricant on the tip, you can throw the electrode flat from a height of about 2 meters. If a chip in the coating is visible, this indicates low quality. Such electrodes should not be used when welding with an inverter.
Damp electrodes are another obstacle to creating a strong seam. High humidity compromises the stability of the connection. Since the arc is short, you will have to press the conductor against the metal base. Consequently, electrode sticking will occur. And over time, cracks form on the surface of the seam.
Effect of current
Novice welders are often afraid of burning through the workpiece, especially if it is small in thickness. Therefore, they underestimate the welding current values found in the tables, mistakenly thinking that with a low current they will slowly weld everything without defects. Unfortunately, this approach doesn't work.
If the current is insufficient, the melting of the workpiece and core to the metal stops before it has even begun, since the current strength is not enough to maintain the arc. The tip of the rod is immersed in the unformed and rapidly cooling weld pool and is seasoned with it.
It is necessary to set the current strength according to the tables and learn how to properly ignite an arc and make a seam.
Incorrect machine settings
This is also a fairly common cause of sticking during arc striking. At the beginning of the welding process, you need to accurately estimate the thickness of the metal that will be welded, select the appropriate diameter of the consumable and set a certain power.
The low current does not ignite the arc, but only slightly melts the tip of the rod, which sticks to the surface.
Mains influence
Why else might the electrode stick? The stability of the electrical network parameters has a strong influence on the ignition and maintenance of the electric arc.
This happens especially often when using outdated models of welding machines - AC transformers and rectifiers. The voltage on the secondary winding of the transformer in such units directly depends on the voltage in the network. If the voltage is unstable, then its surges also lead to the inability to ignite the arc; the secondary voltage is not enough for the discharge.
If the power of the local network is insufficient, then the very switching on of the welding transformer causes sudden voltage drops in the network, and the newly ignited arc dies out, and the tip of the electrode sticks to the cooling weld pool. This happens especially often when there is a lack of practical experience.
The use of welding inverters allows you to get rid of this dependence.
Lack of experience
Why does a dry electrode stick when welding with an inverter? In addition to underestimating the current, there is another typical mistake of novice welders. This is an attempt to keep the electrode too close to the workpiece . An air gap that is too short leads to a breakdown in the arc, the beginner tries to save the matter by bringing the tip even closer - and sticks it into the weld pool, where it can stick.
Errors occur both in the trajectory of the electrode during ignition and in guiding it along the seam. With a lack of experience and an attempt to use professional electrodes, such as UOSI, they also stick, most often due to excess welding current
It is necessary to get better at training preparations; once you gain enough experience, this effect ceases to appear. It is better to train on simple structural steels, and only then switch to alloy or stainless steel. Training should be conducted on inverter welding machines.
Uncleaned metal and improper arc ignition
The contaminated surface of the parts does not facilitate proper contact of the mass holder with it, and indeed the electrode itself. When you try to light an arc, it may go out and the coating may begin to fall off. Further actions will lead to sticking of the tip of the rod. Often, in the absence of experience, sticking occurs due to improper ignition of the arc. By tapping the tip of the rod on the workpiece, the electrode lingers on the surface for too long. A short circuit occurs, the metal at this point quickly heats up and solders the rod to the surface.
For novice welders, it is best to learn how to ignite an arc not by tapping, but by striking the consumable rod on the surface.
These are the main causes of sticking during welding. How can they be avoided?
TOP 5 reasons why the electrode sticks when welding
Experts identify a number of main reasons that lead to electrode sticking:
- Violation of operating and storage conditions for electrodes. The humidity of the electrode should not be allowed to increase. Since they are treated with a special coating, when exposed to moisture, the electrodes can lose their properties. That is why you should not leave them unpacked and allow moisture to penetrate. As a result, violation of storage rules leads to sticking.
- Manufacturing errors or poor quality. If any rules were violated during the manufacturing process, this can lead to deformation and poor quality of the product. Avoid artisanal producers. You should not chase a low price at the expense of quality, on which not only the well-being of the welding process depends, but also the reliability of the structure. Poor quality electrodes are a common reason for them sticking to the metal base.
- Incorrect setting of current strength and other parameters. If you incorrectly determine the diameter of the seam, respectively, the electrode itself, or set the missing current strength, this may affect the quality of the welding process.
- Contaminated surface of parts. When preparing for welding, it is important to remember the need to clean the surface of the material from rust, dirt and other contaminants. If you miss this moment, there is a possibility of low contact between the electrode and the metal. Consequently, the arc goes out quickly and you cannot achieve the desired connection. As a result, you start burning the electrode several times, which leads to the tip sticking.
- Incorrect ignition. A typical mistake among beginners. You may be holding the tip of the electrode against the metal part for too long. As a result, high temperatures are formed that practically solder the electrode.
Troubleshooting
Let's add a few words about how to diagnose malfunctions in the device.
If you smell burning or smoke from the inverter housing, this is a signal of a very serious breakdown. We do not recommend diagnosing the device yourself in such a situation; it is better to take it to a service center. Eliminating such malfunctions requires many years of experience and understanding of all the nuances of the operation of the device.
If the breakdowns are less critical, you can do the diagnostics yourself. To do this, remove the housing and visually inspect all components of the device. Sometimes manufacturers produce models with poor-quality soldering or low-quality wires. In such cases, you can simply re-solder individual sections and the device will work properly.
How to eliminate electrode sticking
Eliminating the sticking phenomenon is quite simple. To do this, you need to use high-quality consumables, set the desired mode and prepare the parts before welding. And, of course, you will need a little experience in lighting an arc.
Preparing materials
Items that were stored in a dry room with a good ventilation system do not need further processing, especially if the batch was taken in original packaging. If moisture gets on the surface, thorough drying is necessary.
Let's talk about the methods used at home if the kit becomes damp.
We offer “folk” remedies for heat treatment:
- Using an electric oven - a gas oven will not work, since heating is not recommended over an open fire. To do this, you need to raise the temperature to 200 degrees, place a bunch of rods inside the equipment, fry for 2 hours and leave there until it cools completely.
- Warming up with a construction hairdryer, where on models there is functionality for setting the temperature regime. Select a container whose diameter is comparable to the hole of the tool. Electrodes are placed there and then hot air is directed at them.
- Building a furnace takes more time, but for people who plan to work with welding on an ongoing basis, this provides a guarantee of effectiveness. We will not touch upon the construction process, since deciphering this topic will require writing a new article.
The above methods are quite suitable for electric welding of non-critical components. However, if a specialist wants to improve his skills and has the financial ability to achieve excellent results, we recommend purchasing special professional equipment, such as a thermal pencil case or a muffle furnace.
Let's start setting up the equipment
The effectiveness of the event will depend on how you can correlate the thickness of the welded material, the diameter of the electrode and the current power.
All these parameters are displayed in the table of the device’s technical passport. It is worth studying them carefully, but at the same time understanding that these are basic data and deviations from the norm are quite acceptable, provided that the specialist has extensive experience and keeps the device in perfect order. Each raw material has its own current parameters, for example, for plates 3 mm thick it is necessary to set 100/120 A. Not all devices are equipped with an adjustable transformer. For those using older models, it is important to move the cable connection to the level where the current stops burning through the weld point. It is important to know! To avoid burn-through (the formation of holes) on a structure made of thin-walled material or when working with car bodies, you should gain experience. To do this, take an unnecessary part and start welding, where by trial and error you will select the required power mode of the device, gradually increasing the current.
In addition, before starting work, it is worth checking the voltage in the network with a special tester. Once you make sure that the line is not overloaded, you can begin to implement the plan. Otherwise, you should wait until the problem stabilizes. If jumps are repeated time after time, then purchase a stabilizer; it will help you carry out the task uninterruptedly and calmly.
The correct combination of ground cable and holder is of no small importance:
- Sixteen-core copper wire with an outer diameter of 11.5 millimeters is suitable for thin-wall material.
- For welding a thicker sample, a 25-core cable with a 13.5 mm hole is suitable.
Learning how to properly create a plasma barrel
If you are new to the business, then we offer you a simple method, once mastered it will be easy for you to move on to the professional ignition method.
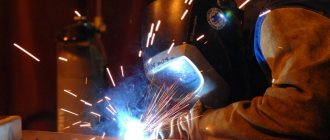
To do this, move the electrode like a match across a box, you will get a striking sound. In this case, try to keep the working element perpendicular to the workpiece. After the arc has flared up, you should tilt the consumable back at an angle of 15 degrees and quickly move the seam along the intended line. The main condition is continuity in work, since stopping even for a short time threatens combustion failure.
Modern devices have high-frequency ignition, which allows the formation of a plasma barrel without directly touching the material. That is, when the consumable approaches, an arc is created due to high-frequency currents, which is accompanied by a buzzing crackling sound.
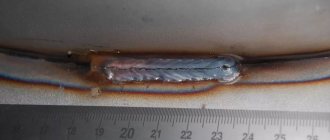
We provide you with a visual aid, after looking at which you will understand why electrodes stick when welding on an inverter and what needs to be done to prevent this:
How to prevent electrode sticking
So, we should summarize and highlight the main points so as not to encounter such a problem as sticking of the electrode during welding.
What we finally have:
- Electrodes must be suitable for welding with an inverter, selected in accordance with the thickness of the metal being welded and absolutely dry;
- The welding current on the inverter must be set in accordance with the diameter of the electrodes used for welding;
- The surface of the metal being welded should not be dirty or rusty;
- The voltage in the electrical network (which was not mentioned above) should be normal. Often, a voltage deviation downwards leads to the fact that the inverter simply does not draw or produce the required current parameters;
- In the process of welding metals, it is extremely important to eliminate errors such as incorrect ignition or an arc that is too short.
All of the above tips should help novice electric welders in their difficult task.
The device does not start
In this case, first of all, you need to make sure that there is voltage in the network and the integrity of the fuses installed in the transformer windings. If they are in good condition, you should use a tester to ring the current windings and each of the rectifier diodes, thereby checking their performance.
If one of the current windings breaks, it will need to be rewinded, and if both are faulty, it is easier to replace the entire transformer. The damaged or “suspicious” diode is replaced with a new one. After repair, the welding machine is turned on again and checked for serviceability.
Sometimes the filter capacitor fails. In this case, the repair will consist of checking it and replacing it with a new part.
If all elements of the circuit are in working order, it is necessary to deal with the mains voltage, which can be greatly underestimated and is simply not enough for the normal functioning of the welding machine.
Which electrodes to use to avoid sticking
If you want to avoid sticking of the electrode when welding with an inverter, consider the basic recommendations of experts. The main rule is that the electrodes must be designed to work with direct current.
If you don't want the electrode to stick, don't skimp on consumables. Choose trusted manufacturers whose products you have already tested. Electricals must comply with GOST or other international standards, demonstrating high quality and durability.
If you want to learn how to properly use an inverter welder, learn how to start and hold the arc. The theoretical basis will help you avoid common mistakes that lead to the creation of an unsightly seam of the wrong diameter.
Rating of electrodes for inverter
Electrode ratings are published constantly; they can differ significantly from each other in different sources.
Without pretending to be objective, the “arithmetic average” rating is as follows:
- rutile-cellulose consumables from the famous Swedish company ESAB ;
- American Omnia 46 from Lincoln Electric;
- Russian OZS-12 ;
- Russian electrodes Resanta MR-3;
- UONI–13/55;
- ANO : the most popular in Russia.
Current strength and device malfunctions
If the permissible current is incorrectly determined, the electrode may stick to the base. To prevent this problem, learn to use tables for determining current strength depending on the diameter of the electrode. The tip of the electrode should not be too immersed in the weld pool, which leads to sticking. However, sometimes the theoretical basis will not be enough to create a neat seam. That is why only practice will help.
Initially, you may be afraid of increasing the current due to the risks of holes forming. For this reason, the joint may not be welded, which is why sticking occurs.
Selecting an inverter device
To understand why the electrode sticks when welding with an inverter, you must first make the right choice of welding machine in relation to the conditions of specific work. The unit must meet certain requirements that will ensure optimal operation of the device in real circumstances. An example of such a device created for Russian conditions is the inverters of the “Neon” line produced in Nizhny Novgorod. Based on these devices, we will talk about the basic requirements for welding machines, which will reduce the likelihood of electrodes sticking during welding. These properties are as follows:
- the mains supply voltage ranges from 160 V to 250 V, which makes it possible to work in conditions of unstable power supply;
- the presence of an automatic protection switch, including overheating;
- PV at maximum welding current 60%;
- open circuit voltage 70 V, which allows you to confidently hold the arc even at extreme input voltages;
- there is a hot start function for reliable ignition of a short circuit arc, as well as arc afterburner;
- To prevent the electrode from sticking, there is an anti-stick function;
- guaranteed stable operation at ambient temperatures from -40 °C to +40 °C.
It should be noted that these characteristics serve as a basis for selection, and not as a dogma, but stable operation at extreme temperatures and network voltages is very important for Russian conditions. For comfortable work, it is useful to use the hot start function, which helps to confidently start the process and optimally use welding electrodes for inverters.
Particular attention should be paid to such functions as anti-stick or anti-stick. Its essence is that at the moment of sticking, the welding current is reset to zero and this allows both the electrode itself and the inverter to be kept intact. Afterburner also helps eliminate sticking, allowing you to increase the welding current at the risk of arc breakage and prevents interruption of the weld, which has a beneficial effect on the quality of work.
When choosing an inverter device, it is important to pay more attention to Russian models, since they are repairable and better adapted to work in the conditions of our country.
What fails most often?
Sparks in the inverter
In inexpensive inverters, such a breakdown is common. It looks like this: the device produces a spark, but refuses to work. There are logical explanations for this, which we will tell you about.
The first thing you should do is take a close look at the welding cables: very often they need “reanimation”. At first glance, there may not be any obvious defects, but just in case, take new cables and insert them into the ground with a holder.
This will start the arc and give you the opportunity to check the connectors for proper operation.
Do you have extensive experience in this matter? Try to carry out the repair yourself. In all other cases, the wires located on the package switch have failed. What if the last ones got burned?
Don’t be discouraged: repairs aren’t for everyone. In order not to waste time, you need to contact a specialist. It will return your inverter to working condition.
Recommendations for DIY repairs
When repairing inverter-type welding machines, you should adhere to a certain algorithm:
- If a malfunction occurs, you must immediately disconnect the electrical device from the network, allow it to cool, and only then open the metal casing.
- Diagnostics must begin with a visual inspection of the electrical components of the inverter. There are often cases when repairing an inverter welding machine involves simply replacing damaged parts or soldering conductive contacts. Visually enlarged capacitors or cracked transistors should be replaced first.
- If a visual inspection fails to determine the cause of the malfunction of the welding machine, you must proceed to checking the parameters of the parts using a multimeter, voltmeter and oscilloscope. The most common failures of power units are associated with malfunction of transistors.
- After replacing the electrical elements, it is worth moving on to checking the printed conductors located on the inverter board. If you find torn or damaged tracks on the printed circuit board of a welding tool, you must immediately eliminate the defect by soldering jumpers or restoring the tracks using copper wire of the required cross-section.
- After completing work with the tracks, it makes sense to move on to servicing the connectors. If the inverter device stopped working gradually, then there may be poor contact in the connecting connectors. In this case, it is enough to measure all contacts with a multimeter and clean the connectors with an ordinary household eraser.
- Despite the fact that malfunctions of a welding inverter are rarely associated with diode bridges, it would be a good idea to check their performance. It is better to diagnose this electrical element in a soldered state. If all the legs of the bridge are short-circuited, then you should search for the faulty diode and replace it.
- The last step in inverter repair is checking the board and control panels. Diagnostics of all components of the board should be carried out using a high-resolution oscilloscope.
If the diagnostics have been carried out, but it was not possible to find out what is broken in the welding machine, you should stop doing independent repairs and contact specialized workshops.
When performing independent repair work, you should not forget about the safety rules:
- Do not use electrical appliances without a protective top casing;
- all diagnostic and repair work should be carried out on completely de-energized equipment;
- It is safest to remove accumulated dust and dirt using an air flow generated by a compressor or a compressed gas cylinder;
- Cleaning of printed circuit boards must be done using neutral solvents applied to a special brush;
- Long-term storage of electrical appliances should be done in dry rooms and completely switched off.
Most inverter electrical appliances are supplied complete with accompanying documentation. In these papers you can find a description of the most common faults and repair methods. Therefore, if malfunctions occur, you should carefully study the documentation and only then begin repair work.
Electrode sticking and overview of welding machine faults
If the electrode sticks when welding with an inverter, it is important to understand why this happens and how to troubleshoot. If the welding machine is under warranty, it would be better to contact the service center. Non-experts do not recommend repairing the device yourself, since understanding the cause of the problem requires many years of experience in welding.
If the breakdowns are not critical, you can try to fix them yourself. For example, DIY manufacturers may equip the welding machine with weak wires, which will cause the welding machine to malfunction and prevent you from connecting metal parts.
To determine which part of the welding unit has failed, visually identify elements that are burnt out, cracked, or darkened. To replace a specific part, obtain the necessary information from the labeling. If you use the GOST table or international documents, you will be able to select the correct part.
If a visual assessment is not enough, use a multimeter. This is a device for diagnosing welding equipment. Test the board and transistors for serviceability. You may find burnt areas on the board. If such can be traced, they need to be replaced. If the jumpers are burned out, you can solder them again. If there is burnt on the board, use an eraser to remove it.
Sometimes the diode bridges located on the radiator break in the welding machine. Despite their strength and reliable fastening, breakdowns occur. To test the diode bridge, you will have to unsolder the wires and remove it from the board while using a multimeter. This is how you will detect a faulty diode. If the above steps do not give the desired result, it is better to contact a specialist.