Gate hinges are a simple device that serves to attach gates to posts, as well as for easy opening and closing. The reliability of the design and ease of operation depend on the choice of this mechanism.
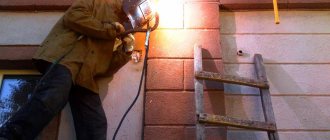
Hinges are mainly equipped with swing structures, which can be quite heavy. Therefore, special attention must be paid to the quality of installation, namely the fastening of hinges. A person who knows how to handle electric welding can weld hinges on the gate themselves, but those who do not have such skills are recommended to turn to professionals.
Welding rules
In order to prevent the gate from sagging and to avoid problems with its operation in the future, all work must be carried out taking into account certain features. Therefore, first of all, special attention should be paid to:
- The integrity of the weld, which must be continuous, that is, without gaps.
- Welding depth - the loop must be welded along the entire plane adjacent to the support.
- Axial location - all hinges on the sash must be in one straight line so that the load on the seams is distributed evenly.
- When determining the number of hinges, if the gate is massive, it is recommended to supplement the design with another pair.
- Dimensions - all measurements are made using tools designed for this purpose, and not “by eye”.
How to make hinges for a door with your own hands
Let's talk about how to make hinges for a door with your own hands. What are they good for? Firstly, they can withstand enormous loads and can be installed on both doors and garage doors. Secondly, they can be given any size, that is, they can be made both small and large. And thirdly, there is much more confidence in the reliability of self-made hinges than purchased ones.
What tool do we need?
- tape measure or ruler;
- marker (chalk);
- hacksaw with blade for metal (grinder);
- hammer;
- file;
- welding machine.
From materials:
- metal plate 2-3 mm thick;
- pipe section;
- steel rod (it must be selected based on the internal diameter of the pipe. It should not dangle. Ideally, a piece of rod should fit into the pipe with tension).
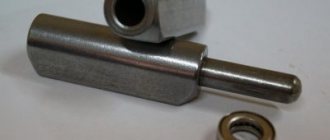
The first step is to cut off a piece of pipe. In general, it is planned to produce metal hinges for a door with a total length of 110 mm. Therefore, we mark 50 mm on the pipe and cut it off. The second segment should be 10 mm larger, that is, 60 mm in size.
We file the pipe sections outside and inside. This is done in order to remove burrs.
In the same way, mark a length of 110 mm on the rod, and then saw it off.
We hammer the rod into the pipe to get a picture like the one in the photo below. If you have a lathe, then everything is much simpler. You grind two parts of the sleeve from a single piece of blank, all that remains is to weld the plates.
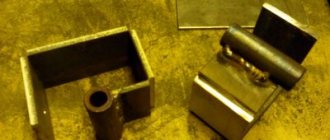
Next you need to cut the plate. There is no point in showing the sawing process. Everything is clear here. The result should be 2 plates, 2 pieces of pipe and a piece of rod.
Let's move on to the welding part. If you are new to working with a welding inverter, then this information can be found at this link.
The end of the pipe from which the rod comes out should not be scalded, otherwise the second half of the canopy will cling to the welding seam.
We grab the plates to the pipe, level them, and scald them.
We get ready-made door hinges. Don't pay attention to the hole, there was just a finished plate.
That's all. This is how you can make hinges for a door with your own hands. If they are painted or galvanized, they will look no worse than purchased ones, and in terms of functionality they will be in no way inferior.
14, total, today
Welding technology
It will be much easier to weld the hinges correctly if you follow the rules of the sequence of the technological process. The sequence of work is as follows:
- installation of plates;
- gate installation;
- welding of hinges.
Now we will analyze each of the stages separately, using the example of circular loops (turned).
Video: How to properly weld hinges with your own hands.
Installation of plates
Platik is a metal mounting plate that serves both to distribute the load evenly and to simplify welding work. The size of the plate and its shape depend on the weight and dimensions of the valves.
It turns out that in order to correctly install the loop, you need to weld such a plate to it. This is done with a continuous seam, without gaps. Experienced welders can weld without plates, which is quite acceptable, but the fastening will not be as reliable.
Welding
Next, you need to prepare the hinges - clean them of rust and fatty deposits, lubricate them with grease or other similar compound. This will prevent so-called hinge sintering when you start welding.
Now you need to use the welding machine: first, the fittings are welded to the gate leaf, and only then to the support pillars. In this case, it is necessary to constantly monitor the quality of the resulting seams.
When all welding work is completed, it is advisable to process the new seams with a grinder.
You can weld hinges on a gate, garage door and on a metal door according to the same scheme as described above.
However, it should be noted that the craftsman usually has the opportunity to weld the fittings onto the door at the moment when it is in a horizontal position on a flat area, which greatly facilitates the process.
This does not work out with gates: the support pillars, as a rule, are installed much earlier than the actual installation of the curtains begins.
Gate installation
Before welding the prepared hinges, it is necessary to install the gate in the opening. This must be done in the way they should be on a permanent basis. For installation, use a long building level or plumb line.
The gates are aligned in all planes: vertically, horizontally. Only after making sure of their correct location several times can you move on to the next stage.
Welding hinges
This process seems complicated only at first glance, but with a little practice you can do everything yourself. This is done as follows:
- The hinge is lubricated with automotive lubricant (solidol, lithol, etc.), this contributes to their smooth and easy operation after installation.
- Thin linings up to 5 mm thick are prepared; this is mainly required for turned hinges.
- Markings are made - the loops should be located at a distance of 30 cm from the top and bottom.
- The hinges are welded in several places, first to the sashes and then to the pillars. After checking for closure and opening, welding continues until a solid, even seam is formed.
- After the seams have cooled, they must be sanded and primed or painted.
This technology is used by almost all door installers.
Tips and tricks
Incorrect welding can lead to problems during further operation; to prevent this from happening, you should listen to the following recommendations:
- Before starting work, make and study a schematic drawing; if all the details are taken into account in advance, then the risk of redoing the finished structure will be much less;
- straight hinges are welded to the gate laid on a flat surface;
- You can open gates with newly welded hinges after the seams have completely cooled;
- on round posts the loop extends 5 mm outward, on rectangular posts it is welded flush;
- the welding seam should go from bottom to top.
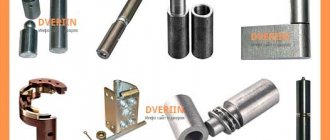
Types of loops
Hinges for fastening swing gates can vary in shape, number of sections and method of fastening. The most reliable, and therefore the most popular, method of fixation is welding.
All other loop parameters depend on the type:
- Cylindrical hinges – equipped with a support bearing, designed for gates of light weight. Permissible load – 400 kg. Attached by welding.
- Cylindrical with reinforcement - they differ from the previous ones by the presence of a special plate to distribute the load between the sash and the post. Maximum load – 600 kg. Fastening by welding and screws.
- Through hinges are used where it is not possible to use welding or a screw connection. They are fastened in the following way: the post is drilled through, and the connection to the sash is made with nuts. Maximum load – 200 kg.
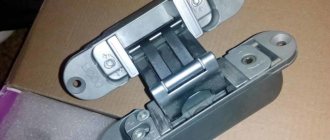
- Three-section overlays - designed for massive sashes, with them there is no risk of sashes sagging or squeaking, and opening will be smooth. In addition, such structures are famous for their increased burglary resistance.
- Zhikovinas (forged hinges) - in addition to their direct purpose, also serve as decoration, giving the gate a special colorful look. Mainly used for wooden structures.
- Hinge - boom, hinged or half-hinged - used for heavy and thick gates, doors or wickets. Available: regular, curly and removable. The best option for massive garage doors.
- Adjustable – design features allow you to change the height of the sash. They are used if there is a high probability, under any circumstances, of displacement of the support posts. Withstand load – up to 200 kg.
As already mentioned, you can weld the hinges yourself if you approach the process responsibly and follow all the rules and technology. However, if you do not have the necessary skills for installation or you are not confident in your capabilities, it is better to use the services of specialists.
Video: How to weld a turned hinge
Swing gates made of corrugated sheets
Previous post
Wave slate fence
Next entry
Video description
See how it looks in this video:
loops with twisted wire are pressed against the block and the post and are also fixed in a vertical position;
the loops are welded to the supports at 2-3 points;
in the same way, they grab the second (upper) part of the hinges to the frame or leaf of the doors;
when the tacks have hardened, the gate is checked for opening - it should swing open 180 degrees without jamming or warping;
if everything is in order, the sashes are closed again, fixed and the hinges are welded onto the finishing surface with a continuous seam from the bottom up;
cooled seams are cleaned of scale with a hammer and sanded with a grinder to give a more aesthetic appearance
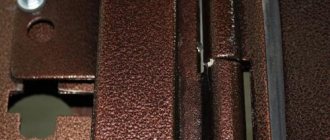
But this work must be done carefully so as not to damage the joint. After painting, the sanded joints will become almost invisible Source i.ytimg.com
After painting, the sanded joints will become almost invisibleSource i.ytimg.com
Do not open the gate until the welds have completely cooled and gained strength.
Metal gates can also be hung on other awnings, which are secured with screws or nuts. But the welded method is more reliable and durable, especially if you know how to properly weld hinges on gates and strictly follow all the requirements regarding their installation technology.