Preparatory stage
In order to unscrew a bolt or any other threaded fastener, you first need to prepare it. This stage can be summarized in 4 steps.
Let's take a closer look at each of them:
- Remove rust or contamination - this is the very first step, since without cleaning the contamination, you simply will not get to the threads.
- Tap the bolt - the knocks should be strong. This contributes to the destruction of the oxide layer. As soon as you feel that the bolt has begun to move out of place, you can stop trying.
- Heat the bolt - this stage is quite dangerous, since it involves direct exposure of the bolt to open fire. A torch, soldering iron or acetylene torch is suitable for heating. During heating, rust is removed from the hole and the fastener moves freely.
Use special products - we are talking about special anti-rust sprays or products that have high fluidity. The substance saturates the bolt well and helps to remove the bolt quite quickly.
The only drawback is that the product must be left for several hours for improved impregnation.
Heat
The set fasteners are heated with ordinary gas from a cylinder. | Photo: youtube.com.
If the previous methods did not help, then it’s time to take more effective measures. First of all, the stuck parts need to be heated, for this they use a gas burner. If you unscrew the nut, then you need to heat it. And if it’s a bolt, then the flame is directed at the part into which it is screwed. With a large increase in temperature, the parts expand, causing the gap in the thread to increase.
In addition, thread lockers are often used when assembling automobiles. When heated, they become fluid, “lowering” the bolt or nut and then it is easier to unscrew them.
The edge of the fastener is damaged
It's time to look at the reasons that lead to the fact that you need to put effort into unscrewing the fasteners. Remember that how quickly you unscrew a bolt is influenced by many factors, from its location to the material from which the bolt is made.
Let's look at the tools that can be used to unscrew such a bolt:
- A sharp chisel is best used if a large bolt breaks. You need to apply a chisel to the place where the bolt head is located, always tangentially, and hit the structure with a hammer.
- Adjustment key - with this key you can tightly clamp the mestizo and move it out of place, thereby unscrewing it. It is better if the key is new, so it can fit more tightly to the head.
- A ring wrench is capable of performing the same functions as an adjustable wrench. To implement this method you will need a hammer.
- Hacksaw – Using this method, you can create a cut in the head so that it can be easily unscrewed with a screwdriver. You can create either a cross cut or a cross cut.
The thread on the fastener is damaged
A fairly popular problem that probably every second person has encountered. In this case, the bolt simply scrolls and does not come out. In this case, you need to use a screwdriver to pick up and lift the bolt.
It will be necessary to make an effort, since everything is not so simple and the bolt will rest.
Extractor
This tool is specially designed for unscrewing a spinning bolt, removing the remains of broken fasteners or any parts remaining inside the holes.
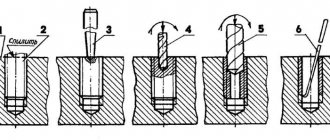
The principle of its operation is to drill a hole in the center and then jam the hole with an extractor. How deep it is placed depends on how worn the head and shank are, and how corrosion affects the threads.
There are several types of this tool:
- Blade;
- Kernel;
- In the form of a spiral;
- In the form of a screw.
All methods and instructions for use can be found in the instructions for the extractors.
How to unscrew a hex or sprocket head bolt
In the automotive industry and other equipment, hex tool bolts are often used. How to turn out a torn cap that has broken edges:
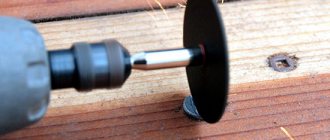
- Make a horizontal notch on the head with a grinder or file. In this case, a strong screwdriver is used to unscrew the broken screw.
- Using a special TORX sprocket, which is driven into the head. The nozzle is selected in size, slightly larger than the torn cap, for a strong connection between the walls.
- A set of extractors that can be purchased at a hardware store. Before using the extractor, a hole is drilled with a drill in the base of the bolt, then the extractor is inserted, and the screw is removed with pliers or a special clamp.
- Using a left-handed drill with a slightly smaller hole diameter. Work with the tool is carried out in reverse mode, with this method it is possible to damage the thread.
How to unscrew a bolt with torn edges manually
Broken nuts are more difficult to unscrew, since during work there is a possibility of damage to the threads. The simplest way is to use chemicals; the surfaces are cleaned and treated with the product for 15 minutes. If the edges are torn off, it is impossible to use a wrench or socket. In such cases, a chisel is used to destroy the main part of the nut, then removed and replaced with a new nut.
How to remove a bolt if the head has broken off
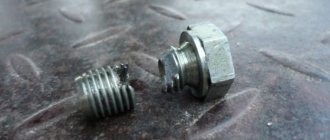
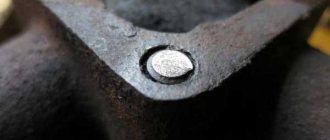
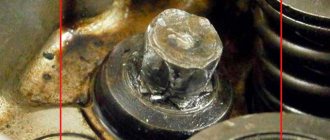
A broken head of the structure can cause a lot of trouble during work. How to act in such a difficult situation without resorting to using a serious tool. If the element is small, it is possible to make a notch with a grinder, the recess of which will allow the use of a screwdriver with sharp edges. To perform more complex work, you will need an extractor, drill and reamer. The base of the threaded connection is drilled exactly in the middle, after making the hole, the tool is screwed in counterclockwise.
When performing sequential actions, unscrewing a damaged structural element will not be difficult even for those who are encountering this problem for the first time. It is necessary to correctly assess the situation and use a good quality tool for a productive result.
How to drill out a broken bolt
A drill made of high-quality material is used for the work. The size must be selected in accordance with the torn edges; the diameter of the drill should not be larger than the hole. A high-quality drill has a higher price, but its use eliminates rapid wear and the possibility of breakage during operation.
You should use the tool slowly, and before completing the task, correctly assess the situation. It is necessary to monitor the position of the tool during operation; drilling is carried out strictly in the center, without deviations in different directions.
Use of solvents
If the bolt has oxidized and because of this cannot be unscrewed, an excellent solution is to use a solvent. It perfectly clears out oxidation.
Most often, motorists encounter this problem.
- All you need to do is pour the oxidizer into the hole with the fasteners and wait about an hour.
- After this you can clean the top of the bolt and start removing it.
- An excellent option would be, if possible, to pry off the cap with a screwdriver.
Do not forget about safety rules when working with hazardous substances.
Disadvantages and advantages
Each method has its own advantages and disadvantages. Let's take the following as an example:
- Cold welding and polymers can be used when the hole diameter cannot be changed. However, the resulting coils are characterized by low strength.
- The tap is used only when the hole can be slightly enlarged. This produces high-quality and durable coils.
- Inserts allow you to expand the range of application of the cutting tool, but the restored thread is also not designed for heavy loads.
In general, we can say that there are simply a huge number of ways to restore fasteners. The choice is made depending on where it is used and what the load is.
Read also: Gap between gate leaves
If you find an error, please select a piece of text and press Ctrl+Enter.
yeah! Before drilling, check the expiration date! I bought it here in the Agov store, dan dil like clean hands - putty for plastic. I’ll see it at home – 11 2005 best bifo.. well, I think 3 months is not scary! - he cut it off, began to crumple it - and inside there were already dried pieces.
So you need to look more carefully in stores!
It’s a pity, but I believed that modern chemicals have long had substances that can glue properly. Like advertising, glue is stronger than welding. And all you have to do is glue in the fitting!
ps And the most ambush thing is that when you need, on the contrary, a removable (detachable) part, it turns sour on its own so that if you unscrew the horseradish, the main product breaks off. But artificially gluing it like that doesn’t work!
If there is a desire to carry out an experiment, then the connection will be permanent
1) If possible, cut something thread-like into an aluminum plug with a broken thread. 2) Wash and degrease the fitting and glue it into the plug with a high-quality epoxy compound. In this case, the compound must both completely penetrate the turns of the fitting and the cut turns in the insert. To do this, carefully coat the threads and flange of the fitting and also carefully coat the surface of the hole. After this, apply more compound to the fitting and insert it into the hole. Press firmly. Fix. Remove excess compound. Let it stand vertically until polymerization, with the nozzle down. 3) After polymerization, we strengthen it. To do this, we matte the face of the tank over a decent area around the fitting. We buy methyl methacrylic compound for plastic. Mix both components and apply the compound to the surface of the tank and to the fitting. Do not smear very thickly (more than 5-9 mm in a layer) - heat is generated during polymerization. As a result, the fitting still turns out to be coated, as it were, with plastic, which is firmly glued to the plastic. If you really want to play it safe, you can wrap the fitting with a couple of turns of soft steel wire (like a corrugated broach) and then coat everything on top
