If you do not live in a round tower without windows and doors, then your home must have corners - internal and external. And during repairs, you have to decide how to finish them so that they turn out perfectly smooth and protected from mechanical influences. If the joint between the walls and the ceiling or floor is easy to hide with a plinth/cornice, then the filling of the internal corners between the walls and the external ones formed by window and door slopes, niches and protrusions must be done efficiently. To simplify this task, special perforated corners are used, the purpose and types of which you will learn from this article.
Can you show us clearly how to install a perforated corner?
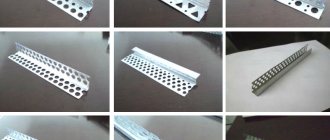
A perforated profile (perforated corner) is installed to protect and align external corners.
Most often, such protection is installed on the outer corners of slopes, columns, openings, niches, arches.
Some craftsmen don’t bother fixing the perforated corner dry using a mounting stapler, and then apply putty on top, but I think that this is not entirely correct. The perforated profile, regardless of the material - metal or plastic, primarily serves to protect and strengthen the corner, which means the internal cavity under it should not be empty, but completely filled with strong putty, for example CE 78, FUGENFULLER, UNIFLOTT.
I’ll tell you step by step how I install a perforated profile on the corners of an arched opening. Installing an arched profile on both sides along the thickness of the arch is more complex and has its own nuances, unlike fastening the profile, for example, to a window slope. It is this option with an opening that we will consider.
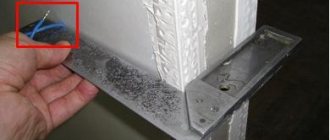
First, we decide on which side of the opening we need to start installing the protection. To do this, use a plumber's angle to check whether the end of the opening is turned around. As a rule, this is a plasterboard partition and the plasterboarder does not always pay attention to this nuance. We start installation from the corner that protrudes the most (acute corner). If both angles are 90 degrees, it makes no difference which side to start framing from.
So, use a spatula to apply putty to the outer corner of the opening:
Carefully install the perforated corner, pressing it into the putty:
In our case, the first profile has already been set. Now we have to set the second profile in such a way that the framed end of the opening is not turned around, but has a 90 degree angle.
The difficulty lies in the fact that the installed perforated profile protrudes beyond the plane of the wall by 3 millimeters. If we apply the plumbing angle close to the plane of the wall, we will not get an angle of 90 degrees. To compensate for the thickness of the perforated profile, you can use, for example, cutting a wire of the required thickness:
On the curved part of the arch we set the profile with the same bench angle with a “device” to maintain a right angle. To fix the arched corner in the design position, you can use self-tapping screws, screwing them into the holes of the individual segments.
To make the plane of the wall near the opening look more or less even, you need to make a “guy” along the installed perforated corners 35-40 centimeters wide:
After “bracing” the perimeter of the openings and niches framed by a perforated corner,
Purpose of perforated corners
What are perforation angles?
A perforated corner is a special device that acts as a frame for applying putty. A solid base allows you to achieve ideal geometry in both horizontal and vertical planes.
Among other things, a perforated corner for wall corners performs a protective and strengthening function. Fixed to the wall under wallpaper or another type of covering, this detail prevents premature destruction of the wall due to damage when carrying furniture, being hit by a heavy object, or frequent contact with the body of household members.
Material of manufacture
Currently, manufacturers produce many modifications of corners for wall putty. The purpose of the perforated corners for putty is determined by the base material and the shape of the product. Various materials are used as raw materials for their manufacture, each of which has a unique set of characteristics.
Corners for plastering slopes. Varieties and features
Popular materials
Today's:
- How to turn on an electric oven. Basic rules for using an electric oven
- How many rolls of wallpaper are needed for a room of 20 sq. m. Let's calculate the rolls of wallpaper
- Correct installation of a duct fan.
- Very good ideas, take note.
- Design - a project of a functional room for a teenage boy.
- How many tiles are needed for a 3 sq. m bathroom? How to calculate the number of floor tiles
- How many layers of putty should be applied under the wallpaper? Why do you need puttying?
Plaster corner
We simply take over part of the delivery of building materials to the site and free up your time.
- Selection of materials
- Budgeting
- Payment
- Delivery and unloading
Plaster corner
During any renovation work, sooner or later, problems will arise with leveling and plastering such hard-to-reach places as window and door slopes, ceilings consisting of several levels, as well as various junctions of corridors and other residential premises. Dealing with this seemingly difficult task is not so difficult; you just need to purchase a plaster corner . After all, its main task is to facilitate labor when plastering hard-to-reach places by creating a reliable basis for applying plaster. In addition, its installation helps to increase the strengthening of this work area.
This perforated plaster corner is used for additional protection against mechanical damage, as well as for leveling areas where two areas intersect. Due to the fact that this auxiliary building element has the shape of a right angle, it practically merges with the surface of the wall into a single whole. And the holes made along its plane allow the plaster solution to freely penetrate under its surface.
The plaster corner is made from materials:
- Polyvinyl chloride (PVC). Such a corner is not expensive, but at the same time very reliable and durable, since it is practically not subject to any corrosive processes and rotting, and is also much lighter than its metal counterparts;
- Environmentally friendly aluminum gives the finished corners durability and additional resistance to any mechanical stress. But it should not be used in combination with parts or elements made of copper and some other substances;
- Galvanized steel, thanks to a double-sided zinc coating, has excellent resistance to corrosive processes such as rust and rotting. That is why a plaster corner with a mesh, like all its other varieties made of galvanized steel, will serve you for decades, without requiring constant attention or replacement from you.
Types of plaster corners
During finishing work one has to deal with potholes of various shapes and sizes. Most of which have a semicircular or rectangular shape, for this reason the following types of corners for plastering are fundamental:
- Straight-shaped plates are used during work on reinforcing and leveling various types of surfaces, both internal and external corner joints. They are also used to hide several planes that do not fit tightly together;
- An arched profile or corner for plasterboard is used to give structures with curved edges a beautiful, even silhouette. They are used in the process of creating ceilings, niches and arches, equipped with figured elements of various shapes, and also make various patterned partitions inside residential premises.
We deliver goods ordered on our website throughout Kyiv and the Kyiv region
We deliver goods ordered on our website throughout Kyiv and the Kyiv region
We deliver goods ordered on our website throughout Kyiv and the Kyiv region
We deliver goods ordered on our website throughout Kyiv and the Kyiv region
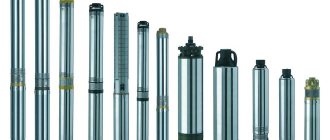
Corners
Arched plastic corner (3 m)
Galvanized perforated corner profile 21×21 3m (Russia)
Galvanized perforated corner profile 21×21 3m (Arcade)
Perforated corner aluminum profile 21x21 3m (Russia)
PVC corner profile with reinforced mesh 10x15-2500
Corner mesh profile for plaster 35x35 3 m (Russia)
Perforated galvanized corner profile PU 25 x 25 (3 m) (Russia)
Self-adhesive adjacent window profile with reinforcing mesh 6 mm (2.4 m)
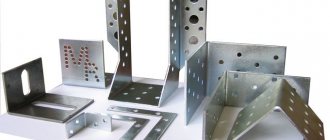
When carrying out interior finishing work with plasterboard sheets, it is necessary to protect the outer corners of gypsum plasterboard partitions from damage. After all, the sheets need to not only be attached to the wall, but also to protect the corners of window or door openings from damage resulting from possible impacts. Galvanized and aluminum corner will provide reliable protection. You can buy this profile in our online store.
Galvanized perforated profile
a galvanized corner is most often used . With its help, finishing materials can be easily fixed to brick, concrete or other walls, while it gives the correct geometric shape to the corners.
In our online store Allstroi.com, galvanized perforated corners are presented in the following positions:
- perforated corner profile 21×21 made in Russia;
- perforated galvanized corner 21×21 Arcade;
- perforated reinforced PU profile 25×25.
Specifications
- Material – galvanized sheet steel.
- The length of the corner is 3 meters.
- Profile size – 21×21 mm, for reinforced corner – 25×25 mm.
Advantages
Perforated galvanized profile has its advantages:
- a specially selected 85° section ensures a reliable fit of the corner to the mating surfaces;
- the presence of perforated holes in the shelves increases grip;
- galvanization prevents the appearance of rust and possible exposure to fungus and mold;
- increased structural rigidity;
- acceptable price.
Aluminum profile
For high-quality finishing of the outer corners of gypsum boards, they also use an aluminum corner, the price of which in our online store will certainly be acceptable for you. This type of fittings is a perforated aluminum corner 21×21.
Its technical characteristics:
- material – aluminum alloy;
- length – 3 meters;
- profile shelves – 21×21 mm.
Advantages
In addition, the aluminum corner has its advantages:
- low specific gravity, facilitating installation work;
- does not weigh down the load-bearing structures of the frame;
- the possibility of easy processing allows you to cut corners to size at the installation site, and this speeds up installation;
- environmental cleanliness.
Installation instructions for drywall corners
Galvanized corner for plasterboard 25x25 mm is one of the types of material that is used to level parts of walls. As you know, drywall is popular in construction and is easy to work with. However, prefabricated interior partitions made of plasterboard have problem areas - corners, which are most often subject to mechanical stress. This is where the different types of existing corners come to the rescue.
Existing types of corners for drywall
They perform the protective function of parts of the walls and will help to build even corners. Knowing their classification, you can choose a suitable specimen.
Full contents of the material
Types of corners and features of their use
The most common product options are:
Metal perforated corner
This type is a thin sample made of a profile with perforation and a rigid edge along the edge. There are basically 2 types of similar corners for drywall:
- straight;
- arched.
These representatives have many subspecies. The corners are not glued, they are practically “slung” onto the structure and secured with putty or gypsum plaster.
Straight perforated corner is used for processing the inside and outside of corners.
It is a V-shaped profile with many holes - perforations.
Options for metal perforated corner for drywall
Actually, with their help, a high-quality connection with the processed corners occurs, and the top, located at the internal corners - inside, and at the external corners - outside, is a guide for the spatula. Excess air also escapes through the holes. Straight perforated corners are made of plastic, aluminum, and galvanized. The latter is tougher than the others, and the wide one can generally be used as a plaster beacon.
Plastic corner
This sample is more resistant to moisture than the profile, but its resistance to mechanical damage is lower. Among the advantages are the low price and the absence of corrosion of the material. There is also a type of plastic corner, for example, AquaBead, which has special paper with glue applied in the inside. Putty is not required for fixing here; just moisten the adhesive surface with water and simply glue the corner to the desired place.
Arched
When installing a gypsum plasterboard arch in the opening, various finishing materials are used, such as plaster, wallpaper, panels and others. But in order to preserve the transition points between planes, an arched corner, which has great capabilities, is used. Arched corners are divided into the following types:
- Installed under plaster, perforated. They have separate petals on one side of the corner, allowing you to place a sufficient strip on any arched curve. There are plastic and profile ones;
- Decorative, which are glued to the plaster.
Before attaching the arched corner, you need to match it with the main finish or in contrast, so the design will look more original.
Products with mesh
Such elements are used in places that require strengthening corners and protecting them from damage. Plaster mesh corners are designed for internal and external corners. They can be made of either plastic or metal profile. The choice will be influenced by the shape and material of the finishing surface.
Installation of corners on drywall using corners
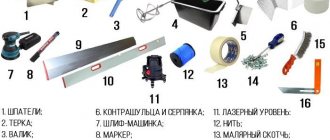
When starting to install a corner on drywall, you need to have tools and material on hand.
Required material
- the selected type of corner will need to be purchased with some reserve;
- using a primer, the surface of the drywall is strengthened;
- It is best to buy Vetonit putty, which is of high quality.
Tools
- metal scissors will help you cut out the necessary parts correctly and quickly;
- a brush that will be needed to apply the primer;
- wide and narrow spatulas will be needed for puttying drywall;
- The sanding block will remove all unevenness on the plane, while the angle will be perfectly even.
This is what mounted corners on drywall look like.
When starting installation, you need to familiarize yourself with the sequence of leveling the corners with putty so as not to damage this fragile material.
Stages of work
- First, the surface must be thoroughly cleaned and treated with a primer. You need to proceed to the next stage only after it has completely dried.
- Measurements are taken and the required length of the corners is cut. They are applied to the drywall as a sample.
- For further work, you will need non-woven tape, serpyanka mesh for the internal corners, one of the types of perforated corners: plastic, adhesive, rounded, either made of a metal profile or paper-based.
- Before you putty the gypsum plasterboard corners, you should select a putty for the gypsum plasterboard. To form internal and external corners, it is better to buy a dry gypsum mixture. It has a reasonable price, good quality and can securely fasten elements to the structure.
- The putty is prepared following all the steps: poured, poured, stirred, allowed to settle, kneaded again.
- When working with external corners, you need to remember that they are most often subject to mechanical stress; it is better to mount metal samples, in some cases having a rounded shape.
- Check the flatness of the end.
- Putty is applied to the area to be treated with smooth movements. Without allowing the composition to dry, you need to secure the corner with pressure, check the accuracy with a level, and if necessary, you can tap with a rubber mallet.
- Sometimes the corner is attached to the drywall with a stapler or glued with glue, and then covered with putty.
- Another layer of the mixture is applied to the installed element and now alignment occurs with the general plane of the wall.
Applying a second layer of putty
Perforated corners
Perforated corner in Nizhny Novgorod: varieties
In Nizhny Novgorod, 4 types of mounting angles are most often used.
- Solid corner
. There are no cavities in the cross section of solid aluminum or metal corners. The corner shelves can have the same or different sizes. In the second case, the section of the corner resembles the Latin letter “L”. - Perforated corner
. Perforated galvanized metal and aluminum corners are used to protect the corners of plasterboard structures from mechanical damage. When applying the corner, an adhesive mass or putty gets into its holes, which, when dry, securely fixes it. Since the perforated corner under the putty is laid over the entire surface, the adhesion force is sufficient for effective service for many years. - Aluminum corner
(including anodized aluminum corner). It is worth buying an aluminum corner for lightweight structures. Such products are not subject to corrosion, therefore they are used for external and internal work. - Galvanized metal corner
. Solid and perforated metal corners, galvanized, serve to strengthen slopes, door and window openings. The mounting angle is perforated and solid, preventing the putty from rolling off and aligning the joint line between plasterboard boards.
Perforated fasteners
A perforated fastener is a metal plate with holes on its surface. They are the place where the screws are screwed in. The name of the plate is a general one, because there are many such hardware that secure structures. They can be not only in the shape of an angle of 900, but also with a complex shape. The peculiarity of such fasteners is holes, so-called perforation.
Perforated corners are produced from high-quality steel with a high carbon content (high carbon). To ensure that this hardware is not subject to corrosion, galvanizing is additionally performed.
The purpose of such fastening is to connect various wooden elements. It is in demand in the construction of wooden structures, frame housing construction, houses made of timber or logs. Even if the house is built from other materials, perforated hardware will be needed when constructing the roof, for finishing slopes on windows, doors, or leveling corners in the room. Perforated corners are suitable for furniture, plasterboard structures, ventilation systems, and facade structures.
Holes
Perforation in the corners is carried out in standard sizes. The largest diameter holes are needed for large hardware. Small ones - for self-tapping screws and nails.
A perforated corner increases the strength of wooden structures. Working with such fastening significantly increases the productivity of the production process, since the connection of elements is carried out much faster than with other methods.
Working with perforated corners does not require the use of specialized tools, however, additional fasteners are also needed: straight hangers, clamps, tape.
Types of perforated corners depending on their purpose:
- Standard. One of the most common hardware. It is in demand for construction work with wood and for rafter systems, as well as in furniture production.
- Adjustable. Purpose - to securely attach building material to a load-bearing or partition wall when installing a roof. Equipped with holes applicable to shifting units.
- Reinforced perforated corner is a sought-after element in various construction fields: installation technological operations, house building. The planes of the product are equipped with stiffening ribs and holes. This hardware ensures the reliability of the fastened structural elements at this node.
- Asymmetrical corners with perforation are made with different side lengths. Used for working with wood, fixing the posts to the foundation base.
- Anchor. Needed for large screws or bolts. This type of corners has larger hole diameters compared to others. It is used for fastening large wooden parts, as well as fastening wooden elements to concrete or brick.
All perforated hardware has a unifying characteristic - perforation, made by stamping with different hole diameters, which allows you to select self-tapping screws or nails of the required length and diameter.
The technology for performing the work does not cause any difficulties, so even a non-specialist will be able to fasten the necessary elements efficiently and quickly.
Perforated plaster corner: how to use
A perforated galvanized plaster corner helps in finishing many parts of the room. The master finisher achieved compliance of these places with the intended design thanks to experience and skill. After all, it is extremely important that the area is straight or oval, where necessary. Today, finishers come to the aid of devices that significantly simplify and speed up their work.
Today we will tell you where and how a perforated plaster corner is used. Also in the video in this article you can find out additional information about the use of this material.
Where is the corner used?
Master decorators try not to advertise that the beauty of smooth walls largely depends on the edging.
This definition implies such areas of use of putties and plaster mixtures as:
- Connection of walls with floor and ceiling;
- Internal, external corners;
- Arches, boxes, corners, channels and other similar structures
At their core, all accessories refer to perforated corners for plaster. There are only two main types of corners: arched and straight, which in turn are divided into different categories. The scope of their use is extremely wide, and covers almost all types of work related to plaster and putty.
Straight perforated corner
The perforated plaster corner is available in two versions: internal and external. The materials used for their manufacture vary from plastic to galvanized, and the width of the corner also varies.
When using one corner or another, it is worth starting from the task at hand, since there is no global difference between them. Although the galvanized corner is more rigid than others. This property allows it to be used as a beacon for plaster, especially if it is wide enough.
Attention; To use a corner, you must choose metal scissors of the appropriate quality. Otherwise, poorly cut edges of the corners will interfere in the future.
- If you use plastic corners, you can even use a stationery knife to work with them. However, if you don’t have any tools at hand, you can break the perforated corner with your hands. In this case, the edges will then have to be straightened with a hammer or pliers, or even manually.
- The straight perforated corner for plastering works looks like the English letter “V”. Moreover, its flat sides are perforated, and the top protrudes about a millimeter. It is characteristic that those corners where it is directed inward are called internal, and external, respectively, those where the top looks outward. The top serves to guide the spatula, and the perforation is necessary to attach the corner itself
Attention: You can cut a dozen corners of the required footage using a tape measure and a grinder. To do this, you need to fold the corners one to one, and then, after measuring the required length, use a grinder. To work with a small number of products, you can also use scissors, however, if there is a power tool not far away, then it is better to use it.
The purpose of the corner and how to use it
Perforated plaster corner is used to strengthen the corner and give the correct geometric shape.
Installation of this product occurs in two methods:
- Curved corner , in this case, if the radius is not large, you will need to make cuts along the stiffeners so that the corner takes the desired shape;
- Right angle , in this case the corner is simply attached along the plane in the form in which you purchased it.
Corner like a plaster beacon
In the first option, the corner will be used as a plaster beacon. To install it, the plaster is placed on the main corner. It is worth noting that if you have sufficient finances, then it is better to choose gypsum plaster; working with it is much more comfortable.
- This plaster mixture is applied not along the edge, but in strokes in the form of a cake. This is done for convenient setting of the angle. The corner is set according to the plane and level, using construction tools, in particular rules and levels.
Attention: If gypsum plaster is mixed with cement or a cement mixture, the beacon will rise within a few minutes, after which you can continue working.
- In order to avoid overlap of perpendicular planes, it is better to cut the working corners at 45 degrees. It is worth noting that it is undesirable to use an internal perforated corner as a plaster beacon. With its help it is better to emphasize the straight lines of the edging.
- In places where the outer corner is subject to frequent mechanical stress, it is worth using a corner with a plaster mesh. A plaster mesh made of fiberglass in combination with a corner made of plastic or metal, if necessary, reinforces the corner. These categories of perforated corners are used as plaster beacons. Because, to hide the mesh under the finishing putty, you will need to apply a layer of plaster at least 5 mm thick.
Attention: If you use a regular perforated corner as a reinforced one, you can glue a mesh onto its shelves - a serpyanka that grips the wall. As such a mesh, you can use materials such as non-woven fabric and fiberglass. Putty can be used as an adhesive element.
Using a corner as a protective cover
In the case when high-quality plaster has already been applied to the wall, the perforated corners under the plaster serve to protect the corner from severe mechanical damage and emphasize its straight lines.
- This corner is installed similarly to the first option. The difference is the use of a more liquid plaster mixture, and its layer should be as small as possible. For such tasks, as a rule, plaster corners made of plastic or aluminum are used.
- Moreover, it is not necessary to use plaster mixtures or putty for installation. The corner is adjacent to the surface, covering it because the base is already level. Installation of such a corner with a thin layer of plaster mixture as an adhesive element is used when working with gypsum plasterboard products.
- It is important that these structures are assembled properly. For such work, a perforated corner is used, on whose shelves self-adhesive strips are applied; such products can be used by moistening them with water.
- In some cases, there is a need to connect corners, in which case it is important that the joining corners are made of the same material. This is due to the fact that different corners may have different sizes, which in the end will negatively affect the finish.
Attention: If the room is frequently walked, then it is better to use a galvanized perforated plaster corner. It is more rigid and better withstands the loads of plastic.
Slope finishing
Slopes on windows and doors should be treated with special responsibility because... upon visual observation, they are involuntarily compared with door or window openings. In other words, the straightness of the lines is assessed. If you do everything with your own hands, then attention should be at its best.
- There should not be even minimal deviations from the door or window lines. You should also check the window openings for compliance with the level; they may collapse. Basically, when plastering slopes, craftsmen focus on the level.
- Therefore, it is recommended to use a perforated corner for this, which can also be used as a beacon. If gypsum fiber boards or gypsum boards were used when installing slopes, and the quality leaves much to be desired, the corner will help eliminate the shortcomings.
- It is important that when working with a brick slope, sandwich products, or installing gypsum boards on a slope, according to building codes and regulations, they must be plastered. A perforated corner in this case will facilitate the correct alignment of the drywall.
Fixture sizes
As for the size of the elements, it all depends on the variety and their purpose. If a reinforced fastening element is required, then its minimum parameters will be 65x65x55 mm, and the largest size of such an element is 100x100x90 mm. Intermediate options include fasteners with values of 95x95x40 mm and 90x90x65 mm. Such elements reach 3 m in length.
A reinforced variety of perforated joints are corners such as 25x25 and 21x21 mm. The reinforced fastening element increases the reliability of connections and has a high load-bearing capacity. Another advantage of the element is that it does not require the use of special tools and equipment for installation.
Installation technology for perforated painting corners
- If the outer corner has large potholes or is very level, repair it or level it accordingly with plaster mortar.
- Prime the corner 40-50 cm to the right and left. Allow the deep penetration primer to dry and cure (24 hours).
- Measure the required angle along the length with a tape measure and trim the paint corner along the length of the angle with metal scissors or just ordinary stationery scissors.
- Mix the putty thicker in a small container.
- On a painting spatula (10 cm wide), scoop up putty, and then apply it directly to the corner itself with strokes 20-25 cm apart on both sides of the corner (on plasterboard corners and on even corners, apply a continuous application). Do not overdo it with the amount of putty, otherwise the corner will float and you will not be able to fix it properly.
- Take the paint corner and place it on the prepared corner directly on the putty. Then lightly push it into the putty on both sides with the edge of a spatula. Excess putty will come out through the perforated holes.
- Remove excess putty with a putty knife, and then use a level or plumb line to level the corner vertically or horizontally, measuring on both sides of the corner. After this, carefully remove the excess putty again.
- Once it has set, fill the remaining voids between the corner and the perforated paint corner with thick putty.
- After drying, putty the corner with an overlap on the wall on both sides with a paint spatula (250-400 mm) with putty diluted like sour cream.
All is ready. Allow the corner to dry completely (24 hours) for a strong bond. Then continue plastering the walls or ceiling with your own hands.
Anyone who has ever renovated an apartment with their own hands has been faced with the question of how to align the corners. The easiest and most effective way is to use a paint corner. You can easily and correctly install them on various external corners by studying the technology in this article on installing perforated painting corners with your own hands.
It is clear that there are not only vertical corners of two adjacent walls, but also corners of plasterboard ceilings, niches in walls, window and door slopes. And they can all be uneven.
Modern materials greatly facilitate the process of leveling uneven corners. A paint corner is just the kind of material that helps in the work of professional painters and self-taught craftsmen.
Meet the reinforced corner!
The fastening angle is the simplest and most reliable fastening element. Using it, you can attach a shelf to the wall, form a bed frame, install a roof rafter system, construct a stair lift, secure a system of utility pipes, and form a box for sheathing with plasterboard sheets.
In any of these options, if the structure is subject to heavy loads, an important task is to ensure reliability and strength! Alternatively, you can install the corners in a continuous sequence; then this will affect both the cost of the work and the appearance of the connection node. To provide increased load-bearing capacity, a stiffening rib has been added to the design of the corner. This element runs in the middle of the fastener along both of its walls.
The reinforced fastening angle is an improved version of the standard fastening angle. The presence of a stiffener corner in the design allows it to be used when connecting load-bearing wooden structures. Such elements usually have large dimensions and weight in the rafter system, and require more reliable fastening.
How to secure the structure
Fastening of elements should be done using nails and screws . The dimensions of the mounting angle depend on the complexity of the planned work. Manufacturers offer various products with certain parameters and established sizes.
You should additionally purchase self-tapping screws, and tighten them with a screwdriver or drill. In this case, it is quite possible to work with a standard screwdriver. If additional reliability is required, you can purchase an element with a stiffener. For a corner 2 m long and 3 mm thick you need to pay 299 rubles. Sometimes you can purchase a package of such products, the price of which can vary significantly depending on the manufacturer.