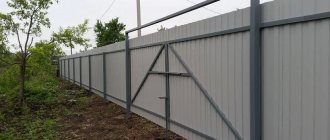
There are many materials from which gates can be made. For quite a long time they were made mainly at home with their own hands from angle steel. This is explained quite simply. In times of shortage, it was very difficult to “get” any other material. And the fact that you could simply buy a gate was out of the question.
Gate frame
But metal sheets could be obtained quite realistically. It was also possible to purchase a steel angle. Nowadays, companies generally refuse to carry out structures of this kind, because the work is quite labor-intensive and time-consuming. However, making such a gate at home is quite possible.
Gate drawing
The project begins with an idea, which is depicted on paper. The easiest way to weld regular swing gates is that they are the least expensive and quite practical to use. You can take this idea as a basis.
The first thing to do is create a drawing of the gate so as not to work blindly. If you don’t have the skills to work with graphic editors and special software, and everything is very bad with drawing, you can look for a friend who can help you do this kind of work, or order a drawing from a specialist.
As a rule, this will be a little expensive, but there is another option - find a suitable drawing. This is much more difficult, but still possible. Moreover, if the garage is still at the assembly stage, then the gate for it can be made of arbitrary sizes, and then the construction can be completed.
Of course, you can work blindly, but there is a high risk of errors, so it is worth drawing at least a primitive drawing that will schematically display the action plan and the approximate dimensions of the future product. In the drawing you need to roughly depict the future gate, and then note the dimensions of each side of the canvas, as well as the design details. This will help not only complete individual tasks faster, but also more correctly calculate the amount of material for work.
It is best to make symmetrical sashes so that no difficulties arise.
What should be in the picture or drawing:
- Frontal view with canvas dimensions. The hinges, latches and lock should also be shown here.
- The top view shows the thickness of the product, the number of corners and other details that are used for frames.
- It is necessary to take measurements of the opening and mark the resulting dimensions in the figure. The minimum recommended gate height is 2 m for a passenger car and 2.5 m for a minibus. In calculations for larger vehicles, you will need to take the height of the vehicle and add a 30 cm margin to it. The typical width can range from 2.4 to 5 m, but for most cases 3 m is suitable. This size must be selected to suit your needs, taking into account the width of the vehicle + the passage distance along which it will be convenient for a person to pass between the car and the garage wall.
The sketch will make it easier to work with finished parts and blanks, then you should start choosing materials.
Requirements for swing garage doors
Regardless of the chosen type of metal structure, there are a number of requirements that must be met during its design and installation. The gate must be wide enough so as not to impede the passage of a car. The minimum door width is very easy to calculate - it must be at least 30 cm greater than the width of the vehicle.
Important! It is best to make the doors as wide as possible, even for a small car. It is worth considering the possibility of purchasing a large SUV in the future.
Garage doors are designed to be quite wide. Source svarka-sibir.ru
The second most important requirement for a door group is to protect the room from precipitation. The sheathing is welded to the frame. For better tightness, the edges of the valves are covered with sealing tape.
Garage doors must reliably protect the contents of the building from unlawful actions of third parties. A powerful lock with a complex mechanism is installed on the frame structure. The sash casing is made of steel from 3 to 5 mm thick.
Materials and design elements
Welding garage doors requires choosing the right material. The most affordable option is steel corners and sheets of metal. What should you take? If the owner relies on ordinary swing gates. Here is the optimal set:
- Corners 75 mm wide are the basis of the future frame. The supporting part of the structure will be assembled from them.
- Square profiles for assembling the frame; they will be welded to the corners. It is better to take a minimum width of 25 mm.
- The braces for structural rigidity are made from a profile from 50 mm wide.
- For cladding, it is best to take a regular metal sheet, but there are also options with corrugated sheets. The latter is more difficult to work with, so a beginner should abandon this idea right away. The minimum sheet thickness for gates is 2 mm.
Everything is clear with the main material, now you need to provide the gate with a fixation system. You need to take standard latches or latches for garage doors, which will not jam even in the cold. It’s worth saying right away that you shouldn’t cook the loops yourself, it’s better to buy them. There are such internal bearing hinges, they open conveniently and easily withstand the weight of even a heavy structure. And these hinges will not jam in the cold, so it would be better to use them. Need 4 pieces in the store. buy.
Rules for calculating the dimensions of a structure
Having decided on the material of the frame and cladding, you need to start creating a diagram, which first of all includes dimensions. Despite their simplicity, swing gates require precise calculations so that in the end they can fit perfectly into place.
It is important to remember the following features:
- The size of the gate when open should allow large vehicles to pass through unhindered. It is better to leave about half a meter on each side of the gate post so that the car can safely pass without hitting the structure. Accordingly, the space that the open doors will occupy is also taken into account;
- the sketch of the future gate should include indications of all dimensions and parameters, even if they seem unimportant. The width and length of the structure must be proportional to the space in which the gate will be installed. The dimensions of the metal pillars that act as a support must be indicated;
- When creating a drawing, scaling with real parameters and materials is observed. According to the sketch and its scale, the number and footage of corrugated pipes, as well as future cladding, are calculated.
Tool and place of work
Since the garage door will be made of metal, you will need the appropriate tool for the job. Here's what you'll need to assemble the gate:
- Measuring kit - square, building level, tape measure.
- It is best to trim metal with a grinder. You should stock up on wheels for both cutting and grinding.
- During the work, a hammer, clamps, a drill, as well as fasteners - hardware may be useful.
- To weld, you need to take an inverter with 3 mm welding electrodes.
- Paint brush. After the gate leaf is installed in place, it will need to be primed and painted. GF 021 and pentaphthalic enamel are suitable here.
Now about the workplace. The owner will need a large, flat area on which to weld the frame and weld sheets of metal. Work can also be carried out in the garage, if size allows.
You will also need at least 1 assistant to move the metal sheets and the assembled frame.
Working on the gate frame
The size of the frame for the gate leaves must be such as to ensure a tight fit to the gate frame from the outside.
Manufacturing a frame of sashes from a rectangular profile
When designing double-leaf garage doors, the drawing is made indicating the dimensions of each leaf separately. For the vertical walls of the frame, cut a profile with a height of 15 mm below the frame in the amount of 4 pieces. To accurately determine the size of the horizontal sides of the gates, divide the width of the gate frame by two and subtract 30 mm.
To weld the gate frame, the parts are laid out inside the gate frame, which will help avoid changes in geometry and speed up the work process. To strengthen the krakas, a reinforcing element is welded in the middle.
Which is better: heated floors or radiators?
Warm floorBatteries
Starting a workflow
Now, how to weld garage doors. Stage 1 - assembling the frame, for this it is necessary to weld the 75 mm corners and the profile into a single structure, then the frame will be fixed to it and the canvas will be welded. Work should begin from the threshold in the following order:
- Cut 2 corners along the width of the opening of the future gate, place them along the threshold on the inside and outside. Weld them together with steel strips or reinforcement in increments of 50–75 cm. The strips are placed on the inside of the corner. So there is a threshold.
- Cut 4 more pieces, they will go to the side of the frame. You should place them tightly to the corners of the threshold, trim the products so that they fit tightly to each other.
- Place all 4 posts to the ends of the wall. We weld with ties, just like the lower part of the frame before. The spacing of the ties is 40 cm from the threshold and ceiling, and the middle one is at an equal distance from the upper and lower planks.
- Weld the threshold to the posts.
- You need to install the upper part of the frame, adjust it where necessary, weld the connections, and then weld it with the side posts. The frame is ready.
- If one of the elements is misaligned, it can be corrected by welding a lever.
Assembling the inner frame
Welding a garage door with your own hands is not so easy if you are in a hurry. The more careless the welding, the greater the chance that the frame and frame will be crooked. If the owner has never welded metal, it is worth asking a familiar specialist to help with this. So, you need to start assembling the frame:
- In the finished frame you will need to install the sashes and secure them to the hinges. It is necessary to maintain gaps for the frame - 10 mm on top, 5 mm on the side, and 20 mm on the bottom gap from the threshold.
- Cut the corner along the length of the side part of the frame, trim another 30 mm and place it in accordance with the gaps to the outer side part of the frame. With a piece of metal you need to grab the workpiece at this distance to the outer frame post, you can grab it with 2 elements to fix it for sure. Repeat the procedure on the opposite side.
- Weld the corners horizontally from the bottom and top, trim them according to the dimensions of the frame.
- Attach the hinges to the frame and weld them to the frame parts. After this, you can trim the welded fasteners with which part of the frame was fixed to the frame.
- Install 2 posts in the middle and weld them.
- Weld 1–2 lintels for each door.
- To prevent gates from sagging without a leaf, you should immediately install braces.
- Now you need to check and open the gate.
- All that remains is to weld the canvas.
Types of metal corners
Angles are produced by enterprises that deal with rolled metal. They have technical characteristics that allow them to be widely used in many types of construction activities.
The product received this name due to its L-shape, and the production of the corner occurs by hot rolling. Along with their low weight, the corners have high rigidity, and their shape allows them to withstand heavy loads.
All metal corners are divided into 2 types:
- Equal. They have the same side sizes. For example, in a 40x40 corner, both sides are 40 mm. The range of sizes of such corners is quite wide: from 20 to 200 mm. In this case, the maximum thickness is 16 mm, and the length depends on the purpose of use.
- Unequal. These are corners with different side sizes. For example, the dimensions of the corner are 130x75: one side is 130 mm, the other is 75 mm.
Types of garage doors
Let's take a closer look at how to weld garage doors. The first thing you should decide on is the design of the gate. Garages vary; some owners have little space before construction, while others have little space.
There are several main garage door designs:
- Recoil. The mechanism of action is similar to sliding wardrobes. A convenient and practical option, but there is an important nuance - in the direction of opening the gate it is necessary to provide space, and of the same length as the gate leaf.
- Roller shutters. A special box is installed under the garage ceiling, into which the canvas plates are removed. It is worth immediately noting that despite its high convenience, this gate design is the least protected from penetration, so it should only be installed in protected areas.
- Sectional. The design consists of a canvas divided into sections. When folded, the gate leaves are refracted and, using a special spring mechanism and a profile system, rise to the ceiling. The main advantage of this design is good tightness and space saving.
- Lift-and-swivel. When opened, the door leaf rises vertically to the ceiling using a lever-hinged mechanism. Gates of this type are quite practical, easy to use and save space both inside and in front of the garage.
- Swing. The oldest and most popular type of gate. They are extremely popular due to their convenient and simple design, consisting of two doors, as well as their low cost. Even a novice welder can weld swing garage doors with his own hands.
Swing gates are the best option in terms of cost and ease of manufacture, so in this article we will look at this particular technology.
What paint to paint the gate
Painting the sashes is necessary not only for beauty, but also to protect the metal from corrosion and extend its service life.
It is recommended to repeat the painting procedure once every 2 years.
Consists of the following stages:
- Cleaning welds, grinding.
- Degreasing the surface with a solvent.
- Applying primer in 1-2 layers. Drying time is a day.
- Staining of sashes. It is better to do this with a roller or spray gun. Narrow, hard-to-reach places are painted with a brush.
The list of recommended paints and varnishes is given in the article: “How to paint a metal fence.”
Requirements
Before welding a garage door from an angle or profile, you need to familiarize yourself with the requirements for high-quality doors:
- the size of the gate should be optimal relative to the dimensions of the car, and ensure unhindered, simple exit;
- the minimum distance from the side of the car to the gate leaf on each side is at least 30 centimeters. If the car is small, still try to make the distance as large as possible - in case you decide to buy an SUV later;
- for passenger cars, the optimal gate height is at least two meters;
- the sizes of the openings differ depending on the size of the building itself, here everything is selected individually;
- The most important function of garage doors is burglary protection. It is best to use galvanized steel sheets with a thickness of at least 3-5 millimeters for cladding. For additional reinforcement, you can use locks designed for external pads. If possible, armored linings would also be useful;
- Another important parameter is protection from negative atmospheric influences, which lies on the gate fastening. To ensure a reliable fit of the canvas, it is worth using vertical locks to prevent distortion. A seal will also be useful - it will ensure good contact between the sashes and the frame.
How to make pillars from bricks?
Brick is known for being virtually unaffected by destruction and looking very presentable. But, a fence made from this material is expensive. Therefore, supports are constructed from brick, and, for example, corrugated sheeting is used for the span.
The process of installing bricks is considered quite painstaking, and should be approached in the same way as building a house. You will have to thoroughly clean the area, mark it, lay waterproofing and install a reliable foundation.
Watch the video
Any incorrect step in this process will cause the pillars to tilt and begin to collapse. Therefore, such construction must be done by competent professional craftsmen. An amateur who is not “skilled” in this matter will not be able to carry out construction efficiently.
Also, having chosen a brick structure, you must take into account that the purchase of material and the participation of qualified specialists will not be cheap.
How to make a gate at the same time as the pillars
First of all, it should be noted that this option for arranging the inlet opening is convenient in that it allows you to accurately calculate the dimensions of the gate without unnecessary measurements. If the task is how to properly weld a gate from a profile pipe, then it is difficult to find an easier option, and if you have problems when carrying out welding work, then this article describes all the stages of welding corrugated pipes.
The work algorithm is as follows.
- The corrugated pipe is cut to the dimensions indicated in the diagram. The top and then the bottom bar of the future gate frame from a profile pipe should be welded to the fence posts.
Then you should weld the vertical frame strips for the gate. Canopy hinges are welded onto one of the strips before welding. During welding work, the correct location of the strips is checked with a level
It is important to position and weld them correctly, otherwise the constructed structure will function poorly
- Canopies are also welded onto the side posts of the fence.
- In the middle of the future frame you need to weld a horizontal bar.
- After this, the frame is cut off from the base and removed from the hinges.
- On the finished frame, everything unnecessary is removed, and the welds are strengthened. It is recommended to carefully weld the frame again along the entire perimeter.
- Next, the lock is inserted.
- And now it’s time to try on the gate frame. If the gate was welded correctly, it will close and open easily.
- Then the support strips are attached.
- The finished frame is covered with sheathing material.
- On the top fence post, on the side where the lock is located, you need to weld a retainer.
The most common sizes of corrugated pipes for the gate frame are 40*20 mm. But, depending on the size of the gate, it is possible to weld from the assortment and 60*40 mm.
How to weld turned hinges
In order for the gate opening to function effectively, many factors must be taken into account. And the question of how to properly weld a gate from a profile pipe cannot be solved if the work is negligent. The constructed structure must reliably close, open and support the force load.
Watch the video
The first two criteria and the tight fit of the structure depend on how correctly the hinge installation process was carried out
In order for the gate passage to open without loud creaking and jerking, it is important to choose the right option for welding these parts for the profile construction
First, it is recommended to remember that the paired work of loops is based, first of all, on their identical placement on a conventionally drawn straight line. That is, in space they should be located exactly along the axis. And this must be taken into account before welding the gate and the doorway in it.
If positioned correctly, the load from the weight of the door structure on the canopy supports will be distributed evenly.
The task of how to weld a gate from a profile pipe yourself will not become an incredibly difficult process if you follow the instructions strictly. Let's consider it using the example of design with a profiled sheet.
If this stage is compared with the rest of the work, then it is the easiest:
- a sheet of the required size is cut out;
- the prepared sheets are attached to the frame with self-tapping screws.
It’s very easy to do the sheathing for the gate yourself. But there is no need to rush in this matter. Patience and accuracy should not be discounted. If you haven't had to do this work yourself, there's no need to be upset. Everything will work out correctly if you correctly measure the required sheets of material and act without undue haste.
Tools and materials
The first thing you need to do is purchase tools and materials for making gates.
This list includes:
- Level.
- Welding machine.
- Roulette.
- Angle grinder with grinding and cutting wheels.
- Square.
- Profile for making sashes. The optimal choice is 25.
- Valve. There are different systems, choose the best one for yourself.
- Loops. Here you should choose based on two main parameters - practicality and safety. A good choice is internal hinges on bearings, as there will be no problems with them in the cold season.
- Sheathing. Here everything depends on the taste of the owner - corrugated board, wood, metal sheet - the choice is quite extensive. Typically, metal sheets with a thickness of 2 millimeters are used.
- Steel corners. They will be needed to make the mounting frame. We advise you to choose a minimum 75 corner, since the strength of the sash fastening depends on the corner, so the strapping must be strong.
You should immediately decide on the place where the gate will be welded. The ideal option is a welding table, but if there is no access to it, a flat area will suffice. A channel is laid on it, the perimeter of which should be no less than the gate itself.
How to weld a fence with your own hands
Before fabrication, the posts must be installed to obtain accurate dimensions for welding the frame. They are made from metal or asbestos-cement pipes, brick, concrete, wood. It is better to do the work together so that it is convenient to fix the racks without distortions.
Installation of support pillars in concrete
Step by step installation guide:
- dig a hole 70–100 cm deep (depending on the severity of the valves);
- a layer of sand is poured onto the bottom, then crushed stone, 10 and 15 cm, respectively;
- the bedding is compacted and spilled with water;
- place a support, adjust it vertically using a level or plumb line;
- fixed in the ground with spacers;
- prepare concrete by mixing cement, sand, crushed stone, the latter material can be replaced with screenings, slag, expanded clay or finely broken brick;
- concrete a hole in the ground around the pillar.
Required tools, devices and materials
To set up posts and hang gates, take a building level or a laser level, a tape measure, a core and a pencil.
Other necessary tools:
- electric welding machine, it requires consumable components;
- drill, screwdriver, Phillips head screwdriver;
- grinder with a disc for cleaning and leveling welds;
- pliers, hammer, metal brush, coarse emery;
- bayonet shovel, axe, crowbar for digging out soil;
- concrete mixer or metal trough for preparing concrete, shovel;
- painting tool (roller with brush or spray gun).
For the frame, a corrugated pipe of the required shape and cross-section is used, and the segments for the stiffeners are calculated. The filling material is purchased so that there are fewer connecting seams on the surface of the valves. They buy ready-made hinges, preferably with a galvanized layer, and choose mechanical, electrical or electronic locks.
Sequence of work
Cutting a profile pipe with a grinder for metal.
The pipes are cut into pieces of the required size in accordance with the drawing. Take into account that corner joints are welded at 45°, and for T-shaped joints the profile is cut at a right angle.
Step-by-step production:
- the prepared parts are cleaned of rust using sandpaper and a wire brush;
- frames are welded in a horizontal position on level ground, or trestles and tables are placed level;
- first, the frame is welded, then the crossbars, diagonal or corner struts are installed;
- remove scale from weld seams, grind it smooth with a grinder, prime it, paint it;
- insert and fasten the sash trim;
- the hinges are attached in the required places, the canvas is hung;
- weld locks and bolts;
- close the end holes of the pipes with plugs, weld them or seal them with sealant.
Manufacturing of the supporting frame
Everything you need has been collected, the place has been prepared - you can figure out how to weld a garage door. The first thing that needs to be done is the strapping along the opening, or the supporting frame. It consists of two main parts - the internal and external frame.
- We measure the height and width of the opening. The measurements must be as accurate as possible, since the installation of the finished frame completely depends on them.
- Blanks for the future frame are measured from the corner and cut with a grinder.
- The finished workpieces are laid out on the prepared surface, using linings they are clearly leveled, all corners are leveled. The resulting result should completely replicate the future frame.
- We weld the frame. To ensure the best fit in the future, its outer side must be flat and smooth, without roughness or bumps, so all welding jambs are carefully ground.
- Levers are welded into the corners (you can use pieces of angle iron). They will provide the finished frame with spatial rigidity, and it will not move.
- We lay out all the elements on a plane, level them and secure them by welding.
- Let's try it on. We correct all discrepancies with a hammer and fully weld
- We make the second frame similarly to the first.
- The inner and upper parts of the frame are installed in place. For fastening to the opening slopes it is convenient to use 15-20 centimeter metal pins.
- All protruding ends are cut off, thoroughly scalded and thoroughly sanded.
- To fasten the frames to each other, metal plates are used, which are welded at a distance of approximately 50-60 centimeters from one another.
- This stage is completed by hanging the sash.
Manufacturing and installation of sashes
There is only one way to properly weld a garage door - you need to clearly calculate the future dimensions of the structure and the spare gaps necessary for the doors to close and open smoothly. Experienced builders recommend 2-3 cm from the floor, 1-2 cm from the ceiling and 5 cm from the side walls for attaching hinges. Based on the calculations obtained, the profile pipes are cut and a cut is made at their edges at an angle of 45 degrees.
Metal pipes are laid out on a welding table or prepared surface, adjusted to length and the corners are checked. Using a welding machine, a monolithic rectangle of a suitable shape is created. Before starting to clean the seams, the finished structure of the future doors is applied to the frame with hinges welded onto it.
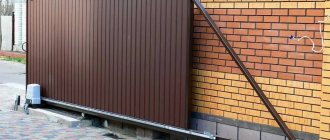
Garage door installationSource tildacdn.com
If the dimensions match, you can begin installing the finished structure. The places where the fittings are attached are marked on the pipes and welded. The gate frame is checked by putting it on the frame hinges - if it fits like a glove, you can proceed to the next stage. Using a tape measure, set the middle of the horizontal crossbars. They retreat 1 cm from it and weld vertical crossbars so that there is 2 cm between them.
The canvas is cut into 2 equal parts, and the protruding pieces of pipe are removed using a grinder. To strengthen the sashes, you can install additional horizontal or diagonal cross members. All welds are cleaned, the structure is painted and installed on the hinges. To prevent the doors from opening inward, a control profile pipe is welded to the top of the frame, which will limit their movement.
Covering the doors with metal sheets
It is not enough to know how to weld a garage door from a profile pipe with your own hands; it is important to sheathe them beautifully so that the final result is pleasing to the eye. Most often, galvanized iron plates 2-3 mm thick are used for cladding.
They are marked and cut with a grinder, the edges are polished, removing metal burrs and shavings. Small slits for hinges are also made on the sides of the sheets.
Garage covered with metal sheetsSource nick-stroy.ru
Welding requires two people. As soon as one aligns the canvas, the second welds it in several places to the sash. You should not make a continuous weld - there is a serious danger that in the future the entire sash will leak. The seam should be spot-on with an interval of 2-3 cm. The finished structure is decorated with forged decorative elements and painted with metal paint.
Installation of locks and latches
Ready-made garage doors must be equipped with a good-quality lock, which will reliably protect the car and other utensils from intruders. The most popular option is a mortise lock. It is welded to the frame of one of the doors. To ensure smooth movement of the crossbars, holes of the same diameter are drilled in the corrugated pipe.
Installing a lock on a garage door
If your budget does not allow you to use reliable mortise mechanisms, you can use a proven option. A small loop is welded to the edges of each of the doors. They are used to install a barn lock. Despite the fact that this option is cheaper, it is seriously inferior to mortise mechanisms for safety reasons.
To fix the valves in the open position, locks on metal springs are used. Even an inexperienced technician will have no problems installing them. The lock body is welded to the bottom of the sash closer to the middle of the garage opening.
Insulation and internal lining of garage doors
The final stage of creating a metal structure is covering it with insulation on the inside. This will allow you to maintain a positive temperature in the room even in winter. Glass wool, polystyrene foam or extruded polystyrene foam are used as insulation.
Insulation of garage doorsSource vikbud.ua
A wooden sheathing made from edged boards is mounted to the frame of the doors. All cavities are carefully filled with insulation, avoiding air pockets. To retain a sufficient amount of heat, a 5 cm layer of mineral wool is sufficient. To give a finished look, the sheathing is lined with PVC panels, clapboard or other materials based on the individual preferences of the garage owner.
How to weld a garage door with your own hands
Welding garage doors yourself is quite simple. Using a welding machine and available tools, a frame is first mounted, onto which the doors are then installed. To give a finished look, the doors are lined from the outside and inside.
Welding of sashes
The frame is necessary for a pair of swinging doors, to which a metal sheet will later be attached. The profile is well suited for making a frame.
The essence of manufacturing comes down to the fact that initially one solid sash is installed in the opening, and it is attached to hinges on both sides. As a result, we get a frame inserted into the frame, which just needs to be cut in half.
To avoid problems with opening the gate in the future, the following gaps must be maintained between the frames:
- above the threshold from below – 2 cm;
- between the sash frame and the ceiling beam - 1 cm;
- between the same frame and the side stand - 5 cm.
The installation process begins with the installation of the side frame posts, and is carried out in the following order:
- A piece of corner, cut taking into account the necessary gaps at the bottom and top, is placed on the side frame. A gap of half a centimeter is left, after which it is grabbed with a piece of metal. We repeat a similar operation on the other end.
- Properly trimmed horizontal corners at the top and bottom are welded to the vertical posts. First you need to cut one shelf exactly in the center of each jumper.
- The canopies are installed, after which their upper part is welded to the sash frame, and the lower part to the frame. The hinge should be located opposite the connection connecting the outer and inner parts of the gate frame.
- In the middle of the opening we install two vertical posts, attaching them to the frame by welding.
- We make two horizontal lintels exactly in the center of each sash.
As a result, we get a frame built into the frame of the opening, which can simply be cut into two parts, each of which, thanks to hinges, opens independently. Considering that the shelves of the lower and upper corners are already trimmed, it is enough to simply cut them from the front side.
Do-it-yourself wicket and gates made of corrugated sheets from square pipes
Initially, you should decide on the configuration of the corner docking unit.
There are two options that you can use. A more complex, but professional method is to use workpieces with an end cut at an angle of 45°.
The second, simpler, but no less reliable way to install gates made of corrugated sheets: the crossbars are butt welded to the vertical posts, and plugs are installed on the end holes.
PHOTO: uz.everaoh.comSeparate wicket and gates made of frame and corrugated sheets
If the fence is already installed, it is most convenient to start by installing the posts, and then start installing the corrugated gates. If you plan to initially install a gate and then a fence, then the best option would be to manufacture the entire structure assembled and then install it. When starting to make wicket leaves and gates from corrugated sheets with your own hands, you should cut a blank from pipes according to the dimensions of the drawing. For the gate - four vertical posts and four crossbars, for the gate - two vertical and two horizontal blanks made of square pipes.
The assembly of structures must be carried out on a flat surface of an assembly table or platform. The frame blanks are fixed with small tacks, the angles are adjusted using a square and the identity of the diagonal of the rectangle of the structure is checked.
After making sure that all angles are 90°, you can begin welding the seams. Finished welding seams are cleaned of irregularities with an angle grinder, popularly called a “grinder”. To strengthen the sash frame, additional diagonal slopes from a profile pipe are welded.
PHOTO: borgavto.ruDesign with unusual forging
The hinged canopies are marked, adjusted and tacked to the posts and sashes. Then the frames of the shutters are hung on the poles and the smooth operation of the hinge joints is checked. Having completed the final adjustment, the hinged hinges are welded and the welding seams are cleaned.
Before installing the corrugated sheets, the finished structure is primed and painted. Sheets of corrugated sheets are adjusted and fastened with self-tapping screws, the length of which should not exceed the thickness of the square pipe.
Gate trim
Gate trim is a stage of work during which it is important to do everything efficiently, since not only the appearance of the structure, but also its functionality will directly depend on this.
When welding, follow the following procedure:
- We cut the sheets of galvanized iron to the size of the sashes. Do not forget to take into account that the left sash leaf should be several centimeters wider and overlap the profile of the right sash.
- The sheet of metal is immediately welded to the frame at several points.
- The sheathing of the right side of the structure is cut taking into account the two centimeters indicated above. That is, the edge of the metal sheet does not reach the edge of the profile by the specified distance.
- Let's start welding work. It is important to immediately grab the sheet of metal at the corners and in the center so that it does not move anywhere, since otherwise one of the corners may bend outward. This is not fatal, and can be corrected with a sledgehammer, but it’s easier to do everything right away efficiently.
- Welding is done not in one continuous seam, but in spots. Otherwise, the gate leaves may move. If you want to cook solidly, then using clamps you need to press the frame tightly against the channel with clamps and cook in stages of about 10 centimeters. It is important to do it on the other side each time to avoid overheating of the metal.
Preparatory work
Preparing the opening
Preparing the opening involves performing several steps:
- Make sure that the walls on both sides of the opening do not have cracks or deformations.
- Dismantle the old structure, if any.
- Align the opening (if necessary).
- Clean surfaces from dirt, cement and plaster deposits.
Installation of locks and latches
Most often, when welding gates with your own hands, at the stage of installing the lock, two types are used - mortise or padded. In order to avoid problems with opening the lock in winter, and not to play with burning pieces of paper to open it, we recommend using lever-type locks with hard springs.
To provide additional security, you can optionally install a heavy-duty deadbolt and pin stoppers. This will allow you to close the gate from the inside if necessary, but will require installing another door in the wall.
Advantages and disadvantages
The main advantage of swing gates is reliability . But this is far from their only advantage. The simplicity of the design provides other advantages:
- there is no need to configure and maintain the automation;
- among the budget alternative options for sectional, overhead and sliding gates, there are no comparable in cost to swing gates - the latter are always more affordable;
- you can install automation: drives that open and close the doors;
- there is no need to strengthen the opening and the top floor, which is often required when installing sectional or overhead doors;
- the possibility of insulating the doors and frame;
- many door design options.
The main disadvantage is the need to get out of the car and close/open the gate under any, even the most unfavorable weather conditions. In addition, in winter it is necessary to clear the space in front of them from snow.
Insulation
The final stage of work is insulation. Thanks to it, in winter it will be possible to retain more than 60 percent of the heat indoors.
For insulation, we install a wooden sheathing on the inner surface of the sashes, inside of which a layer of insulation is laid. Mineral wool, glass wool, and PSB-S polystyrene foam are well suited for high-quality insulation.
It is especially important to avoid the presence of air bags and to carefully fill all gaps. For normal heat retention, a layer of about 5 centimeters is sufficient. Cladding slabs or lining are installed on top of the sheathing. Also, if desired, you can hang a plastic or tarpaulin canopy from the inside.
Self-installation of gates with the proper skill, dexterity and compliance with all stages will help not only save money and weld beautiful and durable garage doors yourself, but also get moral satisfaction from the result.
At current prices for materials and finished products, there is only one way to save money - to do the manufacturing work yourself. This also applies to metal swing-type garage doors, which you can weld yourself if desired. You will need to study the assembly algorithm, prepare tools and materials, and involve one assistant in the process.
Welded swing gates for garage
Features of care and operation
Properly manufactured and installed swing gates have a large margin of safety. To ensure that their service life is not exhausted prematurely, it is necessary to follow several simple maintenance rules.
- Keep metal structures clean.
- Renew the protective paint coating in a timely manner.
- Avoid mechanical damage to the skin: dents and paint chips.
- Do not clean painted structural elements using scrapers, stiff bristle brushes, washes or solvents.
- Before opening/closing the doors, make sure that there are no obstacles in the way of their movement.
- Do not allow weight loads on the gate leaves.
- The hinges are periodically lubricated with Litol or something similar.
The process of making swing gates in a garage is not as complicated as it might seem at first glance. All stages of this task, from design to painting the finished structure, can be done with your own hands. This will significantly reduce the cost of the garage improvement estimate.
Gate manufacturing methods
There are 3 ways to weld garage doors:
- When construction is not yet completed, the swing gates are welded separately as a single product. They are then delivered and installed at the site of the future opening, after which the front wall of the garage is built around the steel frame.
- When the garage has already been built, the doors can be made according to the size of the opening, brought to the site and installed.
- Along the finished opening, gradually welding the elements right in place.
The last assembly method is well suited for motorists who are taking on the task of constructing a garage entrance with their own hands for the first time. Here you will not need high precision measurements, straightening the diagonals of the sashes and moving heavy iron parts. If all operations are performed correctly, the homemade structure will function successfully and last for many years.
Calculation
You can make the calculation manually, using formulas, or using a special calculator
Professional calculation of the strength characteristics and geometric parameters of materials for the manufacture of garage doors is carried out using a set of complex mathematical formulas. The following factors are taken into account:
- opening rigidity;
- deplaning deformations for given dimensions of the valves and the use of a certain material;
- bending strength;
- twisting forces (from wind pressure, weight load, mechanical influences).
Specialized calculators have been developed to perform accurate calculations. If necessary, you can use them.
Procurement of materials
In order to purchase metal in the required quantity to fill the entrance opening, it is necessary to measure the dimensions of the latter and the thickness of the front wall. You will need the following rolled metal:
- an equal angle corner of at least 75 mm wide - for framing the walls around the entrance and for making sashes;
Equal corners of different sizes
- the same, 60 mm wide for braces;
- steel sheet with a thickness of 2 mm or more for door leaves and connections between frames;
Stainless steel sheet 2mm
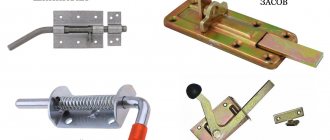
- simple cylindrical canopies (hinges) for outdoor installation;
Main types of cylindrical hinges
- valves - 4 pcs., can be welded from round timber or bought ready-made;
Gate latch
- locks.
The list of tools is also small:
- welding inverter;
- Angle grinder - angle grinder (grinder);
- electric drill;
- clamps;
- measuring instruments - tape measure, ruler, square and liquid level;
- ordinary plumbing tools - hammer, pliers, etc.;
- consumables: welding electrodes with a diameter of 3 mm, metal circles, drills.
To install locks, you will need fastening hardware - bolts, nuts, washers. At the end of the work, the canvas must be primed and painted with your own hands, for which the composition GF-021 and pentaphthalic enamel (PF) are usually used, respectively.
Step-by-step instructions for creating a frame from rolled pipe
According to the method of opening gates there are:
- swing;
- retractable;
- tilt and turn;
- rail;
- foldable.
Tools, materials and equipment
For gates, it is recommended to use metal posts. Their cross section depends on the weight of the future sashes:
- for a structure weighing up to 150 kg, 80*80*4 mm is enough;
- from 150 to 300 kg it is better to take 100*100*5 mm;
- for large, heavy, over 300 kg, reinforced ones are taken - 100 * 140 * 5 mm.
Materials you will need:
- Profiled pipe with a cross section of 40*60 mm. Necessary for racks that are fixed to poles at the entrance. The average flow rate is two pipes 2 m long.
- Profiled pipe with a cross section of 40*40 mm. From it you will have to weld a frame for the halves of the sashes. With an average sash size of 1.5 * 2 m, 17 meters will be required.
- Corrugated pipe of square section 20*20 mm. It will be required to make braces (increase the rigidity of the product).
- Steel right triangle (corner gusset). The length of one side is 10 cm. The thickness of the metal is 2.5 mm. One leaf will require four pieces.
- Corrugated sheeting or other covering material. For a 1.5*2 m canvas you will need two sheets.
- Self-tapping screws for fastening corrugated sheets. Enough for 60 pieces.
- Two stoppers, a bolt, a lock, a deadbolt.
- Four loops with a diameter of 25 mm.
- Roller mechanism (only for sliding design).
- Anti-corrosion primer, paint, brushes.
- Decorative elements, if provided for by the project (forged, carved wooden).
Tools you should prepare:
- grinder with a circle for metal;
- welding machine, mask, electrodes;
- electric drill, drills;
- hammer;
- file;
- tape measure, building level;
- grinding wheel.
All the subtleties of choosing a suitable base for a fence.
Most often, a columnar foundation is used, where each column is concreted separately.
The metal is cut into the required fragments with a grinder according to the dimensions indicated in the drawings.
Rust and burrs are cleaned off.
Frame assembly
This is done in two ways:
- welding;
- threaded connections.
Let's look at each of them in more detail.
Welding
To weld a gate from a reliable professional pipe, you must:
- Cut the ends of the blanks for the outer frame at an angle of 45 degrees.
- Clean all fragments from rust and defects.
- Lay out on a flat surface, giving the shape of future doors. Check the evenness of the corners with a square, horizontality with a level. Deviations are allowed by 2 mm, but no more.
- Before welding, to securely fix the workpieces, connect them with corner clamps.
- Weld the fragments using the tack method.
- After checking the evenness of the connections, weld them completely.
Threaded fasteners
An alternative to welding parts. Suitable for owners without welding experience.
For implementation you will need to prepare:
- electric drill with drills;
- bolts;
- nuts with M8 thread;
- sealing (spring) washers;
- spanners;
- corner scarves.
Spring washers provide protection against arbitrary unscrewing and reliable connections.
The nuts are tightened through pre-drilled holes. Otherwise, the procedure is similar to the previous method.
Painting – protection against corrosion
All metal parts must undergo anti-corrosion treatment. Next, to make the frame look neat, it is painted in the color you like.
We recommend the article: “How to paint a metal fence.”
Installation of sashes
After preparing the frame, you need to move on to welding the hinges.
The seams are protected and covered with a primer. After drying, hang the frame and check the quality of work (opening and closing of the sashes).
The initial stage is framing the opening
At this stage, it is important to correctly cut and weld the corners into a single structure - a frame, which will support the outward opening doors. Framing work begins at the threshold of the garage and is carried out in the following order:
- Cut 2 corners the width of the opening and lay them along the threshold on both sides. Weld them with steel strips (ties).
- Cut off 4 more side corners with your own hands, whose length is equal to the height of the opening plus 2 widths of their shelves. The resulting racks must be cut at both ends so that they clearly fit into the corners of the threshold.
- Attach the racks to the side ends of the walls and connect them together using ties. The latter must be placed opposite the joint welding points.
- Weld the frame of the threshold and walls together.
- Repeat the action described in step 1, only install the corners on the upper end of the wall. Weld them to the side posts.
During the work, it is necessary to ensure that the framing elements fit as tightly as possible to the walls. Steel tie strips must be laid between the corner flanges and the wall, and then welded.
The first stage is making the frame
We weld the hinges and install the gate
In order to hang profile swing gates without distortion, the leaves are temporarily welded together with narrow metal strips with a gap of 3 - 5 mm. Then, using bricks or wooden blocks, they are inserted into the opening to the height of the technical clearance. The position is checked horizontally and vertically with a plumb line and level, after which it is fixed with wedges or welded to the posts with steel strips.
To evenly distribute the load on the pipes of the racks and frame, steel strips (ears) are welded to the cylindrical hinges. In this way, canopies can be welded on both sides. The lower part of the hinges is attached to the post, the upper part with the ball is attached to the sash. If it is solid, you need to drill a hole for lubrication. To prevent the movable connection of the canopies from sintering during welding, it is first generously lubricated with grease.
Depending on the weight of the swing gates, 2–4 hinges are installed. First, they are grabbed, then, after removing the temporary fastenings, the movement of the valves is checked. The final welding is carried out from the bottom up along the perimeter of the ears. To prevent the removal of swing gates by intruders, limiters are installed on the supports.
General nuances when welding gates with a wicket
It is important to understand that the fewer distortions in the welding table, the smoother, in turn, the perimeter of the frame for a gate with a wicket will be. It is necessary to constantly monitor changes occurring in the metal. During the welding process, metal elements either compress or expand.
If you weld gates and wickets yourself without using a welding table, the finished product will definitely have noticeable defects, which will affect not only the appearance, but also the overall functionality of the structure.
Before welding the gate, all parts of the frame should be tightly fixed and only then connected. In the finished product, no more than 2 mm of discrepancy is allowed in accordance with the diagonals of the welded frame.
To make it impossible to remove and steal the gate, limiters are welded to the posts at equal distances at the rate of 1 limiter per 1 post.
If a structure with heavy doors is being welded, it is preferable to choose ball hinges with a through hole, thanks to which it is possible to renew the lubricant. When working with blind hinges, you need to drill holes in their lower part and then seal them with putty.
If you plan to weld a gate from a profile with a rectangular cross-section, then in the place where the hinge is welded to the sash, it is important to install a spacer that will protect the profile from the formation of holes during welding.
Installing hinges
To ensure that the gate opens well, you should choose hinges on a bearing or ball. The hinges are marked no closer than 30–40 cm to the edges of the frame, after which the hinges are welded to its surface. To ensure reliability of the welding connection, the hinges are first welded onto metal plates (4mm thick), and then these plates are welded to the gate and post.
Once the hinges are installed, you can begin installing the deadbolt. Vertical pins are used as a deadbolt. The manufacture of such a design is not so difficult; in addition, this design itself is highly reliable.