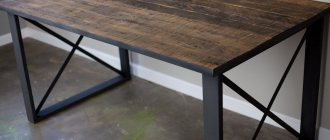
Nowadays, corrugated sheeting is often used to fence a suburban area. To support the overall architectural style, gates and gates are also made from this material. The frame for these products is made of profile pipe. This material is aesthetic, easy to process, and has high strength. With welding skills, you can make beautiful and reliable gates yourself. Let's figure out how to weld a fence gate from a profile pipe with your own hands.
An example of making a gate from a profile pipe Source fences-for-you.rf
Materials for production
To make a gate you will need:
- Profile pipe.
- Profile sheet for covering the frame.
- Rivets or self-tapping screws for fastening corrugated sheets.
- Rollers for sliding gates.
- Accessories: locks, hinges, handles.
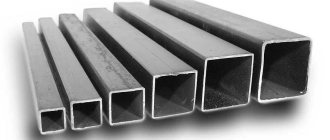
The profile pipe can be of the following sizes:
- 60 x 30 mm for making a gate frame;
- 100 x 100 mm for pillars;
- 40 x 20 mm for lintels and stiffeners.
The profile sheet can be used in any configuration and color; the metal thickness must be at least 0.4 mm. It is more convenient to use a profile pipe with a rectangular or square section. To train your skills, it is better to first make a gate.
Doors
Now you can begin assembling the frame for the sashes. It is designed in such a way that it is slightly smaller than the leading frame and fits freely into the opening. Afterwards, the finished structure is sheathed with sheet metal. The sash material should be slightly visible at the top and bottom of the main frame. Now you can start welding the hinges, after which you can install the gate itself.
Gate installation should be carried out with maximum precision, taking into account all the rules. They are attached to the wall using reinforcement. It is driven into their surface in advance. If the door is securely installed and tested to perform its functions, it is time to begin installing locks and latches, once all of these steps are completed, the welding of the garage door is completed. They often make it possible to close one of the doors from the inside. This will undoubtedly come in handy in the future.
Manufacturing of gates
Let's look at how to weld a gate from a profile pipe with your own hands. For its manufacture, it is necessary to take into account the location. The gate must be located on level ground, without holes, depressions or slopes. Ease of use should also be taken into account. It should be located opposite the entrance to the house or opposite the path leading to the entrance by the shortest route.
After choosing the installation location for the gate, measurements and a drawing of the product are taken. A standard opening must be at least 1 meter wide and height – at the level of the fence. It should be taken into account that the higher the height of the gate, the greater its weight, and the greater the impact it will have on the supporting posts and hinges.
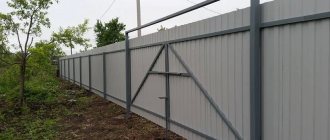
Scheme for manufacturing a gate Source dostup-zabor.ru
To increase the strength of the structure, it is recommended to weld an additional jumper between the pillars. If the gate is about 2 meters high, it is advisable to weld additional stiffeners.
Main manufacturing stages:
- The pillars are being installed. For this, profile pipes 100 x 100 mm are used. They are buried 1-1.5 m and concreted.
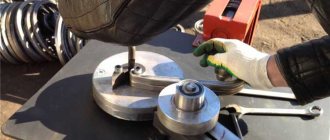
- The frame of the gate is made from a 60 x 30mm profile. Pipes are cleaned and treated with anti-corrosion agents. Next, according to the drawing, pipes of the required length are cut. The joints at the corners must be sawed off and welded at an angle of 45°. This results in a more aesthetic and reliable design.
- Additional jumpers are cut out and welded from a 40 x 20 mm pipe.
- Curtains are welded to the gate. Then the curtains with the gate are welded to the support posts.
- All welds are ground. The gate frame and posts are painted.
- Next, the gate is sheathed with corrugated sheets. It is attached using roofing screws or rivets. Holes for rivets must be pre-drilled.
- A handle and lock are attached to the finished gate.
An example of making a gate Source metabox.by
Hacking protection
Even having a good and expensive lock is not a guarantee of security for your car and is unlikely to completely protect you from burglars. After all, it won’t be difficult to remove the hinges or cut them off with a grinder. This is exactly what they did in the dashing 90s. But there is still a way out.
| First option | Weld a piece of corner to the frame (from the inside) in the area of the hinges. It ends up like this:
|
| Second option | Installation of a spider lock with pins firmly embedded in the floor, walls and ceiling of the garage.
|
Manufacturing of swing gates
Let's look at how to make a gate from swing-type corrugated sheeting. The main advantages of this type of gate are:
- ease of manufacture;
- cheapness;
- reliability.
The disadvantages include:
- large gate opening area;
- strong exposure to wind loads.
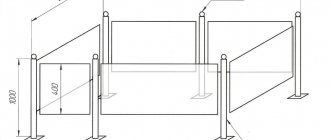
The main element of this type of gate is the stiffening ribs. The swing design involves hanging one side of the sash on curtains. The second side hangs freely, and therefore the structure needs to be strengthened. This is done using a 40 x 20 mm pipe.
Options for stiffeners Source moyaograda.ru
See also: Catalog of companies that specialize in small forms
Options 1 and 2 are the most budget-friendly and are suitable for small-width gates. Used in regions with low wind load.
Options 3-5 – balance between weight and reliability. Various variations provide for strengthening the structure with latches, supporting wheels, and locking devices.
Option 6 is ideal for automatically opening gates. Does not require additional locking and supporting devices.
There are additional options for strengthening the structure using corners or profile pipes in the corners of the sashes. Experienced specialists will suggest the best option for a specific product.
Let's look at how to properly weld a gate. For proper manufacturing, a clear drawing is required indicating the dimensions, dimensions from the ground, and the required clearances. Further:
- According to the drawing, blanks are cut out at 45° angles;
- a 60 x 30 mm pipe is used for the frame; for small gates it is rarely used, for example, in a dacha it is possible to use a 40 x 20 mm corrugated pipe;
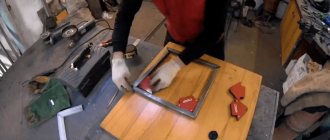
- Next, the frame blanks and stiffening ribs are laid out on a flat surface, and the correctness of the design is checked;
- all parts are welded into a single structure, squares are used to maintain the correct shape;
Here you can see how to properly weld a gate from a 40 20 profile pipe with your own hands Source zabor-vorota-stolby.ru
See also: Catalog of companies that specialize in fences and enclosures
- hinges, latches, brackets for locks and additional devices are welded;
- the gates are welded to posts 100 x 100mm;
- the entire structure is cleaned, rust and scale are removed;
- The gates are coated with primer.
Next, the installation site for the gate is prepared. At this stage, you should consider the material of the entrance cover. If the entrance road is covered with asphalt, tiles or concrete, it is enough to leave a gap of 5 cm between the gate and the ground. If the entrance is unpaved, it is necessary to leave a gap of at least 10 cm. Taking this into account, holes are dug for installing the pillars. Further assembly is carried out in the following sequence:
- curtains with shutters are removed;
- the pillars are installed to a depth of 1-1.5 meters and concreted;
- after the concrete has hardened, the doors are hung;
- the structure is painted;
- a corrugated sheet is attached to the frame using self-tapping screws or rivets;
- The lock is cut in, handles and bolts are installed.
To securely fix the bolts, metal tubes are driven into the ground. The latch must go at least 10 cm deep into the tube to prevent spontaneous opening in strong winds.
Ready-made gates Source stella-partner.ru
Video description
Installing a lock on a garage door
If your budget does not allow the use of reliable mortise mechanisms, you can use a proven option. A small loop is welded to the edges of each of the doors. They are used to install a barn lock. Despite the fact that this option is cheaper, it is seriously inferior to mortise mechanisms for safety reasons.
To fix the valves in the open position, locks on metal springs are used. Even an inexperienced technician will have no problems installing them. The lock body is welded to the bottom of the sash closer to the middle of the garage opening.
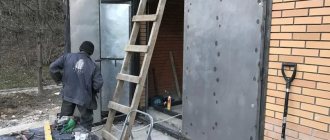
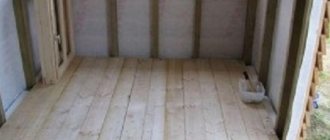
Insulation and internal lining of garage doors
The final stage of creating a metal structure is covering it with insulation on the inside. This will allow you to maintain a positive temperature in the room even in winter. Glass wool, polystyrene foam or extruded polystyrene foam are used as insulation.
Insulation of garage doors Source vikbud.ua
A wooden sheathing made from edged boards is mounted to the frame of the doors. All cavities are carefully filled with insulation, avoiding air pockets. To retain a sufficient amount of heat, a 5 cm layer of mineral wool is sufficient. To give a finished look, the sheathing is lined with PVC panels, clapboard or other materials based on the individual preferences of the garage owner.
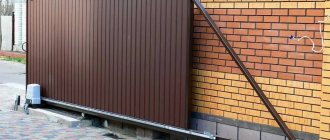
DIY sliding gates
Sliding gates are an excellent option for your home or cottage. They have a reliable design and have a long service life. Sliding gates are made from profile pipes and sheathed with various materials, including metal profiles.
Sliding gates come in two types:
- Rail - an outdated model, used mainly in industrial enterprises.
- Console is the most common option. This design provides for a console, which is a continuation of the gate and hidden behind the fence. Thanks to it, the gate moves on sliding trolleys attached to the foundation. Each sliding mechanism is equipped with bearings with polymer or metal rollers. The trolleys themselves are located in a guide, which protects them from contamination and precipitation.
Sliding gates on sliding trolleys Source vorota-goroda.ru
Advantages and disadvantages
Manufacturing gates using profiled pipes provides the following advantages:
- The light weight of the raw materials simplifies and speeds up the process of transportation and installation.
- Low prices for materials reduce construction costs.
- The metal profile is easy to process and weld.
- The design is strong and rigid.
- These gates look neat and beautiful.
Material on the topic: “How to properly weld sliding gates”
Disadvantages:
- Metal corrosion is possible as a result of poor-quality protective treatment or its absence.
- When fastening a profile with threaded elements, there is a risk of deformation of the product.
These shortcomings cannot be considered critical, since provided that all stages of assembly and installation of the gate are followed, they can be completely avoided.
To extend the service life of the sashes, it is recommended to periodically apply anti-corrosion primer or paint.