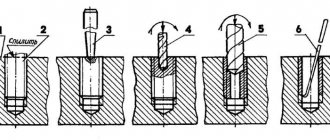
Question 38 Repair of threaded connections
There are the following types of threaded connections:
- bolted; It is advisable to use in connections of small thickness and frequently subjected to assembly and disassembly;
— screw; used when a bolted connection is not applicable due to the fact that there is no room for a nut;
- using a hairpin; used in conditions of frequent disassembly.
Threaded connections are made both using threaded fasteners and through threads cut into housings, shafts and other parts.
In threaded connections, especially those that absorb large or alternating loads during operation, increased wear and damage occur due to insufficient tightening of screws and nuts. The thread is also destroyed by over-tightening the nut or screw. Under the combined influence of various loads, wear of threaded connections is observed,
appearing as follows:
- bolts and screws stretch; the bolt rod elongates as a result of axial operating loads and tightening forces;
— the thread pitch and its profile are violated; the thread profile along the average diameter changes - the gap increases (observed in screws and frequently unscrewed fastening bolts);
— the nuts “stick” (the thread pitch changes under the influence of axial work loads);
— wear of the faces of the heads of bolts and nuts.
— the working surfaces of the thread profile are crushed under the action of work loads;
Worn or damaged mounting bolts and screws are not repaired, but replaced with new ones.
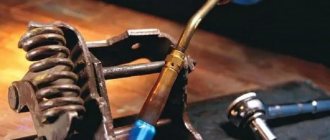
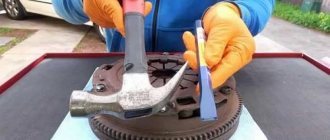
To make it easier to disconnect the connections, tap the nut, inject kerosene into the threaded connection, and cut off the nuts.
Defects in threaded connection parts and their repair;
1) Wear, breakdown, collapse of threads on bolts, shafts:
- cut off the worn thread and (if this is allowed by strength conditions) cut a new one, processing it to the nearest diameter according to the standard; (parts of significant diameter).
— a bushing or threaded bandage is placed on the part (parts of significant diameter).
2) Wear, breakdown, collapse of threads in housings:
Worn or torn threads in the holes of a part are usually not restored, making repairs as follows:
a) the hole is drilled to a greater depth (if possible) and the thread is cut into it again; a new screw with an elongated threaded part is screwed into the recessed hole;
b) the hole is drilled out, a new thread of a larger diameter is cut and new screws with threads of the given diameter are installed; The hole for the screw in the second part to be connected is drilled out.
c) instead of the old stud, they make a new one with a shoulder and thread of two diameters (Figure 4.63, a): the larger one is for screwing the stud into one of the parts to be connected and the smaller one is for connecting to the second and tightening them with a nut;
d) restore the nominal (original) thread: the existing hole is drilled out, a new thread is cut, then an adapter sleeve is made (with external and internal threads designed for a normal screw), installing it flush with the plane of the part and locking it with a pin (Figure 4.63, b) However, the adapter sleeve must be thick-walled, so it is preferable to install it with epoxy glue (Figure 4.63, c)
e) a worn threaded hole in a part is “plugged” by drilling another hole next to it and cutting a thread of the required diameter in it. A new hole is also drilled in the second part to be connected.
Figure 4.63 - Schemes for repairing threaded connections using the installation:
A -
a new stud with a shoulder of two diameters,
b
- bushings with external and internal threads, in -
bushings for glue
3 Nicks and dents on the thread are eliminated by “pushing” with taps, dies or a mating part.
4 Compression of the faces of nuts and bolt heads is eliminated by sawing or surfacing, followed by processing of the faces.
5 Non-straightness of the axis of a rod, bolt, screw, or stud is eliminated by straightening in a vice or using a screw press.
General rules
The simplest option is to restore slightly damaged or dirty threads. To do this, it is enough to drive the hole with a tap and restore its original configuration. If the damage does not allow this option to be used, then other solutions are necessary.
Restoration is quite simple if it is possible to switch to a larger diameter. It is necessary to drill the hole with a drill of the required size and cut a new thread in it. In any case, the following general rules must be observed:
- The movements of the drill and tap must be made strictly at right angles.
- Use a complete set of taps for roughing and finishing cuts. As a rule, these are two (less often three) numbers.
- Carry out cutting carefully using a wrench or an adjustable wrench, without distortions, excessive force or sudden movements.
- Use lubricant and remove chips regularly.
Thread restoration method
Damaged threads can be completely restored using the following technology:
1. Drill the threaded hole to the diameter indicated in the table below 2. Cut a special profile thread in it with a special tap 3. Screw a spiral repair insert (a durable stainless steel sleeve) into the resulting thread using a special tool.
Threaded insert
After such an operation, the thread becomes stronger than the original one in good condition. This effect is especially noticeable when the carving is made in a soft material such as aluminum. When a bolt (stud) breaks off in a threaded insert, there is no “biting” effect. A broken bolt (stud) can be easily removed.
Watch a video of how the threaded insert is used
What capabilities do threaded inserts have?
This method is especially relevant for restoring threaded holes in body parts of automobile engines, for example, a spark plug hole. The candle thread becomes very durable and reliable.
Threaded insert screwed in
Threaded insert screwed in
If the thread for a stud is broken, sometimes they drill it out and cut the thread to the next size. In this case, you have to use a stepped stud of unknown origin and dubious quality. And not every stepped hairpin can be found at the right time. If you repair the hole using a threaded insert, you still have the option of using a standard, branded pin.
Another use for repair threaded inserts is in brass exhaust manifold nuts. The result is a nut that combines a very strong thread and the property of not “sticking” to the studs.
Owners of some foreign cars should pay attention to the possibility of replacing the M12 x 1.5 thread with an M12 x 1.25 thread. It often happens that a bolt with such a thread is damaged, and it is almost impossible to find it in a retail chain in your city (we have such bolts in our store)
A turner will not turn out a decent bolt, because... The threads on factory bolts are formed by pressure (knurling), which provides the necessary strength. And on a lathe, the thread is made with a cutter, while the fibers of the steel bar are cut and the threads cannot bear the required load.
If you replace the thread in the body part with the more common in Russia M12 x 1.25, it becomes possible to select a bolt of the required size and strength from the assortment of Russian and European manufacturers of automotive fasteners presented in our catalog.
Video - how a threaded insert works, demonstration
What tools are used to restore threads?
1.
Drill
The drill diameter is selected from the table.
Table for selecting drill diameters for the most common threaded holes
| No. | Repairable thread sizes | Drill diameter |
| 1 | M5 x 0.8 | 5,2 |
| 2 | M6 x 1 | 6,3 |
| 3 | M8 x 1 | 8,3 |
| 4 | M8 x 1.25 | 8,4 |
| 5 | M10 x 1 | 10,25 |
| 6 | M10 x 1.25 | 10,4 |
| 7 | M10 x 1.5 | 10,5 |
| 8 | M12 x 1.25 | 12,25 |
| 9 | M12 x 1.5 | 12,5 |
| 10 | M12 x 1.75 | 12,5 |
| 11 | M14 x 2 | 14,5 |
| 12 | M14 x 1.5 | 14,5 |
| 13 | M14 x 1.25 (for a candle) | 14,25 |
2.Tap
To repair the spark plug hole, a stepped tap is recommended. It is centered in the old hole with its lead-in part, and immediately cuts a new thread, bypassing the drilling operation.
A stepped tap significantly reduces the risk of damage to the spark plug hole, but it is noticeably more expensive than a regular tap.
To lengthen the tap when repairing a deeply recessed spark plug hole, you can use a regular 10-point twelve-sided socket with the appropriate tool.
3.Spindle (tool for screwing the insert)
The working part of the spindle is similar to the threaded part of a bolt, with a hook at the end.
4.Repair insert
The insert is a diamond-shaped spiral.
At one end there is a leash, behind which the insert is rotated by a spindle. The inserts have different lengths.
Helicoil Product Types
This thread restorer is a set of a tap of the appropriate size, a spindle, a drill, and a driver breaker. The set also includes several threaded inserts. They can be purchased separately if necessary.
Using these kits, you can restore metric threads in sizes from M2 to M16 with a thread pitch of 1.5, as well as from M18 to M36 with a pitch of 1.5. The set also includes repair kits for inch threads of various sizes, ranging from American threads to pipe threads.
Using a thread tap
The tap is used to cut grooves, due to which the required geometry is formed. The instrument in question consists of two parts and can be classified according to a large number of criteria. The features of the work carried out include the following points:
- The tool is lubricated with oil. Due to this, the process of forming turns is simplified.
- When working three turns along the way, there are 1.5 turns in the opposite direction. This is done in order to remove chips from the cutting zone.
- The tool must be positioned strictly vertical to the surface.
- After the required surface has been formed, a control bolt is used. The first pass may be under a slight load, but after that there should be no problems.
It takes a relatively short amount of time to form turns. In this case, you can get high-quality and reliable threads that will last for a long period.
Repair methods
You can restore a broken thread by drilling a hole to a larger diameter and cutting a new one. This is a fairly effective method. But design features do not always allow drilling a hole. Among the advantages of this method are accessibility and low cost, as well as the absence of the need for any other details. But this will change the size and other characteristics of the thread. Also, by increasing the diameter of the hole, the structure may weaken.
Along with simple drilling, you can install a special threaded bushing. This technology is used when it is not possible to drill a repair hole. The method is quite simple, but it differs in that the characteristics of the thread do not change in any way. But it is not always possible to make a hole of a larger diameter, and the repair sleeve must be securely fixed in the hole.
There is a third, more effective, repair method that does not have significant drawbacks. A thread restorer is used here. These are special kits consisting of threaded inserts or metal-filled chemical products. This restoration method is good because it can be used anywhere, even when repairing a car in the field. There are several modern thread repair products available.
Today, products from brands such as Helicoil and Loctite are especially popular among specialists. There are other manufacturers that make similar thread repair kits. But their efficiency is much lower.
Benefits of Helicoil
Hellicol thread repairer is easy to use. The manufacturer offers a wide range of sizes and diameters. The company produces sets with metric or inch threads. With these kits you can repair holes so that their diameter remains the same.
The repair thread is characterized by high wear resistance and mechanical strength. The connection is reliably protected from corrosion, as well as from high temperature exposure. The fit is very secure and the inserts do not require additional fixation. Another significant advantage is the minimal cost of repairs and the ability to restore the connection without the need to remove the part.
How to restore threads in a hole without a tap
The question of how to restore the thread in a hole without a tap is often asked by people who do not understand threaded connections at all. There is only one answer to this question. It is impossible to restore the thread to obtain maximum reliability without using conventional or special taps. There are only ways to build up damaged surfaces and strengthen the strength of joints to certain levels.
Using Epoxy Glue
This method is not suitable for restoring and strengthening connections subject to high loads and vibrations. There is also no point in using epoxy glue if components and structures operate at high temperatures.
Photo No. 4: epoxy glue for thread restoration
If there is no need to ensure high connection reliability, proceed this way.
Fill the hole with epoxy glue.
Wait until the polymer hardens.
Wait for the depravity to set.
Cold welding
Cold welding can also only be used when working with non-critical parts that are not subject to high loads and vibrations. The connections are more reliable than when using epoxy glue to restore threads.
Most often in our country, two-component formulations of the following brands are used.
Photo No. 5: ABRO cold welding
When using two-component cold welding to repair threads, proceed as follows.
Open the package and remove the components.
Thoroughly degrease the surfaces of the external (on the product intended to be screwed in) and internal (in the hole) threads. To do this, use the composition from the first tube. Handle everything carefully. The presence of deposits and debris will worsen the welding result.
Treat the damaged internal threads with anti-adhesive compound from the second tube.
Mix equal parts of the substances from the first and second tubes. Squeeze the compounds onto a non-metallic surface. For uniform (!) mixing, use a spatula.
Apply the resulting mixture to the product intended for screwing.
Provide the required temperature.
Do not touch the parts for the time specified in the instructions.
Note! Don't skimp on the mixture. When screwing the product in, its excess should come out from the pressure
This will ensure the correct formation of threads when restoring the thread.
Taps are special devices designed for cutting and calibrating internal threads. Below we will look at all the features of these metal-cutting tools. After reading the article, you will receive answers to the following questions.
Need to cut a thread but don't have a wrench handy? Dont be upset. In half an hour, if you have the suitable parts, you can make a tap holder with your own hands. You won't have to waste time going to the store. In this article we will tell you in detail how to make a homemade crank at home.
Even experienced craftsmen sometimes face the need to remove a broken tap from through or blind holes. In this article we will describe ways to solve this problem.
Which tap to choose if the master is faced with the task of drilling holes with internal threads to restore studs, nuts, broken bolts and similar work? We suggest you follow the recommendations - take into account the parameters described below.
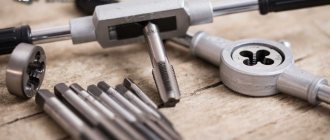
Taps and dies, also called taps, are an indispensable thread-cutting tool in modern mechanical engineering. Moreover, they can be used both for cutting threads manually and for forming threads using a machine.
Dies are designed for cutting external threads. The tool is structurally similar to a nut with cutting teeth and holes for fastening in the driver.
A tap is the main tool for cutting internal threads.
Self-tapping screws with stripped splines (asterisk)
If overheated screws are unscrewed/twisted a couple of times, their edges lose their sharpness, the screwdriver turns, but the screw itself remains in place. If it “sits” in wood, plaster, chipboard or other similar, not too hard materials, you can put a thin elastic band (for example, for hair) under the screwdriver. Due to the elastic force, a tighter fit is achieved to the remaining edges, which helps to move the self-tapping screw from its place. Other methods are more “traumatic”:
- Cut grooves inside the “licked” funnel using a flat-head screwdriver and unscrew. This method is quite dangerous: if the walls of the “funnel” are too thin, there is a chance that the screw head will simply crumble from the effort. All that remains is a screw that cannot be unscrewed.
It’s already difficult to unscrew such a self-tapping screw
Unscrew the self-tapping screw with torn edges (cross)
The remains of a bolt or stud without a head can be unscrewed as follows: cut a left-hand thread in the remaining body, drip “moment” glue, screw in the left-hand tap, and leave for an hour. Apply some oil to the main thread and leave for an hour. When the glue sets, unscrew it. If the remains of a self-tapping screw are stuck in the wood, it is easier to seal this hole and install another fastener nearby.
How to tighten a nut onto a stripped thread of a stud or bolt?
It is better, of course, to replace it, but the desire does not always coincide with the opportunity. Sometimes the thread at the end is damaged - knocked, tightened, but then it’s normal.
There are several ways to get out of the situation using improvised means or “in the field.”
If you have a file, grind the thread to 45 degrees.
Use a clamping lever that presses the nut against the thread from the end. Press and turn with the key. The main thing is that the nut is in an even position to the stud, otherwise it may not go “along the thread.” For leverage, you can use a large key, a plate, or a hammer handle. By securing the studs above with a rope, a chain, simply sliding it under something, and pressing below. Sometimes it is enough to press with the butt of a hammer to make the nut “go.”
If you “don’t do collective farming”, but really do everything efficiently, then you need to buy this set of dies with a knob,
A torn thread means that it is not there (licked threads).
Driving the thread with a nut is not the best option; there is a high probability that you will break the thread on the nut (internal), you will have to buy a tap, or use screwdrivers.
If you go the right way, then we clamp the bolt or stud in a vice (with the problematic thread facing up), lightly lubricate the thread with oil and drive it through with a die, then tighten the nut, you can even do it by hand.
If done incorrectly, then a certain load must be applied to the nut for it to move.
For example, press with a sledgehammer, and also clamp the bolt (or pin) in a vice.
Next, we work with an open-end wrench, the nut is under constant pressure, we push and tighten.
We make sure that the nut moves evenly, that is, distortions, especially during entry, are not permissible.
DON'T LEAN!
BE MORE DELICATE WITH YOUR CARVINGS
TEXT / SERGEY STASOV
In your car, the number of screws, bolts, and nuts goes into the thousands. The reliability of a car, its durability, convenience, and simply serviceability largely depend on the condition of the fasteners, primarily threaded ones.
There is no such thing as unnecessary fasteners. Ask experienced ones, everyone will probably remember something on this topic. Let's say how, while removing a panel, I lost a screw. I couldn’t find a suitable one and decided: it doesn’t matter, as long as I go without it. After some time, the panel began to rattle a lot, and then the speedometer “died.” They examined it - it turned out that it had crumbled! Shook him up. Silence in the cabin is not only comfort. Any “bounce” is vibrations, and they are not to be trifled with.
But this kind of “failure” is a mere trifle compared to the destruction of the suspension, steering, or the loss of a wheel while driving, when the driver has little chance of a successful outcome. Taking a closer look at old cars, you can “figure out” an optimist owner: one of the wheels is missing a bolt or nut. The reason is common - the thread is broken. Buying a new hub and replacing it seems expensive, your mouth is full of other worries, you need the car “on the go.”
Fortunately, God protects fools. Many people get away with this attitude. But not everyone. The wheel is now attached to the hub weaker, and even asymmetrically. When cornering, especially for speed enthusiasts, it seems to breathe, further loading the remaining bolts. The result is predictable: the metal is crushed at the fastening points, the tightening weakens - and the wheel begins to naturally dangle, threatening to break off the remaining fasteners.
HOW TO RIP A THREAD
There are many known ways. Often the mechanic applies excessive force to the key. What can you do, it is not customary for us to use a “momentary” key (exceptions are rare). Of course, the physical capabilities of people are not the same, but anyone can break the M8 thread, and even more so M6 and lower. Especially threads with fine pitch, of which there are many, for example, on the Volga. Usually the thread is not damaged the first time, but after several disassemblies of the assembly it “ends” naturally: the threads are deformed, moving more and more, and finally cut off. Therefore, in many cases, it is better to replace bolts, screws, and nuts that have already worked with new ones.
Premature thread wear and loss of strength are also caused by dry tightening without lubrication. Moreover, if the lubricant is “replaced” by sand, dust, and dirt.
Finally, an inexperienced person can ruin parts when trying to tighten a bolt, nut, spark plug, sensor, etc. not by thread. The result of inattention is especially sad if you damage the threads in critical, expensive parts - the cylinder block or its head, wheel hub, etc. Not everything can be easily repaired.
AND HOW TO SAVE IT
How to screw in a screw, spark plug, etc. to avoid them going in the wrong direction? The technique is ridiculously simple, although many people don’t know about it.
Let's say you insert a candle into a socket. Holding it aligned with the hole, press firmly and rotate smoothly counterclockwise. When the start of the thread (“start”) on the spark plug coincides with the start of it in the hole, you will hear a click and the spark plug will fall a fraction of a millimeter. Now, still with your hand, wrap it. Is it easy? So, by carving. What happens next is a matter of technique. We will use the key when it is really needed: during the final tightening. This technique is especially useful when dealing with small threads of large diameter. For example, when adjusting the “toe-off” on a Zhiguli. The threads of the steering rods and couplings are M16x1, moreover, there are both left and right.
Even if the screw or nut is screwed tightly, it is almost certainly a defect in the thread. Probably, as they say, it has already “pulled” - it has not yet been broken, but the finish is not far off. In some cases, this is easy to check: the nut is easily screwed onto the bolt with one side, but if it is turned upside down, it requires a wrench, which means that the thread is already wrinkled. When there is no other way out, it’s worth once again driving the threads: in the hole with a tap, on the screw with a die. If very little metal has been removed, the thread will still serve. A lot - it’s better to replace the parts.
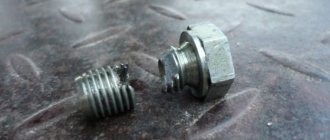
Particular attention to screw jacks. The screw and nut have, one might say, a colossal responsibility here - tearing the car off the jack is unacceptable! One of the signs of excessive wear on the threads in the nut (which primarily affects it) is a clearly increased force on the jack handle, not only when lifting the car, but even when lowering it. Due to severe wear and distortion of the thread profile, the nut jams on the screw (Fig. 1) - using such a jack is at least unwise.
Selection of material for thread restoration
As noted above, the market offers a wide range of cold welding materials produced by various companies.
Commercially available grades of material are divided into two main types - liquid and plastic.
- Liquid ones contain a hardener and a base mass that ensures bonding of materials.
- Plastic ones look like plasticine. A single-layer or two-layer bar must be thoroughly kneaded and mixed immediately before use.
Selecting products for restoring internal threads requires a serious approach
It is important to pay attention to the parameters of strength and ductility. Sufficient plasticity will allow the material to be given the most accurate shape, even in the case of the smallest details. Strength guarantees sufficient reliability of the connection of the material with the surface being repaired
Strength guarantees sufficient reliability of the connection of the material with the surface being repaired.
The most popular products currently are those manufactured under the Almaz, ABRO, Hi-Gear and Polymet brands.
Restoring external and internal threads by cold welding - step-by-step instructions
The best option for thread restoration is a two-component material, sold in two separate tubes.
Thread restoration is carried out as follows:
- After unpacking the material, the substance contained in the first tube must be thoroughly cleaned and degreased to restore the thread surface. This procedure should be approached responsibly, since the presence of particles of metal shavings or plaque can affect the quality of the connection;
- treat the surface of the threaded element with an anti-adhesive substance from the second tube;
- squeeze out the same amount of content from both tubes onto a non-metallic surface and mix thoroughly with the spatula supplied;
- apply the resulting mixture to the area of the threaded element to be restored and screw it into a hole of the appropriate diameter;
- After the time specified in the instructions, the part can be unscrewed - if all the technology conditions are met, the thread will be restored.
An important condition for high-quality thread repair is thorough mixing of the cold welding components until a homogeneous consistency is obtained.
The mixture must be applied to the part being repaired in such an amount that when the thread is turned out under pressure, its excess comes out, which ensures optimal formation of the pitch and shape of the threads.
Loctite products
This company is also well known for its quality and effective products. But unlike Helicoil, Loctite thread restorer is a completely chemical substance. Everyone knows the thread clamps of this brand.
To solve any problems with threads, the company offers anaerobic compounds. These are one-component liquid materials with varying degrees of viscosity. They are able to remain in their original state for a long time, and also quickly harden in small gaps of connected parts or in threads. In order for liquid thread to begin to polymerize, two conditions must be met. Thus, the presence of metal ions is necessary, as well as minimal contact with air. How to use Loctite thread repair agent? It is enough to apply the composition to one of the surfaces to be joined in such an amount that is sufficient to completely fill the repair gaps of the damaged thread.
Thread restorer after polymerization is a solid thermosetting plastic that has special properties. Thus, it steadily withstands any vibrations and shock loads, the connection has good sealing, and withstands corrosive and other aggressive influences.
These compositions are produced in the form of a stick, which contains a thick paste inside. It is enough to apply the mixture to the unit being repaired and after polymerization the thread will be restored.
With repair insert
In the case where the above method is not suitable, a repair insert or foot will help out.
The operating procedure is as follows:
- We prepare a footer of the required size.
- Using a tap whose size corresponds to the outer diameter of the insert, we cut a hole for screwing in the fitting.
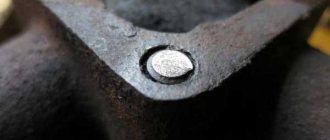
- After thoroughly cleaning the chips, install the insert and secure it with a retaining ring. As a result, the hole will look like in the photo and will be completely identical to the old one.
If you follow all the details of installing an insert with a double-sided thread, then the reliability of this repair method will be the highest. The only disadvantage of this type of repair is the need to have a lot of inserts of the required diameter and a tap in stock.
How to repair the expansion tank cap yourself and why it is important
There are many reasons for thread damage on aluminum parts.
One careless movement or too much force to tighten becomes the beginning of a new problem. But it can be solved very easily if you know and correctly apply the repair methods used by experienced car enthusiasts and professional car mechanics
Education: secondary specialized. Specialty: car mechanic. Professional diagnostics, repair, maintenance of passenger cars of foreign production 2000-2015. Extensive experience working with Japanese and German cars.
2 comments
- Denis says: I don’t understand why you need to go through the trouble of making a tap out of a bolt when you can take a ready-made tap.
- skivko1 says: This advice will be useful to someone. In Russia we are used to repairing cars ourselves.
How to restore a thread with a tap while maintaining its diameter and location
If you need to restore the thread while maintaining its diameter, use one of the following methods.
Welding the hole and then cutting a new thread
This method is rarely used due to the fact that the strength of the new thread obtained using this technology will be lower. This method is also chosen in the absence of special devices (screws and spiral inserts).
This method of thread restoration includes the following steps.
Removing old threads by drilling.
Welding the hole. The choice of technologies depends on the materials of the parts.
To weld holes in steel products, electric arc or gas welding is used in protective environments.
When working with cast iron parts, gas or electric arc welding is used in a cold state or with general/local heating.
Electrodes (MNCh-1, OZCh-1, TsCh-1), cast iron rods with a high silicon content and other materials are used as additives.
Machining the hole flush with the base metal.
Cutting a new thread.
Note! When working with aluminum products, this method of thread restoration is usually not used. This is due to the fact that the metal actively absorbs gases during welding.
Pores form in the deposited layers. With severe shrinkage, cracks appear.
Restoring threads using a screwdriver
Screwdrivers are special cylindrical devices that have threads of the required diameter and pitch on the inside and large threads on the outside. Such products are made from steel, brass, bronze, copper and other materials. At the final stages of production, the screws are hardened and further strengthened.
Photo No. 2: screwdriver for thread restoration
If you need to restore the thread while maintaining the diameter using a screwdriver, proceed as follows.
Drill out the hole. The drill must be selected in such a way that the diameter of the resulting hole allows cutting a thread for screwing in the screw.
Cut the thread with a tap. Follow the rules listed above.
Screw in the screwdriver. It needs to be installed flush. If this is not possible, mill the part and remove the protruding part of the fixture.
At the border of the new thread and the screw, apply notches using a core. This will prevent the device from unscrewing spontaneously.
Repairing threads using a spiral insert
Spiral (also called wire and spring) inserts are also often used to restore damaged threads.
Photo No. 3: spiral inserts for thread restoration
These devices have high-precision rhombic threaded profiles on the inside. Almost all models are equipped with special driving tongues designed for screwing in devices.
For the manufacture of such products, especially durable high-quality stainless steel is used. This guarantees the resistance of the restored thread to deformation and corrosion.
Restoring threads using a spiral insert includes 4 stages.
Drilling. Drill out the hole. Select the diameter of the cutting tool according to the table that manufacturers provide with spiral inserts.
Image #1: Drilling the hole for the spiral insert
Thread Forming
Note! To cut threads, use special taps that differ from standard ones and come with spiral inserts. Follow all rules and recommendations
Image #2: Forming a thread for a spiral insert
Installation of the device. Place the spiral insert onto the supplied special tool and screw it into the hole.
Image #3: screwing the spiral insert into the hole
Removing the drive tongue. You can get rid of it using a special tool (manufacturers also supply it). To remove tabs from large-diameter inserts, ordinary pliers are suitable.
Using professional spiral thread inserts has the following advantages.
The required tension is ensured at the insert landing site. This completely prevents twisting. The devices are located in the receiving threads with virtually no gaps. There is no need to use glue for additional fixation of products.
Due to the elasticity of the inserts, loads and stresses are distributed evenly. This creates ideal conditions for the transfer of forces between the bolts and the receiving threads.
Spiral inserts are universal. They are used not only to restore threads, but also when it is necessary to strengthen connections. Spiral inserts are used when working with products made of low-medium and high-strength metals, as well as plastic and wood.
Types of spring threaded inserts
Wire inserts for repairing threaded holes have the shape of an elastic spiral, the turns of which form a high-precision rhombic profile on the inside, which is similar to the thread profile.
Most sold screws have a driving tongue that serves to screw them into the prepared receiving thread. After installation, it is easily separated along the cut using a special breaker. Spring sleeves have a different number of turns and, accordingly, different lengths, which are designated 1d, 1.5d, 2d, etc., where d is the diameter of the spiral. Special types of inserts are also available, for example, for spark plug threads or oxygen sensors. Threaded inserts are made from particularly strong, high-quality steel, mostly stainless steel, which makes it possible to obtain reliable threads that are resistant to wear, deformation and corrosion.