Despite the small diameter of the heads, finishing nails can be quite noticeable if they are located at eye level. To completely hide the fasteners, you can use:
- Furniture wax. It is enough to drown the fasteners in the wood using a hammer and cover the recess with wax.
- Circles. To close the caps, many people use special circles that are glued to the surface of the wood. Among the presented products, you can choose exactly those that match the color and structure of the wood.
- Putty of a suitable color. This material also effectively hides the caps and does not stand out against the background of the wood.
In most cases, it is enough to just recess the cap deeper into the material so that it is not noticeable.
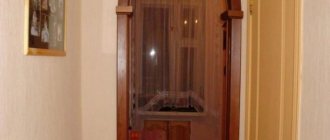
Correct installation of interior doors
The box parts are connected using self-tapping screws.
The box is installed as follows:
The doors are installed on hinges pre-attached to the door and frame. You need to first hang the canvas, checking how smoothly the door closes; to adjust, place the spacers slightly below the door handle and above the top hinge. After this, you need to check the door again - for example, it should not move on its own in a half-closed position.
When the leaf is installed perfectly straight, the joint between the door frame and the opening can be filled with polyurethane foam, after first removing dust and wetting the surfaces.
Methods of fastening platbands
Doors for a sliding wardrobe: step-by-step instructions for calculation, assembly and installation with your own hands (photo & video)
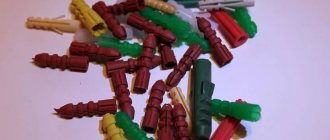
Installation is carried out with finishing nails, liquid nails, self-tapping screws, and “beaks”.
Using finishing nails
This type of fastener is widely used due to a number of advantages:
- stealth;
- ease of installation;
- no experience required.
For work, use thin nails about 4 centimeters long and up to 1.5 millimeters in diameter. The distance between them should be 50 cm. Points are marked on the slats with a simple pencil.
After fixing, the nails can be puttied to match the color of the wood, so that the nails will not be visible
At the marks, nails are driven in so that they fit 20 mm into the box. If the caps are narrow, then they can be left or, if desired, trimmed with side cutters. The resulting small depressions are masked with a wax pencil of a suitable color.
The disadvantages of working with finishing nails are:
- Difficult to dismantle. Due to the peculiar structure of the head, it is almost impossible to get nails.
- Less strong connection than regular nails.
- When choosing this fastening method, also keep in mind that such nails are intended for finishing where there is no bending load.
Liquid nails
This method is ideal for MDF framing. It is performed quite simply and does not require specific skills or dexterity.
Liquid nails are used to install MDF trims
Liquid nails are applied to the underside of the decorative element and attached to the wall. For the glue to set, you need to hold it for a few minutes and then secure with tape.
This type of fastening is good because it leaves no marks on the outside of the slats. However, the fastening strength is not as high as when using conventional nails.
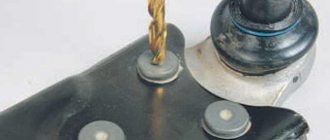
Fastening with self-tapping screws
This method is characterized by reliability. It is used for wooden products.
Wooden trims are secured with self-tapping screws
Even a beginner in construction can handle a self-tapping screw. To do this you just need to follow the instructions:
- Find self-tapping screws with a diameter of 6 millimeters and a length of 2 centimeters.
- Place marks on the front side of the planks 50 cm wide from each other.
- Drill small holes in the marked places, and then drill them out a little. This will hide the screw heads.
- Screw in the screws. If desired, they can be disguised under putty or decorative overlays.
Fastening with beaks
“Beak” is the name given to the casing, which in appearance resembles the Russian letter “G”.
Beak-shaped clypeus
This method is very simple. It consists in placing the largest section of the part in a recess specially designed for this purpose and snapping it into place.
The disadvantage of fastening with “beaks” is the gradual delamination of the structural element. Under the influence of the fastening itself, the planks begin to collapse at the joints. As a result, there is a need for additional fastening with glue.
How to glue platbands using polyurethane foam?
How to glue trims to doors using polyurethane foam? To be honest, it is quite difficult to obtain a high-quality connection of trims to the wall surface using polyurethane foam.
As in the first case, the main requirement is that the plane of the wall and the door frame be at the same level. Otherwise, it will not be possible to ensure a good fit of the platband to the wall. The platbands are glued in the same way as with liquid nails.
It is necessary to use clamps that will secure the platbands for a sufficiently long time for drying.
To securely fasten the platbands, it is recommended to use nails, driving at least two into each platband.
Here are tips on how to remove polyurethane foam if it gets on your hands or objects.
You can finish the door not only with the help of a master, but also with your own hands. To avoid mistakes, strictly follow the algorithm.
Stage 1. Preparatory work.
Using a construction knife, clean the surface of the doorway from protruding polyurethane foam. Then walk with an even strip along its entire perimeter, look at the position of the wall and the box. Existing problems will be resolved during installation of the frame.
Step 2: Mark the location of the trim strips.
Overlay strips are installed in such a way that the rounded corners of the door frame remain visible.
Platband installation
And the straight lines from the side of the extension should coincide with the corners of the decorative element.
Pay special attention to ensure that the platbands do not interfere with the operation of the hinges and the door lock screwdriver. Attach the strips and use a pencil to make marks above the box above the joint angle at a distance of approximately 3 mm. The marked places show the height of the vertical and width of the horizontal decorative elements at the lower connecting corners.
Sometimes during installation, the extensions receive numerous damages. To hide them, experts advise placing marks on the door elements two millimeters below the corner. If there are no defects, then install the planks flush with them.
Stage 3. Attach vertical strips to the marks and place marks on them at the desired height.
Markings for installation of platbands
After measuring the platbands, number them and put the numbers on the wall in the appropriate place. This will prevent them from being mixed up during the work process.
Step 4. Trim the vertical parts of the structure at a 45˚ angle.
The cut should be smooth, without chips. When cutting, consider the width of the cut, as in some tools it can be up to 3 mm. Therefore, make an appropriate indent from the label.
Vertical planks are trimmed taking into account the width of the cut
Step 5. Attach the vertical and then horizontal elements.
The vertical strips are fixed first, and then the horizontal ones.
To make your own plastic trim, strictly follow the diagram:
- Measure and mark the mounting profile - this is a plastic product with latches for attaching the front profile.
- Cut the mounting profile blanks at an angle of 45 degrees with an electric saw or grinder. The mounting profile can be made 10 mm shorter than the front one. This will make it easier to take measurements.
- Attach the mounting profile to the wall using self-tapping screws.
- Measure the front profile from the floor covering to the corner of the box. Please take into account the thickness of the connecting elements. Most often it is about 3 mm.
- Cut the vertical plastic strips at an angle and fix them in the mounting profile.
Plastic trims are fixed in the mounting profile - Insert connecting elements into the cut ends of the vertical trims. Saw off a horizontal board from one end, insert it into the profile and measure out the area for cutting the opposite end.
- Cut the face profile at a 45˚ angle and install in place.
The fittings make the joints look beautiful, so there is no need to use sealant to close the gaps.
When the materials have been purchased and the tools are at hand, all that remains is to figure out how to properly install platbands on interior doors.
All construction work begins with adjusting the material to size. This also applies to platbands. There are two ways to connect the vertical strips to the top casing. Let's look in detail at how the strips for each of them are measured and cut.
At an angle of 90
The rectangular connection of platbands can be of several types, and therefore measurements are taken in different ways.
Vertical. The connection of the planks with a vertical seam involves the placement of a horizontal platband between the side posts. In this case, the work is performed in the following sequence:
- on the side of the hinges, at a distance of 3-4 mm from them, a platband is applied to the door (the indentation is necessary for the doors to open freely) and at the top, on the inside, the line of the strip is marked;
The platband should not interfere with the operation of the hinges.
- a similar operation is carried out with the platband and on the side of the handle. In this case, one of the trims must be marked - they may have different heights due to the uneven floor;
- The top strip is applied to the door frame and brought to a horizontal position. If there is a visual distortion, adjustments are made in such a way as to hide the existing defect as much as possible;
- taking the drawn vertical lines as a guide, the length of the upper casing is noted;
When the platbands are connected vertically, the side strip is attached last.
- a mark is made along the top of the plank, close to the edge, which necessarily intersects the previously placed vertical lines;
- side trims are applied to the door one by one to determine their length - marks are placed opposite the drawn crosses on the slats;
- on the surface of the planks, cut lines are marked with a pencil using a construction square;
Construction square to help.
- Using a jigsaw or a handsaw (preferably using a miter box), the platbands are cut to size.
We invite you to familiarize yourself with: Insulation of a bathhouse made of expanded clay concrete blocks
Horizontal simple. With a horizontal connecting seam, the upper casing is first applied to the door frame. After finding its specific installation location along the bottom edge, horizontal lines are drawn from both ends that will show the length of the side trims.
After this, the length of the vertically located strips is determined by analogy with the previous example. Experienced carpenters determine the size of the top platband after attaching the side ones - a perfect match is guaranteed: a horizontal platband is laid on the fixed strips. Marking its length is not difficult.
A line is drawn defining the height of one of the side trims.
Horizontal with an overlap. In some cases, designers suggest installing the top trim with slightly protruding edges. In this case, the top strip is laid on the already installed side trims, as in the previous case, and then the cutting lines are marked.
At an angle of 45
Step 1. The length of the left and right trim is determined. To do this, on the side of the hinges, with an indent of 3-4 mm, a platband is applied to the box. The lowest point of the cut is marked. It is located above the door opening by an indent.
Step 2. The length of the second casing is determined in the same way.
Step 3. Platbands are placed on stools or a table. The lower control lines are drawn along the marks. After this, the platband is extended to its width. The upper control line is drawn along the second mark.
By connecting the opposite corners of the marks, we get a cutting line at an angle of 45o.
Step 4. The trims are cut at an angle of 45o. If sawing is done with a hand saw, then the bar is attached to the miter box so that one of the marks is opposite the slot at 45o. If you have a jigsaw at hand, mark the place of the cut with a pencil - the upper and lower marks are connected diagonally.
Without a miter box it is very difficult to get an angle of 45o.
Step 5. Side trims are installed.
Step 6. The top strip is placed on the platbands so that its bottom coincides with the beginning of the cut of the ends of the side strips.
After installing the side trims, the dimensions of the top strip are determined.
Step 7. The corners at the top bar are cut.
Step 8. The joints are sealed with acrylic or silicone sealant and then painted with a corrector.
The sized planks are attached in several ways.
On nails
The most common method of attaching cash to a door is with finishing nails. They are hardly noticeable on the surface of the planks, do not require work experience, and are easily removed from the box along with the trim. For work, use nails with a flattened head, about 40-60 mm long, and 1.5 mm in diameter. The color of such nails may be different, since they are coated with one of the following metals:
- zinc;
- copper;
- chrome;
- brass;
- bronze.
If desired, the finishing nails can be matched as closely as possible in color to the trim.
You can hammer in with a simple hammer or a pneumatic tool. The step between the fastenings is about 50 cm.
The most reliable tool is a hammer.
If you can’t buy finishing nails, you can use regular ones. In this case, they are not hammered in completely, leaving the opportunity to bite off the caps with a side cutter. After removing the heads, the nails are driven in completely.
Of course, it’s more convenient to work with a pneumatic gun, but a simple hammer will do the job just as well.
In most cases, nail heads are inconspicuous and do not require masking. If you need to hide traces of fastening, then use a wax pencil.
For self-tapping screws
Fastening with screws completely follows the instructions for fastening with nails:
- platbands are cut to size;
- are applied to the box (side), after which the places for screwing in the screws are marked on them;
- holes are drilled (the drill is taken 1 mm thinner);
- side strips are attached;
- Using the same technology, the top cash is attracted to the box;
- the heads of the hardware are masked with a wax pencil, veneer or film.
It is better to hide the traces of fastening.
For liquid nails
Methods of attaching platbands to interior doors
Using finishing nails
Methods for arranging a doorway without a door
Working with finishing nails is simple and does not require any expense or physical strength, as well as a lot of time.
Scheme of the structure of the door casing and frame
To attach cash to interior doors, you will need finishing nails. This is a small nail, which is only 4 mm long and 1.5 mm in diameter. The cap has a smooth surface (flattened). Using these nails, the platband can be removed and reinstalled.
Step-by-step process for installing the trim on the door
It will not work to hammer nails directly into the platband - it is difficult and ugly. Therefore, you need to use an electric drill. A hole is made for a nail every 7 cm, then nails are driven into these holes, but not completely. Nail heads should be cut off with a side cutter. After this, slightly knock down the protruding needle so that it does not protrude on the surface. Thus, you can achieve a good result in all respects: the appearance is not spoiled, the platband is installed. To ensure that nothing is visible at all, you can use a special pencil that will paint over the fasteners. The video shows in detail how to attach platbands to interior doors.
Application of liquid nails
This method is used only when the platbands are made from MDF. High-quality work done will delight you with the appearance of the door without nails, which will be the result of installing the platbands. So, liquid nails must be used on a perfectly smooth surface, free of dust and pebbles. The fastening process consists of several steps.
Pressing the platband with clamps to the door frame
“Liquid nails” are applied to the inner surface of the platband using a construction gun. Without waiting time, the platband should be secured in its place, on the base. The element is pressed against the wall, a little time is waited (literally 1 minute), and then it is removed. You need to wait 2 minutes, apply a little more nails to the back side of the platband and attach it to this place. It should be held for 2 minutes for the reaction to begin.
The process of applying liquid to the platband
To be on the safe side, you can use double-sided tape. After the first application, you have 2 minutes to secure the tape to the edge of the back side of the casing. This method has its advantages: the appearance of the door leaf remains unchanged and original. If a decision is made to dismantle the platbands, then it will be difficult to do without a tool. “Liquid nails” differ from other adhesives in their technical characteristics; the main advantage is good adhesion.
Use of self-tapping screws
Installation of the platband using wood screws is the key to strength and durability. This is done in the standard way. The self-tapping screw for a wooden surface should be 2 cm long; the tools used are a screwdriver or a screwdriver, as well as an electric drill with a wood drill. In order to recess the head of the screw in a wooden frame, you need to use a drill and a large-diameter drill to make a recess for the top of the screw. The fastener is screwed into the platband until it stops. After this, the fastening site is masked with a special pencil.
The principle of fastening the platband with self-tapping screws
Another option is to purchase special nylon linings of the same color as the door leaf with the frame.
Using clasps with a latch
The interesting name “platband with beak” has become widespread and used in installation. This door element resembles the letter “G”. Installation of this platband is quite simple and does not take much time. The largest segment of the element is placed in a certain recess and snapped into place.
Device diagram and installation of platband with latch
This method has some disadvantages. The main one is stratification. If the trim is constantly removed and put on, the latch will damage the canvas.
Using nails
If you want to learn how to glue platbands onto liquid nails, try to purchase platbands without bends and the correct shape.
Plastic trims can be glued to liquid nails, provided that the walls are perfectly smooth.
Check the flatness of the box over its entire height. The areas where you plan to glue the platbands must be cleared of wallpaper, cleaned, and primed. It is recommended to use PVA glue as a primer.
After the glue has dried, apply liquid nails in dots to the platbands in 20 cm increments. The lath is applied to a pre-marked area and held for several minutes. Ideally, press with a clamp overnight.
Different manufacturers of liquid nails have their own technological requirements. In problem areas, it is allowed to secure the slats with nails, which can then be covered with furniture wax.
The strength of the bonded joint is largely influenced by properly selected adhesive.
Among the most reliable, we can recommend liquid nails under the designation TITE BOND with red letters. You can also use Titebond glue with the Heavy Duty designation, which allows you to glue heavy parts.
Moment glue does not always provide the required quality of connection.
When pressing platbands with liquid nails applied to the surface, glue may bleed through. In such cases, the adhesive should be removed immediately.
The most traditional way to install platbands is to use nails. In order to hide the attachment points as much as possible, special miniature nails are used; their peculiarity is the almost complete absence of a head.
In order to properly nail the trims onto the door, you need to align them level. Since when installing on a wall, distortions or gaps may occur that were not present on a flat surface, it is recommended to leave a small excess of material when cutting.
Since nails without heads are used for interior door frames, try not to damage the coating of the cladding itself. It is most convenient to work with a small hammer. You can mark the joint location in advance using an awl.
In order to cover the nails on the platbands, they usually use a special mastic or grout to match the coating. Minor damage can be masked with paint, a felt-tip pen or pencil.
Using nails is a traditional way of attaching platbands
Another method of attaching platbands involves the use of special glue. The most popular option is the so-called liquid nails. This composition provides quick adhesion to almost any surface.
Let's look at how to properly fasten platbands without ordinary nails. To do this, it is necessary to initially determine the exact position of each element. After this, apply a small amount of glue to the back of the plank and press it against the wall. If glue oozes out from under the casing, wipe it off immediately. It is advisable to apply only a few dots to prevent spreading.
Fastening platbands with liquid nails simplifies the process
Finishing nails are used primarily in finishing work, making it possible to make the fastening of wooden elements subtle or completely invisible. A special design helps complete the task - the head of such nails is higher and has a smaller diameter compared to other types of fasteners. The domestic industry produces finishing fasteners with a length of 12–250 mm and a rod diameter of 0.9–7 mm.
We suggest you read: What accessories to use for baths and saunas
The height of the head, as a rule, coincides with the diameter of the nail. In work, fasteners with a length of 35–50 mm with a head of 2–2.4 mm are most often used. The notch (recess) in the center of the head makes it possible to “drown” the finishing ones when hammering, using a center punch or other devices. The high head helps withstand this impact.
Fasteners are produced on nailing machines. Low carbon steel wire and cold die forging method are used. If high quality materials are used in production, the products will be wear-resistant and durable. Nails also differ in the type of coating, which determines the location of the finishing. In particular they can be:
- Without cover. The simplest and most common type. They corrode easily and are not very durable. Used for interior finishing work in rooms with low levels of moisture.
- Galvanized - with a silver tint, for rooms with low humidity.
- Copper-plated - with a reddish tint, suitable for very humid places.
- Chrome plated - with a silver shiny tint for rooms with high levels of humidity.
- Brass plated - yellow, decorative, made from thin wire.
The main advantage is that they are practically invisible on the surface of fixed materials. But there are a couple of disadvantages:
- They cannot be removed and reused;
- Not as strong as construction nails.
Related Posts via Categories
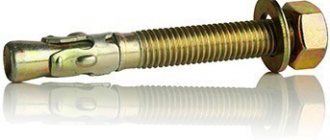
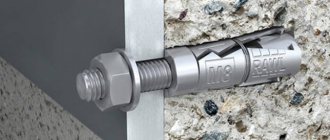
- Strength class of bolts - how well do hardware resist destruction?
- Anchor bolt with nut - proven fastening option
- Dowel-nail – which fasteners are of the highest quality?
- Anchor bolts - a special type of fastener for complex structures
- Designation of bolts according to GOST - navigating the world of hardware
- How to set a rivet - automatic and manual methods for different materials
- Making bolts is a clear technological process
- Needle spring cotter pin – eared fastener for mechanical engineering
- High Strength Bolts - Complete Information on Fasteners
- Blind rivet sizes – what should you think about when calculating?
How roller blinds are attached to plastic windows without drilling and other installation methods
You can attach platbands to the door frame in different ways.
— For liquid nails
Photos 3 and 4 show trim glued to liquid nails. This is the most aesthetically acceptable, but also the most unreliable method of attaching platbands. It is advisable to use it only when the walls are well leveled and the platband will be adjacent to both the door frame and the wall.
— Thin nails
Recently, companies involved in installing doors have been using this particular method, since the platbands, secured with nails with bitten off heads, can be easily removed, and this makes it possible to finish the walls after installing the door. Photo 2 shows platbands nailed with copper nails with a diameter of 1-1.5 mm with bitten off heads; one of these nails can be seen in the photo. The disadvantage of this method is that a nail with a bitten off head holds worse than a regular nail, much less a self-tapping screw, but the hole from the nail is not noticeable. However, sometimes such platbands lag behind, especially if the door is installed in a thin, insufficiently rigid partition, and there are enough people who like to slam doors in the apartment, then the platbands often have to be knocked down or additionally placed on liquid nails.
— Combined method
Photo 1 shows platbands that were glued to liquid nails and additionally secured with nails with bitten off heads.
Since the trims that came with the door were quite strongly curved, it was not possible to fasten them only with liquid nails, and I didn’t want to fasten them only with thin nails.
- Nails or screws
Photo 5 shows trims screwed with self-tapping screws. This method is only suitable for wooden unpainted or primed trim. However, recently nails are increasingly used to imitate antiquity, and sometimes you have to specially select nails with large textured heads and nail them as roughly as possible, it all depends on your aesthetic preferences.
Platbands can be joined with precise cutting at 45 degrees or joined without cutting
more precisely with a 90 degree cut.
Photo 1. Joining of platbands with a 45 degree cut. Fastening with liquid nails.
Photo 2. Joining of platbands with a 90-degree cut. Fastening on copper nails with bitten off heads.
The first method is most preferable for embossed platbands and platbands with a clearly defined pattern. It is quite difficult to cut platbands at 45 degrees without a good miter box, but it is possible. When installing wooden platbands that are not painted or primed, this is not a big problem, since the gaps between the joined platbands can be filled with putty, and after painting the joint will almost not be visible. But when installing platbands with a finished surface, the joints will have to be adjusted. When joining platbands with a 90-degree cut, the quality of the joint does not play such a big role, and moreover, there is more room for maneuver.
Docking with a 90 degree cut can be done in other ways:
Photo 3. Joining MDF trims with a 90 degree cut. Fastening with liquid nails.
In this case, the cut ends of the white trims were pre-painted, so even if you look at the trims from the side, the cut is not noticeable:
Types of products
The use of finishing nails depends not only on the design, but also on the material of manufacture, and, more precisely, on the additional coating.
- A black finish nail is the name given to any fastener without a protective coating. It is made of low-carbon steel and is not resistant to corrosion. Fasteners are used in dry residential areas.
- Galvanized is the most popular option because it is quite cheap to produce. The zinc layer on the finishing nail is at least 6 microns, preventing the appearance of corrosion. The nail has a dull silver color and is used for finishing rooms with average humidity - kitchens, for example.
- Copper-plated - a layer of copper gives the product a red tint and excellent resistance to water. Fasteners are used for lining dressing rooms, bathhouses, balconies and are even used for external finishing work.
- Brass plated – The brass coating gives the product a beautiful golden hue. At the same time, the layer of brass absolutely protects the fasteners, so brass finishing nails are used in the wettest rooms, but, as a rule, only in areas where aesthetic requirements are high: the product is relatively expensive.
- A chrome finish nail has a silver shiny color and is more corrosion resistant than a galvanized finish nail. Chrome plated products, like brass plated ones, are readily used in the manufacture of furniture.
- Coating finishing nails with bronze is even less common than brass, although it provides no less reliable protection against water and corrosion. The point is the cost of the product and the noticeable weighting of the nail itself.
Coatings of brass, copper and chrome are more resistant to corrosion than a zinc layer. However, the cost of such products is higher.
Finishing nails for platbands (photo)
Areas of use
When finishing, many operations will require inconspicuous fasteners to complete. In particular, you cannot do without them when:
- installation of window and door frames;
- fastening the lining;
- installation of skirting boards;
- laying parquet boards;
- fastening glazing beads, thin slats;
- installation of various decorative elements.
Uncoated nails are the most picky about the external environment; their enemy is moisture. They are not recommended for outdoor work and work in rooms with high humidity. Galvanized ones are perfect for covering rooms. Other types can be safely used for finishing rooms with high levels of humidity, when covering balconies and verandas, when installing external glazing, and fastening door frames.
Kinds
To correctly install platbands on interior doors, you first need to select the appropriate elements
First of all, pay attention to the material of manufacture:. Products made from natural wood are considered universal
The strips can be painted to match the color of the doors. The wooden elements are fastened with nails without heads. If the walls are well aligned with the door frame, the platbands are placed on an adhesive composition - “liquid nails”
Products made from natural wood are considered universal. The strips can be painted to match the color of the doors. The wooden elements are fastened with nails without heads. If the walls are well aligned with the door frame, the platbands are placed on an adhesive composition - “liquid nails”.
Laminated MDF planks resemble natural wood in appearance. Decorative elements are matched to the color of the door. The platbands are secured with adhesive or nails without heads, having previously drilled blind holes.
PVC cashing is more suitable for plastic doors. The planks are glued or mounted on the mounting profile.
Most planks are given a standard flat, rounded or curly shape.
Depending on the mounting method, cash can be overhead or telescopic. The first type of elements is fixed directly to the door frame. The second one is equipped with mounting grooves.
Telescopic models
The simplest is to attach telescopic trims to interior doors. It is made without nails, but can be supplemented with glue for greater strength. Installation features are directly related to their design. The fact is that the edges of the platbands, when connected, coincide with the edge of the extension or loot.
Telescopic trims are attached strictly to the groove of the box strip
In other words, one part goes inside the other. Thus, in order to install such products, you just need to saw off the excess and join the parts. The protrusion of the element fits into a recess in the door frame. Then you need to set the required distance, which is adjusted by the size of the recess.
Regardless of which installation method you choose for a particular situation, you should be careful, since one awkward movement can ruin the entire structure. If there are unevenness on the wall, it is necessary to first level them so that there are no gaps, this applies to absolutely all models of platbands, regardless of the material of manufacture and configuration.
Secrets of installation using finishing nails
The scope of application of finishing nails indicates that they are mainly used for working with wood, less often with MDF or chipboard. Although the installation itself is extremely simple - the nail is held at a slight angle with the left hand closer to the material, and the hammer is held closer to the head to control the force of the blow. The nails are driven in right up to the head, which is then flattened, making the joint almost invisible.
Installation of door frames is carried out in two ways: at a right angle (simple) or at an angle of 45 degrees (curly), each of which has its own characteristics. If construction work is carried out independently, then it is better to focus on the first method, which does not require the use of special tools to maintain the geometry of the connections.
When fixing platbands, never hammer a nail in the middle of the board; it is better to do it closer to the edge. To avoid damaging the plank, you can use a special pin, slightly thicker in diameter than a nail. There is also this secret: with a sharp knife, a small piece of wood is cut out at the place where the nail is fixed, the nail is hammered in, and the wooden patch is then glued in.
If you work with wood products, then using finishing nails for trim is easy. It is more difficult if the platbands are made of MDF or lined with veneer. In order not to damage such a surface and at the same time securely fasten it, you should drill 5-6 blind holes (1.5 mm drill) along the platband with a drill, into which to hammer the nails.
Having secured the platbands, all remaining holes can be sealed using sealant or putty, matched to the color.
Also, using finishing nails, the top strip is connected to the side strips, which is especially important if the trims are slightly deformed in case of long-term storage.
Aligning the plane of the platband with the wall
Our builders do not always adhere to standards, so many shortcomings appear. One of the most common are curved walls. What to do when the wall and the box are not parallel to each other?
If the error is very small, then solving the problem is easy. To do this you need:
- Press the decorative strip against the box and measure the size of the gap that appears between it and the wall. If it is no more than 3 mm, then the deficiency can be eliminated without special construction work.
- Find a narrow lining. It should be the same thickness as the gap. Place it on the workbench of a saw or miter box. The lining will lift one side of the casing during cutting.
- Press the overlay strip as tightly as possible to the work table, cut the end at an angle of 45 degrees and with a slight slope in relation to the surface. This way the joint of the overlay strips will be sealed and no sealant will be needed to fill the gaps.
The situation is worse if there is a large error between the wall and the door frame. Then you will have to eliminate it in one of the following ways:
- Disassemble the wall, make a niche for the frame if the frame is deeper than the surface of the wall. To do this, attach the overhead strips to the box and draw lines along them along the wall. Then, using a grinder, cut through this line and make grooves around the entire perimeter of the door. Constantly check their depth. If the niche turns out to be deeper than necessary, seal it with cement mortar.
- Correct the defect using a plane if the purchased wood planks are too thick.
Installing finishing is a troublesome task, but you can sacrifice anything to create home comfort.
Tags: nail, what kind, trim, nail
« Previous entry
Tools and materials
To perform installation work you will need a set of the following tools and materials:
- construction level;
- carpenter's hammer;
- side cutter;
- drill;
- screwdriver;
- drill;
- self-tapping screws;
- nails (finish and liquid);
- latches;
- pencil.
Finishing nails
Finishing nails are often used in cladding work. The main advantage is their inconspicuousness, which is achieved due to the small size of the “hat”. Under the influence of impact, the nails are flattened and become invisible.
Liquid Nails
Using the adhesive base of liquid nails, the fastening of the platbands is more durable and resistant. The front panel is fixed by applying an adhesive base to the inside of the casing and pressing it against the wall. In this case, you must follow the rules for working with liquid nails:
- Apply to a dry and grease-free wall.
- Given the rapid hardening of the applied glue, the platbands must be pressed firmly against the wall surface for 1-2 minutes.
- To improve adhesion, it is advisable to apply the adhesive dotted or in strips, excluding surface treatment completely.
- Due to the toxicity of the material, safety regulations must be observed.
- To apply glue, use a mounting gun, which is well suited for gluing in hard-to-reach places.
Self-tapping screws
Assembly of platbands using self-tapping screws is considered one of the highest quality. To simplify the process, using a drill, prepare holes into which screws of at least 2 centimeters in length can be screwed quite easily.
Latches
Fastening using the latch method is a simple and popular method. The use of a platband with a latch makes installation simple, while a wide section of the part must be placed in a special gap and snap into place without much effort.
The only drawback of this method is based on the fact that the platband made of MDF, when constantly removed, is subject to rapid wear and delamination, which causes destruction of the joint.
Telescopic method
The name of the method implies the conditional ability of the platband to adapt to the thickness of the wall. The transformation is usually carried out using an adjusting angle, which moves into a special groove located on the end side of the door structure.
In the process of such movement, it becomes possible to narrow or expand the details of the platband.
Conclusion
The use of finishing nails is much wider than the installation of platbands. Their technical characteristics make it possible to successfully use nails in furniture production and in domestic conditions during repairs. When selecting, special attention should be paid to the place of use and selection of the length of the product.
Wood as a decoration will never go out of fashion - people will always strive to surround themselves with beautiful natural materials. Finishing nails are used to securely fasten it.
Calculation of additional planks
An additional strip or extension is a decorative device. It is necessary if the wall is 70-75 mm thicker than the frame. Performs an expansion function if the box is narrower than the wall itself. The length of the element corresponds to the length of the platbands. The base is chipboard, fiberboard, plywood or other wood-based building materials. The surface has a different texture (film, thin cut of wood).
Dimensions depend on the chosen manufacturer. Width calculations using the formula:
T st - W k (wall thickness minus box width)
You need 2.5 extras for a standard door (without a threshold): purchase 3 pieces (rounded up).
Production technology
The production of finishing nails of any of the presented types occurs using the cold stamping method. Provided that the materials are of high quality, the products are durable and reliable. When marking fasteners, diameter and length are used. The first indicator varies between 1.5–3 mm, length – from 35 to 100 mm. Length and diameter are interdependent - the shorter the rod, the smaller its diameter.
Finishing fastener parameters
Industrial packaging is done in boxes by weight. Weight can be from 5 to 25 kg. In retail stores you can find packaging not by weight, but by the piece. In this case, the minimum quantity that can be purchased is 10 pcs.
The characteristics of finishing nails are regulated by GOST, or more precisely, they are produced according to state standard drawings. Each manufacturer stamps hardware according to technical specifications (TU). Some technical characteristics of the products:
- The hardware is made from non-hardened steel wire.
- The height of the head must correspond to its diameter; there may be a deviation, but its size depends on the cross-section of the nail.
- Point – point angle – no more than 40 degrees.
- The deflection of the rod depends on the length. With a length of 6 cm - no more than 0.7 mm.
How to install
We will divide the whole process into 3 parts:
- Preparatory work;
- Frame construction;
- Fastening the lining to the wall or ceiling.
Nails are also different
Stage 1 – preparation
To begin with, you should stock up on everything you need, the list is shown in the table.
| Material | Recommendations for selection |
| Lining | Use material with a humidity of no more than 14%, otherwise after fastening you risk finding deformed elements |
| Bar | A frame will be created from it, most often the version with a section of 30x30 or 40x20 mm is used. The material must also be dry |
| Nails | Let's figure out what nails to nail the lining with. For work, a finishing option with a reduced head will be used; the length should be at least 30 mm, if the finishing material is thick, then the entire 40 mm. Galvanized nails are excellent, they resist corrosion well, and the price is lower than other options |
Finishing nails are the best solution for attaching lining
The technology for nailing lining with your own hands requires the presence of a certain set of tools:
A regular hammer will be used for fastening. You need to use small options weighing from 300 to 500 grams;
There is a hammer in almost every home
In order not to damage the lining with a hammer, it is necessary to use a special device - a hammer. With it you can hammer nails without hitting the wood;
A homemade finisher can be made in a few minutes
- The material is cut using a hacksaw with a small tooth size;
- The frame can be attached in two ways. For concrete and brick walls you need a hammer drill and dowels. For wooden surfaces - self-tapping screws and a screwdriver.
Before nailing the lining, it is necessary to build a solid foundation:
First, you need to check the base with a level to find out how crooked your walls are. Next, the lines for the location of the bars are marked. Remember a simple rule - if the lining is mounted vertically, then the frame is positioned horizontally and vice versa;
The easiest way is to sketch out a design diagram in advance to have a clear idea of what it should look like.
A block is attached along the lines; if the walls are smooth, then you can fix it directly to the wall, and if there are unevenness, then it is better to fix the hangers every 50 cm. Then the hangers are bent, the block is placed, leveled and fixed in the desired position.
With the help of hangers, setting the frame level is not difficult
We have come to the main stage and will look at how to properly nail the lining. The instructions consist of the following steps:
First, let's figure out how to nail the lining vertically. The first element is placed with a tenon in the corner and secured with nails through the groove; they are located at an angle of 45 degrees so as not to interfere with the joining of the next element.
We drive the nail with gentle blows of the hammer
The work continues simply: the tenon of the next element is inserted into the groove of the previous one, after which the element can be tapped more tightly through a wooden block and secured;
The next plank is nailed in the same way
Now let's look at how to nail the lining in a horizontal position. The most important thing here is the correct location, the groove should always point down and the tenon upward, then moisture will not accumulate in the recesses. The work is carried out from top to bottom, as you need to drive nails into the groove;
Horizontal trim looks great
If we nail the lining over the top, the work will be slightly different. Nails are hammered into the panels in advance so that they do not peek out from the back side. After this, the element is put in place, tapped through a piece of lining, and only after that the nails are hammered through a hammer flush with the finishing surface.
Nails are achieved after sealing the joints
I hope you have figured out how to nail the lining and how to do it correctly. To make it even clearer, below is a diagram that shows the correct position of the nail, when it holds securely and does not interfere with the joining of the next element.
This is what the fastening technology looks like
And one more option on how to nail eurolining. As you know, it has a very wide tenon, so you can fix elements directly through it. The mounting area is covered with the next panel and everything looks great.
Eurolining can be mounted this way
Nails for lining
How to hide hats
Despite the small diameter of the heads, finishing nails can be quite noticeable if they are located at eye level. To completely hide the fasteners, you can use:
- Furniture wax. It is enough to drown the fasteners in the wood using a hammer and cover the recess with wax.
- Circles. To close the caps, many people use special circles that are glued to the surface of the wood. Among the presented products, you can choose exactly those that match the color and structure of the wood.
- Putty of a suitable color. This material also effectively hides the caps and does not stand out against the background of the wood.
In most cases, it is enough to just recess the cap deeper into the material so that it is not noticeable.