Let's start production
To start making a CNC machine from an old printer, you will need some parts that come with inkjet printers:
- Discs, pins, printer guides (it is recommended to use several old printers; the printers should not print);
- Disk from floppy drive.
- Material for creating the body - plywood, chipboard, etc.
- Drivers and controllers;
- Fastening materials.
The resulting numerically controlled machines will be able to perform many functions. Ultimately, it all depends on what device comes out of the car. The most common uses of inkjet printers are to make a CNC router, a torch (by installing a torch at the outlet of the device), and drills to make printed circuit boards.
The base is a wooden chipboard box. Sometimes they use ready-made ones, but doing it yourself is not difficult. It is worth considering that electronic components and controllers will be inside the box. It is better to assemble the entire structure with self-tapping screws. Do not forget that the parts must be located relative to each other at an angle of 90 degrees and fastened together as tightly as possible.
Making a housing for a CNC machine controller
Manufacturing the housing for the CNC machine controller is the final stage of our machine tool construction.
Our sample board has dimensions of 5 by 7.5 cm, so we will make the case 7.5 by 10 by 5 cm in size to leave enough space for the wires.
Cut out the walls from a cardboard box.
Cut out 2 rectangles measuring 7.5 by 10 cm, 2 more measuring 5 by 10 cm and 2 more measuring 7.5 by 5 cm.
You need to cut holes in them for the connectors. Trace the outline of the parallel port connector on one of the 5 x 10 walls.
On the same wall, trace the contours of a cylindrical socket for DC power. Cut out both holes along the contours. What you do next depends on whether you soldered the connectors to the motor wires.
If yes, then attach them to the outside of the second currently empty 5 x 10 wall. If not, poke 5 holes in the wall for the wires. Using a glue gun, attach all the walls together. From the outside, the corners can be fixed with transparent tape. The body of our CNC machine controller can be painted.
Now you need to insert all the components inside the case. Make sure to get plenty of glue on the connectors because they will be subject to a lot of stress. To keep the box closed, you need to make latches. We cut out a couple of ears from foam plastic. Then we cut out a couple of strips and four small squares. Glue two squares to each of the strips as shown in the figure. We glue the ears on both sides of the body. Glue strips on top of the box. This completes the manufacture of the body.
Converting an inkjet printer to produce printed circuit boards
Lately I've been looking for ways to make PCB making easier. About a year ago I came across an interesting page describing the process of modifying an Epson inkjet printer to print on thick materials, including a copper circuit board. The article describes the upgrade of the Epson C84 printer, but I had an Epson C86 printer, but since then I think the mechanics of Epson printers are the same for all, so I decided to try to upgrade my printer.
In this article I will try to describe in as much detail as possible, step by step, the process of upgrading a printer for printing on printed circuit boards with copper bond.
Necessary materials: - well, of course, you will need the Epson C80 printer itself. - a sheet of aluminum or steel - staples, bolts, nuts, washers - a small piece of plywood - epoxy glue or superglue - ink (more on this later)
Tools: - grinder (Dremel, etc.) with cutting disc (you can try a monkey) - various screwdrivers, wrenches, hexagons - drill - hot air gun
Step 1. Disassemble the printer
The first thing I did was remove the rear paper output tray. Next, you need to remove the front tray, the side panels, and then the main body.
The photos below show the detailed process of disassembling the printer:
Step 2. Remove the internal parts of the printer
After removing the chassis from the printer, you will need to remove some of the internal components of the printer. First you need to remove the paper feed sensor. We'll need it in the future, so don't damage it when removing it.
Therefore, it is necessary to remove the central pinch rollers as they may interfere with power supply to the PCB. In principle, the side rollers can also be removed.
Finally, you need to remove the print head cleaning mechanism. The mechanism is held on by latches and can be removed very easily, but be very careful when removing it, because it includes different pipes.
The printer disassembly is complete. Now let’s start raising it.”
Step 3: Removing the print head platform
Let's begin the process of updating the printer. The work requires care and the use of protective equipment (eyes must be protected!).
First you need to unscrew the guide, which is fixed with two bolts (see Photo above). Unscrewed? We put it aside, we will still need it.
Now notice the 2 bolts next to the head cleaning mechanism. We also unscrew them. However, on the left side it is done a little differently, where you can cut the fasteners. To remove the entire head area, first carefully inspect everything and mark with a marker the places where you will need to cut the metal. And then carefully cut the metal with a hand grinder (Dremel, etc.)
Step 4: Clean the print head
This step is optional, but since you have completely disassembled the printer, it is best to clean the print head right away. Besides, there is nothing complicated about it. For this I used regular ear tips and glass cleaner.
Step 5: Install the print head platform. Part 1
Once everything is disassembled and cleaned, it's time to reassemble the printer, taking into account the space required to print the PCB. Or, as the keepers say, “the rise.” The amount of lift depends entirely on the material you will be printing on. In my modification of the printer, I planned to use a steel material feeder with an attached PCB. The thickness of the material feed platform (steel) was 1.5 mm, the thickness of the foil-covered circuit board, which I usually made boards from, was also 1.5 mm. However, I decided that the head should not put too much pressure on the material, so I chose a gap of about 9 mm. Also, I sometimes print on a double-sided PCB that is slightly thicker than one side.
To make it easier for me to check the lift level, I decided to use washers and nuts, the thickness of which I measured with a caliper. I also bought long bolts and nuts for them. I started with a front feeding system.
Step 6: Install the print head platform. Part 2
Minibar or bread box
Such things can also be assembled from an old printer, which many users like. The body of the product must be completely freed from all unnecessary parts in order to cover the resulting shape with fabric. The free space can be used to store valuables, alcoholic beverages or baked goods. The finished product will look appropriate not only in the kitchen, but also in the living room.
Models of cars and motorcycles
The most original way to use broken office equipment was found by Spanish designer Enrique Conde. Use them to create models of motorcycles, helicopters and cars that will amaze with their entertainment and realism. This hobby is closer to art and requires certain skills.
Model car made from office equipment parts
So broken printers are useful for more than just sending them to landfill. With some changes and improvements, they can continue to benefit their owners.
Product details
As a rule, only one element in a scanner or laser printer becomes unusable, and the remaining parts are quite suitable for work. The most valuable in this regard are MFPs and matrix devices. When disassembling the latter with your own hands, you can get many valuable parts.
Old printer
- Fasteners: screws, nuts, gears, bolts and other small items. For a home craftsman, any fasteners will be useful, since sometimes the lack of elements of the required diameter makes the work very difficult.
- The most valuable part in any type of printer is the hardened steel guide. In many Chinese and Korean cars, the guide is made of a cheap alloy and also bends under the weight of the drive belt. Canon or Epson inkjet machines are made of steel. This part is used when assembling CNC machines or homemade printing devices.
- The head sliding unit is plastic in inkjet machines and is only suitable for CNC engravers, while in matrix machines a bronze bushing is pressed into the block, so the part can be used on household metalworking machines.
- If you are planning to install a printing device, a Canon cartridge is the best option.
Canon cartridge
- The timing belt is a versatile part suitable for any application where power must be transferred from the stepper motor to ground. And the belt fixation unit can be found in MFPs, scanners and even in old Epson copiers.
- Stepper motor—provides paper movement. However, they are more powerful on older dot matrix and laser machines, and inkjet printer parts can be used effectively. Also, the motor, controller and driver can be removed from the old machine.
- Limit switches: provide paper quality control. A necessary part for a homemade device or press.
What will serve as the basis?
Making a homemade CNC machine from a printer is possible using matrix-type equipment. You can use any that is available, regardless of the manufacturer's brand. Also, for high-quality control and efficient operation of the units, it is necessary to remove other parts from the printer - the motor, carriages, toothed belts, guides, and various gears.
Useful parts
Creating a homemade machine
Before converting printers or scanners into mini-machines capable of performing milling work, it is necessary to assemble the structure frame and its main components as accurately as possible.
The top cover of the device requires the installation of the main axes, the main components of all professional machines. There should be only three axes; work should begin by fixing the y-axis. To create a reference book, a furniture reference book is used.
Separately, we note the creation of a CNC from a scanner. Converting this device is the same as converting an old inkjet printer at hand. Any scanner has stepper motors and pins, thanks to which the scanning process is carried out. In a machine, these motors and pins will be useful, instead of scanning and printing, milling will be done, and instead of head movement, the printer will use the movement of the milling device.
For the vertical axis in a homemade CNC we will need parts of the unit (the guide along which the laser moved).
Printers have so-called strips, they act as lead screws.
The motor shaft must be connected to the stud using a flexible coupling. All boards must be attached to a chipboard base. In this type of design, the milling machine moves only in the vertical plane, and the part itself moves horizontally.
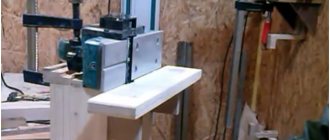
Features of making a milling machine from a printer with your own hands
Unlike the simple CNC machine discussed above, a milling machine must have a more massive and stable structure. Its production has a number of features. First of all, you need to choose a router design. The photo shows a standard diagram based on an old drilling machine. The use of stepper motors from the printer allows the machine to operate using belt drives, excluding screw drives.
The basis of the machine is a rectangular beam, securely fixed on guides. The supporting structure has increased strength. The nodes are bolted together.
Assembly order:
- Guides are installed in the supports and secured to the sidewalls before they are installed on the base.
- The smooth movement of the calipers along the guides is adjusted.
- The guides are fixed by tightening the bolts.
- The calipers, guide assembly and sidewalls are attached to the base.
- The Z-axis assembly is assembled and connected to the X-axis assembly through an adapter plate.
- Lead screws are installed and connected to the motors through a coupling.
- Stepper motors are mounted and secured.
Particular attention is paid to the manufacture of calipers. The photo shows drawings of calipers on all axes. When fastening, it is important to take into account that the vertical axis (Z) experiences significant loads, and therefore the vertical posts must have increased strength.
What can you take from the printer?
The experience of some craftsmen shows that it can be used for a homemade CNC milling machine. Examples of the use of materials and components:
- For the X axis, bases from a matrix type printer in A3 format were used. Furniture guides 50 cm long were attached to them.
- For the Y axis, a motor from a matrix printer and a belt drive are used, and the frame itself is made of 100 × 25 mm boards.
- For the Z axis, the stepper motor from the scanner is most suitable. The screw drive is secured with an M10 pin. Furniture guides 30 cm long were used.
Important! The milling machine spindle can be made from an engine from an old automobile compressor. A collet is installed on its shaft.
Electronic filling
There are two options:
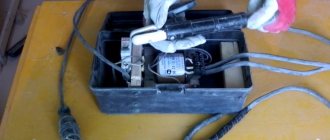
- You arm yourself with a soldering iron, flux, solder, a magnifying glass and understand the chips from the printer. Locate the 12F675 and LV1745 printer control boards. Work with them by creating a CNC control board. You will need to connect them to the back of the CNC machine, under the power supply (we also get this from a sick printer).
- Use the factory CNC machine controller. Offhand: five-axis CNC controller. Homemade electronics are great, but the Chinese greatly undercut their prices. Then, with a light click of the mouse, we order CNC from them, because in Russia it is not possible to buy such a CNC device. The 5-axis CNC controller CNC Breakout Board allows you to connect 3 limit motor inputs, a stop button, automatic control of the Dremel and up to 5 drivers to control the stepper motor of a home-made machine.
This CNC is powered by a USB cable. In the home version of the CNC, the IC printer control board must be powered by the CNC machine's power supply.
A stepper motor will have to be selected for a homemade CNC machine with a power of up to 35 volts. With other options, the CNC controller runs the risk of failure.
Remove the power supply from the printer. Connect the power supply, on/off switch, CNC controller and Dremel.
Run the cable from the laptop/PC to the machine control board. Otherwise, how will you load tasks into the machine? Speaking of homework, download Math3 for drawing. CorelDraw is suitable for non-industrial design professionals.
On a homemade CNC machine you can cut plywood (up to 15 mm), textolite up to 3 mm, plastic, wood. The product will not be longer than 30-32 cm.
Quite often, among owners of poorly functioning or already faulty office equipment, the question arises of what can be done with an old printer. Of course, the easiest way to do this is to send you a used inkjet or laser printer. But if you have free time and a little desire, you can turn a printer into a CNC machine, that is, CNC equipment, which has found wide application for solving both amateur and professional problems. You can learn more about this below, but first let's look at what you can get out of your old printing device.
Necessary materials
In order to make your own laser engraver using Arduino, you will need the following consumables, mechanisms and tools:
- hardware platform Arduino R3;
- Proto Board equipped with a display;
- stepper motors, which can be used as electric motors from a printer or DVD player;
- laser with a power of 3 W;
- laser cooling device;
- DC-DC voltage regulator;
- MOSFET transistor;
- electronic boards that control the laser engraver motors;
- limit switches;
- a housing in which you can place all the structural elements of a homemade engraver;
- timing belts and pulleys for their installation;
- ball bearings of various sizes;
- four wooden boards (two of them with dimensions 135x10x2 cm, and the other two - 125x10x2 cm);
- four round metal rods with a diameter of 10 mm;
- bolts, nuts and screws;
- lubricant;
- clamps;
- computer;
- drills of various diameters;
- a circular saw;
- sandpaper;
- vice;
- standard set of locksmith tools.
The electronic part of the machine will require the greatest investment
Cabinet or drawer for needlework
A broken printer can be a good cabinet or chest.
An even more interesting solution is to make an embroidery box. For this purpose, the internal space of the device is divided into cells with fabric-covered plywood. Fabric pockets are made for necessary small items. The mirror can be glued to the back of the lid with liquid nails, and the body can be painted with paints.
Embroidery box
Universal machine
From an old printer you can make a very original device that can be used to solve many problems. To work, you need to prepare a set of construction tools for the stud. Experts recommend having a vice, side cutters, pliers, a hacksaw and screwdrivers on hand. Manufacturing principle of the machine:
- From a regular piece of plywood you need to cut four squares 37x37 (2 pieces), 9x34, 34x37.
- All workpieces must be fastened together with self-tapping screws. You need to pre-drill holes in the plywood with a drill.
- Duralumin corners can be safely used as guides along the Y axis. The product should be as durable as possible. To attach the corners to the side walls of the case, it is necessary to make a protrusion of two millimeters. Metal parts must be screwed through the central surface using self-tapping screws.
- The propeller can be built from a construction pin. Interaction with the engine will occur through the clutch.
- Instead of a spindle, you need to install a Dremel on the CNC wall, which will be equipped with a holder consisting of a bracket for the board.
- A sheet of plywood with a 19x9 cm base is ideal for making high-quality supports. You will also need to drill corresponding sockets for the guides.
- At the final stage, the master will have to assemble the axle using Dremel brackets. The finished machine is placed on the prepared surface.
Parts and tools
The basis of a homemade CNC machine is a printer. It is preferable to take a matrix camera of any brand (HP, Epson, Xerox, Ricoh, Canon). Printer motors are easy to install with your own hands, durable, and quiet.
Before you buy an old device, you need to look at the motor parameters and other design details in the instructions. Some craftsmen use stepper motors from scanners.
In addition, the following details are needed:
- plywood for building No. 15;
- duralumin corners 20 mm;
- self-tapping screws;
- three bearings 608;
- several M8 bolts 25 mm long;
- construction pin M8;
- rubber hose;
- 2 M8 nuts;
- Dremel;
- 4 linear bearings;
- bracket for boards 80;
- PVA glue.
Tools:
- hacksaw;
- screwdriver;
- electric drill;
- pliers;
- vice;
- file;
- side cutters.
Compact shocker
Even beginners know that an old inkjet printer can be used to make an original part that will be useful in difficult situations. The product contains a universal part - a board equipped with high voltage converters. The master must be extremely careful, as the procedure is quite dangerous. The work requires knowledge in the field of electronics. Beginners should avoid this task. If everything is done correctly, you can end up with a stylish shock keychain.
Assembly
We weld batteries with flaws to each other. We solder the wire at the connection point. We do the same with the plus. Since batteries are used, when disassembling I recommend not tearing the nickel-plated tape, but cutting it. Then it's easier to solder the wires. I had a minus, I had to pay carefully. We put the wires in one direction, there will be a charge controller. Caps for the case, and card holders are also cut out of plastic. PVC plastic, I really enjoyed working with it. Soft, works with a construction knife. I mark the holes for all connectors and the switch. I cut with a knife. I make small indentations for the boards. I attach the cards with hot glue. They stick perfectly, there is no pressure on the outside. Solder the wires to the controller. From the controller to the other side of the lamp to the boost converter board. To secure the batteries in the case, I will use pieces of wine cork. It is necessary to cut a piece on the cork to allow the threads to pass freely. We insert the batteries, the plug and install the plug with the charge controller. Everything is holding up great. Solder the switch to the plug on the side of the boost converter. We break the positive or negative power cable. The one that comes from the battery charge controller. The wires are unsoldered. We carefully put everything in a case and don’t forget the wine cork. You can also glue it with superglue. This is the converter side. This is what it looks like from the charging connector. This causes the indication LEDs to light up during operation. You could drill a hole and fill it with hot glue, but I didn't think much about it and left it as is. Here is such a strong and quite affordable Powerbank. In general, I think that the photoconductor is a good element for this. I advise you to repeat this device.
Testing
We connect the motor to the controller.
To do this, connect the common wire of the stepper motor (see the documentation for the motor) with the wire that was soldered to the positive power bus.
We connect the other four wires through trial and error. We just hook them all up and then change the order of the connections if the stepper motor takes two steps forward and one step back or something like that.
For testing, we connect a 12 V 350 mA DC power source; the easiest way is to use a power supply from a computer.
Then we connect the DB25 connector to the computer. We look and test in TurboCNC whether the motor is connected correctly.
As a result of testing and checking the correct connection of the motor, you should have a fully functional CNC machine.
To check the scaling of our CNC, we attach a marker to it and run a test program. We measure the resulting line. If the line length is about 2-3 cm, the device is working correctly. Otherwise, check the calculations we did above.
If everything worked out, then congratulations, the hardest part is over! Little things remain.
How to connect a mini drill to a power source
The last step in assembling the device is connecting to a power source. Now the second part that you removed from the printer will come in handy: the power supply. Disconnect the wire from it that led to the printing mechanism.
Remove the board and solder the mini drill wire to the power supply. This is an important stage, since the success of all work will depend on the quality of the weld.
That's all, you can check how the mini drill will work and try it with different accessories.
This miniature tool can perform a variety of jobs. You can use it for sharpening, grinding, drilling and engraving
As you can see, everything is quite simple. Even if you have little experience working with an electrician, you can handle it. In exchange for a broken printer, you will receive an excellent working portable power tool, the factory equivalent of which costs at least 2 thousand rubles. Great idea, right?
Turbo CNC setup
After loading Turbo CNC, a screen similar to the one below will appear. Press spacebar. Now we are in the main menu of the program. Press F1 and use the arrow keys to select the “Configure” menu. Then select “number of axis”. Press Enter. Enter the number of axes that will be used. Since we only have one motor, we select “1”. Press Enter to continue. Press F1 again and in the “Configure” menu select “Configure axes”, then press Enter twice.
The following screen will appear. Press Tab until you reach the "Drive Type" cell. Using the down arrow, select “Phase”. Using Tab again, select the “Scale” cell. To use the calculator, we need to find the number of steps the motor makes in one revolution. Knowing the engine model number, you can determine how many degrees it turns in one step. To find the number of steps the motor makes per revolution, you now need to divide 360 by the number of degrees per step. For example, if the motor rotates 7.5 degrees in one step, 360 divided by 7.5 equals 48. We enter the number you get into a scale calculator.
We leave the rest of the settings as they are. Click OK and copy the number in the Scale cell to the same cell on another computer. Set the Acceleration cell to 20 because the default of 2000 is too high for our system. Set the initial speed to 20, and the maximum speed to 175. Press Tab until you reach the “Last Phase” item. Set it to 4. Press Tab until we reach the first row of X's.
Copy the following into the first four cells:
1000XXXXXXXX 0100XXXXXXXX 0010XXXXXXXX 0001XXXXXXXX
We leave the remaining cells unchanged. Select OK. Now Turbo CNC is configured to work with our controller.
Compact wind generator
It is important to note that even such a multifunctional product can be made from an old printer. A ready-made wind generator will be able to convert ordinary wind into electricity, which is quite enough for ordinary household needs. The most effective are laser stepper motors or MFPs. Progress:
- To remove the motor, you must carefully disassemble the old printer.
- The master needs to assemble a rectifier: two electrodes are taken for every fourth stage.
- PVC pipes are ideal for blades, since in this case there will be no difficulties in choosing the optimal degree of curvature.
- The slate sleeve is mechanically adjusted to the shaft. All parts must be compact so that a lightweight structure can ultimately be assembled.
- A sleeve is put on the shaft, fixed, and then the blades are fixed. The product should be as balanced as possible.
- The motor is inserted into a piece of PVC pipe and secured with bolts. A duralumin weather vane is attached to the end. The structure is supported by a vertical pipe.
Sources
- https://VseOChpu.ru/chpu-iz-printera/
- https://les-tish.ru/shite/chto-mozhno-sdelat-iz-printera.html
- https://FB.ru/article/465772/chto-mojno-sdelat-iz-starogo-printera-opisanie-rasprostranennyie-variantyi
- https://SdelaySam-SvoimiRukami.ru/4545-ne-vybrasyvajte-staryj-kartridzh-sdelajte-iz-nego-poverbank.html
- https://homius.ru/dremel-iz-printera.html
[collapse]