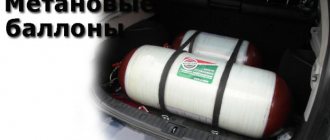
Surely, you have often wondered what can be made from an old gas cylinder? An amateur will mistake the receiver for unnecessary scrap metal and send it to a landfill, but only a real master will be able to use the container as the basis for a new product.
Agree, a used gas cylinder is an ideal housing for a homemade barbecue, smokehouse, boiler or even fireplace. Detailed instructions will help even a beginner quickly understand how to disassemble a gas cylinder as safely as possible.
Disassembling the receiver requires the technician to follow important rules used for safely cutting the container in which flammable materials were stored. We have compiled detailed instructions for disassembling a propane tank, which describes step by step how to empty the container of gas residues and cut it correctly.
How to cut a balloon safely
When making a gas cylinder from propane or other gas, fairly high quality metal is often used. That is why many are considering the possibility of cutting it to obtain blanks, which are later used to create various products. When considering how to cut a gas cylinder, it is recommended to pay attention to the following points:
- The body can be a good workpiece for making a stove, water tank or barbecue.
- Before actual work, the oxygen gas cylinder should be emptied, since the gas at its high concentration is not only flammable, but also explosive. Therefore, before cutting, you should check the filling level of the gas cylinder.
- As a rule, there are no significant problems with oxygen and carbon dioxide gas cylinders. This is due to the fact that ordinary iron is used in their manufacture.
- Propane gas tanks can cause some pretty serious problems. This is due to the fact that it is quite difficult to empty them completely; this requires preliminary preparation.
Gas cylinder explosion
Before you begin, you also need to prepare the required set of tools. As a rule, it can be found in almost any garage and workshop.
Conclusions and useful video on the topic
The article presented step-by-step instructions for disassembling a gas cylinder, including the secrets of properly bleeding the gas and rinsing the cylinder with clean water. A few simple rules for working with an angle grinder will help you correctly cut the cylinder container, reducing the likelihood of a fire or explosion to a minimum.
A prerequisite is to maintain the sequence of actions presented in the instructions, since the successful completion of the work on disassembling the gas receiver depends on this.
You can learn how to avoid a gas cylinder exploding during its disassembly from the video:
You can unscrew the valve of the propane receiver, without the need to cut it down, in the following way:
Have you ever had to disassemble a gas cylinder yourself? Share your experience with our readers, tell us about the problems you encountered when disassembling a propane receiver. Tell your story in the comments below the article, where you can also ask our experts any questions you have.
What will you need?
To carry out the work in question, a certain set of tools is required. As a rule, cutting is carried out with a grinder. Other necessary tools are as follows:
- Gas and open-end wrench for working with the valve. In order to remove all the gas from the container, the valve must be fully opened.
- A hacksaw is also used for cutting, for example, in the case of cutting off the neck. It is worth paying attention to the correct choice of a suitable cutting blade, since too soft metal leads to rapid grinding of the teeth.
- Water is used to clean the surface. It is usually poured into a container.
When working with an angle grinder, you should be careful, since the circle is in contact with a small area. In addition, when cutting, you should use safety glasses, as a large number of fragments and burning abrasive are formed.
Cutting a gas cylinder with a grinder
For an angle grinder, it is important to choose the most suitable circle. This is because the wrong abrasive wheel can quickly wear down. Before each cutting, you should check the integrity of the nozzle and its secure fastening. Cutting without a protective cover is not allowed.
DIY rocket stove from an oxygen cylinder
- Step one: cutting the balloon
- Step two: loading chamber
- Step Three: Loading Hole
- Step four: ash pan
- Step Five: Vortex Flow
- Step six: welding work
- Step seven: thermal insulation
- Step eight: gas afterburning system
- Step Nine: Cover
- Step ten: support
There are several options for building such a furnace. The master combined two such versions of photos 1 and 2, and made his photo 3.
For production, the homemade master used the following
Tools and materials:
- Oxygen balloon;
- Cardboard;
- Marker;
- Insulating tape;
- angle grinder;
- Magnetic square;
- Welding machine;
- Profile pipe;
- Band saw for metal;
- Channel;
- Roulette;
- Wire brush;
- Hammer;
- Clamp;
- Metal container;
- Pliers;
- Bolt;
- Two bushings;
- Perlite;
Step one: cutting the balloon
For the stove to function properly, its vertical part must be 2.5 times longer than the fuel chamber. Taking this into account, the master marks the cylinder. For an even cut, wrap a piece of cardboard around the balloon, align the edge and outline it with a marker. When marking volumetric parts in this way, you can be sure that the cut location will be level.
Next, the master cuts the cylinder according to the markings.
Step two: loading chamber
Now you need to properly cut off the edge of the loading chamber. The master makes a template from paper. Transfers the template to the workpiece.
Cuts according to markings.
Step Three: Loading Hole
Using a magnetic square, it secures the loading chamber to the workpiece. He traces it along the contour from the inside and outside.
Cuts a hole.
Checks the fit and adjusts if necessary.
Step four: ash pan
The ash pan provides access to the combustion chamber and can also be used to control draft. The master made the ash pan from a 100*100 mm profile pipe. Cut it to the required size.
I adjusted it to the radius of the pipe.
I cut a hole in the pipe.
Step Five: Vortex Flow
To ensure greater draft, the master makes fresh ventilation. The pipe will draw in air and, passing through the curved pipe, it will increase the draft.
Trims channel flanges.
Makes a notch.
Bends the edge of the workpiece around the pipe.
Step six: welding work
All parts are prepared and welding can begin.
Welds the loading chamber.
Grabs the ash pan.
Now you need to measure where to cut the hole for the supply ventilation. The craftsman places the workpiece on the ash pan and outlines the location of the curved part.
Cuts a hole.
He welds the workpiece and scalds the ash pan.
Step seven: thermal insulation
The master uses a barrel to insulate the upper part of the riser. Cuts a hole in it. Makes "petals".
Places the barrel on the pipe.
Subsequently, the master filled the interior space with perlite.
Step eight: gas afterburning system
To improve efficiency, the master makes a gas afterburning system. The air rising through the chamber will enter the upper part of the furnace and mix with gas. Due to the influx of oxygen, the gas will be burned.
A box is made from a channel.
Marks the location for the hole on the oven body.
He cuts a series of holes and welds plates onto them.
Welds the box.
The master makes a lid for the ash pan. The cover is secured with a bolt and two bushings turned on a lathe.
How to proceed?
Once everything you need has been purchased or found, you can begin the actual work. The sequence of actions is usually as follows:
- The valve opens fully to completely release the gas. Do not forget that even a small amount of such a substance can lead to fire or explosion. In addition, all clothes can become saturated with harmful odors. You can make sure that there is no more gas left in the container by covering the valve with a soapy mixture. You can drain the remaining gasoline only after completely unscrewing the valve and removing it, which is not recommended if there is pressure.
- The next step is to unscrew the valve, after which the pins and the fixing element are removed. Removing this locking mechanism is quite difficult in some cases, but if possible, a diameter of 6 mm is formed. If you can’t unscrew the valve, you can cut it off using a regular hacksaw. You can reduce the likelihood of fire by supplying water to the cutting zone, for which it is enough to use a regular hose.
- After this, the gas tank is filled with water. This is required in order to remove any remaining gas that may remain in the semi-closed container. The resulting gasoline solution can be safely drained, as it is absolutely safe and cannot ignite.
- It is worth considering that the resulting liquid has a persistent and rather pungent odor. That is why it is recommended to drain it away from the structure. To speed up the process, you can supply compressed air to the gas container.
- After the container is completely cleaned, you can begin actual cutting. To do this, mark the surface, for which you can use chalk. Many people cut along welded seams, since they are characterized by less high strength.
- Before work, it should be taken into account that in most cases, steel with a thickness of 3-4 mm is used in the manufacture of a gas cylinder. At the joints this figure increases to 5-6 mm. Almost any grinder can cope with such a task.
- You can simplify your task by passing the grinder prematurely when using a 1.6 mm thick disc. By using a wider blade, you can eliminate the possibility of jamming the attachment that will be used for the final cutting.
- Some thicker elements may be cut, and then cut with a chisel and hammer. Due to this, the cutting process is accelerated, but the quality of the resulting cut is significantly reduced.
The cutting methods under consideration are used so that the gas cylinder can be reused in the production of a wide variety of products. If, after cutting it, a pungent odor remains, then the inner surface is burned with a blowtorch. After such processing, the body will be ready for further use.
Properties
Liquefied gas consists of gaseous hydrocarbon components (propane and butane) subjected to thermal effects under pressure. The abbreviated name is LPG. Its weight is almost twice as light as water - 0.58 t/m3, and in the form of steam it is heavier than air - 2.2 kg/m3 versus 1.2. Propane and butane gases are explosive and flammable at 400ºС. They have no smell , so for recognition by odorant, an odorant is added to them. In tanks and other vessels, LPG is present simultaneously in the form of vapor and liquid, but is used in the gaseous phase. The coefficient of volumetric expansion of the liquid fraction is high, therefore, in order to avoid explosion of the vessels when the temperature rises, they are filled only to 85% . Negative qualities of LPG:
- Although liquefied gas does not contain toxic or poisonous substances, it has a suffocating and narcotic effect on the human body: poor health, dizziness, followed by intoxication and loss of consciousness.
- Incomplete combustion of LPG leads to the formation of carbon monoxide - carbon monoxide, which has a poisonous effect on humans.
What should you pay attention to?
There are a few things to consider when cutting. The main ones can be called:
- Cutting must be carried out using special protection.
- Processing along the seams is easier, but often the markings do not match. When cutting on a round plane, you need to put a slight load on the grinder, since a small contact area leads to slipping of the nozzle.
- Many problems arise with removing rust and paint.
In general, we can say that the cutting process does not create significant problems.
Safety precautions
Even if you are sure that the cylinder is empty, there may be residual liquefied gas at the bottom. Therefore, in order not to take risks, you need to get rid of it. To do this, leave the structure open for 12 hours. In this case, it is necessary to make sure that there are no sources of ignition nearby.
After this time, it is necessary to rinse the inside of the cylinder with clean water, which will remove any remaining gas. In addition, it is allowed to use lime with water or chlorine to clean the structure. True, after such manipulations an unpleasant odor may remain, which quickly disappears.
Examples of using cut gas cylinders
The parts of the cylinder can be used to achieve a variety of purposes. The following cases are examples:
- Furnace body.
- Containers for storing liquids.
- Grill.
- Smokehouse.
Gas cylinder stove
The scope of application is wide, but it is worth considering that the metal is not characterized by high corrosion resistance. An exception is a propane gas cylinder, which is coated with paint using a special technology.
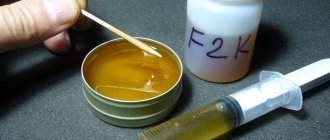
Refilling valve thread cartridges
Refilling valve threaded cartridges requires the following pre-prepared equipment:
- Two fittings: one, with a union nut, is connected to a household gas cylinder, and the second, threaded, is connected to a gas cartridge;
- A transparent hose with which you can monitor the process of gas transfusion. Also serves as an adapter and connects to two fittings;
- Valves that allow you to turn on and off the gas supply from the cylinder right at the valve;
- A filter built into the valve that prevents debris from entering and clogging the can;
- An additional valve that allows you to bleed gas without removing the adapter.
A good adapter model outperforms a cheap one due to a number of advantages:
- The adapter valve ensures the safety of the valve of a household cylinder, which deteriorates due to regular unscrewing and tightening and due to rust or other metal particles falling on the threads;
- Due to the fact that the valve is in the closest position to the canister valve, during the next filling cycle there is practically no leakage of excess gas, pouring it onto your hands and spraying it into the environment;
- The ball valve design allows you to quickly stop the gas supply and avoid unwanted overflow and forced release of excess gas;
- Thanks to the advantages described above, the refueling process is noticeably easier, safer and more economical.
The adapter is screwed onto the valve of a large household gas cylinder instead of the reducer. It is better to do refueling in the company of an assistant and in the open air away from crowded places. Since there will be a strong smell of gas, people passing by may become worried and call the gas service.
The process of refilling valve threaded cartridges consists of the following steps:
Step 1. First of all, you should drain the remaining condensate, release the residual pressure in all cylinders that you plan to refill before the adapter is connected to the large cylinder. This will make the refueling process a little faster.
The adapter is screwed onto the canister, which is turned upside down; with warm hands, the cartridge is slightly heated, which increases the volume of gas and speeds up the bleeding process. It is preferable to drain the condensate into a plastic bottle. It smells quite unpleasant and permeates the surrounding objects with the smell.
Step 2. Preparing the system consists of placing the gas cylinder in a stable position with the valve pointing downwards and opening free access to it. Under no circumstances should the cylinder rest against the valve. The ideal option is to hang the cylinder upside down. Next, tighten the adapter and open the valve of the large cylinder.
Step 3. The adapter is screwed tightly to the can. Open the valve on the adapter and begin to fill in gas. The cessation of the noise made by the gas pouring means the end of the filling.
Step 4. The next step is to release the gas in order to cool the canister. The procedure is performed by opening the bleed valve on the adapter. After a few seconds, the can will become cold enough and the pressure in it will drop to the desired level. Close the valve. If necessary, refilling is carried out.
Step 5. The most important step is to create a buffer cushion in the can in order to prevent possible expansion and explosion. Open the bleed valve and wait for the moment when the liquid no longer flows.
Never point the gas stream at yourself. When you shake the can, you should definitely feel some fluffing. Another effective method is to weigh the filled canister on a scale.
After going through all the stages, it is important to check the tightness of all filled containers
When bleeding, draining remaining condensate and creating a buffer cushion, always point the end of the hose away from you
For safety reasons, it is not recommended to store cans in the sun, in damp or cold places. Cold cylinders after filling are covered with a layer of condensate. To prevent rusting processes, it is worth wiping the containers with a dry towel.
Rules to follow when cutting
The rules for using an angle grinder in this case are not much different from those for other work. The main ones can be called:
- Work must be carried out in special clothing, which is made of non-flammable material. Do not work with exposed areas of skin, as contact with fragments may cause a burn.
- Before cutting, you should pay attention to the condition of the disk: the degree of wear, the presence or absence of defects, and much more.
- Cutting should only be done with safety glasses. When cutting, a fairly large number of fragments are formed, which can get into the eyes and cause injury.
- The grinder should only be used with a protective cover.
- When working metal, it is recommended to stand to the side of the cutting line.
- In some cases, cutting is divided into several stages. When cutting for a long time, the accessory used may cause it to become hot. Too high a temperature increases the wear rate.
In addition, cutting should be carried out only when the gas container is completely emptied. This is due to the fact that even a small amount of gas can lead to detonation.
When cutting, a large number of fragments are formed, which will immediately ignite the flammable mixture.
Transportation rules
- Transportation is carried out in specially equipped vehicles marked with warning signs.
- A special permit is issued for the transportation of cylinders with LPG and technical gases.
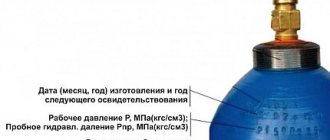
- Each gas cylinder is designated by its own color: household propane-butane mixture – red, oxygen – blue, acetylene – white, carbon dioxide/nitrogen – black with the designation of the chemical element/compound, argon – gray, helium – brown.
- It is strictly prohibited to transport containers with different gases together, as well as empty/consumed ones together with full ones.
- When transported in a car, they are laid horizontally no higher than the sides, in no more than three rows; in a container - standing, and it is permissible to transport tanks with oxygen and acetylene together.
- Propane-butane containers can be transported standing up without containers, with a spacer between them and a reliable fence.
When loading/unloading gas cylinders, it is prohibited:
- To work alone, there must be at least two loaders.
- Work in overalls and gloves contaminated with fuels and lubricants and vegetable oils.
- Load oxygen tanks into a car body that has spills/stains of fuel and lubricants, as well as debris and foreign objects.
- It is strictly unacceptable to carry containers with gases on your arms/shoulders, roll the cylinders, or move them, dropping them, or hitting them against each other.
- Hold and feed the container with the shut-off valve down.
- Load/unload tanks without protective caps.
Inside buildings, steel containers with any gases must be transported on a stretcher with reliable fastening or a special trolley with wheels with rubber tires; In this case, it is permissible to transport two cylinders together - with oxygen and acetylene for gas welding work.
Safety precautions
Even if you are sure that the cylinder is empty, there may be residual liquefied gas at the bottom. Therefore, in order not to take risks, you need to get rid of it. To do this, leave the structure open for 12 hours. In this case, it is necessary to make sure that there are no sources of ignition nearby.
Before flushing the structure, you must unscrew the valve
After this time, it is necessary to rinse the inside of the cylinder with clean water, which will remove any remaining gas. In addition, it is allowed to use lime with water or chlorine to clean the structure. True, after such manipulations an unpleasant odor may remain, which quickly disappears.
Guarantee
Gas cylinders have a warranty period of 1-2 years from the date of sale, depending on the body material. The service life of the tank is up to 30 years.
Conditions for the manufacturer to fulfill warranty obligations:
- having a passport;
- safety of factory markings and serial number on the device;
- strict adherence to the instructions for transportation, storage, installation, operation and maintenance of the device, as well as the user manual;
- availability of a warranty card filled out by the seller;
- For some manufacturers, a mandatory condition is registration of the warranty on the official website of the plant;
- no traces of attempted self-repair or re-sticking of the markings.
The manufacturer undertakes to fulfill warranty obligations.
These include:
- testing;
- free repair;
- replacement with equipment of similar technical characteristics of proper quality;
- financial compensation.
The warranty does not apply to the casing of a composite cylinder, as well as to containers with the following external defects that arose during transportation and operation by the consumer:
- mechanical damage to the cylinder from contact with a sharp object or resulting from a fall or impact - scratches, gouges, dents, deformation, cracks, abrasions that caused a decrease in the thickness of the cylinder wall;
- darkening of the valve color or appearance of inclusions on its body.
When a warranty claim occurs, a claim sheet is drawn up and sent to the manufacturer.
The complaint is accepted subject to the presence of the serial number of the product in the manufacturer's database or the presentation of copies of documents confirming the fact of sale of goods with an unexpired shelf life.
Required Tools
You can install LPG on your car yourself or contact a service center. In any case, in order to carry out the work efficiently, you will need to take care of the necessary tools and equipment in advance. So, you need:
- set of fourth generation gas equipment;
- gas hoses with clamps, the length of which is 0.6-0.8 m, and the diameter is 4-5 mm and 12 mm for 0.5-1 m (for a 4-cylinder engine);
- gas tubes 40-70 cm long and 6 mm in diameter;
- a cooling system hose with two metal tees corresponding to the size of the inlet/outlet on the gearbox;
- thermoplastic gas tube. A product made of copper and aluminum is also suitable;
- automotive tools;
- drill;
- pliers;
- screwdriver;
- metal drills with a diameter of 4.8 mm, crown 3 cm;
- thread tap – 6 mm;
- electrical tape, construction tape, heat shrink tube;
- soldering iron and everything necessary for soldering wires;
- multimeter;
- metal clamps or brackets with self-tapping screws - will be needed for fastening lines under the bottom of the vehicle;
- car enamel or anti-corrosion treatment;
- bolts, nuts;
- engine intake manifold gasket
Attention! The length of all tubes, hoses and the diameter of clamps is determined taking into account the car model. It is convenient to carry out work in an inspection hole or on an overpass
Instructions for installing Euro equipment will help you avoid mistakes. But it’s unlikely to be possible to do this without a tool.
It is convenient to carry out work in an inspection hole or on an overpass. Instructions for installing Euro equipment will help you avoid mistakes. But it’s unlikely to be possible to do this without a tool.
Which is better
The most preferred ones in everyday life are composite (polymer) containers. The advantages in reliability, compactness and other indicators make them obvious leaders compared to their metal counterparts.
The only disadvantage of a polymer tank is its smaller maximum volume.
If for a metal cylinder this figure is 50 liters, then for a composite cylinder it is 33.5 liters.
That is, it is advisable to purchase a metal tank only in cases where high gas consumption is expected, since the need for refilling will arise less often.
The volume, connection method and other parameters must be selected individually, in accordance with the needs of the buyer.
If you need a supply of fuel for portable, including travel, gas equipment, then you need to choose a product among compact disposable cartridges with the appropriate type of connection.
The choice also depends on the temperature at which the gas equipment will be used. The type of mixture is indicated on the container - winter, summer or all-season.
