How to make raw rubber at home
If you need to make reliable, durable and durable protection against moisture, take advantage of the benefits of liquid rubber. And for this, it doesn’t hurt to know how to melt rubber to a liquid state. After all, it is in this form that it is applied to the desired surface, completely covering it and filling all the depressions and cracks. It adheres well to any coating, and after hardening it turns into a hard and durable protective layer. Liquid rubber can be used in many areas, from construction to insulate buildings from contact with water, to repairing cars and bicycle wheels.
Making a vulcanization device
Each vulcanizer has two main elements - a heating part and a clamping device. The basis of such rubber processing equipment can be used:
- iron;
- “bazaar” electric stove;
- piston from the engine.
In a device with an iron, the heating part is the surface that is used for ironing in everyday life. If we plan to use an electric stove, then the heating coil should be covered with a metal sheet, and when working, you need to place paper between the rubber and the metal. Such a device must be equipped with a thermostat to avoid overheating of the material.
The pressing part of the vulcanizer is easiest to make from a clamp. The simplest device to manufacture would be a device consisting of an iron and a clamp. Since they are both metal, joining them using arc welding is not difficult. The iron also has a thermostat.
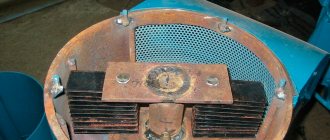
A piston vulcanizer also uses a metal plate. A rubber bladder is placed on it. The piston, with its smooth part, which is in contact with the explosive mixture in the engine, presses down the patch using a homemade clamp. Paper is also placed between the piston and the patch. After that, gasoline is poured into the piston and ignited.
Such a device made from a piston is especially useful on the road, when there is no way to connect to the electrical network. However, such a device does not have a thermostat, and the temperature will have to be controlled manually.
How to melt rubber to liquid state
The process itself is quite simple; the only additional materials you need are a solvent, for example, gasoline.
Pour it into the rubber and wait until it swells. Then add more gasoline to get the desired consistency. To speed up dissolution, you can heat the solution in a water bath. But keep in mind that this can only be done outdoors or in a well-ventilated area. As a result of the chemical reaction, a very unpleasant and hazardous odor is released. It should be understood that it will not be possible to melt any rubber, but only raw rubber. The resulting solution will resemble glue. But old tires are not suitable for this, since they are made of sewn gray rubber. This material does not dissolve in hydrocarbon solvents.
If you are unable to get raw rubber, you can also use soles from old shoes. The only requirement is that they must be made of thermoplastic elastomer (a copolymer of butadiene and styrene) without vulcanization.
Symptoms indicating the need to diagnose seals
During operation, cracks of various sizes may appear on the injector sealing ring. The ring loses its elasticity. The appearance and shape change, and deformations appear.
Appearance of old and new o-rings
A visual inspection may reveal fuel leaks. Depending on the size of the damage, it can be a drop, a speck, or a trickle. The problem with loss of tightness can lead to serious consequences. If fuel gets on a hot surface it can cause it to ignite and, as a result, a fire in the engine compartment of the car, so it is not recommended to delay replacing the rubber.
Gasoline seepage
Another symptom of damage to the seals is the engine running on a lean mixture. This situation arises due to air leaks through the resulting damage to the ring. This is often due to loss of elasticity as a result of prolonged exposure to temperature, especially after the engine overheats.
Old injector rubbers, some of which were torn in half
In diesel engines, escaping gases enter the oil. This causes coking of the oil. The oil receiver begins to clog. The first time after starting the engine, you can detect white smoke from the exhaust pipe, which has a pungent odor. In the most advanced cases, the lamp flashes periodically, indicating deviations from the norm in oil pressure.
DIY liquid rubber
You can make liquid rubber mass at home and this is a more affordable way than looking for raw rubber. You will only need to buy 1 pack of borax and 2 bottles of PVA glue. The preparation itself is as follows:
- Mix borax with 0.5 tbsp. water until the liquid becomes clear.
- Add glue and mix well again.
If necessary, you can paint the rubber in the desired color. To do this, first add dye to the glue and only then mix it with diluted borax.
You can use homemade liquid rubber immediately or put it in the refrigerator. There it can be stored in liquid form for some time without solidifying.
Replacing the cardboard spacer
Installing a cardboard gasket will not take much time, but when carrying out this operation, care and caution are required so as not to damage the fragile internal parts of the carburetor, as well as to eliminate the possibility of dust and dirt getting inside the float chamber. For Solex carburetors you can find, sold separately, cardboard gaskets
In this case, the cost of repairs will be almost invisible to the budget.
For Solex carburetors you can find cardboard gaskets sold separately. In this case, the cost of repairs will be almost invisible to the budget.
After the carburetor is removed, the five bolts that secure the cover are unscrewed. The cover is then removed and the float is removed, which is held in place by a pin.
The pin should be carefully knocked out of the hole using a thin nail and a hammer.
Then we assemble the carburetor and install it in the reverse order of removal.
Tightening the carburetor bolts that hold the top cover must be done evenly and crosswise to prevent misalignment and the possible leakage of air into the carburetor mixing chamber in this case.
Where is silicone used?
This material is used in almost all spheres of human life - in construction, everyday life, medicine and production. Silicone has earned popularity due to its unique and valuable qualities that are absent from analogues of this substance.
Silicone is capable of reducing and increasing the adhesion process , as well as imparting hydrophobic properties to the target object. This universal material is able to maintain its basic parameters at extremely high, low temperatures and in conditions of high humidity. In addition, silicones have dielectric characteristics, bioinertness, a high degree of elasticity, are durable and environmentally friendly.
On an industrial scale, silicone liquids and emulsions based on them are used as anti-adhesive lubricants for large heavy molds, the production of water-repellent liquids, greases, special oils, shock-absorbing, coolants, coolants, sealants and dielectric compounds. Particularly popular are defoamers made on the basis of silicone mixtures.
This material is used to produce silicone alkides and silicone polyesters for various coatings, which must be particularly durable and resistant. It follows that different types of gaskets, bushings, rings, cuffs, plugs and other parts can be used at temperatures from minus 60°C to plus 200°C.
Another property of silicone is resistance to substances such as ozone, radiation, sea water, ultraviolet radiation, boiling water, alcohol, acid solutions, alkalis, mineral oils, various fuels and electrical discharges.
Concept of vulcanization
Vulcanization is a chemical process during which raw rubber, improving the properties of the material in strength and elasticity, becomes rubber. In fact, rubber can be used as a special glue to seal a puncture in an inner tube or tire. Rubber vulcanization processes are as follows:
Hot vulcanization method
- electric;
- sulfuric;
- hot;
- cold.
How to make silicone at home
First way
To prepare silicone rubber (polydiethylsiloxane), you will need liquid glass and ethyl alcohol. Take a plastic container into which the components are poured in equal proportions and carefully mixed with any instrument. When the mixture thickens, you need to knead it into plasticine by kneading it with your hands.
Next, you can sculpt the necessary shapes from the silicone mass, which are left to harden for a while until the product becomes solid.
Second way
- 150 g white spirit;
- 1 drop of acrylic paint;
- 3 drops of liquid glycerin;
- 30 g silicone sealant.
To make silicone, you need to immerse the sealant in a container, add paint, glycerin and white spirit. The solution must be mixed until a homogeneous mass is obtained. You can work with this solution for no more than five hours, since after this time it hardens.
Third way
You need to take equal amounts of silicone sealant and potato starch. Stir the mixture for about 10 minutes until the silicone begins to easily come off your hands, then you can begin making the required shape.
Fourth method
Take gelatin and glycerin in equal proportions and mix thoroughly. Then the solution must be heated in a water bath for about 10 minutes, stirring constantly. It is important to prevent the gelatin from boiling, otherwise a strong unpleasant odor may appear.
Fifth method
It is used to make silicone for DIY molds.
To do this, you need to take a shape slightly larger than the object being copied. A little silicone is poured into the bottom of the mold and left until it hardens - this is the base of the object. The thickness of the base should be one centimeter or more so that the “house rubber” securely wraps the object on all sides. If the mold comes out thin, then it will quickly tear when removing the prototype or will not hold on at all.
The prototype is then dipped into a container of gelatin to get rid of any air bubbles, and then quickly transferred to the bottom of the mold to stick. Then the mold must be completely filled with silicone. Homemade resin from the fourth method, which hardens very quickly, works well. Immediately after cooling, the mold must be disassembled, an incision made and the prototype carefully removed.
At the last stage, you will need to mix and pour epoxy resin into the mold. It will be difficult to remove a frozen casting, so you will need to completely break the silicone.
Price
You can buy this product at any hardware store. Its price will depend on the type and manufacturer. It is worth noting that this is not a cheap material. The market includes Italian, Israeli, Canadian and domestic brands.
Using liquid rubber to insulate the surface from moisture, you can achieve excellent results. The coating will be durable, elastic, seamless and, most importantly, reliable. This material will last for many years, fulfilling its purpose to the fullest. No weather conditions are scary for him!
Experienced specialists recommend using this material. The main thing is to apply it to the surface correctly. Compliance with all the nuances of the work will give the desired result.
Getting rid of silicone on clothes
Silicone sealants are widely used in repairs and construction. But careless handling of this substance can lead to the formation of persistent stains on the fabric, and to get rid of them you will have to use special cleaners or improvised means.
- Acid-silicone sealant has a characteristic smell of vinegar, and its removal is carried out using a 70% acetic acid solution . When removing a stain from such silicone, you need to take precautions: wear glasses, strong rubber gloves and a respirator, since acetic acid negatively affects the eyes, skin of the hand and the respiratory tract. To clean the stain you need to apply it liberally, leave it for 30 minutes and remove the silicone with a rag.
- Alcohol-based silicone neutral sealant can be easily removed using alcohol-containing liquids . You can take medical, technical, denatured alcohol or vodka and apply it to the dirty area, and then remove the stain with a brush.
- Oxime, amine or amide silicone sealant can be removed using white spirit, benzine, acetone or solvent . The liquid is applied to the sponge, then to the stain and left for 30 minutes until the silicone dissolves. If necessary, the treatment can be repeated. Then wash the fabric as usual with washing powder.
There are also special compositions for cleaning the surface of fabrics from silicone. A remover under the trade name “Penta-840” or ANTISIL is ideal. It is necessary to carefully read the attached instructions before using any product.
In addition, the silicone stain can be cleaned mechanically using a plastic scraper. To do this, the fabric is stretched onto a flat surface and the stain is carefully scraped off. Residues can be removed using one of the methods listed above.
Important! You should only work with silicone sealants in thick cotton clothing, since it will not be possible to remove its residues from delicate items without the help of dry cleaning specialists!
Brief characteristics of the species
Raw rubber rolled mixtures are a product that has undergone a certain stage of processing. This material is usually sold in bags (30 kg) and has a shelf life of up to three months. The main characteristic feature is that the material is passed through rollers at the final stage of production.
Calendered raw rubber compounds are supplied in rolls. The thickness of the rolled layer can be 1; 1.5; 2 mm. The main purpose of this type of material is to repair tires. Rolls are available in different weights: 15; 20; 30 kg. In addition, there are three other types of raw rubber:
- unvulcanized for special purposes;
- general use;
- resistant to oil and gasoline.
It’s worth taking a closer look at each of them.
Where is silicone used?
This material is used in almost all spheres of human life - in construction, everyday life, medicine and production. Silicone has earned popularity due to its unique and valuable qualities that are absent from analogues of this substance.
Silicone is capable of reducing and increasing the adhesion process , as well as imparting hydrophobic properties to the target object. This universal material is able to maintain its basic parameters at extremely high, low temperatures and in conditions of high humidity. In addition, silicones have dielectric characteristics, bioinertness, a high degree of elasticity, are durable and environmentally friendly.
On an industrial scale, silicone liquids and emulsions based on them are used as anti-adhesive lubricants for large heavy molds, the production of water-repellent liquids, greases, special oils, shock-absorbing, coolants, coolants, sealants and dielectric compounds. Particularly popular are defoamers made on the basis of silicone mixtures.
This material is used to produce silicone alkides and silicone polyesters for various coatings, which must be particularly durable and resistant. It follows that different types of gaskets, bushings, rings, cuffs, plugs and other parts can be used at temperatures from minus 60°C to plus 200°C.
Another property of silicone is resistance to substances such as ozone, radiation, sea water, ultraviolet radiation, boiling water, alcohol, acid solutions, alkalis, mineral oils, various fuels and electrical discharges.
Replacing the O-ring on the injectors
Injector O-rings are one of the important components in a car's injection system. These rubber products are necessary to create a very reliable sealed connection between the injector itself and the fuel line. The presence of o-rings on the injectors helps to avoid possible fuel leakage, drops of which, if they enter the manifold, can lead to ignition. In addition, due to its unique technical characteristics, this rubber product perfectly prevents particles of dust, dirt, moisture or air from entering the injection system.
However, even high-quality seals, when constantly exposed to extremely high or very low temperatures, sooner or later begin to lose their elasticity. In addition, due to prolonged aggressive use, small cracks may appear on the surface, which can lead to loss of tightness. Such wear will lead to the entry of gases or air into the oil, after which coke masses will form, which will simply fill the oil receiver. And if drops of oil can leak through the seal and fall onto the hot manifold, then it is likely to catch fire.
To avoid such troubles, you need to timely replace the injector sealing ring. It will be possible to determine the malfunction of the sealing element based on some characteristic features. Firstly, fuel leaks immediately appear on the injectors. Secondly, when the engine operates at low speeds, it operates with the least power, which can be immediately felt. Thirdly, the exhaust gases from the car are released in larger quantities, and the smoke is white and has a rather pungent odor. In addition, when the engine starts, the smell of gasoline seeps into the interior of the car.
Replacing the O-ring on injectors is usually done in cases where you need to temporarily remove the injectors for cleaning and inspection or need to replace them with new ones. However, if the first signs of malfunction of these seals are detected, they must be replaced as soon as possible.
Please note that during work you will need to thoroughly clean the seat itself, since the installed copper washers may stick to it. Before performing the replacement, be sure to lay out all the necessary tools, lubricants, and new O-rings.
Please note that replacing the O-ring on the injectors must only occur when the pressure in the vehicle’s fuel system has been completely relieved. In addition, the initial stages of replacement on different brands of cars, and in some cases on different models of the same brands, may have certain differences
This is due to the unique design features of each brand. Therefore, we do not guarantee 100% accuracy of the method stated here. The instruction manual will help you learn how to change the O-rings in your particular case.
How to replace injector O-rings?
Initially, we will need to de-energize the fuel rail. To do this, you need to remove both battery terminals one by one - both negative and positive. Now, to gain full access to the injector with a damaged seal, we need to disconnect all the pipes and hoses connected to it from the fuel rail. Then, using a hexagon or another wrench suitable for the configuration of your bolts, the fasteners are unscrewed and the fuel frame is removed immediately along with all the injectors. Finally, all the nozzles in it are carefully removed from the frame one by one. Old injector sealing rings are removed manually by ordinary pulling. If worn-out products have lost their elasticity and do not give in, then you can try either prying them off with a flat screwdriver or cutting them with a knife. After removing the old rings, new ones are installed in their place.
At the same time, it is important not to forget to treat them for lubrication with any motor oil. The disassembled structure is assembled and installed in the reverse order. In this case, it is necessary to avoid distortions when installing the ramp. The last step is to check the functionality of the system. Please note that the installed nozzles must be able to rotate freely in all directions.
Source s-agroservis.ru
How to make silicone at home
First way
To prepare silicone rubber (polydiethylsiloxane), you will need liquid glass and ethyl alcohol. Take a plastic container into which the components are poured in equal proportions and carefully mixed with any instrument. When the mixture thickens, you need to knead it into plasticine by kneading it with your hands.
Next, you can sculpt the necessary shapes from the silicone mass, which are left to harden for a while until the product becomes solid.
Second way
- 150 g white spirit;
- 1 drop of acrylic paint;
- 3 drops of liquid glycerin;
- 30 g silicone sealant.
To make silicone, you need to immerse the sealant in a container, add paint, glycerin and white spirit. The solution must be mixed until a homogeneous mass is obtained. You can work with this solution for no more than five hours, since after this time it hardens.
Third way
You need to take equal amounts of silicone sealant and potato starch. Stir the mixture for about 10 minutes until the silicone begins to easily come off your hands, then you can begin making the required shape.
Fourth method
Take gelatin and glycerin in equal proportions and mix thoroughly. Then the solution must be heated in a water bath for about 10 minutes, stirring constantly. It is important to prevent the gelatin from boiling, otherwise a strong unpleasant odor may appear.
Fifth method
It is used to make silicone for DIY molds.
To do this, you need to take a shape slightly larger than the object being copied. A little silicone is poured into the bottom of the mold and left until it hardens - this is the base of the object. The thickness of the base should be one centimeter or more so that the “house rubber” securely wraps the object on all sides. If the mold comes out thin, then it will quickly tear when removing the prototype or will not hold on at all.
The prototype is then dipped into a container of gelatin to get rid of any air bubbles, and then quickly transferred to the bottom of the mold to stick. Then the mold must be completely filled with silicone. Homemade resin from the fourth method, which hardens very quickly, works well. Immediately after cooling, the mold must be disassembled, an incision made and the prototype carefully removed.
At the last stage, you will need to mix and pour epoxy resin into the mold. It will be difficult to remove a frozen casting, so you will need to completely break the silicone.
Getting rid of silicone on clothes
Silicone sealants are widely used in repairs and construction. But careless handling of this substance can lead to the formation of persistent stains on the fabric, and to get rid of them you will have to use special cleaners or improvised means.
- Acid-silicone sealant has a characteristic smell of vinegar, and its removal is carried out using a 70% acetic acid solution . When removing a stain from such silicone, you need to take precautions: wear glasses, strong rubber gloves and a respirator, since acetic acid negatively affects the eyes, skin of the hand and the respiratory tract. To clean the stain you need to apply it liberally, leave it for 30 minutes and remove the silicone with a rag.
- Alcohol-based silicone neutral sealant can be easily removed using alcohol-containing liquids . You can take medical, technical, denatured alcohol or vodka and apply it to the dirty area, and then remove the stain with a brush.
- Oxime, amine or amide silicone sealant can be removed using white spirit, benzine, acetone or solvent . The liquid is applied to the sponge, then to the stain and left for 30 minutes until the silicone dissolves. If necessary, the treatment can be repeated. Then wash the fabric as usual with washing powder.
There are also special compositions for cleaning the surface of fabrics from silicone. A remover under the trade name “Penta-840” or ANTISIL is ideal. It is necessary to carefully read the attached instructions before using any product.
In addition, the silicone stain can be cleaned mechanically using a plastic scraper. To do this, the fabric is stretched onto a flat surface and the stain is carefully scraped off. Residues can be removed using one of the methods listed above.
Important! You should only work with silicone sealants in thick cotton clothing, since it will not be possible to remove its residues from delicate items without the help of dry cleaning specialists!
Types of injector sealing rings
Inlet or upper o-rings are found on both gasoline and diesel injectors. They serve to eliminate air leaks and fuel leakage at the point where the injector is connected to the fuel line. Most often they are made of rubber, because:
- no large mechanical loads;
- the temperature effect is small due to the distance to the hot engine;
- rubber is characterized by high elasticity;
- slow loss of properties under the influence of an aggressive environment.
Rubber inlet seals
The lower seal operates under more severe conditions, so the following options are possible:
- metal ring;
- alloy seal;
- rubber, made of a special composition, capable of withstanding temperature and mechanical stress.
To increase reliability, it is possible to simultaneously use a metal and elastic seal. In this case, the lower ring is made of a resistant material, for example, copper, and serves as a flame arrester. The upper ring is in this case protected from adverse influences. It is made of rubber, which ensures the tightness of the system at the proper level.
Removing silicone from work surfaces
Silicone is a product that helps glue surfaces and seal seams. This substance prevents the penetration of air and moisture. Sealants with antibacterial composition are used in bathrooms, cars, construction, aquarium hobbyists, etc. The sealant is not easy to remove from the surface, but it is possible.
The sealant is made on the basis of solvents, which give this composition a pungent odor. In addition to the smell, solvents give silicone elasticity and help it adhere better to surfaces.
Therefore, chemicals that are sold in stores are often used to remove silicone.
But using traditional methods , you can remove silicone from any surface, for which you use white spirit, rags, blades and detergents.
To remove silicone from the work surface, you must first moisten it with white spirit using a rag. After about 60 seconds, the silicone will have a jelly-like consistency and can be easily cleaned with a blade. Then this area should be washed with detergent and wiped dry with a rag.
Silicone can also be removed mechanically, using a knife and pumice. But this option is suitable for surfaces that are not susceptible to scratches and chips.
Cement for vulcanization and its application
Another alternative option for repairing bicycle wheels while traveling is a can of cement vulcanizer. You can buy them, for example, at the car market - this material is very popular among car enthusiasts. The composition is sold in tin and aerosol cans under pressure from brands such as Abro, BL, Zefal, Top RAD and many others. In terms of their composition, they are not hazardous to health and are not toxic, because... they do not contain chloride and aromatic hydrocarbons, so they can be used freely both at home and outdoors without a protective mask. In order for tire cementation to occur, a temperature of 18 degrees Celsius is required. The composition is also used for hot vulcanization (150 degrees required). To repair, you need to remove the foreign object that caused the puncture from the rubber of the inner tube, fill the inner tube with a cement vulcanizer through the nipple, slightly inflate it with a pump and ride a bicycle for 2-3 kilometers to adjust the pressure in the wheels. This tire repair technology is simple and is also used everywhere. To consolidate the result, it is possible to use a patch of plaster followed by the hot vulcanization method - exactly the same as described in the instructions above. The technology is suitable for any tire cuts. In this case, the patch for repairing the tubes is applied before filling the tire with cement.
What's happening? Rubber is made up of polyisoprene chains that slide along one another when the material is stretched. In its pure form, the substance is too sticky and soft to be of any use, so it is treated with chemicals such as sulfur. These chemicals form cross-links between the chains, making the rubber stronger and less sticky. The process itself is called vulcanization.
Over time, ultraviolet rays and oxygen in the air attack the rubber, forming radicals that divide the polyisoprene chains into short pieces. As a result, the rubber regains its original shape, becomes soft and sticky; You've probably noticed that it leaves sticky marks on your hands. Later, the radicals form new, short cross-links between the chains. The rubber hardens and eventually becomes brittle and crumbles.
