A shovel is rightfully considered the most popular and frequently used garden tool. Caring for it is simple, but requires certain skills. Not every gardener knows how to sharpen a shovel correctly. Meanwhile, this matter is simple and not labor-intensive. You just need to familiarize yourself with the rules and features of the process. The issue of preparing and sharpening garden tools is especially relevant at the beginning of the spring season. But even during the operation of the shovel, it has to be adjusted (sharpened) several times.
Shovel sharpening options.
This can be done with:
- file;
- angle grinder (angle grinder);
- grinding machine.
Types of shovels and features of their choice
The effectiveness of straightening garden tools largely depends on the material from which it is made. There are 3 classes of shovels: gardening, construction, loading and unloading. All of them, according to the shape of the blade, are divided into 2 main types: bayonet and scoop.
Gardening:
- digging;
- excavation;
- universal.
Construction:
Types of shovels.
- copal pointed;
- digging rectangular;
- selection;
- selection faceted;
- mortar
Loading and unloading:
- sand scoops;
- scoop grains;
- coal;
- metallurgical;
- snow removal
A special type of shovel is sapper shovel. They are similar to a garden bayonet, but have a unique blade shape that allows this tool to be used as a bayonet and shovel. This equipment has standard blade and handle dimensions, which are strictly observed during the production of the product. Therefore, a mining shovel can be used as a tool for measuring distances.
Sharpening is required only for those tools that are equipped with a bayonet-shaped blade. Shovels are used primarily for moving bulk materials, so the sharpness of the edge of the metal blade is not so important for them. The success of sharpening a blade largely depends on what material it is made of.
Independent construction of a house from timber. More details>>
What are shovel blades made from?
The manufacturer of gardening and construction equipment does not always indicate what material it is made of. On shovels it is most often noted that they are made of rail steel (that is, from a rail that has served its purpose).
Table of steel alloys for shovel blades.
This material is not bad, but does not provide any guarantee of the quality of the canvas. In most cases, it is used to produce bayonet-type pointed digging shovels.
When choosing a tool, you need to pay attention to the thickness of the blade: it should be at least 2 mm. The optimal thickness of the cutting edge is 0.5 mm.
It is extremely important that there are no flaws on this part of the blade. It is recommended to choose shovels made from the following materials:
- carbon steel;
- stainless steel;
- alloy steel;
- alloys.
Varieties, choice
According to their purpose, shovels are divided into:
- Bayonet. Used for digging up soil (vegetable garden, trenches, holes). During use, the working surface may become dull. Requires timely sharpening.
- Sovkovye. They are used for moving materials subject to flow, as well as work related to loading and unloading. Sharpened in rare cases.
- Sapper. Such a tool has found a narrow application for performing special tasks in combat situations.
Preparatory stage
It is important to remember one rule: sharpening a shovel should only begin if the blade is securely connected to the handle. This will allow you to avoid injury to your hands during work and perform it efficiently, which is especially important when using power tools. If you decide to sharpen using a grinder, it is recommended to prepare a bench vice, disconnect the metal blade from the handle and securely fasten it between the jaws of the tool. While sharpening, you should not hold the shovel blade with your foot, pressing it against a block or stone: this method of fixation is dangerous.
Protective measures should not be neglected. When working with metalworking tools, glasses and gloves are required. It is recommended to check the integrity of the electrical cords of the grinder or sharpening machine. The blade of the shovel is thoroughly cleaned of dirt and wiped with a dry cloth, after which the edge is carefully inspected and the sharpening side is selected. It is best to carry out metal processing from the side on which it was done at the manufacturer.
Nice things with your own hands
How to sharpen a shovel correctly
In this article I will tell you how to properly sharpen a bayonet shovel. You may ask, why do you need a sharp shovel? When using a sharpened shovel, you do not need to put in much effort when digging up the garden, as it will glide well through the soil and cut off any roots that come in contact with it. The shovel sharpening process will take you only 10 minutes. At the end of the article, you can watch video instructions for cleaning and sharpening a bayonet shovel.
This is what the shovel will look like after sharpening.
Due to rust and blunt edges, the shovel does not penetrate the ground well.
Sandpaper is very effective at removing rust. If there is a thick layer of rust, it is best to use coarse-grain sandpaper (60, 80); remove a small layer of rust with fine-grain sandpaper (220, 320).
If you have a sander, the shovel cleaning process will be much faster. The downside is that in deep areas the rust will need to be cleaned off by hand with sandpaper.
If you want to remove rust faster, you can use a metal brush. This attachment will allow you to remove rust from all the recesses of the shovel.
We install the nozzle with twisted wire on the grinder and clean the surface of rust. This method is very fast, thanks to the high speed of the grinder.
That's it, the shovel is clean. With a little more effort, you can achieve a steel shine and a perfectly clean surface.
One way to sharpen a shovel is to use a file. You can use any non-coarse file. It is important that when sharpening, point the file only away from you, so as not to damage the edges of the shovel with blunt teeth.
Secure the shovel in a vice at an angle, with the blade facing up. The angle doesn't matter. Hold the file with both hands, moving forward until the edges are sharp.
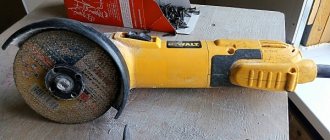
If you want to save time on sharpening, you can use a grinder with a metal disk.
With the help of a grinder, sharpening is done very quickly due to the high speed. Therefore, it is necessary to make quick and easy passes with the disk along the edge of the shovel. The disc must be kept parallel to the floor, just like the file.
The grinder usually leaves burrs, which I remove with a file.
In order to protect the shovel from rust, it is recommended to lubricate the surface with oil or drying oil. This shovel is ready for use. In the future, you can correct the sharpened bevel with a file quickly and easily.
Knocking the shovel blade
Scheme of a sharpening emery machine.
Before sharpening, it is advisable to beat off the metal blade (rivet it, pull it off). This process is similar to beating a braid, but in the case of a shovel it is not performed as delicately.
For this work, they used to have special tools on the farm: an anvil (“grandmother”) mounted on a massive block, and a hammer, one side of the head of which was made in the form of a cone.
Today, many craftsmen use improvised tools for beating or completely abandon this preparatory process.
However, it is he who largely determines the correctness and quality of sharpening the shovel. Experts assure that a “pulled” blade is much easier and more convenient to process.
In modern conditions, a regular hammer can be used for beating. The process is as follows: the metal blade is “pulled” with light blows of the hammer towards the cutting edge. If you plan to sharpen the side ribs of the shovel, they should also be beaten off.
How to properly sharpen a shovel with a file
The simplest and most commonly used method of sharpening a shovel is filing the cutting edge. Since this method is the most accessible, you should familiarize yourself with all its nuances. Among its advantages are the low cost and small size of the instrument, which allows it to be used in field conditions. In addition, when working with a file, it is much easier to control the thickness and uniformity of the metal layer being removed.
The shovel should be sharpened using the side of the file.
Stages of work:
- It is advisable to disconnect the shovel blade from the handle, but this is not absolutely necessary.
- Next, you need to fix the blade in a stationary position. A bench vise is suitable for this purpose. In field conditions, you can use heavy stones or hold the canvas with your foot, pressing it against a strong support.
- Primary metal processing is performed on the front side of the cutting edge using a file with a coarse cut. The direction of hand movements is from the edge of the blade towards the handle.
- Finish sharpening is done with a finely cut file. At this stage, the thickness of the treated surface is adjusted to 0.5-0.6 mm. It is important to maintain the optimal sharpening angle: 40-45°.
- The height of the cutting edge should not exceed 5 mm.
Traditional file sharpening and its features
Many people do not trust the traditional “grandfather’s” method of sharpening, which has existed for hundreds of years. However, a hand file has many “advantages” in the process of processing garden tools. Let's take a closer look at why it is more profitable to use it.
- Excellent edge quality. You will not be able to achieve exactly the same levelness when using a power tool, especially if it has a high rotation speed of the wheel. You will be able to regulate the thickness of metal removal and make uniform processing not only of the cutting front part, but also of the side planes.
- There is no overheating of the metal. Perhaps this is one of the most important advantages, since an ordinary grinder or electric emery heats the metal surface to a temperature of +200 degrees or higher, changing the physical and mechanical properties of the material. With the slightest resistance, it will wear off or become dull, making it impossible to cultivate hard soil.
- You can take it with you on the road. You can adjust the shovel directly at the workplace if large-scale work is planned far from a source of electricity or a vice.
And the most important thing is that a file can be found in any owner’s workshop, so you don’t have to spend a lot of money on purchasing an electric emery or any other device. Let's take a step-by-step look at how to properly sharpen a shovel.
Step 1
Secure the work surface.
The first step is to fix the blade so that it does not move under significant physical impact. It is best to use cleats, but without fanaticism - do not tighten too much, so as not to deform the stamping - they are quite fragile.
Step 2
We process it with a “rough” file.
Now you need to take a coarse file and run it along the inside of the edge. You cannot sharpen the back side of the shovel (the one on which the holder comes out); we only process the front side. It is preferable to sharpen towards the holder, that is, the file stroke begins in the direction from the edge to the holder.
Step 3
Jewelry fitting.
Now you need to work with an ordinary, small file, with which you can adjust the blade to a thickness of at least 0.5 mm, and at an angle of no more than 40 degrees, so that the metal does not quickly wear off. Sharpening of the shovel should be carried out until the entire blade is no more than 0.5 mm thick at the very edge, and before that it should be processed with a fine-grained file.
Step 4
Removing sharp areas.
Now we take a square file and run it several times along the very edge to remove thin sections that will become dull at the first contact with the ground. 5-10 wires will be enough, then run them several times at an angle of 40 degrees to remove possible chips.
We figured out how to sharpen a shovel with a file, now you can go and try out the acquired knowledge in practice. But there are other ways to process garden tools, which have their own advantages and disadvantages; let’s look at them in more detail.
A shovel is rightfully considered the most popular and frequently used garden tool. Caring for it is simple, but requires certain skills. Not every gardener knows how to sharpen a shovel correctly. Meanwhile, this matter is simple and not labor-intensive. You just need to familiarize yourself with the rules and features of the process. The issue of preparing and sharpening garden tools is especially relevant at the beginning of the spring season. But even during the operation of the shovel, it has to be adjusted (sharpened) several times.
Shovel sharpening options.
This can be done with:
- file;
- angle grinder (angle grinder);
- grinding machine.
How to sharpen a shovel with a grinder
When using power tools, you must comply with the safety requirements described above. The main difficulty of this sharpening method is the high probability of overheating of the metal, which leads to a change in its physical and chemical properties.
The blade becomes more flexible and the cutting edge quickly becomes dull. The advantage of this method is that preparing the shovel for further work is done quickly - within 1-2 minutes.
When sharpening a shovel with a grinder, you need to make sure that the material does not overheat.
When working with a grinder, it is difficult to achieve uniform removal of the thickness of the metal.
Moreover, burrs and chips will inevitably form on the edge, which will have to be removed with a file.
Using an angle grinder is the most traumatic way to sharpen a shovel, so you should be extremely careful while working.
Basic rules for the sharpening process:
- the blade is securely fixed in a vice;
- the grinder disk should rotate towards the handle;
- the pressure should be weak and uniform;
- Sharpening of the back side of the blade is performed only for scoop-type shovels.
We use power tools
How to sharpen a shovel quickly and without extra effort? To do this, you can use a grinder or a grinder.
You need to work with the grinder carefully. There are many reasons for this:
- The rotating disk of the tool can cause serious injury.
- When sharpening is too intense, the metal overheats, causing it to significantly lose strength.
- At high disk rotation speeds, it is very difficult to control the uniform sharpening of the shovel tip. With a high degree of probability, the cut will be uneven, with burrs and chips.
How to sharpen a shovel with a grinder? This must be done from bottom to top, being careful not to press too hard with the tool so as not to thin the edge. For safety reasons, be sure to protect your eyes with goggles and wear gloves.
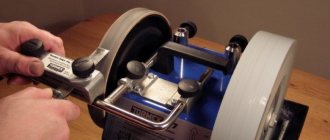
A special sanding machine is much more efficient. It allows you to regulate the speed of rotation of the disk and makes it possible to select the optimal mode. In addition, modern machines are usually equipped with clamps that allow you to firmly secure the tool being sharpened and prevent it from oscillating during the sharpening process. To ensure uniform surface treatment of the shovel, it is recommended to use heavy abrasive wheels.
But no matter how hard a person tries to sharpen a shovel correctly on a machine, it is still a rough tool that will probably leave minor imperfections, and they will have to be corrected with a fine-cut file. At the same time, you should understand that even the most careful sharpening will not save a low-quality shovel from rapid breakdown. Therefore, when choosing a tool for working in the country, you should not skimp.
A garden shredder is a faithful assistant in the household. How to mow the grass on the property?
Sharpening a shovel using a sharpening machine
This method is more acceptable than the previous one, as it allows you to obtain high quality cutting edge processing. Modern machines are equipped with a disk rotation regulator, which helps to fully control the metal sharpening process.
The most uniform cut is obtained when using massive abrasive wheels. You should start the work with a rougher one and end with a finer notch. The main difficulty of this sharpening method is fixing the blade of the shovel. The use of a bench vice in this case is unacceptable, but modern models of machines are equipped with a special stop that allows vibration to be dampened as much as possible.
When roughing, a layer of metal 0.3-0.4 mm thick is removed. The shovel blade is held at an angle of 40° relative to the rotating emery wheel. Make smooth movements with your hands in the direction of the edge (up and down). Finishing is carried out until the tip thickness reaches 0.5 mm. Upon completion of the sharpening process on the machine, the edge is refined with a finely cut file.
It started with a properly sharpened shovel...
V. FOKIN
The earth was compacted. In winter, they brought firewood from the garden: they carried it, sawed it, split it - so they compacted the beds even through the snow cover.
I remember my childhood. “Sons, don’t start anything for today - we’ll dig a garden.”
...After breakfast we reluctantly unpack the shovels. My father takes the largest one, “Stakhanovka”: one and a half times more than my mother’s... My brother and I get the lightest ones, with short cuttings...
The earth was compacted. In winter, they brought firewood from the garden: they carried it, sawed it, split it - so they compacted the beds even through the snow cover.
...By lunchtime there were calluses on my hands. More and more often we sit down to rest.
“And the shovels need to be sharpened...” the neighbor commented, turning one of the shovels in his hands. He comes from a village and knows a lot about gardening.
He took the first one he came across, put it on a piece of wood with the back side facing him and asked for a file... His work with a sharpened shovel went better than ours...
We, embarrassed, did not know what to say. They almost always mastered their 4-5 acres (albeit with calluses) without sharpening their shovels. It was madness for him to work with a blunt instrument: he has a larger area. We quickly sharpened the other shovels and pretty soon finished the job. This is how I learned the first rule: you need to work with a sharpened tool.
...Three years later I came across a small article from the magazine “Technology for Youth”... It was called: “Are you sharpening a shovel correctly?” - Well, I think, by the way...
What a competent and meticulous article... It turned out that our neighbor, and even more so we, were sharpening the shovel incorrectly. He placed it with the front surface on a block of wood (it’s more convenient - it doesn’t wobble), and used a file to chamfer the back surface. It is necessary to sharpen, as it was written in the note, only from the front side.
By that time, I had graduated from technical school with a degree in tool making - I looked at the note and the drawing in it from a scientific point of view... Indeed, if a shovel was stuck into the ground strictly vertically, it could be sharpened from any side. And since the gardener plunges the shovel into the ground with the handle slightly tilted towards him, sharpening the back surface becomes a brake when the blade moves in the soil. So you only need to sharpen the shovel from the front side. Then, the article said, digging will become easier.
In the spring I sharpened it properly. It was easy and quick to dig - my soul rejoiced... Here is the second commandment: you must work with a properly sharpened tool.
However, I will say: neither before nor after reading the note did I see anyone with a properly sharpened shovel. Everything is sharpened from the back. Probably because it’s more convenient: the shovel lies on a block of wood and doesn’t move. If you sharpen it correctly, you need to hold it additionally, since it rests on the block of wood with its convexity and swings from side to side. By the way, I still haven’t seen a properly made shovel in stores (taking into account the recommended sharpening). Neither ours nor foreign ones. So much for technical progress...
The shovel is a thousand years old and is still sharpened incorrectly.
When I was designing a flat cutter, I remembered the recommendations of an article I read in a magazine, the theory of cutting, the features of tool production, and much more that I studied at the technical school and then at the institute.


