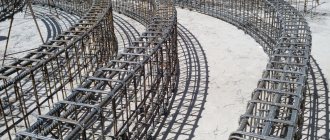
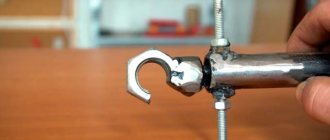
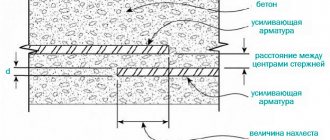
Corrugated or smooth reinforcement is often used in the manufacture of reinforcing frames for foundations and other reinforced concrete structures.
Moreover, for the manufacture of metal frames, both straight and bent reinforcement bars are used.
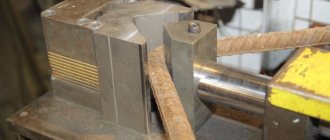
If there are no problems with straight rods - I measured and cut them, then with bent rods you have to tinker. Of course, you can bend the reinforcement with your bare hands, but that’s if you do it too much.
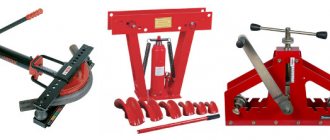
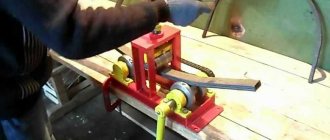
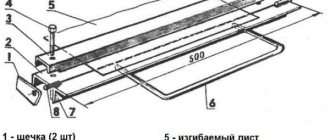
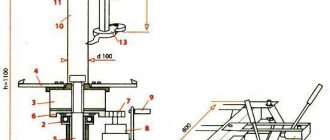
In general, for these purposes, various machines and devices are used at home (popularly they are also called armagibs or simply benders).
In today’s article, we’ll look at several ways to make a homemade bending machine for reinforcement with your own hands.
We would like to immediately draw your attention to the fact that you cannot do without welding and a grinder.
Therefore, if you decide to make a bending device with your own hands, this tool must be at hand. And, of course, you need to know how to use it.
The correct reinforcement bender for yew trees
If you do not need a simple manual machine for bending reinforcement, but a universal device for performing various tasks, then pay attention to this design.
The idea and production of a homemade device belongs to the author of the YouTube channel “IGOR ANDREYCHUK”.
The practicality and functionality of a homemade device can be explained very simply - by using different equipment, you can perform different operations with metal.
The machine can not only bend reinforcement at right angles, but also make decorative curls and twist round steel bars.
The capabilities of this device can be seen in the photo below.
Bar winding
Making a curl
Let's now look at the main stages of manufacturing and assembling a homemade bending device.
Step one - we make the housing bearing.
To do this we need a bearing of a suitable size and a piece of pipe. We select a pipe of such diameter that the bearing fits freely into it, but the gap should be small.
Cut a piece of the required width from the round pipe. Using a grinder with a cutting disc, we make a cut in the wall of the ring.
We insert the bearing inside the ring and tighten the edges with a clamp. Then we scald it.
Step two - we make a seat in the bearing for installing the equipment.
From a metal corner 30x30 mm we cut two identical pieces. We apply them to a 30x30 mm profile pipe and scald them. We grind the corners with a grinder.
We insert the corrugated pipe with the corners inside the bearing, and weld the corners to the inner race. Then we remove the profile pipe and scald the upper part.
Step three - we make a handle with seats for the stop.
To make the handle of a bending machine, you can use a rectangular profile pipe. Cut a piece of the required length. The seats for the emphasis can be made from a round pipe.
We select a pipe of a suitable diameter, and then cut off six small pieces (barrels or bushings) from it. Then we weld them together.
The professional pipe handle must be attached by welding to the outer race of the bearing.
A previously made block of six bushings is welded to the side of the handle. Then the standard procedure is performed - cleaning the welds and the metal itself, and painting.
Step four - making a stop for the workpieces.
It's very easy to make. You will need a bolt, bearings and a nut. We insert the bolt into one of the seats on the handle, put bearings on it, and secure it with a nut.
Step five - preparing
a homemade bending device for work.
We install the equipment required for the job into the bearing (they are manufactured separately for specific needs). We clamp the lower part of the equipment in a bench vice.
Then, at the required distance from the equipment, we install a stop for the workpieces.
To bend the reinforcement you will need a lever handle. It can be made from rods of corrugated fittings, to the ends of which sections of corrugated pipe must be welded. We hammer the handle into the profile, welded to the outer race of the bearing.
You can also clamp the device itself in a yew. In this case, the lever handle will be inserted into a special attachment, which is installed on top of the equipment.
How to make a reinforcement bender with your own hands is shown in all details in the video below.
Reinforcement bender
Overall, the design turned out to be practical and functional. And the costs of time and materials for its production are quite adequate.
Technical problems
FAQ.
Reverse does not change
For example, the reverse of a machine does not change . In order to solve this problem, you need to inspect the three-phase motor, and specifically test it in idle mode. If the same changes are observed at idle, then most likely the engine needs to be replaced or repaired.
Vibration
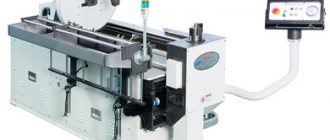
Machine SGA-1, used for bending reinforcement.
Photo by PromStroyMash Another common problem is machine vibration , even due to the absence of a workpiece. This may indicate that the motor is not running properly, or the main center axis is unbalanced, or the unit is not securely secured to the floor, or the pad between the unit and the floor is uneven or at an angle.
Other questions
It is also possible for the bent rollers to go beyond the working plane . In other words, the mechanism tends to bend the part outside the workbench. This problem is typical for machines that have a broken converter bus, that is, the breakdown occurred at the software level. The control panel does not convert commands properly, transmitting incorrect instructions and incorrect rotation and pressure coordinates to the mechanism.
Another type of such a breakdown is normal readings on the control panel and incorrect operation of the mechanism in reality. That is, on the control panel the operator will observe that the process is proceeding according to the standard algorithm, and the workpiece will not bend or will bend incorrectly. In this case, you need to inspect the operating system of the machine. You may need to change the software or install it again.
Machine SGA-1 for bending reinforcement. Photo Machine World
Another common problem that can be either hardware or mechanical related is workpiece flyout. In other words, when installing the workpiece, it does not bend properly, but flies off the rollers. The reasons may be the following: the first and most common is a violation of the integrity of the fastener walls; the second is the failure of the clamping rollers, the third reason is violations in the software shell, which provoke too fast or incorrect operation of the mechanism. Before starting work, it is recommended to remove the clamping bending rollers and the central shaft and reinsert them in order to inspect the grooves and the integrity of the entire system, and diagnose the device for damage.
IMPORTANT! Machine tools are classified as potentially hazardous mechanisms. Therefore, it is recommended to contact specialists rather than repair them on your own, even if the contractor has experience. After all, a breakdown of a mechanism can result in more than just a failure in the entire electronic network. loss of time, reduction in production volumes, but also injury to the machine operator.
Do-it-yourself bending machine (rebar bender)
If your work requires a homemade desktop machine for bending reinforcement, we suggest adopting the idea of the author of the YouTube channel Fawa Bros.
This device can be used to bend corrugated and smooth reinforcement, as well as square bars.
Step one is making the base of the structure.
We will use a channel as a base. We cut the workpiece 35 cm long.
We install housing bearings on top of the channel, and use a marker to mark the locations for drilling holes.
After this, we drill holes and secure the bearings with bolts and nuts.
Step two is making a homemade bending mechanism.
On a lathe you need to turn a shaft with metal blanks at the ends. If you don't have a lathe, you can do it differently.
We cut two blanks of the same length from the steel round timber.
We drill blind holes at the ends of the workpieces. We insert pieces of a round rod of suitable diameter into the holes and scald them. Then in the blanks themselves you need to cut grooves for the reinforcement and square rod.
We insert two parts of the shaft into the holes in the housing bearings installed on the frame, and then weld them together.
We weld a long handle-lever made of a round rod to the central part of the shaft. A travel stop needs to be welded to it.
Step three - make an axle with support rollers
.
On the opposite side of the housing bearings, we weld an axle made of a round rod to the frame. We put on it two support rollers made of thick-walled round pipe.
To prevent the rollers from jumping off the axis during the bending of the reinforcing bar, washers must be welded along the edges of the rod.
The author solved this problem differently. First, he welded pieces of a metal strip with holes to the base (for fastening to the work table), then, along the edges of the axis, he welded pieces of a square rod that rest against the mounts.
Step four - installing a homemade handle stop.
You need to drill a hole in the base and weld a nut on the bottom. Then we screw a bolt into the nut, which will act as a stop to adjust the bend angle. We clean and paint the homemade product.
The completed structure can be mounted both on the table and on the floor in the workshop if you first drill holes in it and install mounting pins.
Instructions on how to assemble a compact machine for bending reinforcement with your own hands can be seen in the video below.
DIY tool | Make A Powerful Metal Bender for Construction Steels
The design turned out to be quite convenient for everyday use, and most importantly, reliable. The only difficulty may arise in the manufacture of the shaft.
General view of the machine for bending reinforcement SGA-1
SGA-1 machine consists of: a welded frame, a drive, a worm gearbox, a plate mounted on the frame, with a bending disk attached to it.
The central and bending fingers are installed on the bending disk. The thrust pin with the roller is installed in the hole of the strip welded to the plate (top sheet) of the frame.
Rotation from the electric motor (drive) to the input shaft of the worm gearbox is transmitted through a V-belt drive and gears. Changing the rotation speed of the bending disk is done by rearranging the gears. To meet environmental requirements, it is planned to remove scale from the frame sheet through a funnel connected to the workshop exhaust ventilation.
SGA-1 machine operates as follows: The rod is placed on a bending disk between the central pin with a roller, the bending pin and the thrust pin with a roller. When the disk rotates, the bending pin jams the rod and bends it around the roller at an angle specified by installing the cam. When the disk returns, the bending finger releases the bent rod and stops after pressing the second limit switch with the second cam. Products made from reinforcement bars with a bending radius of 55 mm are bent around the roller, and with a radius of 20 mm - directly around the central pin. Products made from rods with a diameter of up to 14 mm with an internal radius of 12 mm are bent when the fork and bracket are installed.
Reinforcement bender for home workshop
We bring to your attention another version of a homemade desktop device for bending reinforcement.
This idea was shared by the author of the YouTube channel Kwando Technic.
A square profile pipe measuring 50x50 mm is used as the machine bed. Cut a piece of it 80 cm long.
We also prepare two bearings and a piece of round pipe of a suitable diameter in order to then make a housing bearing.
At the end of the profile pipe we make a seat for installing a housing bearing.
Next, we manufacture the housing bearing itself. You will need to weld a lever from a square corrugated pipe to it.
In order to secure the frame to the desktop, it is necessary to weld metal plates with drilled mounting holes to its lower part.
On one side of the frame, the author welds metal plates to the mounting “feet”, between which a guide made of a round pipe will be attached.
At the next stage, we weld a piece of a corner to the frame, to which the workpiece stop is attached (we also make it from a corner, but we just need to cut the grooves for the bolts).
We install the guide in its place, having first put a pair of movable sliders on it. We weld the end stops to them.
Next, we proceed to assembling the reinforcement bending machine. We attach a housing bearing with a handle to the frame, and weld a pin to the handle onto which the thrust bearings are placed.
You can familiarize yourself with step-by-step instructions on how to make a desktop machine for bending reinforcement with your own hands, and also see the principle of operation of the device in the author’s video.
Homemade Metal Bending Tool | Making A Powerful Metal Bender
Compared to previous options, the design seems a little confused. But overall, it is quite functional.
General view of the machine for bending reinforcement SGA-1EB (with Electronic Unit)
The SGA-1EB machine differs from the basic SGA-1 machine by the presence of an electronic unit that allows you to automate the bending process in conditions of mass production of parts from reinforcement.
The SGA-1EB machine has two operating modes - manual and automatic. The manual mode is convenient for single or small numbers of bends and is used when setting up the machine and checking sensors. You can work in manual mode if the sensors fail, which eliminates machine downtime. The automatic mode is used for repeated implementation of one or several successive bends.
Manual operation:
- When you press the pedal, forward rotation starts; when you release the pedal, the rotary disk stops (with virtually no overrun)
- When pressed again, reverse rotation is activated; when the pedal is released, the rotary disk stops
The automatic operating mode has two submodes:
- Single bend mode
- N-bend mode on one of eight programs
A shockproof display is installed on the side panel, which indicates the “Set Value” of the bending angle. To change the “Set Value” of the bend angle, use the +/- buttons. When you press the button briefly, the “Set Value” changes by 1 degree, and when you press it for a long time, it changes by 10 degrees.
Bending machine from scrap metal scraps
You can make a simple reinforcement bender with your own hands even from unnecessary scraps of metal that are lying around in scrap metal.
A version of this bender design was shared by the author of the YouTube channel Fawa Bros. We will take this as a basis.
The first step will be to manufacture the moving part of the structure.
We cut out a blank of the required shape from sheet metal. Then you need to drill a hole and attach by welding a section of a pin onto which a thrust roller made of a round pipe is placed. Screw the nut onto the stud.
We weld the bearing to the bottom of the workpiece.
A metal plate of rectangular or square shape is suitable for the base - whichever you prefer.
We drill mounting holes in it in the corners, and another one closer to the central part.
We install a previously made part with a bearing on the plate, and fix it with a steel round timber, in the upper part of which there is a groove so that workpieces can be inserted.
The lower part of the round steel will need to be welded to the base of the reinforcement bender.
Next, we weld a piece of profile pipe to the moving part, onto which the lever handle will be placed.
We weld a piece of a square rod to the metal plate, on top of which we need to weld an elongated coupling. We screw a bolt into it, which in this case serves as a travel limiter for the moving part.
At the last stage, all that remains is to make the handle and install it.
The handle additionally has a movable stop, with which you can adjust the bending length of the workpiece.
How to make a compact device for bending reinforcement with your own hands is shown in all details in the author's video.
DIY Tool | Make A The Simplest Metal Bender | Homemade Metal Bending Tool
As in previous cases, the homemade product turned out to be simple and easy to use. The square plate is attached to the table using bolts, and you can immediately start working.
Powerful do-it-yourself reinforcement bender
This homemade product allows you to work with both corrugated and smooth fittings, as well as with corrugated pipes. Therefore, you can call it a pipe bender or a universal bender for the home workshop.
The author of the YouTube channel Kwando Technic shared how to make this device.
Necessary materials:
- channel;
- round pipe;
- Metal sheet;
- corner;
- steel round timber.
First we make the frame. For this we will use a channel. We decide on the length of the bed and cut the workpiece to the required length (80-90 cm will be enough).
We make homemade housing bearings and weld them to the frame. We install the steel shaft.
Additionally, the craftsman cuts off a piece of square rod and welds it in front of the housing bearings. It turned out to be a kind of small emphasis - just in case.
We cut out two narrow strips from sheet metal. We bend them like clamps and weld them to the frame and housing bearings.
At the next stage, we need to weld a shelf from a corner on the side of the bed, and attach a support roller next to it. We weld a fork to the end of the shaft for bending the workpieces.
Two handles must be welded on the opposite side of the shaft.
At the end, all that remains is to make a limiting stop to limit the stroke of the handle. To do this, cut off a piece of the corner, then weld it to the frame. First, drill a hole in the corner and weld the nut. We screw the bolt into the nut.
To attach the homemade product to a table or floor in the workshop, “feet” with holes need to be welded to the bottom of the frame. The final touch is sanding and painting.
You can watch how to make a device that bends reinforcement and corrugated pipe in the video on our website.
DIY tool | Homemade Powerful Metal Bender for Construction Steels
