When developing a homemade bandsaw, it is important to understand how it is designed and for what purposes it will be used. If you run a private business, you can create a band saw with your own hands, capable of working not only with wood, but also with other materials, including:
- Stone.
- Metal.
- Synthetics.
Due to their high density, such materials must be processed with special machines made of reinforced steel. Standard metal is not capable of cutting stone or metal workpieces properly. It also cannot handle hard wood.
Setting up band saw equipment
The proper and high-quality operation of a carpentry installation depends directly on the equipment settings.
There is a scheme for setting up the installation. First, install the wheels parallel to each other. Next, install fluoroplastic washers necessary to prevent vertical displacement. For the first time, the launch is performed without guides. At this stage, the smooth start-up and clean operation of the engine are checked, and then a test cut is carried out using a blade, but with minimal loads. To work with increased loads, a block with guide belts is used. This design consists of two halves, which are installed along the line of the cutting blade.
Previously, craftsmen made not only machines, but also cutting blades with their own hands. It is difficult to independently close the belt unit into a ring and requires at least some initial experience in assembling the machine. Sharpening using a template is also carried out manually. You can do all this yourself, saving your money, but the modern market is simply filled with all sorts of devices and parts that improve the quality of material processing or make the equipment multifunctional. The main thing in this matter is to remember about safety precautions, because production models or homemade ones pose a great danger to human health.
Originally posted 2018-07-04 07:38:21.
Preparatory activities
Before starting assembly activities, based on the drawing, you should prepare the necessary materials and tools. This will allow you, first of all, to determine whether you have everything you need for the job (you will need to buy what’s missing), and also not to be distracted by little things during the process.
Required materials and tools
To make a band saw, you will need the following materials and parts:
- boards or sheets of plywood (or chipboard) from which the frame, table, and pulleys will be made;
- sheet steel (for saw);
- channel used to create a support frame, or metal corners, or wooden blocks and slats;
- bearings;
- steel rod - for making pulley axles;
- electric motor;
- self-tapping screws, bolts with nuts and washers;
- polyurethane glue;
- rubber from a bicycle inner tube;
- textolite;
- bushings;
- V-belt;
- varnish or paint.
To work you will need the following tools:
- screwdriver (with drills);
- hammer;
- wrenches (the size of bolts);
- screwdrivers;
- pliers;
- Sander;
- Bulgarian;
- grinder;
- jigsaw
Power tools can be easily replaced with their hand-held counterparts. But in this case, assembly will require more time and labor. When using metal corners or channels instead of wooden blocks, you will also need a welding machine and electrodes. The use of bolted connections creates additional problems with the tight fit of parts.
Recommendations for choosing tape fabric
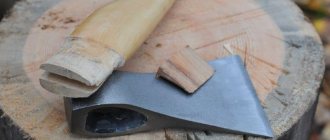
Making a cutting blade with your own hands is quite difficult. For these purposes, tool steel grades U8 or U10 are needed. The saw must be flexible. Its thickness for relatively soft wood is from 0.2 to 0.4 mm, and for hard wood - from 0.4 to 0.8 mm. The blade length of the assembled version of the machine will be about 1.7 m. You will need to cut the teeth yourself, set them correctly and sharpen them. To solder the tape into a continuous ring (end-to-end), you will need to use a gas torch and solder. The connecting seam must be sanded afterwards.
It is much easier and more convenient to purchase a ready-made cutting blade of good quality in a store, so as not to waste time on its manufacture. The width of the products ranges from 18 to 88 mm. In this case, you need to focus on the material that is to be sawed. Manufacturers offer the following types of saws according to this criterion:
- bimetallic, intended for performing work on metal (stainless steel and relatively strong alloys);
- diamond, with which you can saw marble, quartz, granite and other hard materials;
- carbide, allowing the processing of high-strength alloys;
- made from strips of tool steel used for sawing wood.
The last variety is quite often equipped with machines assembled in domestic conditions. This is due to its affordability and practicality. But if you have to work with hard materials, then it is better to purchase a more durable, wear-resistant and expensive saw to reduce the likelihood of the tape breaking to a minimum.
If you plan to make a figured cut using a band saw, then you need to select the width of the blade taking into account the radius of curvature. Some relationships between these quantities are shown in the following photograph.
Advice! For even longitudinal sawing of lumber, wide cutting blades should be used. They allow you to make a more even cut.
When choosing a saw for wood, you also need to take into account the pitch of its teeth (the distance between their centers). The hardness of the wood that can be sawed depends on this. The following are the most common tooth profiles, their markings and areas of application.
You also need to pay attention to the quality of sharpening of the teeth. The cutting edge must be sharp and smooth
You should also ask your sales consultant about the possibility of re-sharpening it and how many times this can be done. For your own safety, it is recommended to give preference to higher quality canvases.
From the history
The band saw has been known for quite a long time, since the beginning of the 19th century (the first patent was in 1808). The very principle of continuous movement of the saw blade (as opposed to the reciprocating motion of a hacksaw) has long been of interest to engineers. It is more technologically advanced for many reasons:
- The hole saw cools naturally - a small part of it is in contact;
- Moving the teeth in one direction causes less damage to the cutting area;
- The tape is easier to sharpen;
- The drive and tension mechanism is simplified as much as possible, as is the lubrication mechanism.
But on the way to implementation, some difficulties arose related to connecting the saw blade into a ring. The tape must be strong, resilient and, at the same time, flexible and sufficiently elastic. Weld such metals that there are no seams left that interfere with its movement in the body of the material and cause overheating (resulting in rupture at the joint).
This is what the first band saws looked like
On wood band machines these difficulties could be minimized, but on metalworking machines everything was different. Only towards the end of the century in France was it possible to establish the production of acceptable saw blades, which were resistance welded and then the seams were carefully ground.
Currently, several types of circular saw blades are produced:
- toothed;
- friction saws;
- electric spark.
A homemade metal band saw, as a rule, is guided by a toothed blade of a bimetallic structure. This is a tape made of durable steel (spring or similar in properties) with teeth made of especially strong tool steel with hardness M42-M71. The sharpening of the teeth is different for different materials.
Largest band saw blade
For example, for cutting pipes and channels you will need a belt with reinforced tooth backs, for stainless steel - with a sharp sharpening of 150 and an increased distance between them. When sawing, stainless steel produces viscous chips that interfere with the movement of the saw, getting stuck between the working edges. If you have to cut large-sized metal, then you need a blade with periodic routing - narrow and wide alternate, to eliminate the threat of the tape getting stuck in the cut.
In order for your DIY band saw to work properly, design it for a factory-made band. It’s quite difficult to do it yourself, even if you manage to find a suitable metal and your workshop has all the necessary welding and sharpening equipment.
Tools and materials
To create the type of saw in question, you will need the following tools and materials:
- a piece of plywood approximately 1.5 centimeters thick;
- timber made of solid wood;
- tapes or attachments that will be used for a screwdriver or grinder;
- a pair of bearings for a drive axle;
- studs, washers, self-tapping screws, nuts, fittings;
- a pair of shafts;
- bolts that will be used to adjust the vertical and horizontal types;
- a pair of brass bushings with internal threads;
- PVA glue;
- upper type axle bearings;
- lamb for tuning screws;
- insulating tape.
Separately, it should be noted that in order to correctly create certain parts of the saw, you must have drawings. To work you will also need the following components:
- pulleys;
- sawing table;
- base;
- cutting blade;
- mechanism responsible for tensioning the tape.
Rip fence
The band saw was already usable, but there was a lack of rip fence. The mechanism for fixing the stop was built on the basis of an eccentric. Due to the rounded front edge of the table, it was necessary to additionally cut out a movable pusher with a semicircular front edge. The support rail was made from larch. On the opposite side of the tire I attached a grip that rests on the edge of the table. It took me almost two months to make the saw. True, I didn’t work on it every day. The project turned out to be very exciting. I am satisfied with the performance of the machine. Now I can’t even imagine how I ever managed without a band saw. I made several boxes as a test for the saw.
Pros and cons of the device
List of important advantages
- The cost-effectiveness of use is primarily due to the relatively small thickness of the cut.
- A high level of productivity is achieved thanks to a fairly high cutting speed.
- The low price of products provides an opportunity to significantly expand the circle of main consumers.
- A long period of operation of the device is ensured due to its special design.
- When used, no excessive noise is created, which means that work takes place in comfortable conditions.
This is what a band saw for wood looks like.
Some disadvantages
- When setting up, inexperienced users may have problems, as this process is quite complicated.
- Due to the presence of a closed system, a protective mechanism must be installed on the opposite side.
- Due to its design features, the product is more suitable for longitudinal cutting.
The work involves hand-made products.
DIY band saw
You can find a lot of materials, photos and videos on the Internet about how to make a band saw with your own hands. For example, the Canadian website of Matthias Wandel offers drawings of a machine made almost entirely of wood. But let's focus on something less exotic, which can be done both in a home workshop and in a small wood or metal processing workshop.
Band machine made of wood
Manufacturing of the bed
The initial stage is the manufacture of the frame. For a wood saw, it can be wooden or metal, for metal - only steel. It can be welded from a channel or a corner. For a small workshop or workshop this is not a problem. The dimensions of the bed are selected depending on the expected dimensions of the material being processed. A normally sawing homemade machine can cope with wood up to 350 mm thick and metal several centimeters thick.
The supporting rod is a channel No. 8, which is welded to the frame or bolted. It must be strictly vertical and secured at at least two points along its length to eliminate the risk of deflection. When biting the saw, for example (which sometimes happens) or sawing large material, the loads arise quite large.
At the work site we make a cut for the saw
On the bed there is a horizontal work table with cuts for moving the tape, a ruler, a stop, clamps and other devices for feeding and holding workpieces. The height of the table from the lower stops is 0.7-0.9 meters. The height of the bar above the table is 0.6-0.8 m.
An asynchronous electric motor with start capacitors is installed in the lower part of the frame, connected by a belt drive to a drive pulley of variable diameter. If it is necessary to change the cutting speed, the V-belt is simply transferred to a different diameter. Belt tension is provided by a spring tensioning mechanism.
Band saw drawing
Drive installation
To drive the belt, wooden or metal pulleys of the same diameter (240-260 mm) are used, which are mounted on shafts mounted on bearings. The lower pulley is connected by a shaft to the motor drive. The saw pulley shafts are mounted on a rod. The lower one is stationary, the upper one is in the slot of the fixed tension mechanism. This allows the use of ribbons of different lengths.
The machine is protected from belt beating by a special damper mechanism, which is located under the work table. Drawings of this device can be found on the Internet. Sometimes you can see band saws with two dampers - below and above the working area. This is justified if the machine is designed to work with large workpieces or exceptionally high cutting accuracy is required.
Saw casting shaft
Lubrication system and protection
Lubrication system (adjustable), installed above the work table. The oil flows by gravity to the saw blade in the required quantity, which is determined experimentally for each home-made machine.
All working units where anything rotates or moves must be protected with casings. It is best to make them from waterproof plywood with a thickness of 10 mm. It's inexpensive, and sanded plywood painted with enamel looks very good.
The starting system is a standard button with an emergency shutdown option. It is advisable to make the lower part of the machine in the form of a bedside table with a wide door, or even two. One is used to select falling sawdust, the second is to access the pulleys and adjust the speed of the belt.
We cover the rotating elements with casings
Making a tape machine with your own hands is not difficult for an experienced mechanic. Some of the necessary parts and assemblies can be taken from decommissioned or dismantled machines of your own enterprise or bought on the market or on the Internet, some can be made yourself. In any case, a self-made machine will cost twice as much as a factory machine, with the same level of performance and adjustment accuracy.
Recommendations for sharpening
The correct choice of grinding wheel type is important. It must match the grade of steel from which the band saw is made. Corundum wheels are used for structures made of tool steel. If you want to improve the cutting properties of bimetallic models, you should use CBN or diamond wheels.
Depending on technical capabilities, it is possible to perform full-profile processing or each cutting part separately. In the first case, you will need a CBN circle, the end of which has the same shape as that of the saw. For the second option, each tooth is processed.
You will first need a machine. It must have the functions of regulating the speed of rotation of the disk and changing its location relative to the tool. After securing the blade in a special frame, you should perform the following steps according to the following instructions.
- The emery is directed downwards. At this time, the front face with the cutting edge is processed.
- Forming a cut in the depression. This is done without leaving the canvas. This stage allows you to remove microcracks and irregularities. An important point is the reduction in surface tension, which is the main cause of fabric deformation.
- The circle moves up. The back of the tooth and its cutting edge are ground.
All other teeth are updated using the same method. It is important that the values of the entry and exit angles are the same everywhere. Otherwise, if the geometry differs in one of the parts, performance will deteriorate.
After completion of processing, it is recommended to perform fine-tuning - treat the surface with fine-grained sandpaper. During this process, the geometry of the web should not change.
With prolonged contact of the circle with the metal, the temperature on the surface of the latter can rise sharply. To eliminate this effect, special coolants are used, coming directly from the machine. The feed is carried out continuously to avoid the formation of a glow zone. In this part, the mechanical strength will be deteriorated.
To avoid the appearance of nicks, before processing wood, you need to check for the presence of metal components in it. Also, special attention is paid to fixing and uniform feeding of the workpiece for sawing.
In the video you can find recommendations for amateur sharpening:
Making saw wheels
The saw wheels have a diameter of 400 mm. They just need to be made from plywood or MDF. My wheels came out 29 mm thick. I glued them together from three plywood circles. The most critical area here is the central part of the wheels. The blanks were cut out using a milling machine. In the center of the circle, I drilled a 0 6 mm hole and installed the center of the milling compass into it. Then I used this hole to combine the blanks and gluing them. I cut out the circles with an allowance of 10 mm for finishing. Shafts 0 25 mm (for purchased bearings) were made for me by a turner. They have a limiter on one side and an M12 internal thread on the other. I used plywood to make the flanges. Before drilling holes for the bearing in them, I drilled a 0 6 mm hole in the center and, aligning it with the center of the wheel, drilled four holes for dowels. The position of the flange on the wheel was marked. The flange consists of two parts. The outer part, 15 mm thick, holds the bearing, and the inner part, 10 mm thick, forms the gap between the wheel and the bearing. The diameter of the hole in the wheel should be slightly larger than the diameter of the shaft. The most critical operation is drilling a hole with a diameter of 52 mm for the bearing in the outer part of the flange. Especially for this, I bought a 0 52 mm hole saw and, after checking, ground it along the outer diameter by 0.3 mm. The bearings were then pressed in using a mallet. Before gluing the flanges to the wheel, I cut out the lower wheel shaft holder - a wooden block with a hole for the shaft, which is attached to the bottom of the frame. It is not advisable to drill a hole directly in the frame: there is a high probability that the drill will lead away. It is easier to rotate the holder to the angle required for correction. I drilled four technological holes in the wheels so that clamps could be inserted into them when gluing. Immediately after gluing the wheel, I put it on the shaft. Thanks to the preliminary centering of the flanges and drilled holes for dowels, one of my assembled wheels had virtually no runout, but the second had an uncritical “figure eight” of up to 3 mm. To adjust the wheel diameter and to form the profile, it was necessary to connect the wheel to the engine. At the first stage, I used a temporary pulley made of plywood - I screwed it to the wheel with self-tapping screws. I machined a pulley for the engine using the engine itself, and then connected the engine and the temporary wheel pulley with a belt. Having fixed the wheel, I screwed on a wooden block as a stop and, using turning tools, turned the wheel to 0.400 mm. The diameter of the wheel on the shaft is difficult to control, so I measured the circumference. It is equal to 1,256 mm. The processed edge of the wheel was given a barrel shape. Thanks to this, the belt does not slide off the wheel, but, on the contrary, self-centers on it. The bevel angle should be 5 degrees on each side.
12. When all the parts were ready, I glued the flanges to the wheel. 13. I used the lower shaft mounting block as a holder. 14.I ground the wheel to the required diameter, giving the edge a barrel shape. The bevel in each direction is approximately 5 degrees. 15.After preliminary assembly of the wheel. 16. Guide complete with support bearing blocks. 17. A guide with an upper support bearing is installed, but so far without “crackers”. Rubber tubes are stretched over the wheels (they need to be glued after final assembly). 18. The work table support is equipped with adjustment in one plane. tilt mechanism
Having made both wheels, I installed a standard drive pulley on one of them (read about a similar solution here). Its thickness and shape were adjusted to the belt used, and its diameter was calculated so that the speed of the saw blade was approximately 800 m/min. Now all that remained was to balance the wheels. To do this, I took bearings with an external diameter of 0 22 mm. They were then used as supports for the saw blade. Having fixed the temporary axle horizontally and put bearings on it, I installed the wheel so that it rotates easily, and its heaviest part falls down. Using a Forstner drill, I made small indentations in the lower area of the wheel from the rear side. As a result of such manipulations, I ensured that the wheel stopped rotating in any position. This is where the balancing ends. The wheels were varnished in two layers.
Link on topic: Do-it-yourself belt grinding machine - photo and design
Then I pulled cut inner tubes from 16″ wheels of a children’s bicycle onto the wheels. Rubber protects the wheel surfaces from damage by the canvas, reduces noise and prevents slipping. The balancing, however, had to be repeated.
Sharpen, do not dull a hacksaw: instructions for sharpening a hacksaw for wood
Despite the abundance of chainsaws, circular saws, grinders and other automatic cutting tools, the ordinary hand saw is still popular.
While it has long been replaced by more advanced saws in production and logging, the good old toothy blade remains in garages and dachas. A wood hacksaw can last for decades if it is sharpened in a timely manner and correctly.
Even people who regularly work with their hands make mistakes in this process.
Need for sharpening
The most obvious advantage of sharpness is the speed of sawing. When working in the country, this is even more important than in the workshop, since you often have to work in cramped conditions, standing in an awkward position. A poorly sharpened blade gets stuck in wood, especially raw wood. In addition, there is a risk that the canvas will break and injure the worker.
The practical benefits of spiciness include:
- Accuracy of the cuts performed.
- Longer service life of the canvas.
- Savings on replacing hacksaws.
- High productivity of carpentry work.
Determining the right moment
Without experience, people often go from one extreme to another and either sharpen the saw every few days or once a year. Determining the need for sharpening by time is the wrong approach.
There are a number of signs that indicate that the teeth are dull:
- The blade regularly gets stuck in the wood.
- When sawing, the sound changes, it becomes more “dull”.
- The shade of the teeth changes.
- The resistance of the material increases significantly.
- The ends of the teeth are noticeably rounded.
- The blade moves away from the cutting line.
Hardened teeth cannot be sharpened. They are easy to distinguish: they are blackish with a slight blue tint.
Sharpening instructions
First you need to prepare the equipment necessary for work:
- Set of files.
- Sandpaper.
Without a basic set, it’s basically impossible to sharpen it.
To make sharpening better, you can prepare additional tools:
- A device that allows you to mount the saw at the required angle.
- Locksmith's hammer.
Wiring
Before returning the sharpness to the saw, you need to adjust the teeth, that is, move them apart. Setting is the installation of cutting teeth at a certain angle relative to the blade and each other.
If you look at the set saw, you can see that they, alternating, deviate to the right and left from the blade plate itself. This configuration gives the hacksaw freedom to make deep cuts.
It doesn’t get stuck because it doesn’t touch the walls with its entire plane.
The distance between the set teeth should be one and a half or two times the thickness of the hacksaw. They are produced no thicker than 1.5-2 millimeters, therefore, the cutting protrusions need to be set at 0.25-0.5 mm for sawing dry and hard wood; for damp or soft wood you need to bend it by 0.5-1 mm.
To set the correct angle for each tooth “by eye”, you need solid experience, which not every carpenter has. It comes after many dozens of sharpened saws. For less experienced carpenters, there is a tool called a setting tool. Its most primitive version is a flat steel plate with a slot. A hacksaw is inserted into this gap with a minimum gap, under tension.
The wiring process looks like this:
- Secure the hacksaw in a vice like this. It is necessary to ensure that the teeth protrude 2 cm above the jaws.
- The teeth are clamped in the groove and then bent in the middle.
- First you need to bend all the even teeth in one direction, then bend the odd ones in the opposite direction.
- At the end, you can spread the jaws of the vice according to the calculated width of the spread and try to pass the saw between them.
- An excessively bent tooth will hit the vice. Use pliers to bend it a little further.
Adjustment of teeth height
All cutting lugs must be the same size to ensure that sawing performance is not compromised. Longer teeth experience greater stress and wear out faster, while shorter teeth do not even touch the wood.
Pulling the canvas becomes jerky, uneven, and more effort is wasted. The accuracy of the cut deteriorates, the cut surface becomes rougher.
Adjustments are made before sharpening begins. To make sure that none of the teeth protrude, you can do this: press the canvas against a sheet of paper placed on the table.
The tops of the teeth will be imprinted on the sheet, and the gaps in this pattern will allow you to adjust their height. To do this, hold the saw in a bench vise and use a file to file down the teeth that are too long.
Direct sharpening
To return the teeth to their former sharpness, a whetstone used to sharpen kitchen knives is not suitable. You need a special tool: a file with a triangular cross-section or a needle file. It is very good if you have several files with different sections and cut pitches: this will allow you to process each tooth perfectly.
Sharpening stages:
- Hold the file by the handle with one hand and place the other on the end of the tool.
- Decide on the sharpening angle. Usually it is 15-30 °. You can determine it by eye, with a protractor, or use simple equipment. Shape a block of wood into an isosceles triangle with angles of 90, 60 and 30 degrees, then use it as a measuring stick.
- Sharpen the left cutting edges of the even (farthest from you) teeth. Each requires an equal number of file passes to remove the same amount of chips. The pressure on the tool should be equal.
- Turn the hacksaw over to the other side, then sharpen the left edges of the even-numbered teeth again.
- Sharpen the tops of the teeth.
- Do not forget to control the sharpening angle using a whetstone.
The process seems very simple, albeit monotonous, but there are a number of nuances:
- The saw must be secured very tightly in the vise for safety reasons. Do not be afraid to damage the metal of the blade with strong compression.
- The work area should be well lit to make it easier to determine angles and sharpness.
- The metal is removed only when the file moves away from the carpenter.
- The more dull the saw, the larger the notches on the file can be, but to fine-tune the teeth you should always use a file with small notches.
- When fixing the tool in a vice, push it between the jaws as deep as possible. To prevent the hacksaw from swinging outward, only the teeth should remain.
- During the work process, there will inevitably be burrs on the sharpened edges. To remove them, just rub the metal with a fine-grained abrasive (sandpaper).
- To check the quality, you need to carefully examine the teeth in the light. They should shine.
Sharpening quality improvements
How do you sharpen a hacksaw for wood?
On your own From a master
The classic option that anyone can use was discussed above. There is a way to make the sharpening process more efficient and easier.
When using a multi-axis vice with a rotating frame, you can fix the blade so that you only have to move the file in the horizontal plane.
You can purchase a special sharpening device at a hardware store. It is attached to the workbench with a clamp and the hacksaw is clamped in it at angles of 90 and 45 degrees relative to the working surface. After installation it will be much easier to use the file.
Conclusion
I tested various sharpening methods in my own experience. In the garage there was an old wood saw that had not been sharpened for probably twenty years. It served as a testing ground for me. I won’t say that the saw is like new, but it can work in the country without any problems.
There is nothing difficult about sharpening saws yourself; you just need to get your hands used to it. My father once taught me how to sharpen saws, but he did everything in a simple way, without fixing the blade in a vice. This is the wrong approach. You should always clamp the saw in a vice. Firstly, it’s safer, and secondly, it’s easier.
Self-connection of parts
After a thorough preparatory process, the assembly of the device begins
At the same time, it is important to take your time and carefully check the quality of the connections of the parts.
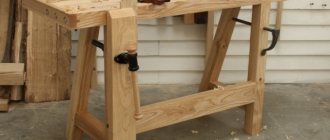
The assembly of a homemade band saw begins with the manufacture of a table with a cabinet. The mechanism will be located on this table. To assemble it you will need wooden blocks and a furniture panel. The convenient height of the table and the diameter of the pulleys are calculated in advance. The table should be comfortable and accommodate the pulleys and motor.
The table should accommodate the necessary tools and have a place to collect chips. It is advisable to immediately think about a waste tray. Cleaning the saw will be easier and more convenient.
If there are no ready-made ones, then you need to make homemade pulleys. They can be cut from plywood. Then the blanks are sanded and coated with epoxy resin. A hole for the roller bearings is drilled in the center of the pulley. For stability, the bearing itself is fixed in a textolite coupling. After this, the wheels are covered with tape rubber. The diameter of the pulleys can be arbitrary. However, the larger the pulley diameter, the longer the life of the saw.
The blade depends on the size of the pulley. A very good ratio is 1/1000 of the saw blade to the pulley diameter. In other words, if you have a pulley with a diameter of forty centimeters, then a four-millimeter tape will do. When installing the pulley, it is necessary to ensure that the bearing shaft is perpendicular. Even with a slight deviation, the wheel will run out, causing the belt to jump off.
The next step is assembling the support frame. The entire device will be mounted on it. The frame is made from a corner channel and can be C-shaped. This shape holds the tape perfectly. A metal axle is put on the channel. The frame or bed is the most important part of the structure.
Pulleys are mounted on the axle using bushings. After which, they achieve their balance. A damper is used against belt vibration. Attach moving parts to the engine. It must be borne in mind that the average speed of rotation of a band saw is from 700 to 900 revolutions per minute. This parameter must be taken into account when calculating the diameter of the drive pulleys.
It is best to put a protective cover on the engine. It will protect the drive mechanism from fine dust and chips.
To make it easier to feed the material being processed, metal corners are attached. They create a guiding mechanism.
Wooden parts must be planed, painted or varnished. On the one hand, this is aesthetically pleasing and extends the service life of the product, and on the other hand, it protects the hands of the worker from splinters made from untreated wood. Before painting, the wood is cleaned with fine sandpaper and treated with liquids that prevent the wood from rotting.
Setting, checking and sharpening
Before starting work, be sure to check and configure the device. You need to make sure that the tape forms a right angle. The slightest deviation can damage the machine and even cause injury. Using a driven pulley, the belt is tensioned. Achieve maximum tension on the cutting tape.
Sharpening of band blades is simple and affordable. The technology has been tested by many masters. You need a special machine and a little patience. First, the initial sharpening is carried out, that is, the symmetry is restored, the saw teeth are aligned, and small cracks on the edges are removed. Then the saw is cleaned of dust and metal filings and the saw is set, restoring the rear and front angles.
The final step is the final sharpening. It is this that gives the teeth the necessary sharpness and eliminates various distortions.
Characteristics
To use a band saw effectively, you will need several blades of varying widths and thicknesses.
When choosing a tool for a particular job, it is important to consider the following:
- Only soft wood can be processed with a thin blade, otherwise it will quickly bend and the cutting line will be uneven;
- the wider the blade, the more accurate the cut will be;
- a thick saw is not suitable for working with small bars and thin sheet material, they are deformed due to heating;
- Angled cuts and shaped cutting can only be done with a narrow blade.
In addition to the geometric dimensions of the blade, it is important to pay attention to the profile and height of the tooth. An important criterion for a band saw blade is the number of teeth per unit length
A saw with a fine tooth has a longer service life due to less pressure on each tooth. A saw with a wide tooth is preferable for hardwood due to the greater pressure on the cutting edge.
The quality of the cut is also affected by the height of the tooth. The large tooth is great for rough work and cutting thick wood. Small bars and thin sheet material can only be cut efficiently using a fine-toothed tape.
Another important parameter is the tooth pitch. There is a rhythmic step and a variable step. A saw with a rhythmic step is suitable for fine work; this tool is convenient for cutting thin slats and sawing out parts from plywood. A variable pitch blade should be chosen for processing large pieces of soft wood. Thanks to the asymmetrical arrangement of the teeth, this blade will not clog and will easily cut thick boards.
Making a saw stand
I chose the dimensions of the cabinet based on the dimensions of the saw base, and adjusted the height so that the table was at a level of 1,050 mm from the floor - this is just right for me. The cabinet was made from scraps of tongue-and-groove floorboards 35 mm thick. The frame of the cabinet was assembled on dowels. The corners were reinforced from the inside with metal corners. Side inserts are made of laminated chipboard. The back wall is made of MDF. In general, everything is from scraps. The top drawer of the cabinet is used to collect sawdust. The cabinet is mounted on wheels with the ability to fix them.
25. The right wall of the lower wheel casing is beveled at the top to simplify the replacement of saw blades. 26. The rear wall of the lower wheel protection is installed at an angle and directs sawdust into the box. 27. The parallel stop is fixed on the work table. Installation of protection. 28.This is what the protection of moving elements looks like. A saw start button and a backlight switch are installed.
The protective covers and elements of the saw body are also guides for removing sawdust. All working elements of the saw are protected by screens. The material for the casings and screens was 8 mm thick MDF and pine boards.
Related link: How to make a homemade stationary circular with your own hands
Frame
In order to make a band saw with your own hands, you will first have to master the frame construction scheme. To construct it, it is worth choosing fairly hard wood.
Main components of the frame:
- table top;
- support rod;
- pulleys;
- saw blade.
To make a homemade frame more stable and stronger, you must first prepare a drawing according to which the entire structure will be made. It is best to make detailed drawings, but if you have some knowledge, you can get by with a schematic representation of the structure
It is important first of all to calculate the optimal length of the canvas; the remaining dimensions can be adjusted
Therefore, you need to calculate the optimal height with the possibility of installation in a workshop or other place where it will be located. It is also recommended to choose a tabletop height that is convenient for a particular craftsman. The working surface (tabletop) can be made from ordinary plywood.
Hardwood is used for the frame.
The main supporting rod of the structure can be made of durable timber, for example, maple or other wood.
In order to give additional stability to the frame, it is edged with slats. In some cases, you can even use parts from old furniture.
The diameter of the pulleys should be selected in such a way that the design is not too bulky, but at the same time ensures sufficient speed of movement of the blade.
Installation of rod and pulley supports
The most primitive band saws, created by yourself with a frame made of plywood or logs, have a support rod 8x8 cm thick. 2 strong supports are attached to it, which will hold the pulleys. It is advisable to create supports for band saws from strong materials, including multi-layer plywood with a rigid core.
The distance between them is selected in such a way that the log to be processed can be placed there. Experts recommend making a small gap to prevent possible problems in the future.
Do-it-yourself band saw at home - how to make a sawmill
First you need to analyze what material will be exposed to the saw, as well as the quality of the tool that will be used in construction. At the very beginning, it is worth checking the sharpness of the saw, its position in the hand and sliding on the material.
DIY band saw
In order to make a band saw at home, you need to highlight all types of band saws:
- metal saw
- wood saw
- mini wood saw
The metal saw is made from alloys of various metals, the most common of which are steel, cast iron, copper and aluminum with tin. In order to select a material, use the following rules:
- The materials must be durable for construction work, and they must also be processed using different methods necessary to create different shapes. (To do this, use gas or electric welding for cutting, bending and other actions).
- The material and the seams connecting it must be strong and resistant to corrosion.
- The use of inexpensive and non-scarce materials is mandatory.
Now we need to consider the metals for creating band saws and its types. Steel tools are usually divided into two categories:
- structural steels used in general construction
- special steels with special properties, such as: acid-resistant properties, heat-resistant properties
There are no universal steels. Steel may be resistant to corrosion, but not resistant to other factors.
Besides:
- Cast iron is used for casting large or small parts. The metal base of a band saw can be cast from cast iron, followed by sharpening the teeth, as well as cutting the teeth.
- Copper and its alloys are used in construction and repair because it has high corrosion resistance.
- Aluminum comes in sheets that are easy to cut into a band saw and sharpen the teeth at the bottom. But the main disadvantage of aluminum sheets is their low strength when cutting hard wood or light metal.
- Tin is used because it is resistant to organic acids. It is more used as a coating for steel or cast iron, against acids.
As the metal variety of band saws is described above, we can draw a small conclusion about its production at home. It is advisable to use more durable metal saws so as not to break when cutting hard materials
Aluminum band saws can be used when cutting glass, but be careful!
To make a band saw with your own hands, you need to purchase a sheet of aluminum (for example), cut it to the required length and weld the teeth at the bottom, with a certain pitch, for example 5 centimeters, and cut at the same distance. This is one way to make a regular bandsaw at home.
Cutting part shapes and sharpening angle
At the first stage, the type of band saw is determined. The main indicator is the shape of the teeth. Depending on this parameter, they are divided into dividing, carpentry or intended for sawing logs. The initial geometry and routing angle are determined by the manufacturer. It is recommended to find out this data at the stage of purchasing components. They are needed to determine the machine parameters.
For hardwoods, the rake angle should be kept to a minimum. This ensures optimal contact between the processing material and the metal. If you plan to process soft varieties, you can use models with a larger rake angle to increase processing speed.
The determining parameters for self-updating the cutting edge are:
- tooth pitch. This is the distance between the cutting elements of the structure. Common values are 19, 22 and 25 mm;
- tooth height. The size from its base to its top;
- corner. The main value that you need to know to form the cutting plane. For carpentry models it is 35°. In dividing saws, the angle is from 18° to 22°. In structures for processing timber – 10°-15°;
- divorce. Determines the deviation of the tooth from the general plane of the blade.
After performing work on the machine, ideally these characteristics should remain unchanged. For each model, the manufacturer determines the maximum deviation value. If during operation this is achieved, it is necessary to purchase a new model.
In order to eliminate resonance, some types of cutting tools use a variable pitch of the teeth. This does not affect manual sharpening, but requires careful setting of parameters during automated sharpening.
How to make a band saw mechanism with your own hands?
To make a vertical bandsaw machine at home, it is enough to have only a basic understanding of how the assembly process occurs.
- First of all, they make all the necessary sketches of the unit and all its operating components.
- After this, according to the drawings, the mill for the workbench is welded. As a rule, the table dimensions are as follows: 400 by 700 mm.
- A tabletop is installed as a frame covering. Most often it is made from plywood flooring with a penetration depth of 20 mm.
- By welding the transverse profile to the corner, a supporting rod is installed.
- The upper and lower pulleys become the main decking to provide a quality working surface based on sheet rubber.
- Using a special resin, a bushing made of duralumin alloy is installed, inside of which an opening for the bearing is first machined.
- A motor is placed inside the table surface, which is the drive for the operation of the machine. The drive pulley is attached to the engine.
- To reduce the vibration of the installation, install a damper made with your own hands from textolite material.
- If the machine overheats, it is necessary to let it “drink” from time to time.
Republished by Blog Post Promoter
Tips for use
- Tension the saw blade correctly. Exceeding the permissible force reduces the service life of the tool. For control, you can use special devices. The saw should not be in operation for more than two hours, after which it must be dismantled and suspended for a day to relieve residual stress.
- Be sure to use belt lubricant. In warm weather, you can use water with the addition of detergents such as “Gala”, “Fairy”, etc., and in winter - a mixture of kerosene or diesel fuel with motor oil in a 5:1 ratio or lubricant for chainsaw chains.
- After finishing work, be sure to release the tension on the saw. This will prevent fatigue phenomena from forming on its surface and will extend its service life.
- Work only with properly sharpened and set tools. If you have no experience in this area, you can use the services of specialized offices. As a rule, their representatives service more than one sawmill in your area.
- Do not work with freshly cut timber. Let it dry for at least one month. In addition, before work, clean the logs from dirt and sand, and even better, remove the bark.
What should happen
Correct result
When sharpening, you need to ensure that the hacksaw teeth are sharp and shaped like a shark tooth. Only such a tooth cuts well - the hacksaw will not slide along the wood, but will “bite” into it. And then it will become clear why the “correct” saw cuts by itself.