How does he work
Briefly, its operating principle is as follows: using a bent long metal or plastic plate, which is installed on a corner, creating a flat surface there, a base is formed, which will then be processed with a solution. The holes are needed so that the mixture can pass through them freely (in both directions), that is, so that the deficiencies are filled and the excess comes out; in addition, applying holes to the product (perforation) reduces its weight, thereby reducing the load on the solution and grip increases.
Marking
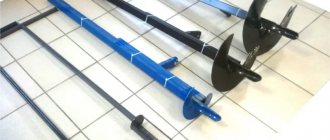
You can plaster corners correctly if you have the correct markings. To draw 90 degree angles on walls, you can use old-fashioned simple tools and marking methods. You will need a rigid rod (or rule), a square, and a plumb line.
Measure (with a plumb line or a rule with a level) the angle for verticality (adjacent walls for collapse). Taking into account the identified surface features on the floor or ceiling, angle lines are drawn along the square, extending them using a rule or a rigid strip. Then, using a plumb line, they transfer these lines and the top of the figure to the ceiling or floor, where they draw an angle. Beacons (methods for installing beacons) are placed along the upper and lower marks.
Is it possible to make a corner without a corner?
By and large, yes. But you need to understand that the corner overlay is used not only to form a joint between wall surfaces, but also to strengthen it and make it resistant to mechanical damage. Without an overlay, your corner will crack from the slightest shock, and if we are talking about an apartment, you will have to plaster it again in about half a year. Finishing without overlays is used when there is absolutely no threat of impact loads, which is extremely rare.
Tools
Prepare tools and equipment in advance:
- for applying and leveling the composition - spatulas (with blades of different widths);
- for mashing - a grater or a grater;
- for priming - brush, roller;
- for preparing the mixture - a mixer and a container;
- to remove a 90-degree grain or husk - an angle spatula;
- for reinforcement - counter-shoulders or serpyanka;
- for grinding - sandpaper/sanding machine;
- for marking - pencil/marker, square, rule, level, plumb line or laser level, string;
- to protect border parts - masking tape;
- for fixing profiles when aligning with beacons - screws, fasteners, screwdriver;
- for leveling slopes - a small spoon;
- to clean the brick base - a brush with steel bristles.
In the room you will also need a stepladder or scaffolding, and a film to protect the floor.
How to choose
They are mainly made of plastic and metal. Let's consider the characteristics and purpose of each type of product.
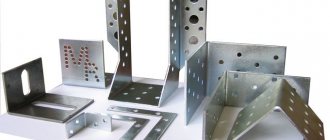
Metal
Metals are sensitive to alkaline and acidic environments, so they are used mainly when latex, gypsum or acrylic are used as finishing materials.
- Aluminum. Linings made from this material are the cheapest and most common. They have good corrosion resistance; due to their lightness, they stick well to the wall and do not move during operation. But, since aluminum is a very soft metal, its impact resistance and resistance to mechanical damage is minimal. This can lead to the fact that from a weak blow, not only the plaster will crack, but also the corner will bend, which means that it will no longer be necessary to carry out cosmetic repairs, but a thorough one, with the replacement of the entire lining. This is why aluminum angles are not used in areas where there is an increased risk of impact loading on walls, such as factories, loading bays or shops. Where workers frequently hit corners, steel should be used.
- Galvanized steel is not as common because it is much more expensive than aluminum, but it has higher strength characteristics. Thanks to this, steel corners withstand impacts very well and do not bend even from a very large-scale collision, however, this metal is heavier than aluminum, so the technology for installing steel corners is somewhat different. It must be taken into account that due to its mass, the lining will peel off or slide down. In addition, it is important not to damage the galvanization, because it protects the steel from rusting. The product should be trimmed with special metal scissors, and in no case with a grinder, so that after a few years the repair does not have to be done again.
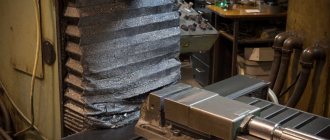
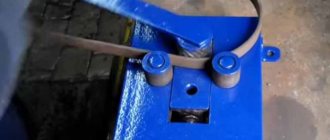
Shapes of metal overlays
The appearance of the product can be completely different, depending on the purpose of the repair, but basically it is just a strip of steel or aluminum, bent at a right angle, in which many small holes are drilled. The thickness of the lining is small - a little more than half a millimeter. Such simple corners are used for dry plaster, and if moisture is present in the process, an additional metal mesh is used, which increases adhesion to the wall due to the fact that more mortar is in contact with the product. Rounded corners are very rarely made from metal, because, as a rule, it is required that the radius of curvature can be changed, and in the case of such durable materials this is simply impossible.
Plastic products
In terms of its strength characteristics, plastic is inferior to metals, and even aluminum, because if the latter simply bends from an impact without causing further destruction of the plaster, then the plastic immediately cracks. In order to achieve at least some strength of the product, the corner has to be made thick, and the plaster, accordingly, must be applied in a thin layer. However, it has an advantage in rooms with high humidity - it is not at all afraid of corrosion, so it is usually used in such cases.
In addition, it is much easier to make a curved corner from plastic (of course, from the point of view of geometry, it will no longer be a corner, but an arc, but they still call it that) with an arbitrary variable bending radius. After all, plastic is very malleable, and the aluminum plate is difficult to bend due to its large length. And products with an adjustable angle are generally a typical phenomenon for plastic, since it bends very easily without violating the integrity of the structure.
Chemical inertness of plastic corners
Since plastic reacts very poorly with other substances, it is advantageous to use it in areas where reagents are used or, for example, in chemical production. Since the air in these places contains a certain concentration of alkalis and acids, they are also absorbed into the walls, negatively affecting the materials. As a rule, metals under plaster become unusable after just a few years.
Slopes
If interior doorways usually have slopes with right angles, then window openings are turned out to let in more light. The unfolded earrings must be the same for both slopes and tops. In this case, a template square is used to align the corners. Using a template, install counters or beacons (the former are preferable, they additionally strengthen the outer corner).
The alignment of corners and slopes is carried out starting from the tops using a screed - a short strip with a protrusion at the end. Apply the solution between the guide beacon/counter beam and the door/window frame. Level the solution with a small spoon, resting one end on the beacon and the other on the box. The gypsum mortar is smoothed with a spatula, and the cement mortar is smoothed with a trowel (smoothing).
Plastering the corners is an operation that completes the leveling of the room when plastering the walls. For beginners who have mastered plastering and leveling walls according to beacons, it is no longer difficult to independently level the grooves and husks. This operation gives the room a neat appearance.
What material corner is best suited for a wooden wall?
The tree itself is already quite strong, especially if we are talking about timber, and it does not need additional reinforcement, so you can save on material here. However, plastic should not be used unless the corner is combined with a built-in metal mesh. The fact is that wood does not hold plaster well, and therefore, when finishing wooden houses, they use mesh of very large areas, ideally covering the entire wall - then the plaster will last longer. In general, in such cases, preference is usually given to either aluminum or combined plastic products.
Preparatory work
Plastering a base of any shape requires preparation. Preparatory work includes:
- removal of old finishes;
- cleaning the surface from foreign substances - rust, fats, efflorescence, pockets of microorganisms;
- jointing of masonry joints;
- applying notches if the base is concrete;
- dust removal;
- insulating remaining metal parts, for example, with oil paint;
- repairing cracks or large potholes;
- priming (at least two passes with drying of the primer composition of each layer;
- reinforcement (for wooden bases - shingle stuffing);
- marking, installation of beacons.
Surface cleaning
Removing Foreign Substances
Notching
Removing dust
Sealing cracks
Padding
Installation of beacons
These preparations of the base for plastering provide:
- strong adhesion of the plaster finishing layer to the base;
- strengthening a weak foundation;
- protection of the solution from water being sucked out by the pores of the base material;
- preventing mutual destruction of incompatible base materials and plaster;
- prevention of stains from appearing on the surface of a plastered wall.
How to use
Working with corner overlays consists of several stages, these are:
Preparing the wall
In order for the plaster to hold tightly, you should break off everything that is loose, so that a monolithic structure remains without any cracks or breaks. Do not skimp on the solution, because in the end the corner will only be stronger. Once you have knocked off all the loose pieces, you should move on to cleaning and priming. Remove dust from the surface with a special brush (but you can also use a simple rag), then prime the wall to ensure reliable adhesion to the solution.
Sometimes the wall joint is so damaged that a corner cannot even be attached to it, because there is simply nowhere to do it. In such cases, the surface is first plastered, preparing the base, and only then the corner overlay is installed on it.
And the last stage of preparation is the installation of beacons, which contribute to a more accurate location of the corner, with minimal deviations.
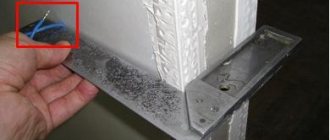
Product Installation
First you need to trim the overlay. Cut it with tin snips if it is steel or aluminum, or with a knife if it is plastic. Next, apply the solution to the wall and place the product on the corner. Press down lightly so that the solution begins to seep through the holes, and press down the mesh, if there is one, as firmly as possible. Check the correct installation using a level, and do not forget to check the beacons.
If the pad is made of heavy materials such as steel, then due to its large mass it will move down a little, so it would be a good idea to hold it for a while, especially if you are attaching it to the ceiling.
Using Fasteners
Holes in the corners are made not only to increase adhesion, lighten the structure and ensure the passage of the solution, but also in some cases to use screw fastenings. Plastic sleeves are driven into the hardened plaster, into which stainless screws are then screwed. This fastening allows you to significantly increase traction, but is used when it is not possible to use a mesh. And there is practically no point in using them at the same time, unless you are installing a corner in an elephant nursery.
When the solution under the pad dries
After the overlay firmly adheres to the wall, you should begin plastering the outer part of the corner and leveling it. The first step is to plaster everything next to the overlay to get the approximate thickness of the layer applied to the corner. When you have leveled the surface of the wall and the surface of the corner, start smoothing the plaster, but you should not get too fanatical - anyway, later, when it dries, it will need to be treated with sandpaper.
How to check your work
After completing each step, you should ensure that it was completed correctly. So, if in the middle of work you notice that you haven’t cleaned the wall well and there are broken pieces of plaster hanging on it, don’t be lazy, remove the corner and do it all over again, this will significantly increase the service life of the structure. If, for example, you notice that you pressed a corner onto the mortar too hard, so that it all flowed out through the perforation, remove it and put on new plaster, because the final result of your work depends most on such little things.
Grouting the joint of planes and leveling
The corner and reinforcing mesh are installed - it’s time to apply the plaster composition
As soon as the mortar on which the corner overlay was installed hardens, you can begin plastering.
Here everything is done like this:
- As part of the first stage, the wall is leveled - at the same time, the corner is not reached by about 400 mm;
- Then the mortar is placed not so far from the established corner - and using the rule it is smoothed: this way all excess will be removed;
- The above operations are repeated, but this time it is not the rule that is used, but a wide spatula or grater;
- The connecting planes are aligned - the master must ensure that during this work no plastic or metal is exposed;
- To create an inner corner, you can use a special spatula. Its blade has a special shape - therefore, both surfaces can be removed very efficiently: a correct depression will be formed between them.
Watch a video on how to attach plaster corners. Surely, this lesson will help you gather your thoughts before work and understand how and what needs to be done.
Now we need to wait for the plaster to dry - the outer layer must undergo polymerization. And then they start grouting.
It all looks like this:
- The corner is first rubbed on one side, then on the other;
- When moving the grater, the master must ensure that it does not remove material from the edge - after all, in this situation, the occurrence of chips is not excluded. This should not be allowed;
- Using a float and sponge, grout the inner corner. If the plans do not include putty, the plaster can be corrected with regular sandpaper.
Is it worth doing the corner plastering yourself, or is it better to entrust it to a professional?
On the Internet today you can find a huge number of articles and training videos on all types of construction and repair work. There are so many of them that it seems as if anyone could build a house and make repairs on it themselves, using only these manuals. But that's not true. The fact is that here you need not only knowledge of how to do it, but also skill, that is, experience. Because, for example, you can know how to hammer a nail, but not be able to do it in practice, the nail will be hammered crookedly, your finger will be damaged, etc. If you've ever glued wallpaper, you should know that even in such a seemingly simple task, you often have to redo everything several times, let alone plaster. A master who not only knows, but also knows how, will set you a high-quality angle in a minimum amount of time, while you can do other more important things.
Results
Special element for rounded surfaces
The use today of corner overlays for plastering walls significantly facilitates the work of those owners who want to carry out repairs in an apartment or house on their own - without the involvement of professional teams.
Yes, if you have little experience (or none at all), it’s not so easy to design a corner well, so you definitely don’t need to neglect various auxiliary devices. Take action - and everything will definitely work out, experience will come with time and everything will work out perfectly - right the first time!
Criteria for choosing decorative corners
To combine the design of a room with its objects, you should pay attention to certain aspects when selecting a profile.
Worth taking note:
- Plane materials. When the walls are lined with clapboard, the edges covered with whitish plastic will look awkward.
- Finish color. A purple corner will spoil the appearance when the room is decorated in light colors.
- General design style. A metal profile will negatively affect the interior of a classic style, but it will well emphasize the high-tech message.
- Functionality of the room. It is optimal to choose silicone corners for children's rooms, and a PVC element is perfect for the bathroom and kitchen. The wooden look with quarters is perfect for furnishing offices.