Wood carving is an amazingly beautiful and very popular type of hand-made wood processing these days. The carved interior details captivate with their magnificent appearance and reflect rich national traditions.
Creative people who are simply itching to do something very interesting and useful should pay attention to wood carving. Girls and women may think that this is only a man's activity. And they will be wrong, because there are no fewer women woodcarvers than men.
Tatyana Boeva from Kamchatka
Tools for work
In stores you can purchase various professional tools and multifunctional woodworking machines. They make work much easier and are convenient and safe to use. However, knowing how to use hand tools is more important. Every beginning woodcarver should learn to work with simple chisels, saws and planes.
These skills will help you in the future:
- master professional machines faster;
- correct inaccuracies;
- make miniature patterns.
Experienced craftsmen do not recommend buying ready-made sets of tools for manual cutting. They are expensive, but do not always differ in quality.
A set may have a good knife but bad chisels, so it's better to buy each tool separately and put together a truly useful set that will last for several years.
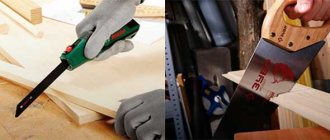
The most important tool for working with wood is a saw. With its help, you can separate even pieces of the desired size from a solid block.
Suitable:
- hacksaw;
- bow saw;
- jigsaw
It is advisable to purchase several types of saws with different tooth sizes. The condition of the paintings must be carefully monitored. Saws should always be sharp and the blade should be well tensioned.
You should also buy a plane . A novice craftsman can buy a hand tool with a cutting surface of medium width. When you gain experience, you will need a jointer and a scraper. They are needed for more thorough leveling of wooden surfaces.
To work with small parts you need chisels . The set should include tools with wide, pointed edges, as well as narrow and thin ones. Blades can be straight or beveled. They should always be sharp, so chisels will have to be sharpened frequently. For this purpose, you can use sandpaper or a special machine.
Working with blunt tools is dangerous because the blade will not penetrate the wood as deeply as required. This increases the risk of the tool “jumping off”, which is dangerous for the carver. He could be seriously injured. In addition, the carving made with such a tool will turn out crooked, and the work will take more time and effort.
In the table you can see what other tools may be required and why:
| Tool | Purpose |
| Hand drill | Drill through holes and small recesses |
| Knives of different sizes | Hew small pieces of wood, plan small parts |
| Small ax | Cutting off small branches and making notches |
| Sandpaper of different grits | Sanding products |
| Clamp | Securely attach the surface to be treated to the countertop |
There are many other wood carving tools available. When a novice master gains experience, he will be able to independently determine which chisels, knives or saws he needs and what is more convenient to work with.
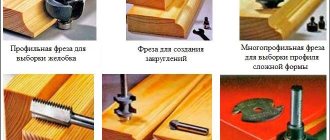
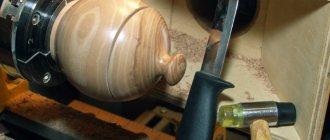
Cutters for wood lathe: chisels, knives
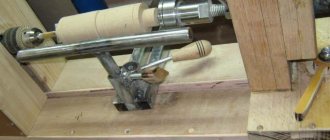
Wood lathes are necessary for processing round wooden parts, as well as to give the product a round shape.
Cutters are used for this. They may differ depending on the shape of the cutting part and the method of sharpening.
General information about cutters
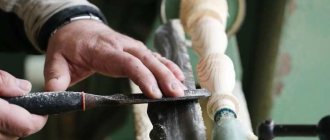
Cutters are used to manually machine a workpiece that is rotated directly in a lathe. This tool consists of two main parts: a metal, working and wooden handle. The working part consists of:
- blade - it is this that comes into contact with the workpiece and is subject to regular sharpening at a certain angle;
- body - the part by which the master holds the cutter on the armrest of the machine;
- shank - a tapering place, immediately behind the body, a handle is attached to the shank.
The handle is divided into a base and a neck structure.
Types of chisels
Chisels perform different jobs, and their configuration and design depend on this. Also, each type of cutting tool for a machine has specific sharpening features. To work, a beginner only needs to have two types of cutters: Reyer and Meisel. More experienced craftsmen will need other types of cutters.
how to make chisels for a wood lathe with your own hands.
Reyer
By design, it is a long steel blade with a semicircular cross-section. Designed for rough rough initial processing of the workpiece. Such a cutter is made from a thick plate or groove with a semicircular cross-section.
Working as a reamer, the master gives the workpiece the approximate outline of the future product.
Meysel
Used for finishing wood products. Using a meisel, you can cut the finished part from the remnants of the workpiece. By design, it is a plate with an oblique blade, which is sharpened at the same angle on both sides.
With the help of two main cutters, you can perform almost all turning works on wood of medium complexity. Many experienced craftsmen successfully process the inner surface of wooden parts using a reyer and a meisel.
Shaped
This is a whole group of cutters, with the help of which all other, more complex work is performed on a wood lathe.
Shaped cutters come in the following varieties:
- Chisel – necessary for leveling cylindrical surfaces.
- Comb – cuts grooves and various sizes of threads.
- The hook is necessary to create a cavity at the end of the part.
- The ring is also needed to create cavities.
- Triangle - designed for rough processing of a part and giving it a cylindrical shape. These cutters are sharpened in the shape of a triangle.
More experience is required to work with shaped cutters. With their help, you can give the workpiece almost any shape.
Homemade
To make a tool for a wood lathe, first of all, you need to select high-quality, strong material. This is a high-quality steel grade that corresponds to the required dimensions.
The best option is to use files that have already “worked out” and are not used for their intended purpose. To create a cutter, a metal blank should be sharpened on a special machine and given shape in the main part and in the shank area.
Only the made cutter is first tested on soft wood. If, after checking, no chips or cracks appear on the cutter, then you can begin processing workpieces made from hard wood.
Homemade cutters help to significantly increase the productivity of the process and expand the range of products manufactured on the machine.
Types by functionality
When working on a lathe, it is necessary to have several types of cutters, since these tools, depending on the sharpening and shape, perform various functions, ranging from rough grinding to fine finishing of the finished product.
Rough stripping
A tool designed for such work contains a pair of working edges that mate with each other at an acute angle. This tool is safer than its radial counterparts.
Finish turning
Cutters of this functionality are needed to remove a small layer of chips. Using this tool, you cannot shape the finished product; you can only make the outer surface smooth. Finish turning tools have a tip angle with a right or left sharpening angle.
Shaped
The shaped type of cutter has a semicircular tip. It is designed to work with non-standard surfaces. The configuration of shaped cutters can be very different, depending on the surface being processed and its shape.
Cut-off
It is used only for a single process - cutting the finished product from the remnants of the workpiece.
Boring
These cutters are designed to remove excess material during processing of the product. There is a special ledge in the cutting area for such operations.
Round
Necessary for processing radius workpieces. The working part of such a tool may contain small technological cutters or be radius.
For internal turning
If the cutter is intended for internal turning, then a limiter must be installed on it to regulate the turning depth.
What is included in the knife set?
To fully work on a wood lathe, the master must have a set of tools. These include:
- blunt knives with different blade angles to create complex relief patterns;
- a chisel is the main tool for shaped processing of a product. It can be flat, angular, semicircular;
- cranberry – intended for manual, finishing processing of parts; geismus - a cutter with a bend angle of 45°.
A complete set of tools for a lathe should include all of the above cutters.
How to make it yourself?
The easiest way is to make your own reyer and meisel. To do this you will need a used file or rasp. They should be processed on a sharpening machine and supplemented with a fastening ring on the handle.
The optimal length of the incisor body is 20-30 cm.
The algorithm for creating a cutter is as follows:
- Using a metalworking machine, cut out the desired shape of the future cutter.
- Perform primary turning.
- To give the product strength it must be hardened. To do this, the workpiece is heated to maximum temperature, and then dipped into machine oil to cool.
- Final sharpening of the cutter.
- Mounted on a wooden handle.
Tips for choosing wood
Professionals divide wood into 3 types:
- soft;
- hard;
- superhard.
Beginners should give preference to the first 2 options. Soft wood is pliable. It is easy to cut small parts from it, forming beautiful patterns. Hard materials are a little more difficult to work with, but they are more durable. Figures made from such wood do not dry out over time and do not burst.
It is easy to work with the following types of wood:
- spruce;
- chestnut;
- fir;
- pine;
- willow;
- Linden;
- poplar;
- alder;
- beech;
- birch;
- aspen;
- ash;
- elm.
Expensive and high-quality furniture is made from super-hard wood. It is difficult to work with this material manually; large machines are often used for processing, so this wood is not suitable for carving.
Basic patterns
There are several main types of geometric patterns that are used in wood carving. These include pegs, diamonds, roundels, pyramids, stars, squares and rosettes. Having studied the features of creating each of these ornaments, the master can independently connect them together, making original and unique work.
Skolishki
In order to carry out wood carving, you must first learn how to perform such simple actions as pricking and trimming.
To do this, you need to take the knife in your working hand. Her thumb should be located on the beveled handle. Initially, you need to press the cutter so that it goes deeper into the wood by a few millimeters. After this, you should lower the blade at an angle so that it intersects the line of the side knife in accordance with the previously made markings. In a similar way, you need to prick on the other side.
Trimming occurs as follows:
- The cutting part of the knife should be applied to the left side of the triangle . With its bevel it should be connected to the top of the figure.
- The knife handle must be pulled back . In this case, it is necessary to maintain a parallel between the right side of the ornament and the blade.
- At the end, you should press on the knife, returning the brush to its original position . At the end, the tip of the knife should be on top. In turn, the cutting part will be on the right side of the triangle.
Since the trimmed triangle should eventually break off on its own, the pattern obtained as a result of these actions is called a chip.
Diamond
The rhombus, which is often used in wood carving, is a fairly simple figure. It consists of two triangles. They are connected to each other by their bases.
Reference. The technology for creating diamonds on a workpiece is the same as for making a peg. First you need to cut out the top row, then turn the board and start on the bottom of the figure.
Viteika
Another type of chips is viteyka. It is obtained due to the displacement of two triangles to the sides of each other.
Thus, having made many turns, you can end up with a winding path on your workpiece. To do this, you first need to cut out the bottom triangles, split them off, rotate the board and start creating the top row. After this, a so-called snake will remain in the middle.
Pyramid
The pyramid is the first complex design that can be made with a wood cutter.
It consists of several triangles, which must be located in a certain order in relation to each other. In the center between the three triangles is the point of contact of the corners. That is why, when cutting, you need to ensure that the cutting surface of the knife is always with one end strictly in the middle. Trimming should be done in the direction of the wood layer.
Star
A distinctive feature of an asterisk is that it consists of more triangles than a pyramid.
Despite this, the process of creating this pattern is similar. To cut out an asterisk, you need to make four consecutive triangles on the workpiece in the same way as described above.
Squares
Unlike all previous ornaments, creating squares requires the use of a different technique called straws. The pattern can be either the border of the entire work or part of a larger element of the design.
The creation of a square occurs as follows:
- Stepping back 1 millimeter from the markings, you need to deepen the knife into the workpiece at an angle of 45 degrees by 2 or 3 millimeters. Thus, you need to make a cut along the line.
- On the left side of the strip, you must perform the same actions in mirror image.
- At the beginning and end of the line, you need to make a puncture, holding the knife vertically to the workpiece.
At the end, a piece in the form of a straw should fall off from the wood. If you process all the lines of the square in the same way, you can get an interesting pattern.
Socket
The rosette is the most complex ornament in geometric wood carving. To create it you will need a compass. With its help you need to draw a circle of large diameter. After this, you need to make another one - 5 millimeters smaller than the previous one. Next, you should divide the circles into 16 even parts.
Once the above steps are completed, you need to mark the points in the middle of each segment on the small circle. From these places you should draw a line to the points of the large circle closest on each side.
At the end, having the markings, all that remains is to cut and split off the triangles in accordance with the technique described above.
Carver's workplace
Professional carvers work at a workbench. For beginners, you can limit yourself to a tabletop. It should be stable and wide. The height of the table is adjusted individually for the master. In order not to strain your back and feel comfortable, you should choose a tabletop that is waist-high, but not higher.
The countertop needs to be wiped regularly and its condition monitored. When working, knives often slip and stick into the table, which creates nicks that need to be sanded down. To minimize damage, you must follow the rules for using the countertop. You cannot throw sharp tools at it, chop with an ax or hammer in nails.
To work you need good lighting. Installing a tabletop near a window is not enough. You will need 2-3 more lamps that will illuminate the work area from different sides. The lamps should be installed above the carver's eyes so that they do not blind him. You can purchase lighting fixtures with flexible legs that can be tilted in any direction.
Tools
The first thing you should purchase are carving knives. And they come in several types. Everything here is individual: each master will eventually have his own basic set of favorite tools to use. But their list is approximately the same for all carvers.
Basic
Carving knives are basic tools. Cutter knife is considered the main tool of a carver. It has a cutting angle of 35 degrees, but the length of the blade and handle are different. The jamb knife is used primarily in flat-relief carving, and is also used in openwork work. A Bogorodsk knife will be needed for sculptural carving.
You will also need chisels for your work:
- semicircular type - needed for any type of work;
- cranberries - chisels with a curved working part;
- gravers - help create various grooves;
- rivets - needed to process the main background.
Most likely, you will need spoons, stamps and punches. The latter help create the main background. For measurements and markings you need a square, a ruler, a protractor, a ruler, a plumb line, a level, a tape measure, etc. are also useful.
Adolf Yuriev gives practical guidance on choosing chisels in his video.
Additional
Auxiliary tools are not always needed, but without them, work with complex compositions can stop.
Worth mentioning here:
- gimlets;
- spindles;
- hand drills (needed for drilling);
- hacksaws (including for metal);
- jigsaw;
- two-handed saw;
- mallet;
- miter box;
- clamps;
- skobel;
- vice;
- hammer;
- chainsaw.
Each tool is potentially dangerous: if handled incorrectly, a person risks injury. And this applies not only to electrical equipment. Compliance with safety precautions is the first thing a carver must learn.
Types of carving and technique
Types of wood carving are divided into several groups:
- contour;
- geometric;
- flat-notched;
- sculptural;
- end-to-end;
- embossed.
Each technique has its own characteristics, which you can read about later in the article.
Contour
Contour threads are characterized by narrow recesses with 2 edges. They are made shallow and carried along the entire product. The main patterns are elements of living nature, for example, plant leaves, inflorescences, berry bunches, as well as animals and birds. The picture that is obtained thanks to this technique visually resembles engraving. All lines are rough, with clear edges. Light and shadow remain undefined.
Experienced craftsmen prefer to mix this technique with other types of carving, for example, geometric and flat-relief. This style also goes well with many traditional paintings.
Pure contour patterns, without collaborations with other styles, look good only on small wall panels. Such patterns are made using chisels and a knife with a beveled blade. The technique of contour carving is simple, but in order to decorate various products with it, you need artistic experience and skillful use of tools.
Geometric
This type of carving is one of the easiest to perform. The patterns consist of indentations of different sizes, which have from 2 to 4 edges.
Together they form various geometric shapes:
- triangles;
- diamonds;
- circles;
- rectangles.
This technique is used to decorate furniture and also create unusual-looking kitchen utensils, for example, hot pads. For work, they use the simplest set of tools: knives, chisels and cutters.
Flat-notched
Another simple wood carving technique that requires only a knife with a beveled blade. The peculiarity of flat-pit carving is the smooth surface of the background. The recesses in the wood are made shallow. The lines are smooth, but have sharp edges.
The finished drawings are visually similar to those made using the contour technique. They also do not have a clear division into light and shadow. The main patterns are elements of living nature, such as trees, flower buds and animal silhouettes.
Sculptural
This is one of the most difficult types of wood carving. It differs from previous techniques in that the image is not flat, it is three-dimensional. Sculptural carvings include three-dimensional figurines of animals, people and divine idols.
Sculptural wood carving
In the Middle Ages, such carvings were used to decorate the roofs of rich houses, decorate the inside of rooms, and place large wooden figurines on the bows of ships. Currently, sculptural carving also refers to decoration.
Wood is shaped with more than one tool; more often than not, several sets are used. Learning to work with this technique will require a lot of time and patience.
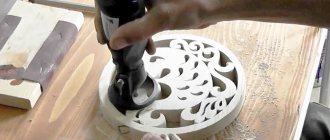
Through
This type of thread has several alternative names: through, openwork and sawn. The resulting pattern resembles thin lace. This effect is achieved by sawing through sanded boards.
The peculiarity of this technique is the complete or partial removal of the background. Craftsmen use this wood processing technology in various design options. Through carvings decorate the frames of windows and doors, as well as cornices. Often such wooden patterns can be replaced on stair railings.
This technology is also used for small decorative elements, for example, for boxes, picture and mirror frames and caskets.
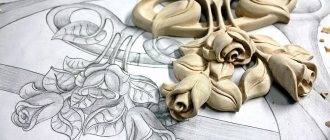
Embossed
This technology is similar to sculptural carving in terms of complexity. On a flat background, craftsmen carve convex, three-dimensional images. These can be figures of animals, plants and even human portraits.
Relief carvings are divided into 2 groups: bas-relief and high relief. In the first version, the ornament turns out to be convex to more than half the thickness of the main workpiece. In the second case, the pattern is made very voluminous. All lines rise above the background and have smooth curves.
Knives
You will need a good knife - one that is comfortable to work with. There are three types of knives - with a folding blade (pocket knife), with a fixed blade and knives with a replaceable blade. I prefer to use fixed blade knives because they are the safest. Knives also vary in blade shape and steel type.
I recommend a high-carbon steel blade with a hardness of 55 to 60 RC—it will stay sharp longer than a stainless or low-carbon steel blade. For finishing and creating shapes, I use a blade 4 mm thick and 3.8 to 5.1 cm long. A knife with a narrower and shorter blade is better for detail work. Some carvers prefer knives with replaceable blades because instead of sharpening the knife, you simply need to change the blade. Another advantage is this. that the handle of such a knife can be used with small chisels.
Precautions during operation
Before you start getting acquainted with wood carving, you need to learn about safety rules. The entire instrument is very sharp. They can easily get hurt, and sometimes you can get so seriously injured that you end up with disability.
What needs to be done to reduce these risks:
- Install the countertop securely and firmly. The table should not sway from side to side or move around the floor.
- The workpieces should be secured to the table with special tools - clamps. Only they are able to reliably fix the part. Any other available materials are not suitable for this purpose.
- Lamps and lamps should not blind the carver. They need to be placed so that the tabletop is well lit and no shadow falls from the master.
- When sharpening chisels and knives, you should wear gloves and safety glasses. Small chips can get into your eyes, and the knife blade can accidentally slip off the machine and injure your hands.
- The quality of sharpening of any tools should be checked on a special whetstone, and not with your fingers.
- When working with cutting tools, you should hold them away from you, and also make sure that your other hand is at a safe distance from the knife.
- There should be no foreign objects in the workplace.
- After each cutting stage, you need to remove chips from the table using special brushes. If too much debris accumulates, a sharp tool may get lost underneath it, and when cleaning, it will stick into your hand.
- All knives and chisels should have a place. Experienced craftsmen recommend placing a jar on the table in which the carver will put away the tools and take them out when necessary. When the work is completed, all accessories must be placed in places for permanent storage.
- When using electrical appliances, it is important to ensure that the cord does not become tangled or twisted.
- You cannot plug several devices into an outlet at once. Many wires on the floor can become intertwined. It's easy to trip and fall on them.
Wax mastic is often used for work. It should be heated on an electric stove, but not over an open fire.
It is unacceptable to place heating elements where chips will fly. It ignites quickly. Wood blanks smolder at a temperature of 214 degrees, then begin to burn, so it is important to monitor fire safety.
The workshop should always have bandages, cotton wool and disinfectant solutions for the skin. Even professional craftsmen are not immune from accidental injuries. Wounds need to be treated as quickly as possible. If the damage is serious, you should postpone work until complete recovery.
Chisels
Chisels come in different widths and curvatures. Curvature is indicated by a number. The steeper the curvature, the larger the number. So, a chisel with number 3 is almost flat, and number 11 has a U-shape. Of course, a number 10 or 11 chisel cuts deeper and removes more wood than a number 3. On the other hand, a number 3 chisel is useful for finishing. The number 12 V-shaped chisel has a wide range from 24 to 90 degrees, but the most common chisels are those with an angle of 60 to 70 degrees.
When choosing a chisel, pay attention to the handle so that the tool does not roll onto the floor when you place it on the table. Otherwise, you will constantly have to repair the blade.
When choosing a chisel, also keep in mind the size and type of carving you want to make. For manual work, palm-sized chisels are more suitable, and for small parts you will need even smaller tools. Sculpted and relief carvings require the use of standard chisels with heavy handles.
Stages of woodworking
Wood carving (pictures depicting different technologies will help beginners understand how to work with wood correctly) always begins with an idea. The master comes up with patterns and makes a schematic sketch on paper, which he then transfers to a wooden surface using a simple pencil or marker.
He then carves out the rough design, then cuts off the corners and makes the lines smooth. Processes the background, polishes all the details and varnishes the finished product.
Further in the article you can read a description of the stages of work in different techniques.
With house carving
Wood carving (pictures are needed to correctly represent the basics of the technology) of this type is similar to the through technique. The master makes through cuts in the workpiece, completely removes the background and leaves only openwork patterns. Such carvings decorate window frames, doorways and roofs of houses.
The work is carried out in 3 stages:
- Choosing a style . All patterns must be in harmony with each other, so the master first selects suitable stencils. Then he transfers them to the workpieces.
- The background is removed using a drill and jigsaw. The ornament is carved by hand using chisels and knives.
- The finished work is sanded and varnished.
For house carvings, hardwood is chosen. It is not prone to rotting and delamination, so it can last more than 20 years.
Carved wood decor with three-dimensional carvings
Wood carving (the pictures show the procedure for working) with convex patterns is carried out in 6 stages.
They can be examined using the example of making a large brooch with images of mountains:
- The master cuts out a round blank and transfers the sketch onto it.
- Using knives and chisels, he carves small indentations along the drawn outlines.
- Using a special knife, the carver gives rounded outlines to the patterns and removes sharp corners and serifs.
- Sands the product using sandpaper of different grain sizes and an abrasive sponge.
- Paints the product with paints.
- After complete drying, treat the craft with wax mastic.
Soft wood is suitable for such work. It is easier to create smooth contours and convex elements.
With geometric wood carvings
Wood carving (pictures will help you make the markings correctly) with geometric carvings is quite simple to perform. Most of the time is spent on creating sketches and markings.
Using the example of making a box, we can consider 5 main stages of work:
- First you need to think about the location and shape of the patterns on each wall of the box, as well as on the lid. You will need to make a schematic drawing.
- Then the product is lined and even squares are drawn on all sides.
- The cells make up the intended pattern.
- Starting from the edges and moving towards the center, the pattern needs to be cut out on each side of the box.
- At the end, the product is sanded with sandpaper. Periodically sweep away the crumbs with a special brush.
Products that will be actively used are varnished by craftsmen. You can choose a colorless coating or a colored one that imitates the natural shades of other wood species.
With slotted
This is a through carving, where the background is completely removed using a jigsaw, but the pattern remains.
The work is carried out in 4 stages, which can be considered in more detail using the example of making a book stand:
- The master selects a sketch, transfers it to paper and pastes it on top of a wooden blank.
- Drills holes. Where the jigsaw blade will be inserted. Then he cuts out the pattern, removing the background.
- Sands the product with sandpaper of different grits.
- Connects the parts of the stand with glue and covers with colored varnish.
For products with slotted patterns, it is recommended to use hardwood.
Materials for work
Each type of wood for carving has its pros and cons. Soft wood is easy to work with, but there can also be a lot of defects. These are aspen, linden, birch. This wood is best for beginners.
Oak, boxwood, mahogany are more expensive and complex wood. It is hard and durable, so it is difficult to carve from such wood. Very often there are troubles when working with such types of wood. Either the instrument or the craftsman may be harmed.
An experienced carver can easily work with a variety of woods, including juniper. Well, for beginners it is better to use inexpensive materials - spruce, pine, pear or birch.
Whatever tools are chosen for wood carving, safety precautions must be strictly observed!
Geometric carving master class
This is one of the most popular types of carving. Professional carvers advise beginning craftsmen to use this technology for their first works.
What tools and materials will be needed:
- harvesting from soft wood, such as linden;
- knife with a beveled blade;
- a simple pencil;
- eraser;
- ruler;
- compass;
- fine grit sandpaper.
Before work, you need to inspect the workpiece and sand it if necessary.
Sketching a pattern
You can download pictures for stencils or draw them yourself. First, the blanks are made on thick paper, and then transferred to a prepared wooden board for carving. To prevent the stencil from bending when tracing, it can be soaked in acrylic varnish and dried.
You need to trace the template slowly. First, draw all the lines along the contour, then highlight the inner pattern.
Cutting out patterns
You need to cut out patterns from the edge, gradually moving towards the center. The knife should be positioned at a 45 degree angle and apply light pressure. You need to remove the layers one by one. If you don’t have enough strength, you can press with both hands, the main thing is that the blade is located away from the cutter, and not vice versa.
In places where the lines are smooth, for example, where there are circles, you need to cut shallowly. It is better to go over one place several times, removing 3-4 layers one by one, than to make a sudden movement and ruin the drawing. When the carving is finished. Use an eraser to remove all markings.
Grinding and impregnation of the finished product
The finished work must be cleaned of dust and crumbs with a special brush. Then take sandpaper and carefully grind off all sharp corners and remove burrs. If you plan to use the product frequently (pick it up, move it from place to place), then it needs to be impregnated with varnish in 2-3 layers.
For decorative crafts that will decorate the room, impregnation with wax mastic is sufficient.
Tool sharpening
You need to start sharpening by aligning the tool blade. To do this you need to use coarse sandpaper. It quickly removes various hangnails. This creates a cutting edge.
When sharpening, it is important not to damage the sharpening angle and the geometric shape of the blade. After using a coarse abrasive, you need to move on to finer ones. With its help, the master can remove the remaining roughness.
If the tool gets very hot during sharpening, it should be cooled in water. At the end you need to apply sanding mixtures applied to the felt. They ultimately create a perfectly flat surface.
Master classes on creating wood carvings
Before work, you need to prepare all the necessary tools and materials for marking, cutting and grinding. The production of any wooden figurines begins with a rough blank. This is a rough piece of wood that is marked and shaped into angular shapes. There is no need to remove all the excess, just cut off large corners and burrs.
One of the most popular three-dimensional figures, the production of which first of all novice craftsmen try to master, is a bear.
To make the product beautiful, you must follow the following algorithm:
- On a walnut block 10x5 cm, 5 cm thick, a sketch of the future figure is drawn.
- Trim off the excess and do rough processing with a knife.
- Using a pencil, draw the back side of the figure and its upper part.
- Using chisels of different thicknesses, gradually remove several layers. Each time the thickness of the chips should decrease.
- Using a small knife, they work out the texture of the fur, forming other small details, teeth, eyes, claws.
- Sand the product with fine sandpaper, then polish and varnish.
Walnut is a hard wood. For the first experiment, you can use pine or linden.
Beginners are often interested in silhouettes of sitting animals, such as foxes or cats. They can be made by analogy, with minor changes.
Procedure:
- Select a sketch and transfer it to the workpiece.
- Saw off excess material.
- Carry out rough processing, observing the main contours.
- Then start working out the details. Needs to be specified. Where the animal will have paws, head, torso and tail.
- Cut out the shape of the muzzle, mark the location of the ears.
- Sand the product to make its contours softer.
- Use small tools to make details clearer.
- Sand the work again with fine sandpaper.
- Using a small knife, cut out the texture of the fur, marking the eyes, teeth and other small details.
At the end, all that remains is to do the final sanding and saturate the finished product with varnish.
Wood carving can be learned in a short time. In the process of work, you need to follow safety rules, as well as follow the action algorithms consistently. Step-by-step master classes and pictures with ready-made stencils will help beginning craftsmen.
Detailed instructions for creating a figurine: example
So, you have decided on the tree, placed the board on the workbench, and transferred the sketch. How to correctly mark the outline, cut out small parts and finish the job? If we are talking about cutting out an animal, then it is easier to cut out the outline with a 10 mm chisel with an inclination angle of 60 degrees.
You need to hold the instrument firmly with your left hand, and push forward with your right hand. If you do everything correctly, you will get a neat line. Make sure that the chisel does not slip off the outline.
The wood needs to be cut gradually. Recommended cutting depth is 1.5 -2 mm. The angle of inclination should be no more than 40 degrees.
The outline is cut, going beyond the pencil line, it remains untouched. The lines will be even and smooth. Take your time to cut off excess wood; periodically inspect the composition as a whole so as not to disturb the proportions.
To draw small details, use narrow chisels with an angle of 45 or even 35 degrees. The background is formed with a semicircular chisel. This element takes the most time. Make the furrows even, of the same depth and width.
When the work is ready, use a gravel to eliminate minor defects. Before finishing, wipe the board with a cloth soaked in solvent. The wood is covered with stain, wax or oil, depending on the wood.
