UV printing on metal is useful for applying logos and inscriptions to souvenirs, mugs, awards or plaques. The logo is applied to metal using a special Roland LEF-20 printer from the VersaUV series in A3 format, making the design very durable and indelible. An A3 format printer can print images on an object measuring no more than 538x360x100 mm, which must be taken into account when ordering.
Applying logos to metal, advantages:
- image brightness;
- the ability to apply an image to an uneven surface;
- high color rendering;
- high resolution (photographic quality);
- use of white paint;
- increased resistance and immunity to environmental influences, etc.
The essence of the method
The effect of acidic environments on the metal is of key importance in the process. The interaction of an aggressive environment with metal is called etching. This is a chemical process to apply a pattern to a knife. The area that is not intended for etching is covered with a protective layer.
It must be neutral to the etching substance. The depth of etching depends on the time of exposure to the blade. The experience of our ancestors revealed several effective methods. In this article we will try to consider all known methods.
Advantages of laser metal engraving
The main advantages of laser metal engraving include:
- high accuracy and maximum clarity of transfer of information previously prepared in a computer program;
- high level of aesthetics;
- affordable cost of this method of applying an image to metal;
- versatility of application, allowing the laser to be used for different metals.
This technique can be used in various fields, including household, production of souvenirs and dishes, jewelry. Laser engraving is also used in medicine, the production of machinery and cars, warehouse and other equipment.
Order a service
Metal etching methods
The choice of acid for pickling depends on the type of steel. Each alloy requires its own aggressive substances. Correct use of the solution affects the speed and quality of the process. There are several ways:
Chemical
A simple process that does not require complex equipment is chemical. But one should take into account the emissions of fumes harmful to humans into the air.
Electrolyte
The use of an electrolyte with current passing through it. This method is fast and you can get a clear drawing. The working fluid solution is also saved, and there are no harmful fumes.
Ion plasma
The ion plasma method is used at large production sites. It is used in dry environments for microelectronics production.
For etching at home, the first two methods are perfect. They do not require complex manipulations and the components are quite commercially available.
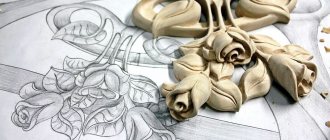
Benefits and uses of gold paints
Most metal objects have a slightly noticeable shine characteristic of the material. However, the use of gold and bronze paints to decorate such surfaces always gives the product a luxurious appearance that evokes admiration.
Golden elements in the interior decor give it incredible charm, a majestic and presentable appearance. In such cases, it is customary to paint using special metallized paints.
Gold coating is suitable for wood, metal, glass and even ceramic surfaces. A wide variety of coloring compositions allows finishing, as they say, “from floor to ceiling.” Decorative acrylic paint (in particular, silver coating) is significantly superior to similar models of oil and alkyd compositions.
The advantages of acrylic paint mixtures include:
- The absence of heavy metals and toxic substances in the composition of decorative acrylic paints;
- Possibility of use on various types of surfaces (plastered, wooden, plaster, metal);
- Tolerates exposure to negative environmental factors, in particular ultraviolet rays;
- Acrylic-based decorative paint is suitable for both interior and exterior decor;
- Quick drying and long service life;
- Does not require special care - can be cleaned with water and special products;
- Gold acrylic paint for metal can be used for tinting.
This kind of coloring mixtures can be used both for decorating objects and for restoring metal and wooden surfaces. Silver paint is often used for painting polyurethane or gypsum stucco, but for restoration of metal with acrylic, paints of bronze or gold shades are suitable (silver solutions are applied unevenly due to low pigmentation).
It is worth noting that modern models of coloring compositions differ significantly from each other in their technological and operational properties.
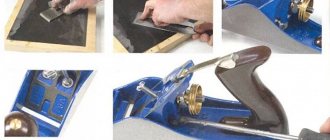
Preparing metal for drawing
Etching on the blade.
For the etching process, it is necessary to prepare the blade. If it is possible to disassemble the knife, do so. It will be easier to work with the blade separately. If this is not possible, then you should wrap the handle with polyethylene.
An acidic aggressive environment can harm any material. The surface to be treated should be thoroughly wiped with acetone. Remove possible greasy stains from the blade. It is not recommended to touch the surface of the product with your fingers.
Creating decor using aerosol
Decorating metal surfaces should be started only after the final selection of the application method and type of material. To make the space at home more attractive, comfortable and memorable, many resort to the services of professional decorators. However, you can make a room unique on your own - all you need is imagination and decorative paint. Aerosol products are characterized by economical consumption and ease of spraying.
With the help of an aerosol you can bring to life the most extraordinary design solutions: create smooth color transitions, geometric patterns and abstract designs. Paint sprays are great for finishing metals and various uneven surfaces. Has your favorite item become unusable? Use aerosol sprays and give it a “second life”!
Interestingly, acrylic paint in aerosols is also used for tuning vehicles. A decorative layer of gold or silver acrylic mixture will not only improve the appearance of the car, but also increase the protective properties of the surface - which is important under constant mechanical loads.
On video: review and application of aerosol decorative paint.
Drawing methods
The protective layer will be a pattern made of various materials. Metal can be etched without treatment. This process is similar to the film negative when developing a photograph. The protective material can be any polymer: nail polish, electrical tape, sticker, metal marker or vinyl.
Primer or bitumen varnish
To begin with, the entire product is coated with the composition, then the contours of the design are applied. It can be applied with a marker or brush. Next, the sketch is scratched down to the metal with a sharp wire or needle. The primer can be used GF 021 or XB 062. A noticeable disadvantage of this method is the possible chipping of dried soil when scratching the sketch.
Have you tried DIY etching yet?
Not really
Glossy paper
This is a good method that has a lot of positive aspects and is rapidly gaining popularity. It is necessary to print the proposed sketch using a laser printer on glossy paper in real size. Next, you need to attach the design to the metal surface and iron it with an iron.
The blade is then placed in water. The toner from the printer remains on the blade, and the crumpled paper peels off. You can additionally treat the design with nail polish. This method allows you to transfer all the smallest details of the design onto the blade.
Nail polish
This material is very common among amateurs. Nail polish is used very often due to its good resistance to aggressive environments. After the composition has been applied to the surface, it can be adjusted with a sharp object. This achieves smooth lines and clarity of the drawing.
Beautiful designs on knives.
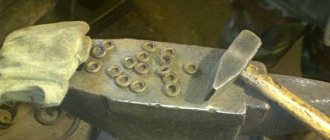
Relief design or inscription on metal in 5 minutes
Hello everyone, now I will describe a rather funny way of applying an inscription or design to ANY unpainted metal very quickly and without the help of special skills or a special tool. The method is the simplest and safest. Let's call it electro-chemical etching. To implement our plans, we will need a stencil of the intended design, made on a piece of self-adhesive film, such as “oracal” or adhesive tape. I found an advertising sticker consisting of a self-adhesive film and a paper backing, which is removed before use, applied the desired design and slowly cut out the contours with a stationery knife. To enlarge the photo, click on it with the mouse
I disassembled the smartphone (and I advise you to do the same, you will understand why later), degreased the surface and glued the stencil so that it fits tightly on all edges.
Now the most interesting thing is that all we need directly for etching is any direct current source (I have a 24 volt power supply), the voltage does not play a special role, the higher it is, the faster it is etched, but you can work comfortably at 5 volts , a crocodile clip (you can do without it), a cotton swab and a little salty boiled water (I took a couple of teaspoons of salt per 50 ml). That's all
Now we throw the positive contact with the help of a crocodile onto the free section of our part (it will be visible in the photo below), and on the negative one we strip the insulation and insert the wire into a cotton swab cut in half until it stops, i.e. so that the bare wire touches the cotton wool. Who guessed what we are doing next 5 plus))), for the rest - we moisten the cotton wool on the minus contact with salt water and touch it to the metal area inside our stencil. What should be there is a slight hissing, slight heating and darkening of the metal, if this is not the case, then we check the contact on the wire with the cotton wool, I repeat that it should touch it, it is also possible that you confused + with -, then it should not darken, but it will hiss. I do not recommend keeping the cotton wool on the part for a long time, because... It can get quite hot, it’s better to go over the stencil pointwise, or with quick strokes. Make sure you don't miss anything and go over the entire stencil, and that you rub the cotton about the same number of times (or touch the cotton for the same amount of time) on all parts so that the etching is even. In general, it’s worth trying first on some other metal object, so that you can imagine what awaits you, but only with a stencil (you can just stick two strips of tape, leave a strip of metal a couple of millimeters between them, and try it on it), otherwise there will be cotton wool leaving only uneven spots when etching the metal. After finishing the etching, wipe with a dry cloth and carefully remove the sticker (it can be used again). Again, we wipe the part from any remaining glue from the film and voila. You should get a pressed pattern that exactly follows the outline of the stencil. The depth of the relief depends on the etching time. The main thing is not to rush with the stencil; everything should be cut out as evenly as possible. In general, there is nothing complicated, after the first attempt you will understand how best to work, and then only improvement))) The field of activity is simply huge - from mobile phones and stamps on knives and forks to painting chair legs and chrome parts of a motorcycle/bicycle/car , you can make boxes and keychains)) In general, it depends on your imagination. As I already wrote, absolutely any metal is suitable, I tried it on chrome, steel (of different brands), aluminum and copper. You can also improve or remake the “working pen”, but personally I’m happy with a cotton swab.
Good luck in your endeavors, with uv. Sergey Paka Kreml777
Instructions for liquid etching of a knife
The process is not complicated, but it will require a very aggressive environment. Gaseous emissions can harm your health. You need to turn on the hood or open a window. For safety you will need the following things:
- respirator;
- latex gloves;
- smock;
- protective glasses.
Avoid contact of the solution with mucous membranes. You can get a severe chemical burn. The following materials will be required:
- grinding machine;
- insulating tape;
- Plastic container;
- acetone, solvent;
- toothpick and cotton pads;
- marker, nail polish;
- distilled water;
- sandpaper;
- supply of ferric chloride.
Prepare your knife in advance. If the product is collapsible, then remove the blade from it, otherwise wrap the handle with tape or tape.
Creating a protective layer
Transfer the pattern to the blade, then you will need to outline it with a protective layer. It should be taken into account that only areas without a protective layer will be susceptible to etching. The best way is to draw a design with a marker and then outline it with nail polish.
To make the lines even, the varnish can be adjusted. The final result depends on the personal qualities of the master; do not be afraid to fantasize. For clarity, use varnishes of different shades. The patterns can be anything.
Applying nail polish.
Preparation of the solution
It is imperative to use personal protective equipment. Always have baking soda on hand when working with acid. It can help if the solution gets on your skin. You should definitely remember the rule - pour acid into water, but not vice versa:
- The ratio of water and ferric chloride should be 50/50. To speed up the reaction, you can use other proportions, but half and half is the best option.
- You should not fill the container to the brim; you should take into account the item placed there. First pour distilled water and add ferric chloride there.
- The container should be marked with the word “Acid”, be careful with it. In this case, you can only use a plastic container; a steel one will not work. It may react with the solution.
DIY etching sketches.
Etching process
During the etching process, to obtain a high-quality result, it is recommended to move the part in the liquid. This will look like rinsing the product in a solution. It is strictly forbidden to touch the blade.
Leaving the part for a long time is also not recommended. According to professionals, it will require repeated short-term immersion of the blade in liquid. The process will look like this:
- immersing the product in the solution for 20 seconds;
- the part is exposed to air for the same amount of time;
- washing the workpiece under running water;
- air exposure 20 seconds;
- again the part is immersed in the solution.
In this way, proper control of the etching process can be achieved. All the steps described above should be done several times. The total time the blade is held in the solution should not exceed 10 minutes.
The total immersion time depends on the grade of steel and the concentration of the solution.
At the end of the process, you need to rinse the blade thoroughly with running water. And use acetone or solvent to remove the protective layer. You can go over the blade with fine sandpaper. Using a grinding machine you can bring the product to a shine.
Etching results.
Peculiarities
The nuances of the process are its simplicity and low requirements in terms of technical training. Galvanizing (the second name) of an ax does not require expensive equipment.
The main stages of the process are:
- Preparing the head for making the pattern: removing dirt and corrosion, cleaning to a metallic shine using a power tool (an angle grinder with petal wheels is enough), degreasing (solvent).
- Application of the desired graphics is carried out using paints and varnishes (from nail polish to regular paint) or stencils and elements cut out of paper and set on glue with strong adhesion.
- An interesting solution is to create several layers of the drawing. The essence of the principle is the same speed of electrochemical processes when protective layers are applied to each other and “eating” the unprotected metal.
- To do this, you need to apply various designs to the metal in 2-3 layers, optimally not with paint, but with paper or self-adhesive film. After etching, each layer will receive its own degree of processing depth.
- Connect the head to a power source and immerse in the solution.
- Current supply and observation.
The process will take from 10-15 to 30-40 minutes, depending on the degree of complexity of the applied pattern and the power of the coating. It is recommended to periodically turn off the current and remove the head.
Once the desired result is achieved, you should rinse the head of the future ax from the solution and remove the remaining protective coating.
After this, all that remains is to further polish and treat with a special paste (for shine and durability).
Forged ax with etching.
Etching a knife in Coca Cola
Quite an unusual method of etching. Experts say that drinking solutions can be used for the process: Sprite, Pepsi and Coca-Cola. The drinks contain phosphoric acid. But why not buy it in its pure form?
It can be done, but it is sold in very large volumes. If you put the matter on stream, then of course it is better to buy a canister of phosphoric acid. But if the process is planned to be carried out a couple of times, then there is no need for such a large quantity.
This acid works great against rust. The treated surface will resist corrosion for a long time.
Etching a knife in Coca Cola does not sound entirely correct, but it would be correct to say bluing the blade in Coca Cola. During the reaction, a layer of iron oxide is formed on the metal surface.
It gives the blade a dark tint and protects the steel from corrosion. The acid concentration in the drink is not high. Buy the drink in small quantities. This will make it easier to control the process. Blade bluing looks like this:
- First of all, you need to thoroughly degrease the surface. Otherwise the process will not be uniform.
- The drink should be poured into a container suitable for immersing the blade.
- Carbon dioxide is not needed in the process, heat up Coca Cola. Bubbles stuck to the blade can leave unetched marks.
- Every 2-3 hours we immerse the blade in the solution. When removing the blade, it should be washed with running water. The resulting oxide will leave. This way you can achieve a uniform coating of the blade with a layer.
All manipulations will take you about a day. If a light gray shade of the blade is enough for you, then this will take 3-4 hours. The resulting layer of bluing is not very strong, as with other methods. The blade will become less afraid of water and high humidity.
Blade bluing in Coca Cola.
How to place an order with us?
With us you can not only order a printing service, but also choose the items on which printing will be done - from flash drives and pens to mugs and signs. The group fulfills orders in bulk. To discuss all the details, call +7. You can not only find out prices, but also discuss colors, logo sizes and other nuances.
We provide services in Moscow at attractive prices and offer flexible conditions for our clients. Advertise your company to your advantage.
Full color UV printing of handles
| Quantity | 1 fragment | |
| Circulation, pcs. | up to 50 | 2800 rub./circulation |
| from 50 | 56.00 rub. | |
| from 100 | 46.00 rub. | |
| from 300 | 37.00 rub. | |
| from 500 | 33.00 rub. | |
| from 1000 | 31.00 rub. | |
| from 3000 | 28.00 rub. | |
The extra charge for volumetric printing (with 3D effect) is 20% for each layer 0.4 mm thick. Extra charge for UV varnish is 40% for each layer 0.4 mm thick. It is possible to apply up to 4 layers of paint. Matte varnish - up to 3 layers. Glossy - 1 layer. The cost of printing a signal sample (pen) is 600 rubles.
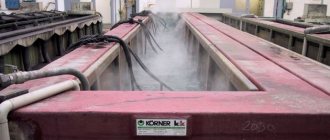
The principle of etching using electrolysis
Two methods are used for metal products: electrochemical and acid. They are used to remove scale and oxide films. It is necessary to follow the etching rules. They include: solution concentration and process time.
It is necessary to degrease the workpieces well. All the work of the master can be ruined by a small greasy spot. When working with varnish, be careful - it is highly flammable. The process itself is not safe. Treat it carefully and carefully.
The result of etching by electrolysis.
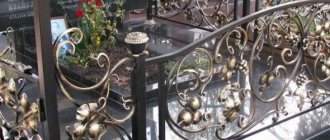
Modern technologies for decorating fences
Installation of a fresco on a brick base
To decorate your fence in a colorful and original way, you can use artistic stickers designed for decorating surfaces. It is only important to pay attention to the fact that the sticker must be intended for outdoor use. The variety of design options is amazing; you can always choose an interesting and stylish decor option.
For example, frescoes that imitate ancient painting on plaster look stylish and modern.
Bright and colorful stickers with pictures in three-dimensional 3D images, the price of which is quite affordable, intended for outdoor use, have the following properties:
- Resistant to moisture;
- Do not fade in the sun and withstand sudden temperature changes;
- Frost-resistant;
- Resistant to abrasion and mechanical stress.
Panoramic design option
A few tips on how to quickly and correctly glue such a pattern on a fence:
- The surface must be cleaned of dirt and dust;
- The protective film on the inside must be removed as it is glued to avoid the appearance of bubbles and breaks;
- If unwanted air bubbles nevertheless form, they can be easily pierced with a needle and smoothed out with the palm of your hand;
- In order to be sure of the durability and durability of the design, after gluing, the surface can be coated with a layer of transparent varnish in several layers.
Important. Work must be carried out in dry, warm weather. Preferably in the morning or evening to avoid direct sunlight on the finish.
Solutions used for pickling steel
Different grades of steel require their own solutions for pickling. It all depends on the atomic lattice of steel. Etching solutions come in different forms:
- Alkaline solutions are well suited for etching aluminum and its alloys;
- The double pickling method is used for durable titanium steel. First, the alloy is processed in alkaline solutions and only then in high concentration acids;
- For copper and its alloys, nitric, sulfuric, and phosphoric acids are used. To increase the reaction rate, chromium and nitrogen are added to solutions;
- You can use nitric and acetic acid for steels of unknown composition;
- for nickel and tungsten, a solution of hydrogen peroxide and formic acid is perfect;
- Cast iron can be pickled with a solution of sulfuric acid.
"Standard" surfaces for painting
Metal
Such bases are more suitable for painting with acrylic and oil. Often, artists use sheets of copper, stainless steel and aluminum.
The biggest advantage of these foundations is their impeccable strength. But over time, any metal oxidizes, and when exposed to temperature, it tends to shrink or expand, which leads to cracks (craquelures). Therefore, the safety of the canvas on metal is low. The exception is gold leaf, which, unlike ordinary metal, does not need to be additionally primed. And when painting with translucent paints, you get a bewitching warm tone and golden shimmer.
Due to their heavy weight, all paintings made on metal bases are small. However, now artists are presented with an amazing opportunity to write on such a metal building material as “honeycomb aluminum”. It is light, smooth like glass, and is not subject to bending or deformation from drying paints. Aluminum honeycombs are similar in structure to corrugated cardboard. You can buy such material in art salons or metal equipment stores.
How to write on metal? The best paints for metal bases are acrylic. You can also work with oil. First, the base must be cleaned of rust and etched with a metal primer.
Plywood
This material is made from poplar, birch and mahogany. The result is a multi-layer board, one side of which is rough and the other smooth. The thickness varies from 0.6 to 1.3 cm. Before work, the plywood is sanded with sandpaper and primed with an adhesive solution.
How to write on plywood? Here the choice is almost unlimited: you can paint with oil, acrylic, ink, pencil, gouache and watercolors. Even coal fits perfectly on plywood. The most important thing is that the thickness of plywood for painting should not be less than 6 mm.
As a primer, you can purchase a special primer for plywood, or an acrylic primer will do.
If you are going to work with oil, it would be ideal to saturate the plywood with drying oil. Instead of a primer, you can use an inexpensive option - PVA glue - the paint adheres perfectly!
Note! If the size of the canvas exceeds 45 cm, regardless of its thickness, it should be reinforced with a wooden frame.
Hardboard
The material is a mixture of wood fibers crushed into sawdust and glue. From all this, a solid hardboard board is obtained, which is distinguished by its durability, durability and strength. The shelf life of hardboard is comparable to that of hardwood.
Among the disadvantages, it is worth noting the heavy weight and the tendency to sag towards the center of gravity. Therefore, hardboard sheets are reinforced on the back side with wooden connecting brackets.
Hardboard is sold almost everywhere and inexpensively. It is better to take hardboard that is smooth on both sides.
How to write on hardboard? Oil is the best paint for this base.
Transparency
Some materials can transmit most of the light radiation through themselves, so ordinary glass almost does not reflect light and we can see what is going on outside the window. But metals, for example, do not transmit light at all. If everything is clear with transparent and opaque materials, then with translucent ones it is much more interesting.
A beam of light penetrates into a translucent object and is repeatedly reflected by particles of the material in random directions, i.e. dissipates. This effect is called subsurface scattering. The material does not completely absorb light - part of it passes through the object and in the illuminated area the color becomes brighter and more saturated.
In a transparent object (on the left), the light ray does not change its trajectory, but in a translucent object (on the right) it is distorted and scattered.
Subsurface scattering is especially noticeable on thin objects:
Hold pollen in the dark to a light source and see the same effect.
Scope of application
The scope of application of products obtained as a result of using this technology is quite extensive.
Sublimation printing is used in the manufacture of various plates, badges, nameplates, awards and medals, and souvenirs. We offer printing services on metal surfaces for advertising agencies, gift shops, industrial facilities and enterprises, and private customers. Examples of our work
Tips for airbrushes
- For enamel and acrylic paints, a special solvent from the Lacquer Thinner brand is best suited. Due to their high pigmentation, such paints require 20% dilution than regular paints. When choosing a nozzle, it is also worth considering that the pigment in such paints is usually larger than usual. We recommend using a nozzle with a small diameter (eg 0.3mm).
- Mixing acrylic paints with water rather than solvent increases the risk of the material clogging the nozzle. If you want to dilute paint with a solvent from water, do the following: dilute vodka and chemically pure (distilled) water 1 to 1, mix with paint, bringing it to a liquid consistency, like milk.
- SP-THINNER solvent is also suitable for acrylic and latex materials
- The Maimeri brand metal material has a liquid consistency, so it is best to dilute them with alcohol.
- Viva brand paints are best diluted with clean water.
Strong base
Even the most realistic render will not save the work if it has poor composition or the character has problems with anatomy. Therefore, first of all, the artist must have basic knowledge of academic drawing and painting. Such a titan of digital drawing as Craig Mullins never tires of repeating this.
“The fundamentals of academic drawing are a strong foundation for the professional growth of an artist. It is important to know composition and anatomy, to be able to work with color and tone.” Craig Mullins
The best airbrush paints
Italian paints Policolor MAIMERI. The advantages are a wide and bright palette, good pricing policy, long-term use due to the thick consistency that can be diluted. Used for painting on walls, drawings on wood, paper, cardboard, canvas.
- Acrylic paints Premia from Rubens. The peculiarity of these paints is that they have the highest level of adhesion, which allows them to work with any types of treated coatings, for example, glass, fabrics, nylon. The color rendition of the colors is very rich. There are 3 categories based on the degree of transparency (marked on each package): case (opaque), semi-transparent and lesirovanie (transparent). The downside of these paints is the rather high price.
- Atelier paints from Rubens. Airbrush paint is used up quickly, as it is more liquid than its counterparts. The pigment in it is large, but the cost is lower. Preferred for amateur work.
- SP-NAIL COLOR is universal, often used in the manicure industry due to its toxic harmlessness. Allows for smooth color mixing
- Similar to the previous one, TM SP-TATTOO COLOR is an ideal option for body art. Stays on the body for up to three days.
- Colorex dyes are popular for decorating smartphones and laptops. A water-soluble material with alcohol as a base, but when mixed with water one to one, it forms a beautiful, strong, and at the same time thin film.
- ROTRING inks are used for drawings on wood, cardboard and paper. Can be used even with a minimum nozzle size. Mixes well with acrylic paints. It is very important, after using mascara with an airbrush, to rinse the tool as thoroughly as possible, preferably with products containing ammonia.
- Car enamels - based on the name, you can understand that this material is intended for painting on a car. Accordingly, it interacts best with metal and glass surfaces; some also work with plastic (see information on the packaging)
- Oil paints can also be used. In order to use oil paint with an airbrush, it must be diluted with white alcohol or turpentine. We recommend fixing the drawing with varnish. Among the brands you should focus on the German Nerchau, Italian Classico Maimeri, or domestic Master Class.