When looking for an idea for starting their own business, many consider the possibility of providing tire fitting services. To provide such work, special equipment is required that you can make yourself. A manual tire changing machine can significantly simplify work and reduce costs. There are quite a large number of different drawings according to which such equipment can be made. They all differ in manufacturing complexity and costs.
Reasons for self-assembly
A homemade tire changing machine in most cases is assembled for the following reasons:
- Financial savings. The cost of service stations provided is constantly growing. In addition, a homemade structure can be used to perform work and make a profit.
- Protection against defects due to the tire mechanic’s dishonest attitude towards his work. Today it is quite difficult to find a service station that provides quality services. Craftsmen quite often make mistakes, which causes rapid wear of tires.
- Quick replacement, no need to wait in line. During the tire change period, literally at every service station there is a large queue of people wanting to change tires. At the same time, the cost of the services provided increases significantly.
- There is an opportunity to earn money with minimal investment. When creating your own car service center, you can save on purchasing a tire changing machine.
You can make your own tire changing machine from scrap materials. At the same time, it will be practically not inferior in performance to the industrial version.
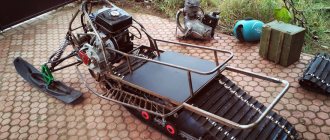
Romance of the highway: tire service on the edge
Do-it-yourself tire mounting on the track can be done using two mounting blades and a special device to tear the tire off the rim. But it will be more convenient and civilized if you have a jack and a tow rope. And you will find them.
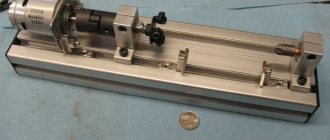
Drawing of a tire changing machine.
Therefore, we continue to work according to this algorithm:
- We remove the wheel, clean it and place it with the nipple facing up.
- Let the air out of the wheel.
- We insert the towing cable into the disc hole and place the jack close to the rim.
- We throw the cable over the jack bracket and fasten the ends of the cable to each other.
- It is necessary to rotate the handle so that the jack pulls the cable up, and the seat ring moves down until the tire separates from the rim.
- If the tube needs repair or replacement, you need to lift the side of the tire onto the rim near the fitting, which we push in and remove the tube under the tire.
- We take out the nipple and remove the air.
- Now we place it under the tire, but first we insert the fitting into the hole inside.
- We pump up the inserted camera a little, without the nipple for now.
- We make a bead, insert the nipple into the fitting, fully inflate the chamber and put the wheel in its place.
All ten of these points are easy to describe, but very difficult to do. And if the weather conditions leave much to be desired, then it becomes completely sad; you will remember such tire fitting for the rest of your life. The quality of such installation will never be perfect.
It would be smarter to acquire some kind of mechanized device for independent tire fitting. There are many options for such devices - you can find a wide variety of design solutions on the Internet.
You can learn more about how to assemble a subwoofer with your own hands and about electronic radio circuits on the website - www.radiochipi.ru.
Design Features
You can create your own tire fitting by taking into account the design features of the machine. The classic version is represented by the following main components:
- Frame. The basis of the structure is represented by a frame, which is made of rectangular profile metal pipes. It is recommended to place them parallel to each other. The connection is made using a welding machine; the structure can be strengthened with metal corners. In order to ensure long service life of the device, stainless steel should be used, as high humidity can cause corrosion.
- Pipe. It serves as a base for attaching the handle. The pipe used must be strong enough, as it will serve as a lever when carrying out the work of removing the tire from the rim.
- The riser is mounted on the frame. It is designed for installing a wheel rim. It is worth considering that a large load will be placed on this structural element.
All elements used must have high strength, since a strong load occurs when the tire is removed. It is recommended to strengthen the connection with screw fasteners.
Disassembly of tubeless tires
The described methods are also suitable for tubeless cameras. But with tubeless cameras, the “sticking” process is somewhat stronger and when using the impact method, the chance of causing damage increases significantly. Experienced craftsmen strongly advise using a jack.
As it became clear from the article, you can carry out disassembly in a garage yourself, but this will require quite a lot of effort and these manipulations may have their pitfalls. Thus, if it is possible to contact a car repair shop, then it is better to do so. Masters have much more experience and special equipment.
Direct assembly process
You can assemble a tire changing machine as follows:
- To make the frame you will need durable profile pipes. They will serve as an excellent basis for the machine.
- A distance of at least 700 millimeters must be maintained between pipes. This ensures the stability of the structure during operation.
- The parallel arrangement of pipes is ensured by using an angle. In addition, they are used to strengthen the structure.
- If desired, you can complement the design with adjustable legs. You can make the device mobile by installing wheels or rollers; in working condition, fixation is carried out using stoppers.
- After creating the base, the metal pipe is fastened. It is recommended to choose a version with a diameter of 20-30 millimeters. A flange is installed at a height of 40–60 centimeters before welding work.
- The next step is to attach the fastening element, which is represented by a steel plate. It will be used as a base when attaching the lever.
- The lever is represented by a design consisting of a shoulder and a paw. The paw is used for direct tire removal.
It is practically impossible to assemble a structure without a welding machine. In addition, the metal should be protected from environmental influences by painting the surface.
Unstressed method
This method will require a little more effort, but will prevent damage to the tire and wheel. Removing the tire in this way can be done in several ways. Before you begin disassembly, the wheel must be removed.
Method 1
To use this method, you must have a second car and a very strong board. The process of tearing off the rubber is quite simple:
- Place the board as close to the rim as possible.
- We ask the car to drive over the hanging edge of the board. The weight of the machine should cause the edge to separate.
- Next, we simply tear off the tire along the entire circumference, simply stepping as close as possible to the junction of the rubber and the disk.
- We turn the wheel over and do the whole process again.
Method 2
If there is no second car and you don’t want to hit the tire, you can resort to the method using a jack. We will need:
- Jack.
- Towing strap.
- A wrench (large) or a pry bar.
Having prepared the necessary tools, proceed as follows:
- We remove the wheel.
- Place a pry bar or key on it.
- We place the jack on the tire, as close to the rim as possible and on the opposite side of the mount (key).
- We attach one of the ends of the sling to the mount (key) and pull it through the disk to the supporting heel of the jack and again pull it to the mount and firmly fasten it.
- We begin to work with the jack until the tire comes off completely.
- You can complete a full lift by simply kicking around the entire circumference.
After separating the edges, the sorting itself occurs. Using a pry bar, we pull the edge of the rubber beyond the disk along the entire diameter on both sides and thereby separate the tire from the rim.
Using a homemade machine
Without a special tire changing machine, it is almost impossible to remove or install tires. If you have it, the work is greatly simplified:
- The wheel is placed on the support frame under the lever. It must remain motionless while performing work.
- The paw is guided to butt the tire with the disc.
- In order to remove the tire, strong pressure is applied to the lever. Under pressure, the tire deforms, causing it to move away from the edge of the disc. This procedure is repeated along the entire rim.
After the tire has partially come off the rim, you can use a regular pry bar. It is best to use a long tool .
What tools will be required for disassembly?
It is a mistake to believe that you can only use a hammer and a pry bar when removing a tire. Such a minimum set can only lead to hidden or obvious damage to the rubber, and the nuances will appear later (after installing the previously removed tire on the rim).
- First of all, the rubber sticks to the disc. To make removal easy, you need a solvent, alcohol, turpentine. First, the removal areas on the tire are processed, after which they need to be wiped.
- As for the tools for disassembling the wheel, you will need to have a jack, wrenches, special mounting blades, a metal corner, and a hammer.
Useful tips
When performing tire fitting work, the following recommendations should be taken into account:
- The extreme part of the lining should not be subject to serious mechanical stress. This is due to the fact that if you make a mistake, you can create serious problems for yourself in the future with the installation of tires. The most difficulties arise when installing tubeless tires.
- The edges are lubricated with grease to eliminate the possibility of damage to the rubber. It is worth considering that the tire should be lubricated every time it is installed. By using a lubricant, the likelihood of a rupture in the rubber is significantly reduced.
- At the time of installation, it is recommended to use a soap composition or another with lubricating properties. Their use greatly simplifies the installation process.
- When installing rubber on the disc, you need to ensure that there is no gap between them. This can lead to the tire starting to flatten or the outer part of the rubber to become damaged.
- On sale you can find quite a few different special kits for installing tires. Their use allows you to significantly simplify your work. Special kits include sealing harnesses and mounts of various sizes.
On the Internet you can find a variety of drawings according to which tire changing machines are made. In most cases, improvised materials are used in construction.
The design of a homemade tire changing machine allows for high-quality removal and installation of tires on almost any rim. At the same time, the machine is assembled practically from scrap materials, that is, it will cost a low cost. Considering that the cost of a service station is constantly growing, a homemade machine in the garage will be useful.
Opinions of car owners on how to properly install wheels on a car
- Look for the arrow with the inscription “To position the wheels correctly, find the arrow, next to it the word “Rotation” will be written. This marking indicates the direction of rotation of the car wheel. There’s nothing complicated, even a beginner can do it right.”
- Naturally, you need to look at the tires
: “Don’t know how to position the rear wheel correctly? Examine the tires carefully. You will see an arrow and the words “front” and “rear”. If they are not there, then the tread pattern is asymmetrical. Then the eccentric will act as a guide. We position the car wheel in the same way as the rear one. Then the eccentrics will be on one side.” - There should clearly be signs
“To position the wheels correctly, you need to look at the arrow. When the tread pattern is asymmetrical, that is, the inner side is designed for dirt, then the pattern will be larger. The outer side is for asphalt, so the pattern will be small. In any case, we are studying the labeling.”