11/19/2019 Author: VT-METALL
Issues discussed in the material:
- What is welding equipment
- What types of welding equipment are there?
- What are the requirements for welding equipment?
The type of welding equipment used directly affects the technological features of welding, the possibility of manufacturing different types of welded structures and the technical and economic features of the entire production. The basic requirements for welding equipment are as follows: ensuring high quality and operational efficiency, reliability and ergonomics of the equipment, rational use of materials and energy resources, minimal costs for the production of equipment.
What are the requirements for welding equipment in production?
In the process of organizing and preparing welding work, the correct and competent placement of the equipment used is of paramount importance. According to current requirements for the operation of welding equipment, all used installations and assemblies, consisting of several welding machines, must be placed in a separate special room. These compartments must be fenced with partitions whose height is equal to or greater than 1.7 meters.
The use of professional welding equipment of various types and types, due to the specifics of its purpose and design, is accompanied by noise that has a negative impact on the nervous system of workers, which entails a decrease in performance and loss of concentration. For this reason, it is recommended to equip such units with high-quality sound insulation or remove them outside the working area of the room.
Free passages of one and a half meters wide should be created between welding machines, while similar gaps between stationary equipment and the walls or columns of the room should be at least half a meter.
The location for esab stationary welding equipment should be in a room that is well ventilated and protected from the atmosphere. The optimal solution is a room with a concrete floor, the walls of which are not able to reflect the glare that occurs during welding work. Otherwise, glare may pose a threat to the welder's vision. In addition, it is necessary to close the doorway of the room with a tarpaulin suspended on rings.
The use of modern equipment and welding technologies at various installation sites is often accompanied by problems and difficulties associated with the storage of units. It is recommended to place this equipment in a closed room, from which only the cables necessary for welding are extended to the welder’s workplace. In cases where such requirements cannot be met, welding machines are mounted on mobile platforms, which allow the equipment to be transported to the storage site after all work is completed.
The workpieces necessary to carry out activities using basic welding equipment must be prepared in advance and in advance.
The welding equipment used must fully meet the requirements of GOST regulations 12.2.003-9/12.2.049-80, as well as the rules:
- PB in relation to electrical installations (according to GOST 12.2.007.8-75);
- technical operation of consumer electrical installations (PTE);
- electrical equipment devices (ELD);
- safety precautions during the operation of consumer electrical equipment (PTE).
The most important requirements for the use of ESAB welding equipment are also aspects such as:
- high performance;
- excellent seam quality;
- ergonomics and operational reliability;
- extremely rational consumption of electricity and materials;
- minimum production costs.
Classic technology
Classic technology for welding metal structures is based on time-tested methods such as gas-fire and electric welding. In both options, suture methods are divided into:
- Auto.
- Semi-automatic
- Manual.
The automatic method is based on the absence of human physical labor. A special robotic device, depending on the work being carried out, is switched to the correct mode and performs the work, thereby replacing a person. Such units have limitations commented on in their instructions. It is most profitable to use such machines in mass production by companies whose products require a large number of connections.
The manual method implies the presence of physical human labor. This includes control of the welding electrodes and joint formation. Most often, the manual method means:
- Using standard flux welding.
- Soldering of metal structures with a gas welding device.
- Arc welding.
The latter method is popular when working at home for your own needs, or in a small enterprise, since large-scale production will have large costs for maintaining this method of welding structures.
Semi-automatic welding
Semi-automatic - involves manual processing of seams, but the supply of the electrode itself is carried out automatically, which increases labor productivity. And in combination with the human factor and the automatic welding method, the robotic joining method is very popular and has gained development among both amateurs and professionals in this field.
Construction of modern welding units
The welding equipment that is currently used is a high-tech device that guarantees high-quality and reliable connection of steel elements of metal structures. The most popular units used in everyday life and in industry are inverter devices. Therefore, we will further analyze the typical composition of this particular equipment.
The key structural elements of inverter equipment are the control unit and the power unit. The latter is focused on rectifying and converting the incoming current, while the control unit allows you to set the desired operating modes.
The power unit of welding equipment consists of:
- a rectifier containing several capacitors and a diode bridge;
- an inverter formed by transistors;
- a noise filter, which is a choke on a magnetic coil;
- a starting circuit, including power supply elements for the components of the unit;
- output rectifier.
The purpose of the welding equipment under consideration is to create an ergonomic and efficient tool that allows welding of steel structures of any complexity.
Let us note the fact that each type of welding unit has its own unique and distinctive features. In addition, the purpose of the devices in question largely depends on the welding technology and the power of the equipment, as well as the method of applying the seam.
Thus, the power of the unit determines what metal can be welded and how high the quality of the weld will be. In addition, this parameter affects what consumables will have to be used and whether the joint will be susceptible to corrosion.
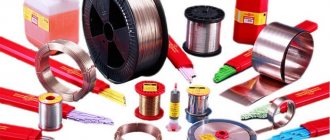
For example, the use of inverter units for welding involves the use of standard fusible electrodes, and welding with arc-type equipment requires the use of a special wire on a reel.
Requirements for welding metal structures
The following requirements for the installation of metal structures and welding apply to a greater extent to professional workers, but if a person wants to develop in this business, then it would be a good idea to familiarize yourself with the following information.
For certain types of metal structures, special types of materials are used from which elements of the correct geometric shape are made. It is also important that the strength and weldability characteristics comply with those required by SNIP II 23-81 and GOST 27772-88. This document also contains sections devoted to diagrams of how seams are created correctly and how their quality affects the stability and durability of the entire structure. The complexity of the work depends on the number and shape of the parts.
Download GOST 27772-88
Also an important point is the qualifications of the employee. Since there are types of welding of metal structures that can only be assembled by workers who have long been familiar with this craft, the work of beginners is simply not acceptable. A more detailed list of such structures is regulated by document RD 15.132-96 of the Ministry of Fuel and Energy of the Russian Federation.
Example of welding metal structures
Also, according to GOSTs of the Russian Federation, welding of critical metal structures must be controlled.
Download GOST 5264-80
Types of modern welding machines
The type of welding equipment is determined by its design features, operating principle and price. These parameters are distinguished:
- diesel and gasoline welding generators;
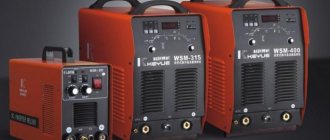
- semi-automatic and inverter welding machines;
- AC and argon arc welding equipment;
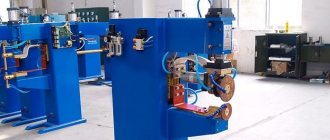
- devices for resistance and spot welding;
- arc welding machines;
- air plasma cutters.
You can learn more about all types of welding equipment in our catalog.
Temperature conditions of the welding process
Air temperature has a great influence on the choice of the technology used to create a seam and on its quality.
The fact is that it is impossible to carry out work on the construction of metal structures if the temperature of the workpieces themselves drops below - 18 ° C. In such conditions, the temperature must be monitored by measuring the area where the two parts join. And if it turns out to be below critical, the workpieces themselves undergo heat treatment before creating the seam. Not the entire element is heated, but only at a short distance from the edge, equal to the thickness of the workpiece, or at a distance of at least 75 mm in any direction.
If a seam must be created between parts made of different alloys, then both are heated according to the temperature regime of the strongest of them (in terms of material strength). Do not forget also that the heating temperature depends on some characteristics of the material itself.
As an example, use steel grade A514, the blade of which, with a thickness exceeding 40 mm, requires heating to 210 °C. Thicker parts made from this steel are heated to 235 °C.
Welded joints and their types
Welded joints are classified according to the presence of one of the following characteristics:
- Location of connection of 2 parts.
- Type of weld used.
- Welding technologies used in connection.
- The environmental conditions under which the process itself was carried out
- According to the thickness of the parts.
- The grade of alloy from which the parts are made.
Aluminum weld
Regarding the first point of the plan, the details, according to their geometric location, have four types of connections:
- Butt joint, single-plane connection of two workpieces.
- Overlapping, when the workpieces are welded by placing the edge of one part on the edge of another.
- Corner joints - joining parts at a certain angle.
- T-joint. Welding when a part is adjacent to another end plane.
Butt joints are made by welding along the thickness of the element or when creating a seam on the lead strips. If the welding process is carried out outside the workshop room, then the connection can be organized by one-sided welding, with further welding of the base of the seam, which implies filling the space between the elements, carried out along one of the edges.
The work based on output pads is radically different from the previous one. The lining should be adjacent to the edge of the parts being joined - this is it. The resulting space should measure no more than 6 mm. This condition applies to the manual welding method. If the work is performed mechanically. Then it should not exceed 15 mm. The pads are selected based on the thickness parameter so that the part does not burn through during the working process.
Titanium weld
In erected structures based on butt joints, blanks made of different thicknesses are often combined. In this case, a processing method is used in which the angle of inclination of steel with greater thickness is reduced, which should correspond to 1/8 of the inclination of stretched metal workpieces, or 1/5 for compressed elements.
Welding structures - features
The very concept of welding applies not only to products made of metal alloys, but also to products made of polymers, that is, for example, plastic. After all, this concept implies a thermal processing process in which two or more parts are combined into a single component.
The work itself is divided into two steps - assembly and connection. The first one has the greatest labor intensity.
After all, in order for the quality of the erected metal structure to be durable, it is necessary that all the stated requirements for the workpieces and the material from which they were made were observed until the end of the work.
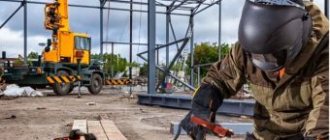
Welding work
From an objective point of view, more than half of the entire work period is spent on the assembly of the future metal structure.
Special checks
A special form of inspection is established when monitoring newly received equipment, equipment that has been repaired, and equipment that has been idle for more than three months.
In these situations, the availability and completeness of the technical operational documentation of the device (passport, operating instructions, diagrams) is checked.
A visual inspection of the technical condition of the equipment is carried out, if the equipment is new, excess lubricant is removed, transport fasteners are removed, and if any, loose bolted connections are pulled.
The presence of a valid (that is, not expired) mark (sticker) of the verification organization on the housings of measuring instruments is checked. If necessary, a note about the verification period is made in the corresponding column of the equipment passport.
The level of electrical insulation resistance is measured. It is also necessary to turn on the equipment to determine its operating status.
Insulation resistance measurements are carried out between windings (for transformers and rectifiers), as well as between each winding and the equipment frame.
In this case, you should follow the recommendations set out in the technical documentation of the device. If the operating instructions do not contain a description of the testing methodology, they should be carried out in accordance with GOSTs. Thus, automatic welding machines are tested in accordance with GOST 8213 standards.
Semi-automatic welding devices - in accordance with GOST 18130. Tests of devices based on a welding inverter are carried out in accordance with GOST 7237. Alternating current devices (transformers) - in accordance with GOST 7012.
As part of the service, electric generators are subject to testing in accordance with GOST 304. Devices using rectified welding current - in accordance with GOST 13821.
Welded components in metal structures
All structures made of metal are supported on a base of welded joints, which are the basis of butt joints. When developing a project, engineers must take into account convenient conditions for high-quality work in these units. These include:
- The condition is that the nodes be welded with a corner or butt joint.
- The lower welding position has priority.
- Mainly use mechanized or fully robotic welding to ensure the quality of the work performed.
There are many subspecies among connecting nodes, most of which have different requirements. A good example would be a beam assembly. In it, the greatest attention is concentrated on the distance between the welds, since it should not be shorter than the thickness of the thickest steel element divided by 10 that is part of this assembly.
Gazprom temporary requirements for gas pipelines
Requirements of OJSC Gazprom
Requirements for the organization of welding and installation work, the welding technologies used, non-destructive quality control of welded joints and the equipment of contractors during the construction, reconstruction and overhaul of main gas pipelines of OAO Gazprom.
5.2 Requirements for non-destructive quality control laboratories
welded joints
5.2.1 NDT laboratory for the quality of welded joints, part of
organization must be certified in accordance with the requirements of PB 03-372-00.
5.2.2 The organization performing NDT must have a developed and
documented quality system corresponding to the field of activity, nature
and the volume of non-destructive testing work performed by the organization.
5.2.3 Contents of the Quality Manual intended for use
personnel of the organization, must comply with the requirements of STO Gazprom 9004-2006
"Quality Management Systems".
5.2.4 During construction, reconstruction and major repairs of main gas pipelines must
Temporary requirements for the organization of welding and installation work, welding technologies used, non-destructive testing
quality of welded joints and equipment of contractors during construction, reconstruction and major repairs
main gas pipelines of OJSC Gazprom
18
use mobile and semi-stationary NDT laboratories.
5.2.5 Requirements for the organization of NDT during construction, reconstruction and
overhaul of MGs are given in the relevant sections of these requirements.
5.3 Requirements for technologies and means of non-destructive testing
quality of welded joints
5.3.1 General requirements for non-destructive quality control means
welded joints
5.3.1.1 The organization performing quality control should be equipped
equipment and NDT tools that ensure high-quality performance of work on
non-destructive quality control of welded joints. Approximate list of funds
quality control is given in Appendix B.
5.3.1.2 The nomenclature of equipment and NDT tools of the organization should
ensure compliance with the requirements of the current regulatory, methodological and
technological documentation required for carrying out control work
quality of welded joints during construction, reconstruction and major repairs
objects of main gas pipelines of OJSC Gazprom using non-destructive methods.
5.3.1.3 The technical means used for NDT must:
be included in the register of Rostechregulirovanie of the Russian Federation;
have a certificate of metrological verification (calibration) established
forms and other permitting documents in accordance with current
requirements;
ensure detection of defects in welded joints according to standards
admissibility specified in paragraphs. 5.6.10, 5.6.11.
5.3.1.4 New NDT tools and materials not previously used at sites
OJSC Gazprom must undergo certification (TU examination) in accordance with STO
Gazprom 2-3.5-046-2006. Examination of specifications using DT funds can be carried out jointly with
certification of NDT technology.
5.3.1.5 NDT tools and materials must be included in the “Register of Welding,
auxiliary equipment, equipment and materials for monitoring and diagnostics
welded joints, the technical conditions of which correspond to the technical
requirements of OAO Gazprom based on the results of positive qualification
tests in accordance with the procedure in accordance with STO Gazprom 2-3.5-046-2006.
5.3.1.6 NDT tools must be included in the registration documents
(record sheets, cards) of the organization in accordance with the requirements of PB 03-372-00.
5.3.1.7 Organizations must have metrological verification schedules
(calibration), maintenance and performance testing of the used
equipment and NDT tools in accordance with the requirements of PB 03-372-00.
5.3.1.8 Repair of NDT equipment must be carried out by a specialized
organization (equipment manufacturer or authorized by the manufacturer
service organization).
5.3.1.9 Enterprise standard samples used for customization when
IPC, PVK and UZK must have verification certificates and/or certificates of
certification of the established form.
Temporary requirements for the organization of welding and installation work, welding technologies used, non-destructive testing
quality of welded joints and equipment of contractors during construction, reconstruction and major repairs
main gas pipelines of OJSC Gazprom
19
5.3.1.10 The non-destructive testing means used must preserve
its performance in the temperature range specified in the passport (or
user manual for imported equipment) and in the requirements for equipment
non-destructive testing specified in these temporary requirements.
5.3.1.11 The non-destructive testing means used must ensure:
control of welded joints of pipes with a thickness of 4 to 41 mm;
repeatability of control results.
5.3.2 Requirements for manual and mechanized ultrasonic
quality control of welded joints
5.3.2.1 When choosing flaw detectors for RUZK, it is recommended to give
preference for devices with FR (AR), providing a larger volume
information for identifying defects.
5.3.2.2 The flaw detector for RUZK must comply with the following
requirements:
be able to save and document settings parameters and
control results (in the form of images of pulses and related information about
control parameters);
the absolute error in measuring the coordinates of identified defects should not
exceed 1mm;
remain operational in the temperature range from 5°C to +40°C
(use of devices with other temperature ranges is allowed if they
correspond to local climatic conditions) see clause 5.7.7. , at temperatures below
5°C RUZK must be carried out in heated shelters.
5.3.2.3 Flaw detectors for mechanized ultrasonic testing (MUZK)
must provide:
detection and registration of defects in MG circumferential welded joints
in accordance with the standards specified in paragraphs. 5.6.10, 5.6.11;
determining and recording the coordinates of detected defects;
ability to view A-scans, __________B, C, D-scans and/or other types of scans
for each acoustic channel;
recording control results for printing data during preparation
conclusions;
generating a list of defects in a format suitable for further
editing;
registration and marking on the scan of areas with no acoustic
contact;
5.3.2.4 MUZK tools must ensure the identification of defects,
provided for in current regulatory documents, including these
requirements and have the following technical characteristics:
absolute error in determining the length of the defect is no more than ±3.0 mm;
temperature of the controlled surface, °C from - 40 to + 60 *);
operating temperature of the electronic unit and scanner, °C from -40 to + 60**)
Note: The MUSK installation used as a measuring instrument must
ensure the absolute error in determining the height of the defect is no more than ±1.5 mm;
5.3.2.5 Mechanized ultrasonic testing means must have
methodology for conducting and interpreting inspection results (suitability assessment) of welded
connections for compliance with the standards for assessing the quality of welded joints specified in
clause_5.6.10.
5.3.2.6 To adjust the MUSK tools, you should use calibration
samples (standard samples - SOP) provided for by the methodology and
interpretation of control results. Calibration samples (SOPs) must be
made of a material similar to the material of the controlled object, and have
passport issued by an accredited center of metrology and standardization (or
manufacturer, if he has the right of primary verification).
5.3.2.7 Sketch of the calibration block (SOP), parameters of artificial
reflectors and control schemes must be given in the MUZK technological map.
5.3.2.8 To check and configure RUZK tools (flaw detectors,
piezoelectric transducers), determining and setting control parameters should
use standard samples (RM) in accordance with GOST 14782 or samples of the International
Institute of Welding (V1, V2), as well as standard samples of the enterprise (SOP) with
artificial reflectors according to GOST 14782.
5.3.2.9 In the case where the MUZK device is an indicator device
control, to determine the type and geometric parameters of defects it is necessary
additionally use measuring control equipment.
5.3.3 Requirements for automated ultrasonic
control (AUZK) of the quality of welded joints and carrying out
qualification tests
5.3.3.1 Automatic inspection tools used to control ring butts
welded pipe joints must:
pass qualification tests (during the examination of technical specifications) in
in accordance with STO Gazprom 2-3.5-046-2006 (in advance, before the start of work);
have a methodology for conducting and interpreting control results (assessment
suitability) of welded joints for compliance with standards for assessing the quality of welded
connections specified in clause 5.6.10 or clause 5.6.11 (depending on the scope of application);
ensure detection and registration of defects in welded joints
gas pipelines;
ensure the determination and recording of the coordinates of detected defects;
provide an indication of the absence of acoustic contact between the probe and
controlled product, registration of scanning areas with the absence
acoustic contact with marking of missed zones on the scan;
provide the ability to view A – scans, B, C, D – scans and/or others
types of scans for each acoustic channel or general scan for all channels;
provide a record of control results for printing data when
preparation of conclusions;
ensure the formation of a list of defects in a format suitable for
further editing.
5.3.3.2 Automatic inspection means must ensure the detection of defects,
provided for in current regulatory documents, including these
requirements and have the following technical characteristics:
absolute error in determining the length of the defect is no more than ±3.0 mm;
temperature of the controlled surface, °C from - 40 to + 60 *);
operating temperature of the electronic unit and scanner, °C from -40 to + 60**)
Note: The AUZK installation used as a measuring instrument must
ensure the absolute error in determining the height of the defect is no more than ±1.5 mm;
*) During control, the temperature of the calibration block and the controlled object should not differ more than
than 30 °C.
**) It is allowed to use AUT equipment having other temperature ranges, if they
correspond to actual operating conditions.
5.3.3.3 AUT equipment must be metrologically equipped
certified SOP (calibration sample), made from pipes similar
controlled in size, production technology and strength class. To each
the type of edge preparation and standard size of pipes must comply with a certain SOP
(calibration sample).
5.3.3.4 The customer must provide the NDT contractor with a part of the pipe
(coil) to make a calibration sample for each nominal diameter
pipe, wall thickness and pipe manufacturer. The material provided must not
have ring welded joints. Dimensions of pipe fragments for calibration
sample must be specified by the contractor performing the NDT work. Surface roughness
calibration block should not exceed Rz40.
5.3.3.5 The calibration sample must have a passport issued
accredited center of metrology and standardization (or the manufacturer, if it
has the right of primary verification), which states:
SOP number;
diameter and thickness range of pipes for control of which SOP is used;
Specifications for the pipe from which the SOP is made;
steel grade SOP;
orientation and geometric parameters of reflectors.
5.3.3.6 SOP sketch, parameters of artificial reflectors and control circuits
must be given in the AUZK technological map.
5.3.3.7 Positioning error of the AUS tool (scanner) relative to
the center line of the weld should not exceed 1 mm.
5.3.3.8 Time spent on installing the scanner on the pipe, scanning,
preliminary processing of data and preparation of a preliminary conclusion should
match the speed of movement of the welding column.
5.3.3.9 To ensure double-sided AUT of a circumferential weld
the outer and inner reinforcement rollers of the longitudinal pipe seams must be removed
to a height of 0.5 to 1.0 mm, while a smooth transition from the metal must be ensured
pipes to the roller. This requirement must be taken into account in the specification when ordering pipes.
The length of the removed section of the longitudinal seam (usually 120-160 mm) depends on the thickness
pipe walls. Reinforcement roller removal in the field is performed
manufacturer of construction and installation work.
5.3.3.10 In the case where the AUS means is an indicator means
control, to determine the type and geometric parameters of defects it is necessary
additionally use measuring control equipment.
Ensuring Correct Assembly
Ensuring high-quality completion of work is also based on correct adherence to a certain list of rules for the assembly of metal structures:
- When selecting the parts that will make up the metal structure, you should adhere to the drawings that were outlined when drawing up the project. Otherwise, the minimal losses will be a discrepancy in the appearance of the structure, and in the worst case, it will not be able to perform the functions assigned to it.
- Based on the project plan, each element must be in its place.
- The width of the gaps plays an important role in the construction of structures. If they end up having larger dimensions than they were supposed to, then this fact will greatly affect the strength of the product. But in turn, too small gaps can negatively affect the proper operation of moving parts.
- Any structure has corners, the level of which must be controlled using special tools. Where this is required, the angles must be exclusively straight, otherwise this will greatly affect the position of the structure and cause it to skew, or even lead to complete destruction.
- Butt joints must be provided with gaps with sufficient space for permissible backlash of elements.
- Throughout the construction of the entire structure, these points must be taken into account. Especially in the case of automatic welding, because with manual technology the worker can control and adjust the direction of the part, which is almost impossible to do when using automatic devices. But at the same time, robotic intervention in welding virtually eliminates errors caused by the human factor.
Positive aspects of welding
In addition to reducing working time and quality, welding has a positive effect on other characteristics:
- Due to the fact that during the welding process only two elements are involved, excluding the influence of other factors, the final soldering in mass does not differ in any way from the original version, which in turn allows saving the amount of material.
- Due to its characteristics, welding is almost completely devoid of restrictions in work due to the material thickness factor. All responsibility for this shifts only to the use of certain equipment.
- A variety of modern welding machines make it possible to carry out joining work with almost any material without loss of seam strength, even taking into account the factor of manipulating such a complex material as aluminum.
- A significant positive aspect of using welding is saving money and working time.
- The heavier the type of welding, the more complex the type of structure can be. It also makes it possible to use elements made by stamping or cast in molds. In this case, the material from which they are made does not play a special role.
- Welding units presented on today's market are quite affordable, and if you use the right technique, you can increase the production speed factor.
- If there is an opportunity, as well as the desire of the enterprise, to erect structures in the assembly of which non-standard materials will be used, welding will help to easily carry out this task.
- Welding is more than applicable even for working with very small parts.
- Welding for the purpose of repairing or bringing mechanisms into working condition is also very appropriate.
- When welding is used, each structure will have absolute tightness. Of all the available methods of connecting joints, welding has the highest reliability indicator for this parameter.
Equipment service
Equipment maintenance consists of performing the following work: systematic preventive inspection; cleaning (removal of dust, dirt, etc.); replacing burnt-out fuse links; checking the reliability of grounding; spring tension adjustment; Maintenance; testing (measurement of response current, response voltage, insulation resistance).
Cleaning and repairing equipment, as well as replacing fuse links, is permitted only when the voltage has been removed.
All permanent contact connections in the equipment must be tight. The tightness of the contacts is adjusted using the springs available in the equipment. Operation of the equipment is not allowed if the contacts are covered with oxide. Oxidized contacts are cleaned with sandpaper until shiny. Worn equipment parts must be promptly replaced with new ones.
