A welding inverter is a universal device for joining workpieces made of almost any metal. Its price is not prohibitive even for an amateur welder. That's why they gained popularity so quickly. The only problem is learning to correctly identify the device that is required to carry out certain work.
How to choose the right inverter? To deal with this issue, it is worth clearly understanding the operating features of the devices, how they differ from each other and what tasks they solve. Every year more and more models with advanced functionality are released, without all this knowledge, choosing a unit can become a real problem.
Types of Welding Devices
All electric welding equipment can be divided into three types:
- Welding rectifiers. Their mode of operation is designated as MMADC, which means that it operates on rectifier current. These devices can be used to join aluminum alloys, carbon or stainless steel. They are also distinguished by high quality welds;
- Step-down transformers. They are used for welding with alternating current. Each of these units is highly reliable and primarily operates in MMAAC mode. Their use becomes relevant if there is no need for an aesthetically pleasing connection when welding carbon steel.
- Inverters. They work in each of the above modes. In another way, they are called universal devices, since with their help you can cope with any metals with high-frequency current.
If we talk about people who do not weld at a professional level, but will use a welding device for household tasks, an inverter would be the best option. Perhaps their price is not so low, but it immediately pays off due to its versatility, ease of use and ease of working with such equipment. But if cost is extremely important, a standard welding transformer can cope with simple tasks.
Household inverters and battery charging
How to charge a car with a welding machine can be seen in the video.
But if you have a special device, then you don’t have to risk burning anything.
Do-it-yourself starter-charger from a welder - is it worth it?
To bring this idea to life, you need not only a special tool and the ability to use it, but also the knowledge to correctly calculate electrical circuits.
Let's start with the starting device . It is usually required in winter, when the battery is dead and the engine is frozen. In cars of older designs, a ratchet was screwed into the front end of the crankshaft for a “crooked starter”. Motorists of the older generation remember how difficult it was to turn it in the “icy winter season” (young people will have to believe it). An electric starter, in order to create the appropriate torque, needs a very high direct current at a relatively low voltage (10...12 volts on carburetor engines and 20...24 volts on diesel engines).
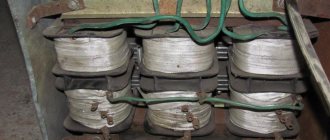
Welding transformers do not have a secondary winding that creates such voltage, and there is no room in the “window” for winding a new one. Any “combination” with lowering the voltage of the primary winding (an additional step-down transformer or autotransformer) is expensive and requires calculation of the circuit parameters. An error in calculations or implementation can lead to the fact that there will be no “starter” and the welder will stop working.
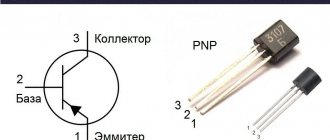
It's even more difficult with the charger. Charging is a complex electrochemical process. For its correct flow, an electric current must be maintained, in digital terms equal to 0.1 of the electrical capacity of the battery. Moreover, as the charge increases, its value will decrease. In specialized “chargers” the process is regulated by a complex electronic circuit . When building such a device, in addition to the problem of low alternating voltage, adjustment of the charging current will be added. In this case, you will need to buy expensive electronic components, assemble the circuit and configure it (this requires special knowledge, tools and equipment).
Advice. It is cheaper to buy an industrial-made charger and jumper for your battery. In this case, the welder will not be harmed.
Choosing a welding rectifier
This type of device operates on rectifier pulse voltage. This has its advantages, namely, it reduces the consumption of electrodes, increases arc stability and reduces the amount of spatter during welding. Such equipment is often used when a neat weld is required.
These welding machines can operate on both single-phase and three-phase alternating current. If the rectifier is connected using a three-phase circuit (380 V), this will provide a high level of power and the necessary stability of the electric arc.
Choosing a welding transformer
The main thing you need to pay attention to when choosing a transformer is the operating voltage at which it operates. They are also compatible with three-phase and single-phase power supply. Devices can work with one of them, or with two, if the device is more complex and expensive.
Then you should pay attention to its power. If this is a device with a 380 V power supply, it will have increased power and cause less voltage imbalance, but this only applies to those units that can be connected to a three-phase network. It is also worth remembering that the power of the transformer should not exceed the power of the network to which it is planned to be connected.
You also need to take into account the dimensions of future electrodes and the operating current range. If work is required on a carbon steel joint, a range of 80 to 160 amps will be sufficient.
Other characteristics are determined individually for each buyer (meaning the weight of the device). Basically, transformers are not light, so if you plan to constantly move it, you need to take care of some conveniences in the form of a special handle for carrying in your hands or wheels in order to roll the unit to another place if lifting it is problematic due to its heavy weight.
Small budget welding machine 3 in 1 MIG-200 (MIG / TIG / MMA)
Hi all! I took this device to test as my first MIG welding, which I wouldn’t mind “killing” due to inexperience. The publication will be on behalf of a beginner in this business for the same beginners, so I ask more experienced masters not to throw slippers at me too much, but to support me with recommendations)
Characteristics
Model: MIG200 Input voltage: 220V ± 15% Frequency: 50/60Hz Rated output current: 200A (for MIG/MAG), 200A (for MMA), 200A (for TIG) Rated output voltage: 20.0V (for MIG /MAG), 24.8 V (for MMA), 14.8 V (for TIG) Wire diameter: 0.8-1mm Size: 318x129x220mm Weight: 5.5kg
Unpacking and appearance
The box was delivered from a local warehouse by DPD quite quickly, the device is housed in foam inserts, so it should survive minor drops during delivery. The kit includes the device itself, a ground wire, a spare connector, half a kilo of wire with flux and scrap paper. On the front side there is a display showing the set and current amperage, just below there are two potentiometers that regulate voltage and current, and at the very bottom there are connectors for connecting ground and handles for MMA welding. On the back there is a sticker with the main characteristics, as well as a power button and an exhaust fan.
The MIG gun is not removable, the cable length is about one and a half meters, the “weight” is about a meter, it looks good
Box with wire. The reel itself is vacuum-packed, additionally marked and wrapped in paper, and the tip is wrapped in a slot so that nothing accidentally unwinds
On the sides of the body there are clamps for quick access to the wire feed mechanism. We unfasten two pieces and open the lid like a KAMAZ cab. Owners of 3D printers will be able to do everything with their eyes closed, because... the “priming” procedure is very similar. We tighten the clamp and thread the wire into the guide tubes. Out of habit, I pushed it manually all the way to the nozzle and that was a mistake, because... when fed manually, the wire is slightly deformed by the fingers with each squeeze and, as a result, goes quite tightly to the end, and then also begins to slip on the roller. So it’s better to pull the end a little, put the clamping mechanism back on and entrust the pulling to the device
Also, don’t forget to screw the spool lock into place so you don’t lose anything. By the way, in the photo you can see that the wire was “frayed”; this was again due to the fact that I decided to push it manually, because... it was difficult to feed it into the tube and monitor the tension, one turn came off and it turned out this horror, but everything is not as scary as it looks, it shouldn’t get confused, after testing the problem area is almost used up and even layers are already visible under it. A 0.8mm nozzle is installed, so the wire should be used with the same diameter, but if desired, you can buy 1mm, they cost about $5 per handful, and there is a corresponding mode
Enabling and setting
When turned on, a self-diagnosis occurs, after which the last selected mode is activated
The left potentiometer is responsible for adjusting the voltage in the range of 11-27V. The display does not show changes, but the arc becomes brighter and sounds more powerful
The second adjusts the current from 20 to 200A and the wire feed speed from 1.5 to 16 meters per minute. After ignition of the arc, the current value of the current is displayed on the screen, the update rate is not bad
The modes are switched in a circle by pressing the central button, and the intermediate current values are also different, but rest at 200A in the extreme position
Practice
We insert the “ground” into the positive contact, select the MIG 0.8 mode and you are ready to work. To begin with, I took a metal plate 0.3mm thick, which MMA welding will easily cut. I set the current to 80A, the voltage is slightly less than half. For some reason, two out of five people, during the first attempt, begin to stubbornly scrape the wire across the material without pressing the trigger, as is the case with electrode welding. Voltage appears only during wire feeding.
There were no problems, the seam may not be very even, but nothing was burned and there are no uncooked areas, it looks just as good on the reverse side
But at the same 80A, but at the maximum voltage, the workpiece is already starting to melt
From the front side, the bottom seam looks normal with an average voltage and current value, but from the back side overheating is noticeable, which is not very good, especially if the tightness of the connection is important
It was also interesting (I think not only to me) how different the result is when using a model with CO2 from a wire with flux. A friend has this kind of equipment, its only drawback is that the first voltage position does not work and welding thin metal is problematic
It burns through the first plate even at the minimum current, so I took a 3mm piece of iron and put a small seam on it without changing the settings. There is little smoke, as well as splashes, the arc is not particularly bright, so the workpiece is clearly visible. Well, the space around the seam is not stained with anything.
Let's go through the subject below, current 95A, voltage regulator in the central position. The difference is noticeable. A lot of smoke, which instead of carbon dioxide protects the welding site, the arc is brighter and the boiling flux sprays the wire more strongly. The result is not so clean and less metal is deposited, but this is already a feature of the wire and feed used. If in a cyclone you can turn it up to maximum without changing the other settings, then here it is tied to the current strength. For beginners, this may be for the better, because the strength of the seam will not suffer much from this, but building up a good layer of metal to repair the workpiece will be problematic. Plaque can be easily wiped off with a soft metal brush
And yes, at the maximum voltage value, even a thick plate begins to burn even at 150A
For MMA welding, it is enough to move the “ground” to the negative contact, and connect the appropriate cable with an electrode clamp to the positive one and you can weld. I dabbled a little on the same plate, the power is also enough to make holes in it, the optimal current for a 2mm electrode, as in the “resanta” that I used earlier, turned out to be 80-90A, in this case the seam lies evenly and not overheats the metal greatly.
And these are the first attempts to weld a profile pipe, on the right is an MMA seam, the section shows it more clearly. In the lower part there are the very first seams, I pulled them horizontally so that the camera could film the process normally, but the frames turned out to be overexposed, so the video and the blanks were ruined. Those that I already fused from top to bottom turned out much better, they boiled deeply, without overheating the workpiece too much. But now I know that MIG welds clean metal much better than rusty metal, so if you need to do it carefully and reliably, it’s worth spending the time cleaning the surface to a shine.
I tested the device without turning off the power, after an hour of operation the temperature of the radiators did not exceed 35 degrees at an ambient temperature of 27 degrees, quite good
The nozzle spits well with flux wire, so it needs to be cleaned periodically. It is enough to wipe it several times with a soft brush on metal.
During testing I probably spent a third of the coil, maybe less. Didn't think to weigh the new one
GIFs haven't been fixed yet, so I made a very short video demonstrating how to turn it on, configure it, and use it.
Results
I think it's very good for a first device. We get MIG+MMA welding for the price of an average MMA machine from local stores. I lowered the TIG mode because... The kit did not include a special cable, to which, in addition to the power supply, a tube for supplying argon is also connected, and it is quite difficult to master, and there are not many settings here to bring it to the ideal, so we can say that it is here more for show. But even those who have never handled conventional electrode welding can handle the MIG mode. I thought I would have to train for a long time like with the first MMA welder in my time, but a semi-automatic machine forgives a lot. At minimum current/supply and voltage it is difficult to burn even a thin part, but to work with a thick one it is enough to raise the voltage. True, the process will drag on with large volumes, but you can delve into the process by torturing a relatively small workpiece. For me, a current of 80-100A turned out to be comfortable, apparently because the speed of operation is similar to working with electrodes. But at the same time, the material does not overheat, thanks to this, the workpiece is practically not carried, and the wire is fed until the coil runs out, so there is no need to be distracted by replacing consumables. There are, of course, disadvantages, but they do not relate to the operation of the device itself, but to the side effects due to the use of wire with flux: the surface has to be cleaned of white deposits, there is more metal splashes, there is a little less smoke than from conventional coated electrodes, but when working indoors you need a good hood. Well, the price, regular wire costs about $5 per kilogram, with flux from $10 to $30 depending on the manufacturer, so if you plan to work a lot, it is more profitable to pay extra for a device with a gas supply, it will cost you 20 kilograms)
At the time of ordering from this aliexpress store with delivery from the Russian Federation, the price was the most reasonable, and even now there is a coupon V3SXC3363V8Q , discounting $10
check price
How to choose the right inverter?
As mentioned earlier, an inverter is a universal welding unit. Thanks to this, it is popular both among highly skilled welders and among hobbyists who use inverters only for home use. Sometimes its price can be significantly higher than any other types of welding devices. But its versatility immediately captivates every welder. It is lightweight, does not consume much power, is compact and is not sensitive to the environment in which it is used.
If you choose it correctly, you should also pay special attention to the possibility of connecting it to a three-phase or single-phase network. If the device is designed for a 380 V network, then it will have high power. But you need to know that the period during which the unit will serve without interruption will depend on the power. If the device operates at high power, it overheats, and the longer it remains in this state, the shorter its service life.
Now it’s worth thinking about the range of welding modes and current. This depends on the thickness of the metal with which the device will have to work. If the inverter will be used only at the household level, a range of 60-160 amps will be sufficient. A smooth control system will allow you to accurately select the required current for the connection, which will affect the quality of the weld.
Another parameter that should not be overlooked is the duration of activation. The higher this characteristic, the longer the device can operate without overheating. Experts immediately noticed that the on-time indicator is calculated relative to the time of the welding process for pauses (for example, for changing the electrode, as well as preparing the next parts). This means that if the on-time is 80%, then the operating time will be about 4 minutes, subject to a mandatory break of 1 minute. But everyone understands that the pause may be longer, but the device will only benefit if it has an additional margin of reliability.
For a universal inverter, which is also called a 3-in-1 welding machine, some additional functions are very important, these include:
- Antistick. This function is capable of independently reducing the current level, which makes it easy to remove the electrode from the welding seam;
- Arcforce. The function is otherwise called “arc force.” It helps improve the quality of the seam even in a vertical position;
- Hot start. This is a sharp increase in current at the beginning of welding. This also contributes to the rapid and trouble-free formation of the welding arc.
Today, inverters without such options are practically no longer produced, but just in case, their availability is worth checking, especially if the device is not the cheapest.
Top 3 best welding inverters
The inverters that have been produced over the past year are amazing in their variety and functionality, choosing the 3 best was a difficult task. Nevertheless, the leaders were identified.
Resanta SAI-220
Every welder who has at least once encountered brands of welding equipment knows that Resanta SAI is always high quality at an affordable price. This unit was no exception. It is capable of not only operating at high current, but doing so for a long time. Its PV is 70%. Additional functions include “hot start” and “antistick”. The operating range is wide ranging from 140 to 260 V.
Its advantages also include the ability to continue working during large power outages, as well as its compact size and light weight. Among the disadvantages, there is high sensitivity in an environment with high humidity.
Svarog ARC 205 (J96)
This model belongs to the Chinese-Russian brand Svarog. It is used for manual MMA welding and argon TIG. Both modes have the same welding current - 180 A. The on-time is 60%. The operating voltage range is from 185 to 255 V. Those who managed to work with it with high current in the garage noted certain difficulties in this regard. It, like the first device, has the same additional functions “hot start” and “anti-sticking”.
The advantages include such features as easy ignition of the arc, long-term operation at high loads and the ability to weld simple structures in an argon environment. The disadvantage is that it is slightly sensitive to voltage changes.
Fubag IR 200
This inverter is one of the best for a reason. It has a maximum current of 200 A, and is also capable of cutting and joining metal with any electrodes up to 5 mm in size. The operation of the unit will not be disrupted until the voltage drops below 150 V. Fubag IR 200 is equipped with two additional functions, “arc force” and “hot start”. Its only noticeable drawback is its PV at 40%.
The advantages of the device are a sufficient current reserve, resistance to surges in the network and special modes to ensure easy ignition of the arc and its conduction.
Welding process
The following steps must be followed:
- The burner and ground cable are installed.
- A reducer is installed on the argon cylinder . You need to check the gas pressure, it should be higher than the residual pressure.
- A hose is installed on the outlet fitting of the cylinder and clamped with a clamp . Its second end is connected to the welding machine.
- According to the instructions for the welder, set the value on the flow reducer to the value recommended by the manufacturer. To do this, you need to open the control valve.
- Clean the burner wire channel if there is any wire left there from previous work.
- Install the reel onto the unwinding rod . Check that the positions of the pins and mounting holes match.
- The wire is passed through a rolling roller.
- Reinstall the pressure roller.
- Using the adjusting screw, set the clamping force so that the wire does not slip in the groove.
- The wire is pulled into the burner cord channel with the conductive tip removed.
- Screw a tip of a suitable diameter onto the burner and install the nozzle in place.
- Connect the device to the network.
- Prepare parts to be welded . The entire width of the edge is cleaned to a metallic shine.
- Edge cutting and chamfer preparation are not required for metal surfaces up to 2.5 mm thick . Aluminum is further cleaned with acetone.
- After preparing the parts and checking the equipment, connect the power supply terminals . With direct current, reverse polarity is applied. “+” is connected to the torch with wire, and “-” to the product.
- Turn the switch that feeds the wire into the working position.
- The electric arc ignites . It is enough to touch the metal in the presence of a melting wire.
- It is recommended to check the accuracy of the settings on non-working metal (sample) . And if necessary, adjust.
- Welding is in progress . The movement of the burner nozzle should be in one direction only, without lateral movements. On a vertical part, the nozzle moves from top to bottom.
- If the metal thickness is large, heating to a temperature of 150-3000C is required.
- Parts are welded at high speed with a single-layer seam.
- You need to finish welding by gradually reducing the arc temperature (decreasing the current). Before doing this, remove (stop feeding) the filler wire.
