How to make a bucket with your own hands from tin, galvanized iron or stainless steel with straight walls.
We cut out the product from the material
h
– height (set the given value)
d
– diameter (set the given value)
l
– circumference (we find by calculation)
l = πd = 3.14 * 329 = 1033
(mm)
h = 310
(mm)
MANUFACTURING A CYLINDER
In the middle of the reamer we mark holes for attaching the ear
1.
On a rectangular sheet of thin-sheet galvanized steel, on, or manually using a mallet and a beam, fold the edges of the sheet “heightwise” in opposite directions.
Bend the sheet into a cylinder. 2.
Fasten the folded edges.
Press the resulting seam evenly with a mallet or mallet along the entire length of the cylinder. 3.
In order for the seam to remain inside the cylinder, it is necessary to carry out the following operation: turn the finished seam so that it is located near the edge of the beam; By hitting the seam with a mallet, we obtain the outer surface of the cylinder without a protruding seam.
FOLDING
The width of the fold depends on its purpose: obtaining a lock; rolling of wire.
4.
Set the cylinder relative to the block to its original position.
Tap with a hammer and bend the fold. 5.
Tap with the pointed side of the hammer.
We monitor the width of the fold - it should be the same. 6.
Align the fold by tapping with the blunt side of a hammer.
7.
We finally bend the bent fold at a right angle.
WIRE ROLLING
We insert a circle around the perimeter of the flange,
made of wire, the diameter of which must coincide with the outer diameter of the cylinder.
We round the circular edge and complete the seaming.
CONNECTION OF CYLINDER TO BOTTOM
8.
Fold the edges of the circle and insert it into the cylinder.
9.
With light blows of the pointed part of the hammer, we bend the fold inside the circle.
10.
Using strong blows from the blunt part of the hammer, we tap the seam on the beam, while turning the cylinder.
11.
Place the fold on the outer plane of the cylinder.
12.
If the work results in a convex bottom, it is necessary to level it.
13.
At the very edge of the bottom, hit with the blunt part of the hammer, along the entire perimeter of the circle. At the same time, the bottom will be leveled, the edges of the connection will receive a clearly defined contour.
ATTACHING THE INTERMEDIATE HOOP
The bottom of the bucket can be attached to the intermediate hoop, and the intermediate hoop can be attached to the cylinder.
14.
We attach the bottom of the bucket with a hoop.
15.
Connect the hoop to the cylinder (bucket body).
16.
Bend the fold at the hoop.
17.
Place the fold on the outer plane of the cylinder and thoroughly tap along the perimeter of the entire circumference.
MAKING THE EAR
If you are interested in the question of how to make a galvanized pipe with your own hands, then you want to save on construction. Indeed, making homemade tin structures is a smart alternative to factory-made gutters, chimneys and ventilation hoods. This article will tell you how to practically do the work.
Material characteristics
Galvanized structures are made of tin. The material is sheet rolled steel with a thickness of 0.1 - 0.7 mm.
Products of complex shapes are formed from soft material
The production of sheets takes place on rolling machines, but the products obtained in this way require additional protection. Therefore, it is coated with a material that is resistant to corrosion. Ultimately, consumers receive a steel sheet with a width of 512-1000 mm, which has a micron coating of chromium, tin or zinc.
The product is characterized by plasticity, which allows the sheet metal to be processed manually. Moreover, if stiffening ribs are rolled onto the material, it is not inferior in strength to its steel counterparts. For these reasons, tinplate is used in the manufacture of products with complex shapes.
Heated washbasin: features of installation and connection to the electrical network
Work on a personal plot is not always carried out in the warm season, so the use of cold water can create significant discomfort. In this case, the best option would be to use an outdoor washbasin equipped with reliable heating. There are several different modifications that differ not only in appearance, but also in design features:
- mounted models are a rectangular tank equipped with a tap, and are mounted on walls or any type of reliable support. A special heating element is built inside the tank. As a rule, such a plumbing fixture is installed under a canopy and has an anti-corrosion coating. However, outdoor installation requires very strict adherence to all safety measures specified in the attached instructions;
- wall-mounted plumbing fixtures with anti-corrosion supports are more advanced models and can be installed outdoors, and the presence of a high-quality, reliable metal frame allows the entire structure to be given an additional level of strength and stability;
- The most complete set of a country outdoor washbasin equipped with water heating is a model consisting of a metal, plastic or wooden cabinet, complemented by a sink made of steel or polymers and a tank for water heating. A voluminous cabinet most often has a collapsible design. Such a device may well be connected to the sewer system.
Equipping with heating elements is typical not only for complex plumbing fixtures, but also for fairly simple devices without a cabinet. Using one such built-in element with a power of 1.25 kW, 15-17 liters of water are heated to a temperature of 75-80°C in half an hour.
Appliances equipped with a heating system must be connected to a regular electrical outlet. Electricity consumption depends on the power of the heating elements installed in the water heating tank. As a rule, small heating elements are mounted in the lower part of the filling tank.
Modern plumbing fixtures are equipped with thermostats, with the help of which the required water temperature is set within the range of 30-70°C. Some models are equipped with a very convenient automatic shut-off mode.
Required Tools
The soft and plastic material is easy to bend, so galvanized pipes are made using simple tools:
- Hand scissors for metal. With this tool you can effortlessly cut sheet metal, the maximum thickness of which is only 0.7 mm.
- Hammer with a soft striker. This role can be played by a wooden hammer or a metal tool with a rubber pad on the striking part.
To work you will need a wooden hammer
- Pliers .
Despite its softness, it is impossible to bend thin metal with your hands.
In addition to tools, you will need equipment:
- A workbench used to mark and cut workpieces.
- A calibrating element in the form of a steel pipe with a diameter of 100 mm or an angle with sides measuring 75 mm.
Important! The calibrating elements should be rigidly fixed, since they are used to rivet the joining seam of future gutters or ducts.
In the process of marking workpieces, you cannot do without measuring tools - a metal ruler, tape measure, square or marker (a sharpened steel rod with a hardened end).
Making galvanized pipes with your own hands
The production of casings and cylinders from galvanized steel includes three stages:
- Preparatory. It starts with marking and ends with cutting out the finished “pattern”.
- Molding. At this time, the formation of a given profile of the chimney or ventilation duct occurs.
- Final. At this stage, the opposite edges of the workpiece are connected to each other.
Now let’s look in detail at the step-by-step production of galvanized pipes by hand.
Cutting out the workpiece
Tin can be easily cut with scissors
Take a sheet of galvanized sheet and make a sketch of the product. Next proceed as follows:
- Cut out the resulting measured piece of sheet on which you have drawn the outline of the product you need.
- Roll out a galvanized sheet on a flat area of the workbench. Measure the length of the box from the top edge and make a mark there.
- Take a square and draw a line from the length mark of the product perpendicular to the side edge of the sheet.
- Mark on the upper edge of the workpiece and the marked length line of the product the size of the perimeter of the ventilation duct or the circumference of the chimney cylinder.
Note! The actual circumference or perimeter must be increased by 15 mm to form joining edges.
- Connect the resulting marks at the top and bottom.
- Cut a “pattern” from the sheet by making a side and longitudinal cut.
On a note! To measure the circumference of a galvanized chimney pipe, use a tape measure or calculate it by the diameter of the product using a school geometric formula. To determine the perimeter, add up all sides of the box.
Formation of a profile
It is better to bend sheets with pliers
Now we begin to form the profile of the future structure.
- Mark a fold line along the workpiece (0.5 cm on one side, 0.5 cm twice on the other).
- Bend the folds at an angle of 90˚ to the plane of the workpiece, which was previously placed along the steel angle (its edge should coincide with the bend line of the fold).
- Deform the sheet using a hammer until it comes into contact with the second plane of the angle.
Important! The shape of the sheet should be changed gradually, slowly moving along the fold line. Do the job using pliers first.
- Make an L-shaped bend on a fold measuring 1 cm along a line of 0.5 cm parallel to the plane of the workpiece.
- Now start shaping the chimney body. Place the workpiece on the calibrating plane and tap the galvanized steel with a hammer until you get the profile of the desired shape. The folds should meet at the end.
Processing the butt seam
To crimp the butt seam, align the vertical folds. Fold the horizontal part of the L-shaped fold down so that it wraps around the vertical fold of the other edge of the structure. Bend the protruding “sandwich”, pressing it to the plane of the chimney.
The question of how to make a galvanized pipe yourself has been resolved. We wish you success!
Enameled bucket with lid
Enameled bucket, with lid, 12 l. 2S28
Enameled buckets are an indispensable item in the household:
- they can hold water;
- collect and transport berries without fear of oxidation;
- they are suitable for milk, sour cream, cottage cheese in those farms where they are engaged in animal husbandry;
- You can use them to ferment cabbage, pickle cucumbers, mushrooms and other pickles.
Dousing bucket for a bath
What are the advantages of enameled containers:
- thanks to the enamel coating, they do not corrode and do not react with aggressive fillers;
- Enameled containers look very attractive. Manufacturers produce them in a wide range of colors. In addition, they are often decorated with printed designs, which cannot but please the eye;
- as a rule, they are equipped with lids and trays, which allows you to boil water, laundry in them, and even cook first courses in large quantities when necessary;
- The handle of the enamel containers is covered with a plastic braid, which is very convenient. When carrying heavy filler in a bucket, the handle does not cut into your hands;
- enameled containers with a lid are most often produced in a standard size - 10-12 l;
- Basically, the shape of enameled buckets is not very diverse: cylindrical and truncated cone.
They are very easy to use, wash well, and do not absorb foreign odors. Usually made from high-quality sheet metal with a thickness of 0.8 to 2.0 mm with double enamel coating, which is carried out, according to technical specifications, in two ways:
- Wet or slip method, in which enamel is applied to the walls of the container using a spray gun or by completely immersing the object in liquid enamel. The item is then dried in an oven and the procedure is repeated.
- Dry method, in which enamel powder is applied to the walls of a red-hot product. After this, the object is fired, a second layer of powder is applied and fired again.
Note! Buckets treated in this way last a long time; the only thing that threatens them is chips of the enamel coating. The thing itself is unpleasant, because it opens access to unprotected metal.
Video: making pipes
With the development of the construction market, the need for tin pipes is gradually decreasing. Today they are used more as integral interior decorations (see photo). Tin is a very thin sheet of steel that is susceptible to rust. That is why today, instead of it, galvanized iron is used to make drainpipes, interesting canopies over them, as well as small roofs over chimneys. But there are still areas where this material is still in demand, for example, for the manufacture of pipes for a samovar, cans, containers for paint coatings and chemical products, household products, information signs and more (see photo).
There are several types of tin. So, today it comes in canned or food grade, thin-sheet black, single- and double-rolled, as well as varnished. They first started making it many years ago, and they did it with their own hands. Sheets of material measuring 1 x 1 meter and about 2 millimeters thick were made using large hammers, after which they were left for some time in containers with lactic acid. Since that time, the technology of its manufacture has changed significantly and today special mechanisms are used for this. Making a pipe from such high-quality sheets is not difficult.
Types of washbasins
It may seem that you can make a washbasin for your dacha with your own hands only of the simplest design. In fact, even a novice master can create a comfortable and very beautiful washbasin using the simplest tools. The degree of comfort is determined by the design of the structure.
By your own choice, you can give preference to one of the most common models:
- hinged (with a pressure spout or tap),
- on a stand that can be easily carried and installed anywhere on the site, even where there is no suitable support,
- "moydodyr" - a structure with a cabinet in which a container for collecting waste water is located,
- heated products.
If you need to choose or without it, then our review article will help you with this.
And the characteristics that the popular and inexpensive one has are presented in other material on the site.
We also have instructions on how to do it. Selection of materials and sequence of work.
Let's get started
In order to create a pipe from tin, you do not need any special skills (see video). It is necessary to prepare a sheet of metal about 0.6 millimeters thick, pliers, and scissors for cutting metal. In addition, a hammer and rivets made of steel or aluminum should be ready. The metal sheet should be as smooth and polished as possible, and also have 90-degree angles, as in the photo. To make a pipe on a sheet, you need to present an unfolded sample of the structure with your own hands. This can be done either with any sharp object or with chalk. The width of such a sample should match the size of the pipe cross-section, to which another 1.5 centimeters is added. After the above steps, the workpiece is cut out with metal scissors.
Next, the structure is placed on the work table for manual processing of metal products and a so-called bend line is drawn on one side of it, the width of which should be 0.5 centimeters (see video). The drawn line is aligned with your own hands with the opposite corner of the metal sheet, and its edge is bent with pliers and pressed well. Thus, a pipe made of tin is obtained. The edges of such a pipe can be properly secured using rivets made of steel or aluminum. To do this, you need to make holes in both edges of the tin pipe in increments of about 3 centimeters, as, for example, in the video.
If this page loads slowly, its main images can be opened and viewed in the “Drawings, diagrams, site images” catalogue.
A cap is a cap made of galvanized sheet metal for a brick pillar.
Choose any height “h”, or taking into account the dimensions of the finished pillar. It is sometimes useful to increase the planting dimensions “a” and “b” by 5 - 10 mm, depending on the quality of the masonry. The size “d” can be “estimated” with a tape measure directly on the pole, or calculated using the formula below.
* Place the pattern face up. Drill a hole Ф3.5 mm. Bend the stiffeners (15mm) down almost 90°. Bend all dotted lines at an angle of 90°. The bending of the lines should be done in a sheet bending machine, at least in a homemade one of two corners (it doesn’t take long to do). Then the bend lines will be straight, clear, without dents, and the product will ultimately have an aesthetic appearance. If there is no sheet bender, then bend lines “a” and “b” as usual; bend lines “A” and “B” on a piece of angle No. 50 - 63 fixed on the edge of the workbench with the shelf facing up. To bend plane A or B all at once, or almost all of it, use a 25x45 mm block (picket) 30-40 cm long.
Bend the edges along the lines “d” to the correct rectangular shape of the cap or umbrella. To do this, have a narrow mandrel: a 50mm corner with a cut flange, or a metal strip 1.5-2 mm thick attached to it, or even better, a saw blade.
Check the tight fit of the upper (closing) stiffener rib to the rear (rear) plane of the cap. Check again that the product is not distorted; Use a thin marker to mark the response hole (diameter 3.5 mm); punch, drill, and secure the assembly with a 3.2 mm rivet.
Bend the planes along lines “A” and “B” inside the umbrella (into its place), holding it with your hands between a strip of metal (2 mm thick, 40-45 mm wide, ~30 cm long); and a block (picket) 25×45 mm of suitable length. If necessary, compact this bend with a mallet. If necessary, slightly settle the top of the closing stiffener rib at the top of the cap.
The lower belt of the cap can not be included in the pattern, but can be made separately. From a strip of appropriate length and width, bend a rectangle with dimensions “a” and “b”; bend the sides in its upper part for rigidity and fastening, and place it inside the cap before the final bending of the planes along lines “A” and “B”. If necessary, secure with a 3.2 mm rivet.
When making large caps, divide the pattern into two halves, but not along the angular lines “d”, but along the middles of opposite planes-edges. Connect the halves with two slatted “seams”, installing the slats inside the umbrella, with the front side facing the joint. A folded seam, especially on painted material, can (and will) look sloppy. The lower belt for large caps should be made separately.
Appearance of a cap with a small height
— see the picture of a square umbrella on the “Gas hood” page.
Simplified pole cap
with a brick belt:
For support posts and metal pillars made of profile pipes, they are used in the form of small caps. The plugs are made of thicker metal, usually in the shape of a low pyramid.
For the production of single and double connecting seams, see the “Steel Roofing” page.
The passage unit for the exhaust pipe box in the roof roof.
The box is installed (put on) on a rectangular glass, all sides of which are 3 - 4 mm smaller than the sides of the box. The glass at the angle of the roof slope is riveted with a sheet of the same color as the color of the roof. It is convenient to draw the pattern of the box and installation cup of the cutting on one sheet of tin. With a small height of the structure, the ventilation (or protective, heat-insulating) box can be connected directly to the roofing sheet, i.e. without an intermediate glass.
Mark a rectangular hole on the back (not front) side of the roofing sheet. The dimensions of the sheet should be taken such that, with a sufficient margin (minimum 20 cm), they cover the areas of the roof adjacent to the pipes, and cover the part of the sheet from the ridge side with the roofing sheet from above.
Check the tightness of the glass on the sheet. Mark matching holes Ф3.5 mm for fastening the rear side. Remove the glass and drill holes. Before final installation of the glass on the sheet, apply sealant or any water-freeze-resistant glue under the mounting sides. Secure the rear side with 3.2 mm rivets; then side and front.
The glass and the box (already with an umbrella) are alternately installed (put on) on the exhaust pipes to insulate them heat and moisture and improve their appearance. On the side of the roof ridge in the lower part of the structure, additionally install a corner-breaker in front of it to drain the flowing water, especially if the flow pressure increases on a steep or long slope of the roof.
Square umbrella
and its pattern, a pattern for
a round umbrella
for a pipe with a diameter of 160 mm, is on the “Gas Hood” page.
Umbrella, smokebox, weather vane.
Choose any height of the umbrella. If you cut off small sections in the end parts in their upper corner (along the “K” line), then the “smoke chamber” will have two additional windows for exhaust hood. Close these windows from above with a protruding ridge, the ends of which can be cut off figuratively. Along the level of the same line (“K”) you can make one rectangular window at the top of the entire umbrella, which will have to be protected from above by a second umbrella, but of a smaller size. A weather vane is an umbrella with a weather vane; often a weather vane is a combination of two umbrellas of different sizes and shapes; one of its simpler options is on this one. The pattern of the main (large) part can be divided into two identical parts - along the line of its ridge.
Drill four holes Ø 3.5 mm in two end parts.
Bend all the stiffeners along the lines “d” almost 90°.
Bend the stiffeners 15 mm along lines “A” and “B” by 90°.
Bend the umbrella along the line of the ridge to the corner of the planes.
Bend all lines *60 taking into account the slope of the umbrella planes.
It is advisable to do bending in a sheet bending machine - even a homemade one made from two corners will significantly improve the quality of line bending and the appearance of the product.
Temporarily fix the main part on a flat surface, maintaining dimension “B”.
Place the end piece tightly against the main piece. Mark the counter holes Ø 3.5 mm; drill. Secure the assembly with 3.2 mm rivets.
Make the racks from strips of the same material, folding the strip (width 105-110mm, length about 40cm) twice - that is, in three layers of 35 mm each, WITHOUT SETTING along the fold lines to maintain rigidity.
Marking the holes for attaching the poles to the umbrella:
In calculating the size » y
» Take 3 cm for an umbrella for boxes or belts made of tin, 6 cm for an umbrella for a brick pipe.
Tee for exhaust hood.
Mark and cut a hole in the pattern of the main pipe “D”. The lower drawing shows (as an example) the exact marking of the hole for the entrance d 140 mm to D 150 mm. On the “Gas Exhaust” page there is a drawing of the marking of the inlet hole for a tee connecting a diameter of 120 mm with a pipe of 140 mm; and an outlet with a diameter of 120 mm, as most often used when installing individual gas heating in a private house or apartment.
Marking an inlet hole with a diameter of 140 mm into a pipe with a diameter of 150 mm:
Prepare the folds, “roll” the pipe “D” into the shape of a pipe, but do not connect the folded seam.
Temporarily install the inlet pipe “d” into the folded (but not sealed at the seam) pipe “D”. Align the relative position of the pipes. Draw out the branch pipe “d” (inlet) and cut it along the line of the inlet hole. Along the cut line on the pipe “d”, bend the side 8 - 10 mm wide as shown in the figure. Install the inlet pipe into the tee from the inside of the “unfastened” flow pipe “D”, fasten the folds, check the tightness of the parts. Seal the folded seam, drill matching holes Ø 3.5 mm - secure the assembly with rivets Ø 3.2 mm. If necessary, add any sealing material to the connection line from inside the tee: putty, paint, sealant.
When installing an exhaust from gas equipment, from a heating boiler or from a water heating column, special attention should be paid to the tightness of the connections.
Corners, ventilation and flue outlets.
A simplified method for marking the mating line of branch links is presented, which gives, although approximate, a pattern that is quite applicable in practice. Reducing the number of bend links (angle) increases distortion and the need for adjustment (trimming) during assembly. Precise patterns of bends are constructed using descriptive geometry techniques.
Pattern and marking of the mating line of the links of a three-link bend at 90 degrees.
For the exact (in numbers) marking of the pattern line for an outlet with a diameter of 120 mm, see the “Gas hood” page. The pattern and marking of the connecting line of the links for a five-link 90 degree bend is on the page “Tee, bends, transitions”. Mirror the patterns on the left side of the patterns to the right side.
Connect the marking points into a smooth line, mirror the resulting pattern on the right.
Pattern and approximate marking of the line of conjugation of two links of a right angle:
The drawing shows a ninety-degree right angle pattern for a pipe with a diameter of 100 mm.
Feeder for rabbits.
Pattern for making a bunker-type feeder from galvanized sheet. The drawing shows the dimensions of the parts of a feeder with a capacity of 3.5 liters of dry bulk food.
Assembly with rivets can be replaced by resistance welding or spot soldering.
Drill all the holes in the parts of the first (test) copy. Make cuts along the edges of the fold lines of the back and inner walls. Bend the sides of the fastening 15 mm by 90 degrees. Bend the 25 mm line of the rear wall inward by approximately 135 degrees, giving the shape of a feeder tray. Bend the inner and rear walls to their working positions, using the side walls as a jig. Make sure the holes match. If necessary, correct their location on the parts of the following copies. Connect the inner wall with both side walls using 3.2mm rivets. Place into the back wall and install rivets.
The feeder can be supplemented with a top cover and elements for attaching to the cage.
Drainage funnel, drainage gutter.
Dimensions, shaped edge of the top and artistic elements of the water inlet funnel are at the discretion of the artist. It is useful to increase the width of the strip for cutting each section of the gutter following the water flow by 1 - 2 mm.
Due to the large amount of material, some drawings and drawings have been moved to other pages, in accordance with their topics.
Patterns for a confuser, a diffuser, a transition from a round cross-section to a round of a different diameter (bucket), from a rectangular cross-section to a round, to a rectangular one are located on the page “Drawings, diagrams, site drawings.”
Every residential or even country house or bathhouse that is not connected to a central heating system is equipped with a heat-generating device. To remove the products of fuel combustion in the firebox from the interior, a smoke exhaust duct is connected to them. The most affordable option is a galvanized chimney; in construction stores the price of 1 m of pipe made of this material is about 110 rubles. If you add to this the costs of the rotating elements, deflector and brackets, installation will cost a pretty penny. However, in this article we will tell you how to reduce costs by 60% and how to make a chimney from a steel pipe with your own hands.
The advantage of store-bought models of galvanized steel chimneys is that manufacturers produce a wide range of sizes. In addition, among the factory products you can find double-circuit, thermally insulated, corrugated, with increased flexibility and single-circuit. When making a homemade chimney, you have to limit yourself to only single-circuit pipes. In order for the smoke removal system to work effectively, the following parameters should be taken into account:
Important! A sheet of galvanized steel measuring 2500x125 mm in construction stores costs about 600 rubles, with proper cutting, one sheet produces 8.75 m of pipe with a diameter of 100 mm, the cost of 1 m is approximately 68 rubles, which gives 60% savings!
Outdoor washbasin for a summer residence: main types of purchased models
A garden washbasin or country sink should combine ease of use and affordable cost. When choosing a purchased model, you need to pay attention to the following parameters:
- the street model should fit harmoniously into the overall decor and the entire concept of the summer cottage;
- for frequent outdoor use, it is best to choose a wall-mounted washbasin with a large water tank;
- for rare, periodic use, it is advisable to give preference to small-volume washbasins, which will prevent water stagnation.
An outdoor washbasin can be portable or portable and stationary.
Such a device is usually located in the working area of a personal plot and can be represented not only by a primitive hanging tank, but also by a device with an increased level of comfort:
- a washbasin without a cabinet
or a so-called pour-over street washstand. This is the simplest design, represented by a capacity of three to five liters. Water is poured into the tank from above. The tank is closed by a lid, and a tap is located in the lower part or a special outlet float is installed. For drainage, a bucket or drainage layer on the ground is used. The best option is a durable plastic model. The most modern type is a plastic hanging tank with lids and a magnetic release; - A special feature of the plastic model on a stand
is the ability to attach it to a metal stand. You can firmly install such a device on the ground by pressing your foot on the bottom crossbar. Some models are characterized by the presence of such an additional element as a sink with water discharge directly onto the ground with a built-in drainage layer represented by fine crushed stone or gravel. The device can be installed between ridges or flower beds, as well as anywhere in the garden.
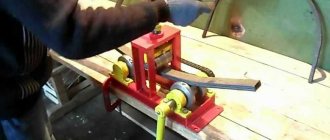
Manufacturing
To make a pipe from a sheet of galvanized steel, you will need a rubber or wooden mallet that is heavy enough to bend the metal. In the process of work, scissors are used for cutting metal, a long ruler, a scriber for marking, a corner and a “gun” for bending. The bending process occurs as follows:
Note! The installation of a chimney requires rotating parts, which are made by cutting straight pipes at an angle. If you cut the pipes at an angle of 75 degrees, then when joining, you get a 150-degree turn; if you cut them at an angle of 45 degrees, you get a 90-degree turn. To improve the efficiency of a homemade chimney, it is wrapped in non-flammable thermal insulation material.
Models on stands
Counter-mounted washbasins are containers with taps mounted on a frame. The frame has “legs” at the bottom that go into the ground. Thus, the washstand on the stand moves freely and is installed in any part of the garden plot. For ease of installation, a crossbar is installed above the support legs - this is a kind of “pedal”. You can quickly and securely install the structure by pressing the crossbar with your foot.
The frame structure of the washbasin on the counter must be reliably protected from moisture, especially its supporting parts that are immersed in the ground.
A tank with a tap can be purchased or made independently. Please note: the immersion depth of the legs for reliable stability increases in proportion to the weight of the structure. This is an important factor when choosing the tank material and its volume.
Advantages
With the advent of a large number of factory products for assembling galvanized steel chimneys, the need to make pipes with your own hands has decreased. However, homemade pipes allow you to reduce costs and choose the ideal diameter.
In addition, they are used to equip drains, so the ability to make pipes with your own hands will be useful in everyday life. Metal chimneys have the following advantages over others:
- A light weight. Smoke exhaust ducts made from homemade galvanized pipes weigh much less than brick or ceramic ones. Therefore, there is no need to equip a foundation, the cost of pouring which exceeds the cost of material and installation work.
- Fire safety. According to building codes, steel chimneys are completely fire safe. High quality metal can withstand heating up to 900 degrees, so it is suitable even for solid fuel stoves and fireplaces.
- Low cost. Chimney pipes made of steel are the most democratic way to organize smoke removal; the cost of installation is several times lower than the installation of brick and ceramic analogues.
- Easy to assemble. You can easily assemble a chimney made of galvanized steel with your own hands according to the instructions, thereby saving money spent on hiring professional workers.
Important! The effectiveness of smoke removal depends on the correct assembly of the chimney. Experienced craftsmen advise choosing a predominantly vertical configuration with the least number of turns. Each rotating element acts as an obstacle to the smoke, reducing the draft force.
Assembly Rules
To properly assemble a chimney made of galvanized steel, you must first mark out the layout and laying of the pipe. Using this drawing, you should determine how many pipes are required and cut them into sections of the required length. Assembly is performed as follows:
Note! The smoke exhaust duct is installed on the roof at a distance of 30-50 cm from the ridge. To ensure the level of traction, the skate should be 50 cm higher. Incorrect placement on the roof can cause backdraft or wind backlash.