The current rating of burning equipment should start with the device Uzor-10K, which is average in price and capabilities. Among its differences are a shock-resistant plastic body, two heating modes for painting on wood and the main image, and shadows or gradient.
The burner tip heats up in just 1 minute, allowing you to start working almost immediately. And the simple switching of buttons and convenient design make the device suitable even for 6-year-old pyrographs. Another plus is good strength and long service life - on average, devices operate for at least 3 years.
A small disadvantage of the domestic device is the need to separately purchase a burning board and a minimum number of attachments. You will also have to turn off the device every 15 minutes - otherwise its handle may get too hot.
The cord is quite long, but does not spin easily, there is no holder, and the needle is relatively thick. However, the device still burns out well, without requiring strong pressure and cooling quickly after being turned off.
What else can you burn on?
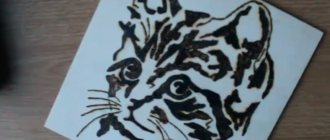
In addition, as on wood, with the help of a pyrograph you can create beautiful designs on fabric. This type of creativity is called guilloche. Usually for this purpose they take acetate silk, satin, nylon, panvelvet and other synthetic fabrics, since they are melted evenly, applied to natural fabric and burned with an electric pyrograph.
This technique is used to make various panels, collars, napkins, imitation lace borders, covers for diaries and books, and decor for scrapbooking.
Preparation of the workplace
A well-lit, thoroughly ventilated place is suitable for work. If possible, this is best done on a balcony or on the street near a private house.
In an enclosed space, it is appropriate to sit near a window into which fresh air will flow.
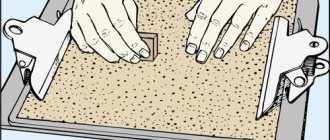
- The working surface can be a table, but it will need to be protected from possible damage.
- This is easy to do with a piece of rags and a sheet of tin. You can use a regular baking sheet.
It is important to prevent accidental sparks from touching flammable objects: textiles, furniture. If you handle the working device carelessly, damage to property may occur, which is expressed in the form of holes and scorch marks.
Choosing a transformer from a microwave oven
To make a Lichtenberg apparatus with your own hands, you use a high-voltage transformer from a microwave oven. Please note: a transformer from a welding inverter will not work.
To burn Lichtenberg figures onto the surface of wood, high voltage and low current are required, which is provided by a high-voltage transformer.
While a transformer from a welding machine, on the contrary, generates low voltage and high current. For this reason it is not suitable.
As for the choice of power source, absolutely any transformer from a microwave oven will do (their characteristics in different models of microwave ovens do not differ much). The main thing is that the transformer works.
We recommend watching a video that outlines the process of assembling a homemade “lightning generator”, as well as the principle of its operation.
https://youtu.be/E4b79ah4gG4
How to work correctly?
First of all, it is necessary to ensure good and proper lighting. If the work will be done on the street, then properly installed street light poles will help with this.
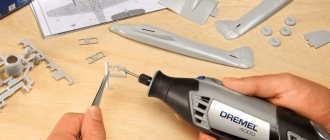
The working tool resembles a simple pencil with a wide working part. Therefore, the work carried out is practically no different from drawing on paper, except that the working part is heated before use. The whole process is divided into several main stages:
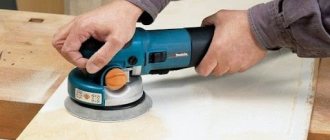
- Preparation. It involves choosing the wood on which the design will be applied. The surface should be smooth and even. It is possible to make the board smooth by sanding it.
- Drawing. For those who create pencil drawings, the task will be simple. In the absence of appropriate skills, a suitable design is printed and then applied to a board using stencil paper.
- Burning out. After warming up the working part of the tool, you can begin burning. The handle of the tool, if it has a small thickness, is taken like a pencil. Simple drawings begin with drawing contours, straight lines are created with quick movements without applying strong pressure. If several lines are located in close proximity, they should be applied with some delay, which is required for cooling. The hue changes by setting the appropriate power. Also, to obtain complex patterns, the nozzles are changed.
Many people leave the product after applying the design without carrying out final processing. This may lead to a reduction in the service life of the product.
Burning methods
You can begin burning work after selecting a sketch after the working part of the tool has been heated to the required temperature. If the tip heats up unevenly, this indicates the appearance of defects and the need to replace it. You can eliminate the possibility of the device overheating by periodically disconnecting it from the network. When considering the main burning methods, you should consider:
- Once drawn, the lines cannot be erased. Therefore, before starting complex drawings, you need to gain experience with easy ones.
- Beginners are advised to use stencils. They can be made in a variety of ways or purchased online.
- Three-dimensional drawings are obtained by combining lines of different shades. When you move the tool quickly, you get a thin light line, but by holding the tip you can get a dark line.
- An experienced craftsman takes into account how the fibers are arranged. The easiest way is to guide the tool along the grain.
When using various techniques, you can obtain complex drawings that are practically indistinguishable from paintings. At first, it is recommended to use the simplest methods.
Final processing
After receiving the image, the surface is treated with sandpaper. You can protect wood from the negative effects of the environment as follows:
- The wood is varnished. This substance significantly extends the life of the product. At the same time, the drawing does not lose its contours, remains bright and rich.
- If necessary, partial or complete coloring of the space that is formed between the drawn lines is carried out.
Final processing of the product can be carried out using a variety of protective substances. The choice is made depending on what result needs to be achieved.
Required materials and tools
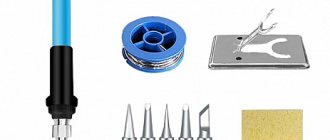
To create a pyrograph you will need a powerful 100 W Soviet soldering iron, as well as tin solder. A model with a replaceable tip is best suited. You also need to prepare the following materials and tools:
- needle from a syringe;
- sewing needle;
- wooden stick about 10 cm long;
- battery pack;
- two-wire wire;
- strong shoe thread;
- insulating tape;
- pliers;
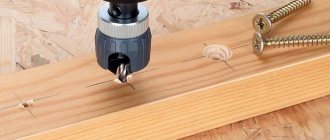
- electric drill.
The more powerful the battery pack or charger, the better the pyrograph will turn out in the end.
You can take any unnecessary charger for your phone or any compact tool like a screwdriver.
Safety precautions
You should work with the burner carefully. The main recommendations are as follows:
- When using the tool, you need to use a special stand, which is made using heat-resistant material. In its absence, ceramic dishes or other products made from this material are used.
- The tool should not be left on the surface being treated for a long time. This is due to the fact that prolonged exposure to high temperatures leads to fire of the material.
- No flammable materials should be located near the work table. Even short exposure may result in a fire.
- Drawing should be done carefully. Clumsy and quick actions can lead to burns.
- Even a high-quality tool can overheat. Therefore, it is recommended to monitor the heating level of the working part.
At the time of burning, unpleasant smoke may appear, which is not recommended to inhale. Work must be carried out in a prepared workplace. Distractions lead to mistakes being made, and the work will have to start all over again.