Aluminum is a metal that is widely used in industry and everyday life.
It is used to produce not only aircraft and ship parts, but also dishes and other utensils. Therefore, there is often a need to independently manufacture aluminum parts that have failed.
The ability of aluminum to melt at relatively low temperatures makes it possible to produce cast products from it in artisanal conditions. In order to independently produce cast aluminum products, you need to know the behavior of this metal at high temperatures and its physical and chemical properties.
Characteristics of aluminum
The melting point of aluminum depends on the purity of the metal and is approximately 660 °C. Its boiling point is 2500 °C.
Aluminum is distinguished by its lightness and ductility, so it bends well and can be processed by stamping.
This metal is an excellent conductor of heat and actively enters into a chemical reaction at high temperatures with atmospheric oxygen, forming an oxide film on the surface. It protects aluminum from further oxidation, but when scrap melts, it significantly affects the composition of the alloy. During the metal smelting process, the structure of aluminum changes.
When it cools sharply, internal stresses and shrinkage of the resulting alloy may occur. This must be taken into account when working with aluminum at home.
Technologies for home aluminum casting and necessary equipment
The principle of casting aluminum at home should be based on the technology for its production in production, adjusted for conditions that can be used at home.
Aluminum products are produced by casting in several ways. In domestic conditions, the most common and convenient method is the technology of casting molten aluminum into specially made molds.
Therefore, to carry out the process, two things must be ensured:
- build a furnace for melting aluminum scrap;
- create the desired shape to produce a cast alloy or a separate part.
The casting process must include several stages:
- Preparation of aluminum scrap, including cleaning from dirt, impurities and various fillers, as well as grinding it to a small size.
- Carrying out the smelting process in the planned way. When the metal is completely melted, slag formations must be removed from its surface.
- Filling the prepared mold with liquid aluminum melt. After solidification, the ingot is freed from the molding mass.
Let's consider how to melt aluminum at home, what designs of furnaces for melting metal can be used, as well as options for making molds yourself.
Homemade furnaces and methods for melting aluminum
In order to melt aluminum, you need to heat it to a temperature close to 660 °C. It is impossible to reach such a temperature on an open flame of a fire. Therefore, a closed space is needed, which a homemade stove can provide. It can be heated by burning coal and wood or using natural gas.
You can also use an electric muffle furnace if you have one on the farm.
With a self-made stove, forced ventilation must be provided to maintain the combustion process.
1. The simplest version of a homemade fireplace can be made from old pots.
Its design is as follows:
- As a frame, use a steel container, for example, an old pan, on the side of which you need to make a hole to supply air through a connected metal pipe.
- Air can be forced through the hose using a vacuum cleaner.
- Coal is placed inside the device.
- Then the coal is set on fire and air is supplied to keep the fire from going out.
- A container for melting aluminum is first placed inside an improvised furnace structure and lined with coal on its sides. When it burns, uniform heat distribution is ensured.
- To prevent heat from being lost to the surrounding air, the top of the “pan” stove should be loosely covered with a lid, leaving a small gap for the smoke to escape.
An ideal design would be a firebox with an oval arch made from a masonry mixture used for heat-resistant bricks. You can use a flower pot of the desired size as a frame to create an oval vault.
After the mixture dries, a good firebox is obtained that can withstand several heats.
2. The second version of the furnace involves using the flame of a household gas burner to heat aluminum.
It can only be used for piece products made of aluminum weighing no more than 150 grams. An imitation oven is created by using two containers inserted into each other with a small gap. These can be ordinary cans from canned food.
The outer jar should be larger. A hole with a diameter of about 4 cm is made in it to ensure the supply of flame to the inner can.
The flame jet should be directed towards the opening of the can. Only the inner container is heated directly, and the outer one serves as a shell that retains heat. The top of the structure must be covered with a simulated lid, leaving a gap for the removal of combustion products.
Read also: What can be done with a wood router video
This design is disposable and can only be used for one melt, since the tin is thin and can quickly burn out.
Lead smelting molds
As noted earlier, lead is cast into molds to produce parts. Casting molds are made from different materials - steel, cast iron, graphite, and aluminum alloys are used in industry. At home, sand, gypsum, silicone and other materials are used. The lead casting mold can be made by hand, but mechanized equipment is most often used. Moreover, in many home workshops you can find hobby mechanical equipment.
Structurally, the mold for casting lead products consists of several parts: 1. The mold itself, as a rule, includes two parts. 2. Fusible or non-fusible rods, guides and locks. To make a plaster mold, you need to prepare two boxes made of wood. Then, gypsum, diluted to a creamy state, is poured into a wooden box. After some time, the plaster begins to harden, at which time the future product can be installed in it. In this case, it should be half immersed in plaster. This will form the first half of the mold. A similar operation must be performed to obtain the second form. After the plaster has dried, the form is ready. In order to be able to pour molten lead during the manufacture of the mold, it is necessary to form a casting hole.
Read also: How to make a 3D book with your own hands
How to cast aluminum
Characteristics of aluminum.
Aluminum is one of the most common metals.
It is silver-white in color and lends itself quite well to casting and machining. Due to its characteristics, aluminum is equipped with high thermal and electrical conductivity, and also has corrosion resistance.
Technical aluminum has a melting point of 658 degrees, high-purity aluminum has a melting point of 660, and the boiling point of aluminum is 2500 degrees.
For aluminum casting, home heating devices are unlikely to be useful and will provide the required temperature. It is necessary to melt aluminum by heating it to a temperature of over 660 degrees.
Aluminum casting: choosing a heat source
The following can be used as a heat source for aluminum melting:
- A very effective method is achieved using a self-made crucible muffle furnace. A crucible (a necessary tool for melting aluminum) is installed on the working surface of this furnace, and raw materials are added to it. Using a muffle furnace you can cast aluminum very easily.
- Do-it-yourself muffle furnace for melting aluminum, here!
- To obtain the melting temperature of aluminum, the combustion temperature of liquefied or natural gas is sufficient; in this case, the process can be performed in a homemade furnace.
- With a small volume of melting, you can use the heat obtained by burning gas in a household gas stove.
- The required temperature will be provided by gas cutters or acetylene generators, if available in the household.
Aluminum preparation
Despite the fact that the melting process will be performed at home, it must be handled responsibly. The metal must first be cleaned of dirt and crushed into small pieces. In this case, the melting process will go faster.
The choice is made on softer aluminum, as a purer material with fewer impurities. During melting, slag is removed from the liquid surface of the metal.
Mold making
You need to prepare the gypsum mixture according to the “powder to water” rule, in a ratio of approximately 1:1, you need to focus on the consistency, it should be creamy.
Pre-lubricate our mold and samples with the prepared fatty cream.
Pour the mixed plaster into the container to fill exactly ½ of the container and tap it on the surface, expelling air bubbles. As soon as the gypsum begins to set, it is necessary to immerse our samples halfway in the hardening plaster. The setting time of the gypsum depends on the brand of the powder itself, the minimum time is 2 minutes, i.e. after 2 minutes we begin to carefully look at the surface of the plaster. As soon as it becomes matte, it’s time!
We insert guides along the edges of our form. It can be anything, I use pieces of wire, toothpicks, lollipop tubes.
Now we wait for complete hardening, 20-30 minutes is enough.
Simple options
The simplest thing is to make lead weights using a plaster or sand mold. This method has a number of undoubted advantages:
- accessibility and prevalence of material;
- lead melts at a relatively low temperature - 320°C;
- ease of manufacture.
The use of lead and gypsum when making sinkers yourself has several significant nuances:
- at a temperature of about 200°C, water begins to actively evaporate from gypsum , which leads to destruction of its structure and splitting of the product;
- Lead, when hardened, is pressed into plaster , which makes it almost impossible to remove the sinker without destroying the mold;
- a gypsum workpiece has a large number of micropores , which leads to the need to polish the finished product.
When using sand instead of gypsum, the process of preparing the mold is greatly simplified, however, the requirements for the material of the box in which the workpiece will be located when pouring lead are increased; it is advisable to use a metal support. The product itself will be somewhat less aesthetically pleasing and will require serious polishing.
Lost wax casting
Lost wax models are perhaps the most expensive and labor-intensive type of metal casting.
It is used for particularly critical types of high-precision products, such as turbine blades. An accurate mock-up of the future part is made from a substance with a low melting point, such as wax. The production uses a mixture of paraffin and stearin in equal parts. For larger types of products, salts are added to the composition to prevent warping of the model. Then, by immersion, the model is covered with 5-12 layers of a special heat-resistant suspension. Hydrolyzed silicates are used as a base, and grains of electrocorundum or quartz are used as a heat-resistant coating.
Lost wax castings
For drying, cabinets filled with ammonia gas are used. Next, the mold is heated so that the paraffin flows out of it. The remaining composition is removed with steam supplied under high pressure. The next preparation phase is calcination at a temperature of about 100 °C. This operation is carried out to get rid of residues capable of gasification. Pouring is carried out into matrices heated to 1000 °C. After the product is cooled according to a given schedule in the thermostat, the matrix is disassembled and the part is removed.
The main advantage of this type of filling is high dimensional accuracy and surface quality.
Other benefits
- it is possible to manufacture products from alloys that are difficult to machine
- It is possible to cast parts that other types of casting would have to be cast in parts and subsequently connected into a single unit
Disadvantages: low metal utilization rate and extremely high labor intensity.
Lead Die Casting
Injection molding technology is used when the task is to produce small castings with thin walls.
This technology has certain advantages: 1. High precision castings.2. High surface quality.3. There is no need for further mechanical processing of cast products.4. Possibility of manufacturing workpieces with complex configurations.5. High productivity of the injection molding complex.6. Low number of substandard products.7. Saving money and resources when producing large batches of castings.
Description of the book How to make injection molds?:
Economic success in the plastics processing industry depends on the quality, accuracy and reliability of the molding tools - injection molds. Consequently, an incorrect design solution, an error in calculations and miscalculations in the manufacture of the mold can lead to disastrous results. The reference book contains generalized and systematized data on the design of technological equipment. It presents all aspects of successful injection mold production from both practical and theoretical points of view. The publication is intended for engineering and technical workers involved in the design, manufacture and operation of injection molds. The book will be useful to university students when studying issues of form design.
| Authors: | Georg Mendes, Walter Michaeli, Paul Morin |
| Translation from English | edited by V.G. Duvidzon and E.L. Kalincheva |
| Publisher: | "Profession" |
| Published: | St. Petersburg, 2007 |
| Download: | Publisher's website |
Homemade feeders for feeders
For feeder fishing, you can use various types of feeder feeders, both industrial and self-made.
A group of fishermen revealed the name of the secret bait during interrogation.
Category: regional news.
This method allows you to obtain not very attractive products, but they are quite suitable for fishing. One should take into account the fact that the feeder is a consumable element of fishing, and appearance is not of fundamental importance. They can successfully compete with feeders made from curlers or plastic bottles.
The advantages of this method of making feeders
- simplicity - you need to spend minimal time making a mold for casting the load of the feeder;
- ease of giving the desired shape and weight of the feeder;
- The output is not expensive material.
To make your own feeder for feeder fishing, you need the following materials and tools:
Characteristics of the material and use in the manufacture of sinkers
For those who are just starting their career, experienced fishermen advise not to hesitate to stock up on a whole set of sinkers at once. Both very tiny and quite substantial ones are suitable here. But, this is for the first time, and then, when the fisherman gains experience and thoroughly studies all the nearby bodies of water, it becomes necessary not only to replenish the supply of weights, but also to make them as convenient as possible for fishing. This is where a soft, fusible and fairly heavy metal that does not react with water or air comes to the rescue - lead.
One of the reasons why lead and its alloys have become so popular for casting weights is the availability of the metal. First as the main metal for casting shot, and later as a metal widely used in the automotive industry, in railway transport, and in communication lines, lead, in fact, has never been a big problem. On the other hand, it was possible to melt the metal with a melting point of only 327.5 degrees using kerosene gas or a fire, and it could also be melted in an ordinary large tablespoon or tin can.
Safety precautions
When casting sinkers over an open fire, fire safety requirements must be observed. Keep water nearby to extinguish potential fires. NEVER pour it into a container with lead.
The room should be well ventilated, ideally have a hood. The melting process should not be left unattended, but you need to choose thick clothing.
Long sleeves and gloves are required to protect your hands from burns if lead is splashed. Make sure that there are no flammable substances or flammable objects near the stove, fire or electric crucible. This especially applies to clothing. In addition, it is very difficult to remove the chemical smell of lead from it.
Making simple disposable molds
The fragility and destruction of the gypsum structure when water evaporates makes it difficult to use this material for reusable use. However, as a disposable and easy-to-make mold, gypsum is ideal.
Make it a rule, on every fishing trip, the first thing you do is start.
To make a shape for a simple sinker you need:
- Prepare a box for pouring the mold; it should consist of two parts, tightly mounted on top of each other; you can use small boards fastened with screws;
- Dilute the gypsum to a creamy state, while trying to ensure that there are no air bubbles in the resulting mixture, since voids then appear in their place;
- The first layer of gypsum is poured into the lower part of the box, which should harden a little;
- The required sinker is immersed halfway into the plaster and, using a drill, a hole is made in the plaster on the side of the workpiece for pouring lead (it is better to insert cylinders of suitable size into these holes);
- The surface of the frozen layer is greased with vegetable oil so that the halves of the mold can then be easily separated;
- The second part of the box is installed on top, into which gypsum is poured;
- After the entire structure has hardened, the box is disassembled, both parts of the mold are separated and the sinker and cylinders of the filling channels are removed;
- The mold is cleaned and covered from the inside with a layer of soot using soot from a burning candle;
- The ears and loops for the sinker are secured, the mold is assembled and secured with wire;
- The finished form should dry well; to do this, you need to place it in a dry place for 1-2 days or use the oven.
The easiest way to make a cone-shaped sinker is to use a paper cone in the sand:
- A paper blank (a piece of paper rolled into a cone) is inserted into any container tightly filled with sand; a metal loop for a sinker is inserted into the sharp end of the cone;
- Lead is melted and poured into a paper cone;
- Part of the cone burns, but during this time the lead has time to cool a little and begin to harden;
- The cooled workpiece is removed from the sand and processed with a file.
You can use aluminum foil instead of paper.
The material for the sinker is also quite common and accessible, so even complex sinkers can be made independently using appropriate blanks
Shell casting
To cast metals using this method, a composition is prepared from sand and a powdered binder, most often phenol-formaldehyde resins.
The model or mock-up is heated to 300 °C and sprinkled with the prepared mixture. In a short time (about a minute) a hardened layer is baked on the surface of the model. Excess mixture is removed.
Sometimes the clad mixture is blown into the gap between the heated model and the figured flask. The next stage is firing at a temperature of 650 °C for final strength gain. After removing the model, the halves of the matrix are connected together - and it is ready for casting. To prevent the matrix from being deformed by the weight of the melt entering it, it is surrounded by a metal box, which is filled with shot. The shot also improves the cooling schedule of the product.
Shell casting
Main advantages of the method:
- significant reduction in labor intensity and time for preparing the mold compared to casting in the ground
- control of the cooling mode of the product
- the process can be mechanized
This type of filling is suitable for products weighing up to 30 kg.
Casting sinkers
Now we can start casting the lead weights! To do this we need wire for the ears, lead, a torch or crucible and a clamp.
We bend the ears from the wire using pliers and put them into the mold.
We connect the two halves of the form and fix them with a clamp.
Melt the lead. I have old cheburakhs, tire weights and other lead scrap. I heat up the lead with a gas torch, it literally takes a few minutes, it’s very convenient! Next, pour the lead into the sprues and let it cool, that is, when you pour it into the last mold, the first one has already cooled down, everything is very fast!
Now we separate the mold and remove our weights.
Next we repeat in the same sequence.
Weights are cast very quickly, sometimes before fishing I remember that I have run out of a load of a certain weight, and then, in literally 20 minutes, I cast the dozen or one and a half weights I need. It takes less time than going to the store for the same goods)
In this way, you can experiment with the shapes and weights of sinkers, and invent some special shape of sinkers that are not available in stores. For example, last season I experimented with stick weights, making several versions of non-snagging weights with different lengths and diameters. The weight of such “stick” sinkers can be reduced directly while fishing, thanks to the small diameter of 6 and 8 mm (if you need to reduce the weight, you can simply bite off part of the sinker with pliers). Also, thanks to such diameters, the load passes 95% of hooks!
Another simplest version of the mold for casting weights is the “bullet” for Carolina. To make such a mold, you need to pour plaster into any sufficiently high mold, I took the cap from an aerosol can, and simply place the bullet samples coated with the same cream on top with the sharp side into the hardening plaster - that’s it, the mold is ready.
To cast such bullets, it is necessary to insert a “mortgage” made of steel wire, lubricated with ordinary toilet soap, into a mold, and pour lead on top. That's all.
The insert is removed from the bullet, leaving a hole for the fishing line.
Form for sealant weights
You can make a mold for making sinkers or spinning baits yourself without much difficulty, using plaster or silicone sealant, as well as a ready-made sample. For example, it is easy and also very unusual to make a mold from a sealant like “Hermesil” and the like. The main factor when choosing a sealant is its ability not to change physical properties when exposed to high temperatures.
What is a silicone mold for plaster
Silicone molds have many advantages. Firstly, the gypsum solution does not stick to its surface. This is very important because the integrity of the product is not compromised. Thus, gypsum crafts cast in silicone molds have an ideal appearance. No other material has such properties. Secondly, the silicone mold for plaster is very elastic and wear-resistant. It can be used many times without compromising its integrity. Thirdly, the silicone mold is easily separated from the frozen product. This means that the silicone plaster mold does not require lubrication before pouring. This is very convenient for craftsmen and greatly simplifies their work.
Making molds for plaster weights
- The melting point of lead, that is, the state from which lead changes from solid to liquid, is 320 degrees.
- At a temperature of 200 degrees, water begins to evaporate from the gypsum mold, the hardness of the gypsum is destroyed and it begins to crumble.
- When lead hardens in a mold, it tends to be pressed in, and it becomes impossible to pull out the sinker without destroying the inner edges of the mold, especially for heavy carp sinkers weighing over 100 grams with spikes and corners in shape.
- The product obtained by this method is subjected to polishing, since the plaster mold is impregnated with micro pores, they cannot be removed with Goya paste, the mold can only be smoked, coated with chalk or talcum powder. Soot, chalk, talc allow lead to slide freely along the inner surface of the mold and fill all voids. These components affect the smoothness, quality of the sinker and allow it to be easily removed from the mold.
- Even dental plaster is not able to withstand repeated tearing of a pressed sinker out of shape.
- A plaster mold can be impregnated and coated from the inside with various sealants and chemical compounds, but this does not solve the issue of water evaporation.
- The plaster weight mold needs to be closed and opened. Can this mold withstand repeated opening as the lead is pressed into the mold?
Main types of mold casting
Types of casting are divided according to various characteristics.
According to the possibility of reuse, a distinction is made between single-use (sand, shell, lost-wax models, gasified models) and multiple-use forms - chill molds, cement, graphite and asbestos. The one-time one is broken to remove the product. Reusable ones are collapsible and non-dismountable, and provide re-casting into the mold from tens to thousands of times.
Single-use forms
Multiple forms
Traditional casting methods mastered by mankind in ancient times - in sand molds and in chill molds.
Progressive types of technology developed in the last century and gaining popularity today:
- into shell forms;
- by lost wax models;
- centrifugal;
- under pressure;
- according to gasified models;
Forms for regular use
A plaster mold, even a very well made and dried one, will sooner or later collapse and you will have to make a new one or use a product suitable for frequent use.
Of course, for repeated use, molds made of heat-resistant steel or cast iron are best suited, but making these yourself is almost impossible. But cement is good for creating a melting mold, although this will require a little work.
Materials and tools for reusable uniforms:
- formwork material (wooden boards);
- liquid soap;
- cement;
- round file;
- fine sandpaper;
- clamp;
- cylinders for inserting into the filler hole;
- wire for making loops for the sinker.
For repeated use, molds made of heat-resistant steel or cast iron are best suited, but making these yourself is almost impossible
Cost of ready-made silicone molds
Today, many companies produce ready-made silicone molds for plaster. The price for them, depending on complexity and size, ranges from 200 rubles and above. So, for a simple form for decorating a room in the form of a shell or leaf, you need to pay 290–320 rubles. More complex, larger shapes cost significantly more. For example, the price of a mold for making decorative stone ranges from 900 to 1,500 rubles per square meter. m. There are intermediaries who offer silicone molds made in China at wholesale prices.
Making a mold for casting weights
Making a mold is not that difficult. First, we take a small box and completely fill it with high-quality sealant. When filling, be careful not to form bubbles.
Next, the original weight needs to be lubricated with a solution of wax or paraffin in gasoline. After drying, the sinker on a thin wire is completely lowered into the sealant, but it should not touch the walls of the box itself.
The weight sample should remain in this position until the sealant hardens. Due to the characteristics of the sealant, this process can last a couple of days or drag on for 5-6 days. Do not remove the weight until complete polymerization.
After the substance has hardened, we cut a small hole through which we extract a sample of the sinker. The elastic form is ready, which means you can try to make your own weight from lead or its alloy.
The metal is poured through the same hole that you made earlier to remove the original sample weight. Thanks to its unique physical properties, the silicone mold allows you to easily remove homemade sinkers or baits, after which it returns to its original form and is ready for use again.
How to make a silicone mold for plaster
Ready-made silicone molds can be purchased at hardware stores. But you can make it yourself. In this case, the master has the opportunity to create a form according to his own creative idea.
The production of silicone molds for plaster is carried out using a certain technology.
First you need to make a container for filling. For this you can use wood, chipboard, fiberglass and any other material. Or you can take a ready-made container. Then you should carefully glue the parts of the mold so that they hold well and there are no gaps.
At the next stage, you need to take sculptural plasticine and evenly lay out up to half of the container. This should be done carefully so that the surface is smooth and free of defects.
Then you need to place a model in plasticine for which the mold is made. It is very important to make small holes in the plasticine with a pencil so that parts of the mold do not move during casting.
Now you need to measure the volume of silicone required. You can calculate the amount of material needed based on the size of the container.
Then you need to lubricate the surface of the model with a soap solution or wax lubricant. To create silicone, you need to mix a liquid solution of silicon dioxide and an acid hardener according to the instructions on the package and pour the mixture in a thin stream onto the plasticine with the model. Once the top of the mold has hardened, you can remove the plasticine. But this should be done carefully so as not to damage the surface of the mold.
Now you need to lubricate the surface of the model and the mold again, prepare the silicone mass and make a mold for the upper part of the model.
The silicone mold for plaster is ready.
Technology for making lead weights at home
Casting lead sinkers, despite the ease of technology and availability of materials, is still a mini metallurgical production, so before starting work it is necessary to at least superficially study the basics of metal melting. And although there is nothing special here, it is very important to listen to advice and instructions - both the result of the work and the safety of the work depend on it.
Materials
For the work you will need several types of materials - plaster, cardboard, tape, twine, wax or paraffin, and of course, lead.
Plaster or alabaster is usually used to make molds. Gypsum is more reliable than alabaster, but alabaster is more affordable. These two materials are required to make casting molds.
The auxiliary material for the work will be wax or paraffin. From them, models of future sinkers are made.
Clamps are used to secure the halves of the forms, but it is cheaper and easier to use twine or a clothesline, or, in a very modern way, adhesive tape.
Lead for melting can be found at any scrap metal collection point. Not only rechargeable battery scrap is scrapped; often lead-sheathed communication cables, lead alloys such as babbitt or typographical lead font are scrapped.
Mold making
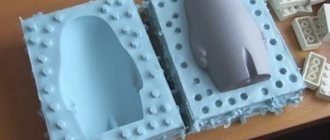
The classic method of making a mold consists of sculpting a sinker model from wax or paraffin and then casting a reusable mold from plaster or alabaster.
Several models of sinkers are made from wax or paraffin. In principle, you can use plasticine, but then, in order for the model to separate from the plaster mold, it will be necessary to lubricate it with Vaseline or fat-based hand cream. After receiving the models, a gypsum solution is made and poured into a plastic or cardboard mold, so that the top surface is as smooth as possible. Until the plaster completely hardens, the model is pressed halfway into it at a distance of 1-1.5 cm from the top edge of the mold. After final hardening, the entire surface, including the model, is smeared with Vaseline, grease or fat-based cream and filled with plaster on top. When pouring, make sure that the height of both forms is the same.
Materials for casting molds
With the open pouring method, the simplest material that is always at hand is often used, this is silica. First, the earth is laid with layer-by-layer compaction. A casting model is placed between the layers, which, after careful compaction, leaves an imprint in the silica. This mold is carefully removed and aluminum is poured in its place.
Some craftsmen use river sand with the addition of liquid glass when preparing the base of the mold. A mixture of cement and brake fluid is also sometimes used.
Plaster molds
When making a model of a complex shape, gypsum is often used, which can mainly be used for a one-time casting process. When casting aluminum into a plaster mold, paraffin or foam plastic is used as models.
The wax model of the product is filled with plaster and, after drying it at high temperature, it is melted and drained through a special hole.
If the model is made from foam plastic, it is filled with gypsum mixture and left in it until the mold completely hardens. Hot aluminum melt is poured directly onto the foam. Due to the high temperature of the metal, the foam melts and evaporates, and its place is taken by an aluminum melt, taking the shape specified by the foam.
When using polystyrene foam as a model, work must be carried out in an open space or the room must be well ventilated, since the combustion products of polystyrene foam are harmful to humans.
Typical mistakes and tips for proper casting
- When working with plaster, you should avoid common mistakes. Despite the fact that plaster molds are a convenient way to cast the desired configurations of parts, this material is very sensitive to moisture. During normal air drying, it remains part of the gypsum. This is detrimental to the quality of the aluminum casting, as it can cause the formation of small shells and bubbles. Therefore, plaster molds need to dry for several days.
- The metal must be hot enough before pouring to fill the entire mold before it begins to harden. Therefore, after reaching the melting temperature, taking into account the rapid cooling of aluminum, there is no need to delay pouring it into the mold.
- It is not recommended to immerse the resulting casting in cold water to speed up the hardening process. This can disrupt the internal structure of the metal and lead to cracks.
As an option, I can suggest making a mold for pouring from plaster or alabaster.
Provided that your part is not of complex shape and does not have intricate reliefs or internal cavities.
We prepare a container slightly larger in size than your part, you can use any ready-made cardboard box or make it yourself from any cardboard or corrugated cardboard, you can half a plastic bottle, dishes, the main thing is to then remove the resulting form for filling.
Coat the part with technical Vaseline or other thick lubricant.
We prepare two dowels for centering the shape of two halves, for example, saw off two 2 cm pieces from a pencil, coat them with Vaseline.
We choose alabaster to make the mold.
We dilute alabaster as follows: add the required amount of alabaster to a container with cold water, wait until the water is completely absorbed into the powder and then stir until a homogeneous consistency is obtained.
The solution should look like medium thick sour cream.
A viscous solution is obtained from the proportion of 1 part alabaster to 1 part water.
Dilute such an amount of solution to use it in one go, since the mixture will harden quite quickly and will need to be thrown away; there is no point in restoring it; the properties of alabaster are not restored.
Pour enough solution into the container so that your part is immersed halfway in it. This will be half of your shape.
It is important to position the part so that after the solution hardens, it can be removed from this half of the mold.
Along the diagonal of the mold, separately from the part, vertically immerse two dowels halfway.
When the solution hardens, we will try to carefully remove the part and return it to its place. Everything worked out, let's continue.
We make a gasket for the frozen mold from available materials: plastic film, tracing paper, thin paper, close only the mold, do not close the part. You can also lubricate it with Vaseline.
We make a cylinder with a funnel on the edge from plasticine at the distance from the part to the edge of the mold and place it in the mold, this will be the filling channel. Decide on the thickness yourself.
Read also: Cold forging pattern drawings
We dilute the required amount of solution and fill the part completely and wait for the second half of the mold to completely harden.
Then we remove the resulting form from the container, carefully separate it into two halves, take out the part and plasticine, and clean up the defects.
We connect the form, the funnel goes to the top, that’s it, you can pour aluminum.
After pouring and removing from the mold, it will be necessary to modify the poured part manually using sandpaper, needle files, a cutter, etc. to the size of the original.
For many, the term “foundry” is closely associated with back-breaking labor and specialized professional skills. In fact, casting a part from the required metal is possible for the most ordinary person without professional training at home. The process has its own subtleties, but it can be done at home with your own hands. Outwardly it resembles the production of lead weights for fishing. Features of the aluminum casting process are related to the technical characteristics of the material.
Lead casting process
Lead alloys are multicomponent compositions that can contain up to 10% copper. Its presence significantly increases the melting point. The second most important component is antimony. The main advantage of lead alloys is that molds of almost any configuration can be used to work with them, at fairly low pressures. The melting point of lead is quite low - 325-350 degrees, and this allows you to cast lead parts at home.
For casting lead, injection molding technology is used. Melting furnaces use equipment that runs on various types of fuel - gas, fuel oil, coke and electrical energy. This equipment must meet the following requirements: 1.
minimum time spent on melting. 2. Minimal material loss. 3. Minimum fuel consumption. 4. Safe and comfortable work. To obtain molten lead and its alloy, the temperature provided in the furnaces is sufficient to melt the lead. Lead is processed in crucible furnaces. The main difference between this class of equipment is that the melt does not come into contact with fuel combustion products. Lead and its alloys are melted in furnaces with metal or graphite crucibles, which can operate on several types of fuel.
Crucible furnaces are produced in two versions: • stationary; • rotary. Furnaces with graphite crucibles for casting make it possible to melt various metals - lead, tin, and aluminum. Moreover, the transition from one metal to another occurs with minimal costs. But crucibles made of graphite have low durability and therefore crucibles made of cast iron are more often used.
The procedure for obtaining lead parts is as follows. Lead pigs or scrap are immersed, where the transition of lead from solid to liquid occurs. After this, the liquid material is poured into prepared models. The principle of castings in industry and households is the same, the key differences are only in scale.
Centrifugal casting
Used in the production of products that have a rotational shape - bushings, gears, etc. Casting is carried out in a metal matrix rotating at high speed.
Centrifugal casting
Centrifugal force presses the liquid metal against the outer wall, where it crystallizes. The method allows obtaining extremely homogeneous castings. It is also possible to create multilayer parts. The layers are poured one after another.
