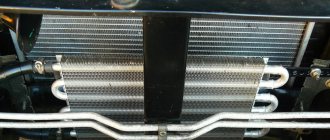
If a car radiator fails, not every driver can immediately replace this part. Its cost often reaches tens of thousands of rubles, and the wait for delivery drags on for months. Soldering cooling radiators helps to postpone replacement for a while. The leak elimination method is chosen taking into account the properties of the material from which the part is made.
Self-repair technologies
Method 1. Iron-rosin flux
So, how to solder a damaged aluminum radiator? The easiest way is to use rosin-based flux. The instructions will be as follows:
- Preparation. We clean the area to be treated, removing any remaining paint and dirt, then sand the metal with an abrasive and degrease it with a solvent. The more carefully we carry out all this work, the more effective the repair will be.
The basis of the flux is crushed rosin
- Preparation of flux. We melt rosin in a metal crucible, gradually heating the container and stirring the melting substance. Add iron filings in small portions (1 part to 2 parts rosin) and stir until the mixture is completely homogeneous.
Sawdust in the soldering mixture acts as an abrasive
- Surface treatment. We cover the area to be repaired with a thin layer of molten iron-rosin flux. The fewer missed sections, the higher the quality of the repair.
Adding propoy under a layer of flux allows you to protect the surface from oxidation
- Soldering. We collect a small amount of solder on the soldering iron, and then apply it in a circular motion to the aluminum under a layer of flux. Iron filings act as an abrasive: they clean off oxides, ensuring a bond between solder and aluminum. Melted rosin allows you to minimize the access of oxygen, so secondary oxidation does not occur.
The main disadvantage of this method of soldering aluminum is its complexity. It is almost impossible to treat such large damage, since the flux hardens quickly and the quality of the repair is reduced.
The sealed area should look something like this
Method 2. Homemade flux
When repairing fairly large damage to aluminum radiators with your own hands, you can use special compounds - flux. In this case, the work is performed like this:
- Preparation. We prepare the defect site according to the scheme described in the previous section, cleaning and degreasing the metal.
The area with the defect must be thoroughly cleaned and degreased.
- Fluid components. Sodium sulfate (4%), potassium chloride (56%), lithium chloride (23%), cryolite (10%) and table salt (75%) are individually ground in a mortar almost into powder. After this, pour the materials into the crucible and mix until a homogeneous powder is obtained.
The components of homemade flux melt in such a crucible.
- Preparing the floodplain. Pour the dry ingredients into the crucible and melt until smooth, stirring gently.
- Soldering. We apply a thin layer of flux to the surface, which is preheated using a gas burner. After this, we solder the damaged area using tin-lead solder with the addition of bismuth.
Eliminating a defect using flux and solder
Method 3. Low-temperature solder with sizing
It is quite difficult to solder such a leak. But it's real!
A car radiator differs from heating radiators primarily in the configuration of the tanks. When troubleshooting a problem, you have to solder small thin-walled tubes and plates, so the methods described above will not always be applicable.
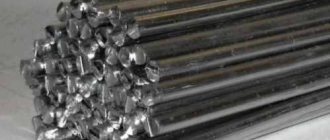
Self-fluxing low-melting solder rods
An alternative is to use aluminum solder rods with a low melting point. An example of repairing a radiator is given in the table:
| Illustration | Work stage |
| Cleaning up the area. Using sandpaper or a special attachment on a drill/screwdriver, we clean the aluminum, removing the film of oxides. | |
| Degreasing. We treat the area with a solvent, removing organic contaminants and oxide residues. | |
| Crimping damage. Using small pliers, we crimp the damaged area, reducing the area of the hole. This is done to facilitate the soldering process. | |
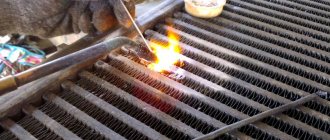
| Soldering. Using a gas burner, we warm up the area. After this, we introduce a rod of solder with a low melting point into the flame and rub it over the damage. With each pass, solder particles will be deposited into the hole and onto the surfaces around it, gradually eliminating the defect. | |
| Additional sealing. After soldering is complete, apply high-temperature aluminum adhesive over the repaired area. When polymerized, this material will close all micropores, which will significantly increase the reliability of the repair. |
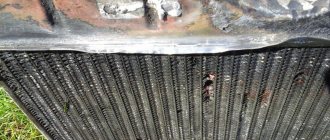
After soldering and treating with glue, the radiator sections look like in the photo
https://youtube.com/watch?v=oMgfIKd1unY
Soldering iron is half the success
In most cases, to solder a radiator you need a massive soldering iron with a power of at least 100 W. But a damaged tube can be soldered with a regular 60-watt one. Much depends on how efficiently the soldering iron transfers its temperature to the part. This, in turn, is due to the correct tinning of the tip, the presence of a sufficient amount of solder at the point of contact of the tip with the part, and the angle at which you hold the soldering iron relative to the surface being repaired.
In addition to electric ones, soldering irons heated over an open fire are also used. There is no fundamental difference in their use, except that during the soldering process it is necessary to additionally control the heating and cooling of the working part of the tool.
Repairing a copper radiator
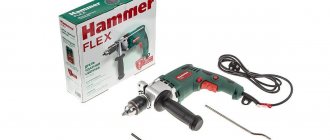
To solder an engine cooling radiator made of copper, you will need the following tools and tools:
- powerful soldering iron or gas torch;
- solder;
- soldering flux;
- pliers;
- sandpaper.
First, you need to dry the radiator, especially if you checked it by immersing it in water. Next, the damaged area should be thoroughly cleaned with sandpaper. If there are slats on it, they need to be removed locally. After this, the soldering area is treated with flux and dried again.
You can solder the cooling radiator using either a gas torch or a soldering iron. In the first case, solder is applied in place and heated with a torch until it melts and fills the crack. When using a soldering iron as a heating tool, make sure that it has sufficient power.
If the solder does not adhere to the surface or lags behind, it is necessary to repeat the stripping and fluxing process. You can check the repaired radiator using the method described above.
Copper or aluminum?
For high-quality soldering of faulty car radiators, you need to find out what they are made of. Modern devices are made of aluminum, copper or plastic.
The easiest way to distinguish material is by color:
The plastic used for radiators is usually black.
Copper is quite easy to solder in a home workshop or garage . Soldering leaky aluminum car radiators is complicated by a number of its physical and chemical features.
We repair the radiator
Soldering copper radiators will require preparing the following:
At the preparation stage, the product is cleaned of mechanical impurities and thoroughly dried. To speed up drying, you can blow it through one of the nozzles with compressed air under low pressure. The leak area is cleaned with abrasive paper. If there are lamellas nearby, they are carefully trimmed. Flux compound is applied to the soldering area and allowed to dry.
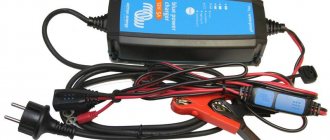
A powerful soldering iron or portable gas burner is used as a heat source . The electric soldering iron can be powered from the mains or from a battery. Solder is placed in the soldering area and heated with a flame so that it melts and flows into the crack or hole. If the molten solder does not wet the metal the first time and does not flow into the gap, you will need to re-clean the surface and apply flux.
What is the difficulty of soldering aluminum?
A layer consisting of oxides with a high melting point quickly appears on the surface of any aluminum part . This temperature is three times higher than that of the metal itself. Until this film is destroyed, there is no point in soldering aluminum parts.
To repair an aluminum radiator you will need:
This is achieved by mechanical surface treatment and the use of specially selected flux compositions.
Materials and tools
To repair an aluminum heat exchanger, you will need:
You will also need a wire brush, hand brush or drill attachment.
Leak test
The quality of the repair can be checked using air or water pumped into the radiator under pressure. The air method has been previously described.
Pressurized water can only be checked during the heating season. To do this, a plug is placed on one side of the battery, and the other is connected to the supply through the Mayevsky tap. Having slightly unscrewed the tap and bypass, fill the radiator with water. To facilitate observations, a strip of white paper is placed under the battery.
If after 10-15 minutes the paper remains dry, the leak has been eliminated and the radiator can be connected to the general system.
If it is not possible to create pressure, then fill the radiator with colored water and leave it for several hours. Usually after 3-4 hours the leak manifests itself.
Looking for a leak
If a stain of antifreeze remains under the car after parking, it means there is a leak in the cooling system.
Before removing the cooling radiator or air conditioner, you should make sure that all pipes and the expansion tank housing are in order. The heat exchanger of the interior heating system is also checked.
Before dismantling, the liquid must be drained from the system. The removed radiator is carefully inspected in good lighting. If the damage cannot be seen, all holes are plugged with tight plugs and the heat exchanger is immersed in water. The emerging chain of bubbles will indicate the location of the leak. If you increase the pressure by connecting one of the pipes to the compressor hose, you can detect a leak faster.
We straighten aluminum with our own hands
The faulty unit should be washed and dried completely. The repair area must be cleaned with abrasive paper and degreased with a rag moistened with a solvent.
Now you can apply a layer of flux with a soldering iron and rub it over the part. Next, solder is applied. Do this in several layers, rubbing and stretching each one. The steel filings contained in the flux will react with the oxide layer and destroy it. This will allow the solder to be in direct contact with the surface of the part and will significantly improve the quality of soldering.
After repair, it is necessary to re-check the radiator for leaks
How to solder plastic?
On modern cars, to reduce overall weight and reduce production costs, many parts are made of plastic. Radiators did not escape this fate either. First of all, it is necessary to accurately determine the type of plastic . This is done according to the markings on the part. As a rule, polyamide (PA marking) or polypropylene (PP marking) is used for manufacturing. It is with this marking that you need to purchase welding rods for plastic. They can be replaced with strips cut from an unnecessary plastic part with similar markings.
The following materials and equipment will be required:
You must act in the following order:
During soldering, you need to ensure that the plastic softens, but does not melt or burn. After the repair and before installing it back on the vehicle, you should check the tightness of the repaired area in a container of water.
Source
How to repair a car radiator yourself
If a car's radiator leaks, most of us resort to replacing it. However, in most cases, the radiator can be repaired rather than replaced. Sometimes no skills are required, but sometimes you cannot do without knowledge in the field of welding or soldering. We learn to determine the condition and try to restore the radiator with our own hands. The most common problem is when the radiator leaks due to age. Coolant runs out from the junction of metal and plastic, which automatically leads to engine overheating. It is not always possible to find a replacement radiator, and repairs will cost at least 2 times less than a new one.
Further discussion will be about car radiators in general, and it doesn’t matter whether it’s repairing a heater radiator, an air conditioner radiator or an engine cooling system radiator. Radiator repair with chemistry
Minor damage can be repaired using special products, which on the market are called radiator restoration fluid, radiator sealant, or powder restorers. The principle of operation is approximately the same: pour radiator reducer into the engine cooling system (ECS). The resulting mixture clogs cracks when exposed to air.
Radiator repair using chemicals. Minor damage can be repaired using special products, which on the market are called radiator restoration fluid, radiator sealant, or powder restorers. The principle of operation is approximately the same: pour radiator reducer into the engine cooling system (ECS). The resulting mixture clogs cracks when exposed to air.
Chemistry is different, so it is impossible to answer for the quality of this method as a whole. For example, a low-quality reducing agent may not help, but on the contrary, may cause harm by clogging the entire SOD. For example, the stove will stop heating and you will need to flush the ODS or replace the stove radiator. Higher quality chemicals can eliminate radiator leaks only temporarily (from several days to several months). Thus, chemicals for radiator repair are only a temporary solution to the problem.
There is a popular method for repairing radiators. It involves patching holes using cold welding (a material similar to plasticine that hardens after use). It is better to seal a small hole in the radiator after thoroughly degreasing the work surface. If the hole in the radiator is large, then you can use a piece of tin as a patch, which we again glue by cold welding.
Source
The main reasons for the loss of radiator tightness, signs, repair features
Loss of tightness of the radiator of the cooling system may be due to the following reasons:
- Natural wear and tear. The approximate lifespan of a radiator is about 10-12 years. As the device wears out, its internal working surface becomes covered with a layer of scale and deposits formed as a result of chemical and thermodynamic processes. The walls of the radiator plates and tubes become thinner. Since the liquid in the device is under pressure, microcracks are possible, as a result of which the liquid begins to leave the system.
Considering that the sizes of microcracks are small, a strong leak is not observed in this case. Wet traces of leakage may disappear after cooling the engine and antifreeze. It is advisable to immediately detect the consequences and place of fluid leakage. The sooner repairs are made in this situation, the less damage will have to be repaired. Can be successfully repaired by cold welding.
- Filling the cooling system with water. Freezing in the cold season. If there is a slight leak of antifreeze, many drivers add limited amounts of water to the system. During the warm season of vehicle operation, the number of such top-ups can be large. As a result, the concentration and characteristics of antifreeze change. In winter, even at slightly below zero temperatures, it can freeze. In this case, volume expansion occurs. The radiator may “break”.
The resulting crack is usually large in size. It can occur at the junction of plastic and metal radiator elements. In most cases, such damage is difficult to repair.
- Filling the cooling system with low-quality antifreeze. Overpressure. In most modern engines, the coolant is under pressure. At the same time, the boiling point of antifreeze increases to more than 100 degrees Celsius. This allows you to increase the efficiency of the engine. If low-quality antifreeze is poured into the system, it may boil at a lower temperature. This may damage the radiator. It may be small. In such cases, it is better to use the soldering repair method, as it provides better performance in terms of resistance to increased pressure. Soldering is easy to do at home.
- Mechanical damage. This malfunction may be due to:
- foreign objects entering the radiator area;
- road accident;
- destruction of fan blades;
- poor quality repairs.
Read more: How to fix scratches on your car
Depending on the location and size of the damage, cold welding and soldering methods can be used for repairs.
Is repair always possible?
It is not always advisable to repair a radiator. In some cases it will be easier and even cheaper to install a new one. But how do you understand that this is exactly the situation before you and not waste time on recovery? We'll help you figure it out.
- Leaks that are located at the junction of the radiator with the plastic pipe cannot be repaired. You can fix the leak, but only for a temporary effect. It is better to use epoxy glue or sealant.
- Nothing can save you from corrosion, which caused the system to depressurize. It is not worth spending any time, money or materials on such a radiator. It must be recycled.
- Structural damage resulting from an accident often cannot be repaired. Even if there is a chance of success, the repair costs will be considerable.
Any leak starts with a small crack, which will be much easier and faster to fix. With timely repairs, the radiator can serve for a long time and properly cope with its duties. Remember, not all defects can be eliminated; in some, especially advanced cases, you will have to replace the part.
The best prices and conditions for the purchase of new cars
Credit 6.5% / Installments / Trade-in / 98% approval / Gifts in the salon
Mas Motors
Security measures
When repairing a car radiator, you should be extremely careful and follow certain safety measures. The heat exchanger itself must be disconnected. Drain all liquid completely.
If you have not previously had experience working with a soldering iron, it is better to entrust this task to professionals. In this case, you should at least practice on less important surfaces and parts of the car.
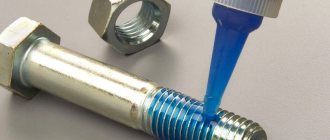
When working with cold welding or glue, it is important to use gloves to avoid damaging your hands. In addition, be sure to follow the instructions for using the glue
This way you can not only achieve the ideal effect of the repair, but also protect your hands from the harmful effects of adhesives.
conclusions
So, following the recommendations and advice in the article, determining what to seal a car radiator with will not be difficult. The main thing is to follow some safety measures and choose the best repair option. If you are not sure that you can cope with such a task on your own, it is better not to take risks and seek help from qualified auto mechanics.
Still have any questions? In this case, we recommend watching a video on how to repair a car radiator at home. We wish you good luck in your endeavor!
Solders and fluxes
In everyday life, the most commonly used tin-lead solders are POS-40, POS-61, POS-90 (the digital index indicates the percentage of tin content). Their melting point is low: it is 190 – 300° C. Solders of this group are characterized by good wettability and ductility. When repairing cars, copper-zinc solders of the PMC series are also used, which provide a strong and corrosion-resistant connection. But due to the high melting point (825 - 905°C), a gas burner is required for heating, which limits their use.
Fluxes are used to destroy the oxide film on the surface of parts and to protect them from oxidation during the soldering process. For tin-lead solders, an aqueous solution of zinc chloride is usually used - “etched” hydrochloric acid. When repairing brass radiators, it is recommended to use rosin (or its alcohol solution), sold on radio markets. It does not cause corrosion of metals and does not require thorough “decontamination” at the end of the work.
Igor Shirokun Photo by the author
If you find an error, please select a piece of text and press Ctrl+Enter.
Source
Preparing a car radiator for soldering
1.Dismantling
Soldering a radiator without removing it is a fantasy. The quality of work will be very low. You need to disassemble the front part of the car, remove the bumper and remove the radiator.
Don't forget to drain all the coolant from the system. All work should be carried out only after the engine has cooled down. You can get severe burns to your face and hands.
When the fluid is drained, do not forget to disconnect the hoses and radiator mountings
The work must be done carefully and carefully so as not to damage the mounting elements. You need to remember the connection points of each hose and pipe
The fan, sensors and other electrical wiring are turned off.
2.Internal radiator cleaning
Over the years of use, scale forms inside the radiator. They need to be removed. You can use a special cleaner to clean the inside of the radiator. It is poured inside the radiator and dissolves foreign compounds.
For convenience, the cleaning agent is dissolved in the amount of water specified in the instructions. The solution is poured into the radiator. After some time, it merges together with the remnants of foreign formations dissolved in it.
After chemical cleaning, the radiator is washed with plain water under good pressure.
3.External radiator cleaning
For high-quality soldering of a car radiator at home, you need to clean it from the outside. Special cleaning agents are used that can remove oil stains, antifreeze spills and just dirt. It is better not to use aggressive chemicals, as there is a risk of damaging the radiator.
When cleaning the radiator externally, it is necessary to record and mark the areas of damage. This will make it possible to carry out repairs as efficiently as possible.
4.Drying the radiator
Before soldering a car radiator at home, you need to dry it and remove all water. It must be dry and clean. To speed up the drying process, you can use a hair dryer.
All soldering areas must be degreased and thoroughly cleaned. This is the key to a successful repair operation. Otherwise, there will simply be no luck and time will be wasted.
Flux for the most durable seam
To obtain the most durable protective seam at the site of damage to the radiator, a special flux called flux is used. It can also be obtained at home. To prepare flux, you will need the following substances in the following proportions:
- potassium chloride – 56%;
- lithium chloride – 23%;
- cryolite – 10%;
- coarse table salt – 7%;
- sodium sulfate – 4%.
The ingredients are finely chopped and mixed. This melt must be stored in a hermetically sealed glass container in a dark place.
What is the difficulty of soldering aluminum?
Aluminum is a very specific metal. Its peculiarity lies in its high chemical activity, manifested in the formation of a so-called oxide film on the surface. It appears instantly when pure metal comes into contact with air, reacting with oxygen. And it is precisely because of this that it is impossible to solder an aluminum cooling radiator in the usual way. This will require additional substances that contribute to:
- removing oxide film from the surface;
- reducing surface tension;
- protection from adverse factors affecting the soldering process;
- improved solder flow.
Features of working with aluminum
The choice of aluminum for the manufacture of various radiators is not accidental: this metal has an optimal combination of low weight, strength and excellent thermal conductivity. Thanks to this, plate structures with a large total area can be made from aluminum, and they will provide excellent heat transfer.
But the material also has a drawback, which is the difficulty of repairing any radiators if damaged:
A film of oxides appears on any aluminum products
- Aluminum is a chemically active material. Because of this, the metal surface oxidizes very quickly, becoming covered with a layer of oxide film.
- The oxide film becomes an obstacle to soldering two aluminum products. For maximum strength, it is necessary to achieve direct metal-to-metal contact, but when heated, a thin layer of oxides inevitably forms between them.
The oxide layer protects against corrosion - this is true for both copper and aluminum
- To effectively solder an aluminum radiator, you need to get rid of oxides on its surface. For this purpose, special compounds are used - fluxes. The use of fluxes based on cadmium, bismuth or zinc allows you to clean the surface of the material, reduce the stress on the surfaces during connection and improve the adhesion of the metal to the solder.
Oxides are removed using special fluxes
The price of high-quality fluxes for soldering this metal can be quite high (for example, Castolin Alutin 51L - about 300 rubles for 25 g). That is why, when repairing radiators at home, they use homemade compounds - the so-called fluxes.
Even such a small hole will not be easy to repair.
In any case, when soldering, the main task is to isolate the treated area from contact with oxygen. This is achieved in a variety of ways.
The simplest ways
First, it’s worth deciding on the scale of the tragedy.
. It is necessary to check all the pipes and the radiator itself in order to draw any conclusions. If the leak is minor, then one magical remedy called a chicken egg can help get rid of it for a while. Yes, yes, this is what saves many on the road. All you need to do is go to the nearest grocery store and buy this miracle product.
The chicken egg must be broken and its contents poured into the radiator. The leak will disappear in an incredible way. In fact, there is no magic in this. Everything is connected with the structure of the egg, which envelops the walls of the cooling radiator. This method is suitable if trouble happens on the way, but you cannot fully rely on this method.
Another simple way is to use sealant
. Of course, we are talking about a specialized version for cars. Here it is also worth talking about minor leaks, the diameter of which does not exceed 1-2 square mm. All you need to do is pour the contents of the jar into the radiator. the substance in it will clog the hole for a long time.
However, do not delude yourself, because such sealants often have a negative effect on the car. Over time, they can simply clog the cooling system. This is unacceptable, therefore, after using them, it is imperative to use various methods of cleaning the radiator in order to completely remove the substance from it.
Soldering order
Proper organization of the aluminum soldering procedure requires thorough preparation, without which it will not be possible to achieve the desired result. Before soldering the radiator yourself, you should carefully read the relevant instructions. It states that the preparatory stage includes cleaning the area to be restored and preparing a soldering composition of the required quality.
Preparatory operations
Before starting soldering, it is necessary to remove the old coating and clean the soldering area
Before soldering an aluminum radiator using rosin-based flux, the damaged area is prepared according to the following instructions:
- Remains of the old coating and traces of contamination are removed.
- The soldering area is cleaned using abrasive.
- Immediately after this, it is degreased with a solvent.
Before soldering the radiator, you will need to prepare the flux in a metal crucible in advance. To do this, rosin is first melted with a gas burner, after which small iron filings, taken in a ratio of 1:2, are added to the melt (they act as an abrasive). At the same time, the prepared composition is mixed until it becomes a homogeneous mass.
Elimination of small defects
Upon completion of the preparatory operations, they proceed to the soldering process itself:
The soldering iron captures a small amount of solder. Using circular smooth movements, it is applied to the area previously treated with flux. During the processing process, it is important to carefully ensure that the layer of solder is distributed over the surface as evenly as possible.
When soldering, the sawdust contained in the solder removes oxides from the surface, and the previously added rosin blocks the oxygen access channel. As a result, all conditions are created to obtain reliable contact between different metals. This method is only suitable for small damage, the size of which does not exceed a few millimeters. On large areas, the flux cools quickly and does not provide good heating of the soldering area.
Restoring significant damage
To restore a significant area of the radiator, you will need a special composition - flux
The need to restore large-area aluminum surfaces is encountered quite often. You will need a special soldering compound called “flux”. Before using it, the battery surface to be treated is prepared, as was done for small areas.
Initial components for preparing flux:
- potassium and lithium chlorides;
- regular table salt;
- sodium sulfate;
- cryolite.
The mixture prepared in a certain proportion is first thoroughly ground in a mortar to a powder state. After this, it is poured into a crucible, where it is thoroughly mixed until a homogeneous mass is suitable for obtaining a melt.
Soldering procedure using flux:
- The damaged area is thoroughly heated using a gas burner.
- A thin layer of flux is applied to the prepared area.
- The damage is soldered with tin-lead solder with the addition of small amounts of bismuth.
When working with special equipment (gas burner), it is important not to overheat the area being restored, so as not to burn it. The strength of the flame is selected so that it is only sufficient to uniformly heat the surface of the aluminum product
Repair of complex configuration radiators
Soldering a car radiator
There may be situations when it is necessary to restore (unsolder) an aluminum car radiator that has many hard-to-reach places. In this case, methods based on the use of iron rosin flux and home-made flux are not suitable. Thin-walled tubes of a copper or brass car radiator, for example, are very difficult to solder due to the design features. In this situation, it is recommended to use low-temperature solder (LTS) with simultaneous gluing of the surface to be restored. To the list of preparatory operations considered, we should add the need to crimp the damaged area of the radiator or stove with pliers, which will reduce the size of the hole.
During soldering, the area to be treated is first thoroughly heated with a gas burner, after which an NTP rod is introduced into its flame. By periodically moving it over this place, you need to try to make sure that the solder particles cling to the edges of the damage and gradually “tighten” it. At the final stage, you will need to seal the defect area using a special high-temperature glue. With its help, it is possible to “fix” all the remaining minor irregularities and flaws.
Preparing gumboil
To repair a heat exchanger with your own hands, you should take care of a good flux composition. Flux is prepared shortly before soldering a leaky radiator, since over time the composition decomposes and loses its properties. For two shares of crushed rosin you need to take one share of steel filings obtained using a file .
The composition must be poured into a fireproof container, mixed and heated with a burner. Then stir again and cool.
For the most durable seam
There is another recipe for flux, which is commonly called “flux”. With its help, you can achieve special seam strength. To create the flux you will need the following ingredients:
All components should be crushed and mixed thoroughly. The composition should be stored in a tightly closed container, protected from light.
Repair work
If aluminum batteries were installed correctly and were operated in compliance with all required technical conditions, then their period of operation may significantly exceed the ten-year warranty stated by the manufacturer. In this case, repair work will not involve large labor costs, even if it is necessary to add additional sections.
Manipulations of a repair nature will in this case consist of shutting off the shut-off valves and riser, from which the coolant must first be drained.
To drain this media, place a container under the bottom connection valve. Then the bottom tap is unscrewed to release the remaining water from the battery or, in the case of using such a coolant, antifreeze. After this, the upper valve is unscrewed and the radiator is removed from its place.
If an aluminum heater does not produce heat, then the root of the problem should be sought by bleeding air from the heating system. After this, you need to wait until the batteries warm up enough, and if this does not happen, you will have to dismantle the radiator and check it for clogging.
Aluminum radiators, consisting of sections, contain a relatively small volume of coolant. By filling the previously removed battery with water, you can determine whether or not the amount of water corresponds to that indicated in the technical passport. If a discrepancy is detected, it is necessary not to repair the radiator, but to flush it. To do this, it is necessary to pass a stream of water under high pressure through the removed battery until the water clears.
In some situations, the only way to bring batteries into working condition is to completely replace damaged sections or add them. If there is a side connection, then such manipulation will not cause much trouble, but in the case of a bottom or diagonal connection, you will have to, depending on the situation, either increase the pipe or, conversely, reduce its length.
Disassembling the dismantled battery into separate sections begins with unscrewing the nipples. To do this, the right nipple should be rotated with a wrench to the left - along the left thread. Accordingly, the left nipple must be turned to the right, since it has a right-hand thread. Carrying out this manipulation requires great care, because the nipple may well “stick” to the battery and you can break the thread with a careless movement. As a result, you will have to throw away 2 sections together.
In a similar way, the nipples on the remaining sections are unscrewed one by one. After dismantling all sections, they are cleaned. The assembly of the structure is carried out in the reverse order.
During the repair, it is necessary to check the condition of the threaded connections for all battery sections and inspect them for chips. Both nipples should be unscrewed and tightened several times in order to achieve sufficient ease during their further installation in place.
If the areas where the sections are joined are covered with dye, then it should be sanded down to the aluminum of the battery. Otherwise, after a while the paint will crack, the coolant will be underneath its layer and microcracks will appear on the surface of the structure.
The next section is screwed on from the reverse side of the nipple, continuously maintaining a tight fit of each element until the entire structure is assembled.
When tightening nipples, never use force to avoid stripping the threads. If a leak of an aluminum heating radiator occurs during the heating season, you should be wary of the hot coolant so as not to get burned from it.
Main fault
Despite the fragility of the design, the radiator can last for years. Its main enemies are low-quality coolant and foreign objects that can cause mechanical damage. Antifreeze or antifreeze themselves are not very active substances that can destroy the protective oxide film, and they practically do not react with pure aluminum. But if the coolant does not meet the required chemical standards, it promotes corrosion processes, as a result of which the honeycomb walls of the device are gradually destroyed.
Mechanical damage to the radiator most often occurs during road traffic accidents, collisions with curbs, tree stumps, etc. In addition, the device may be accidentally damaged during car repairs. In any case, the result is the same - leakage from a broken cell. The size of the hole determines the possibility of repair. If the heat exchanger is not seriously damaged, and the size of the problem area is several square centimeters, you can try to restore it. There is no other option to repair an aluminum radiator (we’ll figure it out later on how to solder it).
Why does a leak appear?
A leak in the device under consideration can occur only for two reasons: due to mechanical damage and due to corrosion processes occurring inside the tubes. In the first case, it may be the impact of a foreign object on the honeycombs or tanks. This usually happens as a result of traffic accidents, hitting a high curb, hitting a stone, etc. Everything is clear here. A visual inspection will allow you to accurately determine the location of the damage, as well as assess the possibility of repair. Corrosion is a little more complicated. In order not to make a mistake and solder the cooling radiator where needed, you will need to carry out a few simple steps to detect the problem area or even areas. The fact is that corrosion damage can occur in several places at the same time.