How to solder SMD correctly? Sooner or later, all electronics engineers had to face this question.
There are times when a simple soldering iron cannot get to SMD elements. In this case, it is best to use a soldering gun and thin metal tweezers.
In this article we will talk about how to properly solder and desolder SMDs. We will train on a dead phone. I showed with a red rectangle that we will unsolder and solder back.
A hair dryer needs a suitable attachment. We choose the smallest one, since we will have to desolder and solder a small SMD card.
And here is the entire structure assembled.
Using a toothpick, apply flux plus to the SMD.
This is how we lubricated it.
We set the temperature of the hair dryer at the soldering station to 300-330 degrees and begin to fry our part. If the solder does not melt, then it can be diluted with Wood's or Rose's alloy using a thin soldering iron tip. As we see that the solder begins to melt, using a pin, carefully remove the part without touching the SMDs that are nearby.
And here is our part under a microscope
Now let's solder it back. To do this, we clean the spots (if you haven’t forgotten, these are contact pads) using copper braid.
After we have cleaned them of excess solder, we need to make bumps using new solder. To do this, take just a little bit of solder on the tip of the soldering iron tip.
And we make tubercles on each contact area.
We put an SMD part there
And we heat it with a hairdryer until the solder spreads along the walls of the part. Don't forget about the flux, but you only need a very small amount of it.
In conclusion, I would like to add that this procedure requires the ability to work with small parts. Everything will not work out right away, but whoever needs it will eventually learn how to solder and desolder SMD components. Some craftsmen solder SMDs using solder paste. I used solder paste when soldering BGA chips in this article.
Instrument electronics is developing simultaneously with general electronics, which results in the continuous improvement of the tools used during repairs.
One of these tools was a soldering gun. Many modern household appliances, such as TVs, tablets, laptops, can only be repaired with its help.
What is needed for work
A soldering gun, also called a hot-air soldering station, is a multi-component tool with a large number of functions for repairing modern devices.
It allows you to solder SMD components, capacitors, LEDs and other parts. The same applies to BGA-type chips, which make installation more dense. Today, almost every electronic component in modern devices is made in this way. To solder SMD components, you need the following materials and devices:
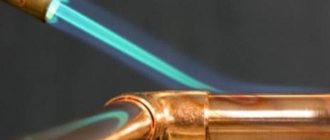
- actually, the hair dryer itself;
- attachments for it;
- flux with solder paste;
- copper braid;
- some kind of device for prying up parts (tweezers, for example);
- medium-soft brush;
- lens;
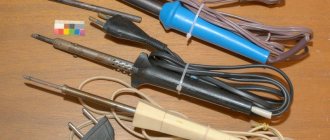
- a soldering iron with a thinner tip compared to a standard one;
- stencil for “rolling”.
To work competently with a soldering gun means to be careful, have angelic patience, and be extremely careful.
Features of working with BGA chips
When soldering BGA type microcircuits, the same temperature range is selected from 345 to 350 degrees, ensuring moderate air pressure to prevent blowing off the “neighbors”. During operation, the soldering gun should be held at an angle of 90 degrees with respect to the board. To avoid failure of the chip, you should not heat it only in the center; it is better to go around the mounting element around the perimeter.
After 1-3 minutes have elapsed, you can try to slightly lift the chip above the board using tweezers. If the chip does not budge, the solder is still hard. To avoid damage to the conductive paths of the board, you need to use the regulator on the hair dryer to “throw on top” 5 degrees of temperature and continue heating.
Heating from below
This technique is not only useful when working with a soldering gun, but also increases the convenience of soldering.
The board is secured with a clamp, the temperature is set to 200 degrees and warmed up for five minutes, after which they begin to work as usual.
Using thermal tape, you can shield nearby elements.
After removing the chip, the contacts are cleaned with the above braid. Do the same with the board.
All procedures must be carried out carefully to prevent damage to the circuit. If you don't have copper braid on hand, you can remove the solder using a soldering iron with a thin tip.
Reballing procedure
To carry out reballing, the chip is placed in a stencil and secured with specialized electrical tape. Apply solder paste on the back side with a finger or spatula, then set the hair dryer to a temperature of about 300 degrees and begin to warm it up. After the characteristic shine from the molten solder paste appears, allow the solder to cool completely.
To free the stencil from the chip, remove the electrical tape and heat the stencil to approximately 150 degrees; at the end of the procedure, the part should be free. It happens that it is impossible to immediately remove a part from a Chinese stencil, so it may be necessary to carefully hook it.
During reverse soldering of the microcircuits, the risks are assessed and the chip is laid out the required number of times to ensure an exact match of the heels and balls. Then they set the temperature on a soldering hair dryer to 330 to 350 degrees and heat until the melted solder allows the chip to fall into place on its own.
Everyone understands how you can, using a regular 40-watt EPSN soldering iron and a multimeter, independently repair various electronic equipment with lead-out parts. But such parts are now found, mainly only in power supplies of various equipment, and similar power boards, where significant currents flow and high voltage is present, and all control boards are now based on SMD element base.
054-We solder SMD components. : 29 comments
Of course, it’s much easier to desolder with a hairdryer, if you have additional attachments, then it’s a blast. If you warm up, you take off. Your method is slightly vandal, it is quite possible to tear off the track under it along with the leg of the microcircuit, it’s good if you only need the microcircuit, but what if it’s the other way around?...
On this I agree. But this is a less vandalistic method than, for example, pouring rosin or heating it with a kilowatt spotlight or an industrial hair dryer. We must understand that this method is only suitable for single desolderings; if this happens often, a soldering hair dryer is a must!
Also, are SMD elements only found on computer boards??
Why only on computer boards? They are used very widely. It is more profitable for manufacturers to make electronic equipment using SMD components for the following reasons: - SMDs are cheaper - there is no need to drill holes in the boards for SMDs (this significantly simplifies and reduces the cost of production) - SMDs take up less space and are stored in tapes convenient for automatic installation - SMDs are easier to install machine guns
For the same reasons, except for the last point, for radio amateurs it is also more profitable to use SMD components
Greetings. What hair dryer do you recommend for the job? What brand, type. Not only desolder, but also solder. Fan in the handle, in the block? Why is one or the other better? What is the price, approximately within what limits?
I won’t say anything about a hairdryer - I don’t have one myself. I make do with a soldering iron.
@GetChiper Fen rules!! And even cooler is a technological convection oven