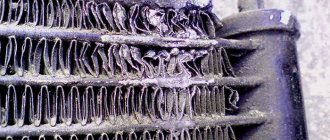
Mid-autumn is the last time to tidy up the cooling system before adding fresh antifreeze. Known, by the way, not only for its frost resistance, but also for its ability to seep even through microscopic cracks. And then, as luck would have it, the radiator leaked...
| Brass radiator soldering technology |
| Mid-autumn is the last time to tidy up the cooling system before adding fresh antifreeze. Known, by the way, not only for its frost resistance, but also for its ability to seep even through microscopic cracks. And then, as luck would have it, the radiator leaked... |
Solder - don't glue
At first glance, in the era of superglues, “cold welding” and other almighty chemistry, it seems awkward to take on such an archaic task as soldering. But when repairing radiators, the use of polymer preparations is not always justified. Do not forget about vibrations, temperature changes, differences in the coefficients of thermal expansion of metal and plastic; and if we add here the price factor and strength indicators... For example, in places where the pipes are attached to the tanks, “cold welding” does not always withstand vibration loads that are transmitted from the engine through rubber hoses. The same can be said about the filler neck. And additives that dissolve in antifreeze, under certain conditions, lead to a decrease in the throughput of the radiator. In a word, a soldered connection is no worse than a glued one. The main thing is that your radiator is not aluminum - this metal is soldered using a special technology.
Peculiarities
Traditionally, it was believed that only specialist coppersmiths could solder a radiator, even a brass one. In fact, there is nothing tricky about this, the main thing is to find a soldering iron of the right size and power and master a couple of simple techniques. In addition, the soldering procedure can be repeated over and over again an unlimited number of times until complete success is achieved.
Soldering such a large unit as a radiator has its own characteristics. First, the leak site is usually contaminated with coolant deposits or oxidation products. Secondly, it is necessary to heat a large mass of metal. And finally, body vibrations must be taken into account, so when repairing the most loaded elements (pipes, places where the radiator is attached to the body), for strength, a larger layer of solder should be applied than is usually recommended.
Process
While the soldering iron is cold, its tip must be freed from scale with a file, as it heats up, lubricate the working edge with flux and carefully cover it with a layer of solder, as if rubbing it in. If this is not done, problems will arise with heating the parts and collecting solder on the tip.
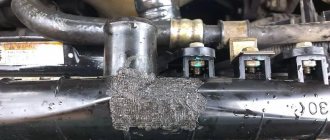
The soldering area must be cleaned until shiny with a scalpel or sandpaper. If you are going to solder a hole in a tank or radiator tube, you should clean a 3-4 mm wide strip along its edges, and free the hole itself from dirt. It happens that only by cutting out the adjacent pipe can you get to the leaking one. Subsequently, it must be completely drowned out - the design of the radiator allows it to be deprived of a certain part of the “honeycomb” (up to 20%). When eliminating a crack at the attachment point of the pipe, you need to clear the gap and its edges. In any case, do not forget to drain the coolant from the radiator and leave the neck open.
The cleaned soldering area must be heated well with a soldering iron, after which the melted rosin will form a thin layer (avoid overheating, it will char at 315°C).
Having collected solder on the soldering iron and transferred it to the heated part, run the tip over the metal several times. If everything is done correctly, the solder will flow from the tip and adhere to the areas covered with flux.
If there are shells left on the tinned surface that are not covered with solder, you need to clean them of flux residues, add fresh rosin there and repeat the tinning in this place.
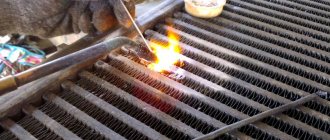
After tinning, a portion of solder is added to the soldering site, which in molten form is “stretched” over the hole or crack. To avoid making a large seam, you can apply a tin patch to the hole. A large seam can be soldered in parts; the heat capacity of the radiator allows you to re-melt the solder at one edge of the seam without disturbing the already cooled layer at its beginning. You can also, using a lower-power soldering iron, smooth the already solidified solder onto a still warm part to give it a marketable appearance.
Reasons for soldering the radiator
First of all, it is worth checking the entire pipe system for integrity. Very often, it is mechanical damage to the tubes or tank collectors due to a traffic accident that is the cause of antifreeze leakage.
Also, do not forget about the possible thermal overheating of the joints, which led to their destruction, resulting in a leak. The same reason may occur if the cooling system was operating without liquid.
If the cooling system is already old and suddenly leaks, the most likely cause may be corrosion. Please note that it may not be noticeable at first glance, as it may be located inside the system. In this case, you will still have to completely disassemble the system.
Classification of cooling systems
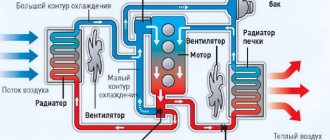
There are several types of engine cooling systems:
- air;
- liquid;
- combined.
The air system uses the flow of outside air to operate. Used in motorized vehicles with low power engines.
In a liquid system, a heated engine is cooled with a special coolant. Most modern car engines are equipped with such a cooling system.
The combined system combines the operation of liquid and air systems. Used to operate high-power power plants. Widely used at energy sector enterprises.
Finding a Radiator Leak
If a spot suddenly appears where the car is parked, it means the cooling system has leaked. In order to quickly and easily determine the cause, it is recommended to follow an easy inspection rule.
- Initially, you need to make sure that there is no external damage as such. Before removing the radiator, you need to carefully inspect all pipes and tanks for mechanical damage.
- Perhaps during movement the system touched some protrusion, which caused a crack to form. At this stage it is also worth checking the heat exchanger of the interior heating system.
- Next, if no external signs of failure were found, you need to prepare to dismantle the entire cooling system. To do this, you must first drain all the liquid from the system.
After dismantling the radiator, it must be carefully inspected. Particular attention should be paid to the lighting; it must be good in order to be able to examine the part in detail.
If the hole could not be found, you must first close all the tubes using plugs, thus sealing the radiator. Then place it in clean, clear water. Bubbles that appear in a chain will accurately indicate the location of the leak; this is the easiest way to diagnose.
Flux for the most durable seam
To obtain the most durable protective seam at the site of damage to the radiator, a special flux called flux is used. It can also be obtained at home. To prepare flux, you will need the following substances in the following proportions:
- potassium chloride – 56%;
- lithium chloride – 23%;
- cryolite – 10%;
- coarse table salt – 7%;
- sodium sulfate – 4%.
The ingredients are finely chopped and mixed. This melt must be stored in a hermetically sealed glass container in a dark place.
Diagnosis of material type
After a crack through which fluid is leaking is identified, you need to find out what material the radiator itself is made of. This is necessary in order to choose the optimal method of soldering the damage, thus repairing the part.
Modern models can be made of aluminum or copper; there are also models made of plastic, but much less common.
- You can distinguish the material quite simply based on its shade. The thing is that copper will have a red-brown tint.
- While aluminum will have a gray color. The plastic part has a black or dark tint.
- As a rule, radiators are not painted, so you should rely on this method.
- If the radiator is painted, it is necessary to remove a small amount of paint from the inside to diagnose the type of material used.
Copper can easily be soldered in a garage or even at home, because working with this material is much easier. But working with aluminum is much more difficult, this is due to its physical and chemical properties, which must be taken into account.
It makes no sense to solder a plastic part, because the plastic is unreliable; if there is a crack, it can be covered, but it is recommended to install a new part.
Safety precautions
| The electric soldering iron must have intact cord insulation and a working plug. During operation, make sure that the cord does not touch the tool or heated parts. |
| Hold the soldering iron by the handle only. You cannot determine its heating by touch - just hold your hand at some distance from the sting. |
| Vapors from heated solder and fluxes are harmful to health. Work should be carried out in a ventilated area or in the fresh air. |
| Please note that the solder takes a long time to cool down on a heated part, so after removing the soldering iron, do not rush to immediately touch the seam with your hands. |
DIY radiator repair (step by step)
In order to repair a broken radiator, you will need the following list of tools.
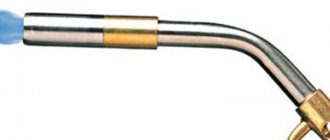
- Electric soldering iron, high power, or you can use a gas torch
- Solder of the right type
- Flux paste
- Abrasive paper
- Pliers
- Solvent
- Rags
First you need to prepare the product for the upcoming work. For this purpose, it is thoroughly cleaned of external contaminants, dust, various fragments and sawdust. Next you need to degrease it, for this purpose you need to use a solvent. Degreasing is necessary in order for soldering to be carried out efficiently.
The entire system must be thoroughly dried, possibly using compressed air through one of the pipes.
The leak area must be carefully cleaned using abrasive paper (sandpaper) so that it is smooth and even with the rest of the surface of the part.
After this, you need to apply a flux compound to the soldering area and give it a little time to dry.
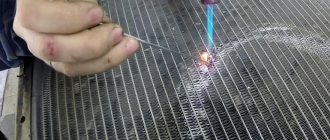
After this, solder is applied to the crack, using a high-power electric soldering iron or a gas torch, it is necessary to melt it so that it completely closes the crack and penetrates inside, thus completely closing the defect.
If it doesn’t work the first time, you need to repeat the procedure again, starting with applying the flux paste.
Using Cold Welding
This method of soldering an engine cooling radiator does not involve heating. The hole is sealed with a special substance that covers the damage. Repairs are performed as follows:
- Prepare the part. To do this, the surface is cleaned of dust and degreased. A rag is moistened with alcohol and the radiator is gently wiped with it. You can’t apply any force; the metal will be damaged even more.
- Prepare the adhesive composition. It is selected according to the type of metal. Cold welding is a thick mixture that must be evenly distributed over the defect. Careful application improves the quality of the seam. Wait for the composition to dry and inspect the soldered radiator.
We recommend reading: Methods of hot welding of plastic
The difficulty of soldering an aluminum radiator
The difficulty lies in the physical and chemical properties of this material. The thing is that when heated, an oxide layer forms on the surface.
It will not be possible to properly apply solder on top of it, thus repairing the part. Initially, you need to get rid of this layer, and then increase the fluidity of the solder itself by heating it more strongly.
After this, it is necessary to prevent the re-occurrence of the oxide layer. It will not be possible to carry out all these stages in a garage or at home, because the part requires mechanical, professional processing using special equipment.
You should also pay special attention to flux compounds and solder. They need to be selected with great care, because the quality of the final soldering depends on them.
After the repair process is completed, the tightness of the system must be checked in the same way as is used to diagnose and detect cracks in the part.
Preparing gumboil
To repair a heat exchanger with your own hands, you should take care of a good flux composition. Flux is prepared shortly before soldering a leaky radiator, since over time the composition decomposes and loses its properties. For two shares of crushed rosin you need to take one share of steel filings obtained using a file .
The composition must be poured into a fireproof container, mixed and heated with a burner. Then stir again and cool.
For the most durable seam
There is another recipe for flux, which is commonly called “flux”. With its help, you can achieve special seam strength. To create the flux you will need the following ingredients:
All components should be crushed and mixed thoroughly. The composition should be stored in a tightly closed container, protected from light.
