13.11.2019
| (Votes: 2, Rating: 3) |
Issues discussed in the material:
- What is cylinder honing
- Is there a difference between cylinder mirror and honing
- What are the technologies for honing cylinders
- How Alusil and Nicasil cylinders are honed and repaired
The internal combustion engine is the heart of the car. For its trouble-free operation, moderate operation and timely maintenance are required. If the conditions are met, the motor will produce the specified parameters for many years. Then the time comes for a major overhaul, which involves complete disassembly and replacement of worn parts. An important operation is honing the cylinder block.
What is engine cylinder honing?
Honing of cylinders (application of hone, honing of cylinders) - abrasive treatment of surfaces using hone (honing heads). Such heads should be understood as the head of a special tool on which abrasive bars are attached. Honing is often used to machine internal cylindrical holes. The honing process involves a combination of rotational and reciprocating movements of the hone with fixed sliding abrasive stones. Honing is also accompanied by the constant application of a special liquid to the surface being treated for lubrication and cooling.
Main advantages
Honing parts has a number of positive aspects. Benefits include:
- After honing, the surface layer of parts acquires increased strength, which affects the duration of their operation.
- Significantly lower percentage of defective parts. This is due to the fact that the honing tool does not create much pressure on the surface of the product.
- Wide range of honing tool grits. This makes it easier to reach the desired level of requirements for the workpiece.
- With the help of a hone, it is possible to eliminate defects when drilling holes on a machine.
- At the same time, several holes are honed on the equipment, which increases the speed of work.
Read more: Alternator repair for Volkswagen Golf 2 3 4 Polo Sedan and Passat B3 B5, do-it-yourself belt replacement
When is honing needed?
There is no general time frame for when engine components will need this procedure.
Cylinders are honed when they reach a certain level of wear, and for each engine this will have its own operating time. Wear is affected by gasoline, the motor oil used by the car owner, driving style (driving pace), serviceability of related systems, etc. Note !
On average, work is carried out when the vehicle’s mileage reaches 100 thousand km or more.
External signs help determine that hone is already needed in the engine cylinders. The more intense the problem, the sooner treatment needs to be carried out. If the car owner notices one of the following markers, you should show the car to a mechanic for work.
List of possible signs:
- The appearance of blue smoke from the exhaust pipe.
- Instability of engine speed at idle.
- Reduced motor power.
- Increased oil consumption compared to previous measurements.
The need to apply hone to cylinder blocks is often caused by a complete combination of these factors - they are closely related. Blueish exhaust smoke occurs when the piston ring does not collect oil from the cylindrical surface without leaving any residue. Oil traces remain and burn together with the fuel. Since defects in the internal channel lead to empty combustion of engine oil, its consumption increases.
Read also: What is squeezing in plumbing
Changes in the cylinder also explain the decrease in engine power and instability of its operation. The piston rings do not adhere tightly to the cylinder walls, a violation of the tightness leads to gases entering the crankcase, and they reduce compression in the combustion chamber. As combustion gases are wasted, vehicles require more gasoline.
Honing will correct the cylindrical surfaces, after which all related problems with the machine will disappear.
Caseless engines
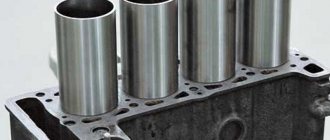
Hone treatment differs on liner and linerless engines. If you need to process a linerless cylinder block, there should not be any particular difficulties.
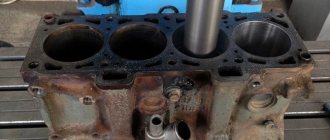
The solid metal structure is securely fixed to the machine table immediately after the boring process. You should make sure that the sleeves are positioned strictly vertically and that no displacements will occur during the reciprocating movement of the cartridge - otherwise there will be no benefit from the processing.
When machining linerless cylinders, only a few machine passes are required.
In this case, it is necessary to strictly control the resulting dimensions and surface roughness. An indicator bore gauge (monitors dimensions) and a profilometer or optical device for measuring the level of roughness will help with this.
Additional recommendations
Various video instructions that can be found on the Internet describe replacing engine mounts as a simple procedure. Because of this, there is a feeling that anyone can replace the part, allocating a few minutes of free time for all this. But practice says the opposite. Lack of free space and poor access to parts create additional difficulties, which is why a seemingly simple job drags on for the whole day.
How to replace engine mounts
But in order for the repair work to proceed fairly quickly and efficiently, you need to follow a few simple recommendations:
- When lifting the power unit, the jack must be placed under the clutch bell. A wooden spacer must be substituted;
- Do not raise the engine too high, otherwise some parts or body elements may be damaged;
- a control check of the fasteners on the new support will not be superfluous;
- when installing the cushion, you need to get into the groove on the beam with the lower pin, which is on the body of the part;
- The right support must be protected by a heat shield. Otherwise, the new part will not last long under the influence of high temperatures from the exhaust.
Don't be lazy to use WD-40
A little theory and technology
Honing
- (from the English honing, from hone - to hone, literally - to sharpen). A type of abrasive processing of materials using honing heads (honing heads). It is mainly used for processing internal cylindrical holes by combining the rotational and translational-reciprocal movements of the hone with sliding abrasive bars attached to it with abundant irrigation of the treated surface with a cutting fluid. Although external honing is also found, such an operation is performed on specialized machines. External honing is used on long parts, the processing of which in conventional metalworking machines is not possible. For example, the hydraulic brake rods of artillery guns. Honing of external surfaces can be carried out on modernized (grinding, horizontal boring) machines. Honing can be done on parts made of both ferrous materials (steel and cast iron) and non-ferrous materials (brass, bronze, aluminum zinc and magnesium alloys).
Carrying out work
To obtain a high-quality result, a honing machine is required. Such equipment is used in large specialized auto repair shops that repair diesel and gasoline engines.
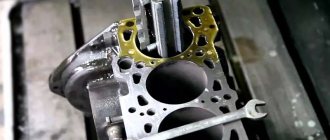
The cylinder block is positioned and secured on the machine table so that the holes or liners are positioned strictly vertically. This is the main condition. The honing head is placed inside. The clutch adjusts the desired hole size.
The processing process is carried out using working fluids. Kerosene is used to process cast iron, and a mixture of kerosene and oil is used to process steel. Coolant emulsions are increasingly being used. For example, 7% aqueous solution of NSC-5.
Interestingly, during honing, the surface is hardened to a depth of 0.06 mm. When the pressure of the abrasive bars is equal to 5 kgf/cm2, the hardness increases by 10−15%. When processing alloy steels and a pressure of 70 kgf/cm2, the hardness value increases to 70%.
How to process non-round holes
A characteristic feature of honing machines is their ability to process any surface.
These can be deep or blind holes, keyways, grooves. Conical elements and non-circular holes can also be processed. This happens due to the fact that in honing machines the stones are located in a special housing, the design of which consists of the following elements:
- pneumatic chamber;
- two couplings: movable and fixed;
- pads
The housing has grooves through which air is supplied. During operation, the pressure of the air flow from the pneumatic chamber presses the tool to the workpiece surface. The pads have the ability to rotate to the required angle. Thanks to this, any surface can be honed, regardless of its configuration. By changing the force of the air flow, the amount of pressure of the honing tool to the workpiece is controlled.
Another way is to use flexible brushes that are attached to elastic threads. As a result, it is possible to process the surface of any contour.
Features of honing tools
The honing tool is the head. It contains the adjusting rod 1. By changing its length (tightening or unscrewing the nuts), the position of the abrasive bars is changed.
A double-sided conical adjustable rod 1 is mounted inside the head, through which the radial rods together with the abrasive bars move apart, adjusting the diametrical size and compensating for the wear of the abrasive bars 4. Movement is possible up to 0.5...2.8 mm. As wear occurs, the turning size must be restored, so the machine operator has the opportunity to obtain the desired size without replacing the bars.
Special cylindrical clamps 5 do not allow changing the set size. The processing accuracy corresponds to class 1-2. You can achieve a mirror-like shine of the resulting surface.
The honing head is used with a special machine 3G833. It has a vertical rigid shaft. It allows you to obtain rigid rotation of the tool without signs of runout.
Design of the honing head: 1 – rod for changing the outer diameter of the hone extension; 2 – workpiece; 3 – spindle; 4 – abrasive bars; 5 – cylindrical clamp
External honing is performed on a fixture that can be mounted on lathes. For large machines such as DIP-300 or DIP-400, an external honing head KhNP-150 is used. It allows external polishing of parts with a diameter of up to 150 mm.
External honing head KhNP-150: 1, 2, 7 and 8 – abrasive stones; 3, 6 – locking expansion pads; 4, 5 – brackets for fixation
The part is installed into the machine spindle. A honing device is located on the caliper. The rotating part is in the zone of action of the bars, which grind the surface. The tool is fed longitudinally in different directions.
Site about SUVs UAZ, GAZ, SUV, CUV, crossovers, all-terrain vehicles
Honing is applied after boring, reaming and grinding. Mainly for finishing holes in order to improve the accuracy of its shape and size. To reduce roughness, as well as to create a specific microprofile of the treated surface. Processing is carried out using abrasive or diamond stones fixed in a honing head (honing head).
Honing, hone designs with different methods of fastening in the machine spindle, honing when finishing the outer surfaces of crankshaft journals.
Honing with a rigid attachment of the hone to the machine spindle with two degrees of freedom of the part is used for processing parts with parallel upper and lower planes and a hole axis perpendicular to them. In the case of processing small and medium-sized parts, a scheme with a rigid connection between the hone and the spindle of the machine is used with four degrees of freedom of the part.
If the misalignment of the spindle and the hole being machined is less than 0.05 mm, then a single-hinge hone mount is used. If the misalignment is more than 0.05 mm, then it is double-hinged, and the parts are given four degrees of freedom.
The hon usually makes three movements:
— Rotational (main) movement D1. — Reciprocating motion D2. — Radial movement of the bars.
Methods for attaching the hone with different numbers of degrees of freedom of the part.
The combination of these three movements creates conditions for cutting microchips and self-sharpening of the tool. On the treated surface, characteristic traces of the trajectory of the grain in the form of a grid remain. The nature of the trajectory depends on the combination of the magnitude of the speeds of translational and rotational movement and the angle a of the cutting speed vector. Specific values of cutting speeds are determined by the dimensions of the part and processing conditions.
Range of honed hole sizes:
— Diameter 2.5-1,000 mm. — Length 5-25,000 mm.
A variation of conventional honing is vibration honing. With it, the hone or part is given an additional circular or reciprocating movement with a small amplitude (1-4 microns) and a frequency of up to 20 days. h./min.
Main movement speed D1:
— For processing steel it is 45-60 m/min. — Cast iron — 60-75 m/min.
The ratio of the speeds of movements D1 and D2 is 1.5-10.0. The performance of vibration honing is significantly higher than conventional honing. And in some cases it approaches grinding productivity.
The figure below shows the trajectories of the abrasive stone during conventional and vibration honing. The uppermost 1 and lower 3 positions of the abrasive stones are set with an overtravel D2, necessary for precise processing of the hole. Minimum shape deviations are obtained with an overtravel equal to 0.33 of the length of the bar, and with a length of the bar equal to 0.50-0.75 of the length of the hole being machined. With each double stroke, the bars end up in position 2, i.e., they shift by the amount of overlap A.
Vibration honing changes the appearance of the mesh, which is determined by the swing of the bar 2A, the longitudinal feed S of the bar per revolution and the angle of the mesh a. As the pattern of movement of abrasive grains shows, during vibration honing the length of chips removed by the grain sharply decreases. And short chips are relatively easily removed from the cutting zone. This allows the use of harder bars that can withstand greater pressures without dulling or metal sticking.
The cutting speed in conventional honing is the geometric sum of the rotation speed and the translational speed of the hone. With a change in angle a, the network of scratches and scratches formed by abrasive grains during the relative movement of the hone changes.
How to properly apply hone to cylinder walls
Let's start with the fact that the process of proper honing in a factory environment is quite complex. We'll talk about this a little later. As for the repair of internal combustion engines in car services or specialized workshops, cylinder honing occurs in two main stages:
- initial processing using bars with coarse abrasive attached to the hone head;
- final honing, which involves finishing the cylinder with a fine-grained abrasive. This abrasive allows for high-precision surface processing;
The complete end of the cylinder honing process is washing the cylinder block (BC) to remove metal shavings, as well as residual polishing pastes. Further, during the engine assembly process, you can count on the correct fit of the piston rings, quick grinding and high-quality sealing of the combustion chamber. Let us add that the abrasive for honing cylinders consists of both ceramic and diamond bars. A ceramic stone has certain advantages over diamond abrasives, since this type of honing stone is more durable, which ultimately determines the lower cost of ceramic honing compared to diamond solutions.
Now let's talk about professional honing, which requires the presence of expensive, complex equipment. Such honing is used during the manufacture of new internal combustion engines, as well as for the restoration of engines in conditions as close as possible to factory ones. Honing should be understood as creating on the cylinder wall not just a chaotic mesh, but a certain microprofile on the surface. In other words, the hone in the cylinder is a set of marks that intersect with each other. The depth of these marks and their location in relation to each other also play an important role. Compression in the cylinders, engine power, fuel and engine oil consumption for waste, as well as the service life of the entire CPG and the engine itself directly depend on these factors.
This angle is called the honing angle. There is also a dependence on the type of abrasive and its grain size, which affects the final quality and structure of the hone. The degree of surface roughness, depth and size of the marks applied depend on the type of honbrusk. The entire process of applying honing is divided into initial and finishing. At each stage different bars are used. Precise control of surface roughness is made possible by subsequent visualization of hone microprofile diagrams. The honing angle is set using special film templates.
- To form a surface at the initial stage of honing that is quite rough, has deep grooves and increased roughness, the use of a coarse-grain abrasive will be required. For this purpose, diamond honbrus are used, which are made on a copper base. The entire rough honing process is accompanied by an abundant supply of cutting fluid. This is necessary for effective removal of mechanical particles, abrasive residues, etc. from the area where the hone is applied.
- After diamond honing, the rough surface does not allow you to immediately begin installing the remaining elements of the internal combustion engine, since the rings and piston will not be able to work in such a cylinder. Sometimes diamond honing is an alternative power method for boring engine cylinders. The rough surface is then processed again with a finer abrasive. This treatment makes it possible to achieve the formation of a new microprofile on the cylinder walls. The final stage of the honing process is re-treatment with a fine-grained abrasive, which allows the cylinder to achieve the planned repair size.
- Upon completion of the formation of the “finishing” surface, the so-called additional honing brushing is additionally carried out. This procedure is not aimed at further boring the cylinder; the main task is to clean the previously obtained microprofile from remnants of honing abrasives. Brushing a cast iron cylinder also opens up the graphite grains. When applied to cast iron, this makes it possible to further reduce friction and reduce mechanical losses, as well as slow down wear. For brushing, brushes are used, which are based on nylon threads and also contain silicon crystals.
Let us add that honing also allows for the application of an additional layer of special anti-friction coatings. Both cast iron cylinder blocks and some cylinder heads made of aluminum alloys can be honed. Flat-top honing is very popular today, which is actually similar to the classical method. The differences between flat-top honing and the conventional method of applying hone are in the materials and bars that are used when processing with the flat-top method.
Methods for boring a block yourself
You can perform this procedure at home in two ways, which are practically no different from each other. We warn you in advance that the process of self-boring is quite labor-intensive, and after it is completed, an ideal result cannot be guaranteed.
To perform the first boring method, you will need a high-speed electric drill, an old piston and a set of sandpaper of various grain sizes on a moisture-resistant fabric base. The process itself can be described as follows:
- in the upper central part of the piston it is necessary to drill a hole for the pin, then insert and tighten it tightly;
- Using a hacksaw for metal, you need to make a cut in the side of the piston, insert the edge of coarse sandpaper into it, wrap it around the piston and fix it in the same cut;
- Boring should begin at minimum speed, gradually adding it. When boring, the drill should be moved up and down in smooth movements;
- when the piston used for boring will freely penetrate 2/3 of the cylinder, change the sandpaper to finer sandpaper and sharpen it with it;
- after all manipulations, final grinding should be done with a “zero”;
Another way is to use a wooden blank that will imitate a piston. To do this, it is necessary to make an appropriate mandrel. Moreover, in diameter it should be 2-3 mm smaller than the piston, and 100-200 mm longer than the cylinder liner. It is also necessary to make a side cut in the workpiece to fix the sandpaper, and drill a hole for the knob in the upper part in the center. The process is carried out in a similar way to the first method. The only thing is that it is more labor-intensive because it is done manually. During the grooving process, it is necessary to periodically lubricate the surface of the cylinder being machined.
The uniformity of boring is controlled visually, or using a pre-made template, for example, from the same wood.
As a conclusion, it is worth saying that this is, in principle, a good way to increase engine power; whether you use it or not is entirely your choice. It is advisable to turn to professionals to carry out this procedure, as everything would be of much better quality.
But why "Mechanics"?
We mentioned above - and for good reason. He is a recognized expert in engine repair. And here are the arguments.
Automotive engines are changing rapidly. The power increases while the size of the unit is reduced. Thermal and mechanical stress on parts is increasing. This means that structural materials for piston rings, pistons and cylinder blocks are being improved. The rings themselves also change - their height decreases, and the number of rings decreases.
You need to know all this, continuously monitor all industry news, and above all, innovative solutions from engine manufacturers.
So, Mekhanika employees keep their finger on the pulse of the global automotive industry. But classical technologies are not forgotten either. Therefore, both the good old naturally aspirated engine and the newest turbocharged unit, born under the downsizing banner, will be repaired here.
As already mentioned, accurate diagnostics are carried out here. This means choosing the right repair technology.
This company has an excellent machine fleet, including modern Sunnen honing machines. And experienced craftsmen work for them. These will not “loose” tolerances; they feel the metal intuitively.
(photo: BC honing machine)
The tools - honing stones and brushes - are imported here. Cutting fluid (coolant) of the highest quality. It washes the instrument and block during the operation, is immediately filtered and again supplied to the working area.
Honing for internal combustion engine parts
When repairing an engine, as was said earlier, most of the internal cylindrical surfaces - holes - are honed. These are the bushings of the upper connecting rod head, the holes of the lower connecting rod head, the rocker arm bushings of the valve mechanism drive, the crankshaft beds and, of course, the engine cylinders.
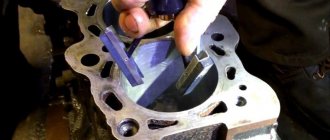
Hong head with hon bars in the cylinder |
If we consider that cylinders are the heart of the engine, then knowledge about honing, the properties of the resulting surface and methods for obtaining it is cardiology.
For normal operation of piston rings (everyone can come up with a cardiac analogue for themselves), it is necessary to provide a certain surface microprofile on the cylinder wall - a set of intersecting marks. The depth and relative position of these scratches largely determines such operational parameters as compression, power, oil consumption, fuel consumption, wear of the cylinder-piston group and engine life. The application of these marks occurs precisely during the operation of the honing head with bars installed in it along the surface of the cylinder. The simultaneous rotation of the tool and its reciprocating movements (this is not for you to go back and forth with a drum machine:) determines the angle of mutual intersection of the marks on the surface of the cylinder - the honing angle. The type of abrasive used, its grain size and bond determines the roughness of the cylinder surface, the depth and size of the marks. Accordingly, it is not difficult to guess that it is necessary to distinguish between rough and fine honing, and therefore the stones used for honing. The “trend setter” in this matter, the company KOLBENSCHMIDT (KS), gives clear recommendations for performing this operation. Therefore, I decided not to take a moment in the workshop to film the honing process and did not even go to the warehouse to get the whetstones. I just scanned the pictures from the KS booklet. So, the recommendations apply to the use of abrasives and lubricants, equipment setup, processing allowances and, most importantly, methods for quality control of the work performed. To control roughness, the Germans use a Hommel tester with the ability to print a microprofile diagram and roughness parameters in evaluation units. To control the honing angle, a special template film is used. In the photo it is attached to the cylinder wall.
Template film for checking hone lines and a visual drawing of the lines themselves from KS recommendations |
Hommel roughness tester |
Consequences of bullying and solutions
| Sign | Problem | Solution |
| Increased oil consumption | The piston ring does not remove residual lubricant from the cylinder wall, waste | 1. Add Active Plus from Suprotec to the oil. 2. If the tribological composition did not help, in advanced cases, bore and hone the cylinder block. |
| Blue exhaust color | A relatively large amount of oil burns along with the fuel, causing significant waste | 1. Pour the tribotechnical composition “Suprotek Active Plus” into the oil. 2. If the composition does not solve the problem, hone the cylinders. 3. In severe cases, bore and hone the cylinder block. |
| Unstable engine operation at idle | Loose mating of the piston-liner pair. | 1. Use Active Plus tribo compound from Suprotec. 2. If the first point does not help, honing the cylinder. 3. In case of large wear and deep scuffing – boring and honing of the cylinder head. |
| Reduced motor power | Some gases break through the piston-cylinder interface without performing useful work | 1. Add Active Plus Gasoline from . 2. If the tribological composition fails, carry out honing of the block cylinders. 3. In advanced cases, bore and hone the cylinders. |
| Increased fuel consumption | Breakthrough of working gases from the combustion chamber through the mating gaps of the piston-liner pair. The engine requires more fuel to achieve the required power | 1. Use the tribotechnical product “Suprotek Active Plus”. 2. If the first point does not solve the problem, hone the block cylinders. 3. In advanced cases, use boring and honing of the BC. |
